Oh, shut up and help me remodel the YoRHa: Dark Apocalypse page!
- Fill in Story section with events..
This request can be discussed on the associated discussion page. Remove this notice upon completion.
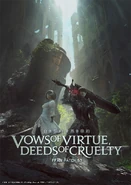
YoRHa: Dark Apocalypse is a level 80 set of 24-player
Yosuke Saito and Yoko Taro work as guest creators for the events.
Story[]
The Copied Factory[]
The Warrior hears a rumour in Tomra that the Tholls’ rival tribe, the Goggs of Komra, have discovered a fascinating find. As an outsider to their feud, the Warrior can easily enter the village of Komra to investigate the rumours, which turns out to be a mysterious machine graveyard. During their investigations the Warrior encounters the dwarven twins Anogg and Konogg, who wish to access the graveyard for their own purposes and procure the Warrior’s help to sneak inside the excavation site.
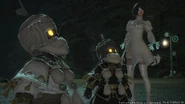
There, they come across a sealed door that Anogg promptly blows up, beyond which what appears to be a person being attacked by a group of strange robots. Upon noticing the party, the robots promptly change targets to them, but the twins swiftly dispose of them with more bombs. The rescued person wakes up and reveals their name to be 2P and that they are in fact an android. She further reveals that beyond the tunnels is a machine factory able to churn multitudes of the robots, or ‘machine lifeforms’, and that she must shut it down quickly. Unable to get her to disclose more details, the group decide to assist her due the hostility displayed by the first group of robots and wanting to stop a threat before it gets out of control, alongside the twins’ own curiosity.
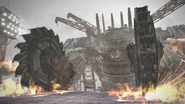
The group, including 2P, storms the Copied Factory, fighting multiple machine lifeforms of differing models until they come across the being 2P claims to be responsible for activating the factory; another android known as 9S. Using a machine-tank, 9S combats the group, but they emerge victorious. Refusing to accept defeat, 9S stands from the wreckage and fights 2P one-on-one, but is knocked into the depths. 2P, sustaining heavy damage from the encounter, states that she will be entering a low-powered mode for self-repair, before quickly warning the Warrior and the dwarves of other androids that are working with 9S and to look for a special ‘key’.
Disgruntled with the lack of information they are given, alongside curiosity about the potential of the technology employed by the androids, Anogg and Konogg take the Warrior to re-explore the now defunct facility, discovering cryptic bits of information and the devices 2P called ‘pods’. They also discover 9S, having apparently survived the fall and climbed back to the facility before also entering a low-powered mode. They return to the excavation site where 2P rests, storing 9S in another location in hopes to see his side of the story when he awakens.
The twins then decide to begin work on the pods, hoping to reverse engineer them and use the technology for their own plans. The Site foreman, who has played guardian to the twins, asks the Warrior to return later to check up on them.
Interlude 1[]
The Foreman asks the Warrior to get the twins to assist with the Gogg’s upcoming festival. The twins have made little progress with their reverse engineering efforts on the pods and secure the Warrior’s help in getting more materials. Eventually the Foreman themselves comes in and forcibly reminds the twins of their duties to the tribe, which they grudgingly accept. The Foreman invites the Warrior to come back when the festival is underway.
The Puppet’s Bunker[]
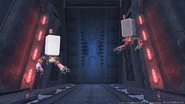
Sometime later, the Goggs have completed their preparations, and the Foreman invites the Warrior to be the one to begin festivities. As the celebrations go underway, the twins appear and pull the Warrior back to the cave where 2P lies. They reveal that they have successfully repaired the key in between the festival preparations, but do not understand how to use it. As such they ask the pod they have successfully repaired to find a way to repair the android, which diagnoses a broken part that can be replaced. Remembering the room in the Copied Factory where they found a bunch of 2P copies, the Warrior takes the twins there and retrieve the necessary component.
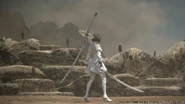
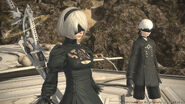
2P is revived and immediately asks for the key, which Konogg hands over. She activates it, but soon after a giant earthquake shakes the cave. As the Warrior and the twins rush outside, they see part of the mountainside has been obliterated, and Komra under attack. Many of the dwarves flee the destruction of their home. A group of androids appear in what appear to be black clothes, however, when 2P joins them, the clothes change to white. 2P reveals that she and her comrades are the ones responsible for the attack, leaving the Warrior and the twins confused, but before the android can cut Anogg down, she herself is attacked by an actual black-garbed android, identical in looks to 2P.
2P and her comrades retreat, while the new android, calling herself 2B, reveals that the androids-in-white are copies of her unit “YorHa” created by the machine lifeforms. 2B intends to track down the copies and destroy them, while the Warrior and the twins follow her on foot to the copies’ base revealed beyond the collapsed mountain.
The Warrior and the twins fight their way through the defences and finally catch up to 2B, who has already defeated and struck down 2P. However, multiple faceless androids spawn themselves from her body before merging into an amalgamated copy of her. 2B is unable to continue fighting, so the Warrior finishes the job, destroying 2P for good.
In the aftermath, the twins reveal that 9S is with them, and take 2B to their hideout, however further discussion is halted when the Goggs confront the twins for their perceived role in Komra’s destruction. Many of the Goggs call for the twin’s banishment, but before Chief Glagg announces their decision, 2B appears to accept all the blame and volunteers to leave the dwarves alone. Anogg, having been deeply scared by her part in her home’s destruction, goes to be by herself, while 2B takes the still unfunctional 9S and leaves to find if there are more machines in the region. Konogg later tries to locate his sister but is unable to find her even with the Warrior’s help, and begins to feel fear in being left alone.
Interlude 2[]
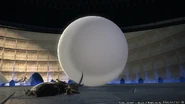
Konogg remains at a loss of what to do. The other villagers ostracise him, and since Anogg has disappeared, their ire is directed solely at him. One dwarf holds an immense grudge, as his wife was heavily injured in the bombing. At the Warrior’s suggestion, Konogg tries to make amends with this one, learning that he loves ale and heading to Wright to procure a bottle. The offer for reconciliation falls on deaf ears and the dejected dwarf runs off. The Warrior searches everywhere for the youngling before finding him at the end of the Puppet’s Bunker standing before a white orb. Through an Echo, the Warrior sees a young Anogg and Konogg wandering the tunnels when they are separated in a landslide, Anogg pushing her brother out of harms way. Konogg searches the bottom of where she fell and seems to find her standing before a similar orb. It appears Konogg believes his sister has hidden herself inside the orb back in the present, but is convinced by the Warrior to return to Komra, who then reports the situation to the digsite chief.
The Tower at Paradigm’s Breach[]
The Chief asks the Warror to check up again on Konogg, as the village residents are unwilling to move on until someone is punished. When they find him, Konogg is delirious from fever, and they put him to bed before reporting to the Chief. Returning with him, they find that Konogg has disappeared once again, but the Warrior believes he has returned to the Orb at the base of the machine’s lair. The two traverse the ruins and find him before the orb, unconscious. As they tend to him, the orb creates a copy of 2P, and then multiple others, who appears to once again attack the party. Suddenly, Anogg arrives with 2B and 9S, having apparently assisted in 9S’s repair and learning from them the truth of the situation. She and the androids attempt to destroy the orb, as it has the power to destroy the world, but unable to stop the multiple 2P copies from remerging with it, causing the ruins to tremble, and forcing the party to retreat.
A giant tower arises from the rubble, which the androids claim the machines are using as a conduit to use the power of the orb. The Warrior joins Anogg and the androids, while the Chief takes to Konogg back to recover. Fighting through the machine forces, the group encounters the Red Girl, the manifestation of the AI controlling the machine network, but are unable to stop it from merging with the orb to become a god-like entity. They engage in combat with it, and eventually prove victorious, but the entity invokes one last spell to commence the destruction of the world. Anogg, having resolved that this situation may occur, give the Warrior a letter for Konogg, before sacrificing herself to stop the spell.
As the spell unravels, the things created by the orb such as the tower, and apparently including the androids, begin to disappear. The Warrior is forced to leave the structure without answers. Back in the caves, the Warrior informs a now recovered Kongg of Anogg’s fate, before giving him her letter. He is confused and distraught by the contents, and while he digests the information, he asks the Warrior to return a certain device belonging to the Chief’s wife. When he receives the item, the Chief wonders why Konogg did not simply give it himself, before realising that the young dwarf did not intend to see him. He and the Warrior return to the cave, and find Konogg has vanished. The Chief despairs, as he realises that it was the treatment of the Gogg clan to the twins that had caused them to develop the habits the lead to situation they were in.
This is emphasised further when the remaining Goggs return and, despite being told that the threat of the machines is no more, demand that an individual be put as the target of blame for them to channel their grief. The Chief grows disgusted with his fellows, especially when they begin to turn on Glagg, and calls them out for their attitude before heading back to Komra. He begins the slow process of rebuilding by himself, hoping to serve as an example to get his fellows to finally start putting aside their grief, and asks for the Warrior’s assistance in the weeks to come.
Aftermath[]
The chief and the Warrior begin the long process of restoring Komra by themselves. However, seeing their iron will, other dwarves begin to chip in and help. As this is occurring, Chieftain Glagg appears to be suffering from some unknown issue, however the digsite chief dissuades the Warrior from investigating and letting him deal with it himself. As the restoration continues, various data archives from Konogg arrive at Komra, which the chief gives to the Warrior to read.
After the completion of the restoration, the chief finds info on Konogg’s whereabouts, and asks the warrior to meet with him and convince him to give Komra another chance. However, when they arrive at the abode, they find it abandoned, Konogg’s helmet lying on the ground, and return to tel the chief the news.
A flashback plays in which it is revealed that Konogg attempted to use the machine technology to clone Anogg or open a gate to the world that she disappeared to. However his efforts prove fruitless and he falls into despair. At this point, Anogg reappears via unknown means, offering to lead her brother to visit other worlds alongside her. The two leave together, hand-in-hand, moments before the Warrior arrives.
Characters[]
Anogg[]
The white clad dwarven sister of a pair of twins that reside in Komra. A cunning genius prone to flashes of brilliance and rushing into a situation headstrong.
Konogg[]
The black-clad dwarven brother of a pair of twins that reside in Komra. A cautious and methodical thinker who often acts as the brakes to his sister's more outlandish plans and ideas.
Dig Site Chief[]
A dwarf of the Gogg clan of Komra put in charge of the excavation of the newly discovered machine graveyard in the depths the of the Duergar's Mountains. Acts as a surrogate parent to Anogg and Konogg.
2P[]
A mysterious woman found within the excavation tunnels that calls herself an 'android'.
2B[]
An android identical in appearance to 2P but appears to be opposed to her plans.
9S[]
An android encountered within the depths of the Copied Factory controlling the various 'machine lifeforms'.
Red Girl[]
Locations[]
Komra[]
The village of the Gogg tribe of Dwarves, who are best known for constantly feuding with their neighbours, the Tholls. The discovery of the machine lifeforms during routine mining operations sparks off a chain of events, with tragic consequences for the village.
Excavation Tunnels[]
A series of mines dug out by the Goggs, accessible by an entrance to the southeast of Komra. Anogg's workshop and the entrance to the Copied Factory are located here; it is also here where 2P and the machine lifeforms are first encountered.
The Copied Factory[]
A large industrial facility, located in a valley filled with lush vegetation. It is inhabited by aggressive machine lifeforms, but who built it and why remains unknown. Its exact location on Kholusia is left unspecified.
The Puppets' Bunker[]
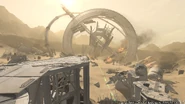
What appears to be the crash site of an immense circular structure. The bunker is situated in a sandy basin behind the Duergar Mountains; Mt. Gulg can be seen in the background while exploring the wreckage.
The Tower at Paradigm's Breach[]
An immense, pale tower that rises out of the wreckage of the Puppets' Bunker. It is circuited with various networks and empty spaces, leading up to the sky where it welcomes whatever lies beyond.
Quests[]
The following is a list of quests from the YoRHa: Dark Apocalypse category of the journal:
 Word about Komra
 A Scandal in Komra
 On the Threshold
 An Academic Dispute
 Tails, You Lose
 Heads, I Win
 Carnivals and Confrontations
 One Way to Do It
 We Can Rebuild Her
 Everything You Know Is Wrong
 Crime and Punishment
 To Make Amends
 Konogg, Alone
 Brave New World
 It Takes a Village
 Komra Wasn't Built in a Day
 All That Grinds Is Not Gloom
 The Merchant of Komra
 How to Catch an Automaton
 Whence the Heart Leads
Duties[]
| Name | Level | Min Item Level | Final Boss | Unlock | Release | |
|---|---|---|---|---|---|---|
| The Copied Factory | 80 | 435 | 9S-operated Walking Fortress | 5.1 | ||
| The Puppets' Bunker | 80 | 465 | Compound 2P | 5.3 | ||
| The Tower at Paradigm's Breach | 80 | 495 | Her Inflorescence | 5.5 |
Musical themes[]
YoRHa: Dark Apocalypse features many tracks taken directly from NieR:Automata, as well as new compositions that combine themes from both NieR:Automata and Final Fantasy XIV.
Allusions[]
The quest line and associated alliance raids feature many references or allusions to characters, locations and plot points from the Drakengard and NieR games:
- Characters 2B and 9S, two of the three protagonists of NieR:Automata, appear throughout the quest line.
- The role of Anogg and Konogg as enigmatic siblings who dispatch the player on quests is similar to that of Devola and Popola, major characters who appear in both NieR and NieR:Automata.
- Hobbes follows NieR: Automata's conventions of naming its machine bosses after philosophers, this one being named after Thomas Hobbes.
- The Copied Factory is modeled after the Abandoned Factory, the first location visited in NieR:Automata. An Engels robot is fought as the boss of the Abandoned Factory; similarly, an Engels is encountered as the penultimate boss of the Copied Factory in Final Fantasy XIV.
- The unintelligible voice that can be heard at the beginning of the Copied Factory is a reference to a similar occurrence in the Abandoned Factory in NieR:Automata.
- The Goggs' festival is a reference to the Amusement Park in NieR:Automata; the background music for this area even plays in Komra following the white-garbed androids' attack.
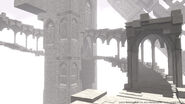
- The Puppets' Bunker is modeled after the Bunker in NieR:Automata, where it functions as the headquarters of YoRHa. The main ring, 2B's bedroom and the command room can be explored; the command room even has the "Glory to Mankind" message repeating on the displays around the room.
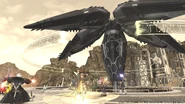
- The energy rings generated by the Serial-813P-operated Aegis Unit feature symbols taken from the Celestial Alphabet, which is used frequently throughout the Drakengard and NieR games. The same symbols later appear during the battle with the False Idol/Her Inflorescence.
- Interestingly enough, the Serial-813P-operated Aegis Unit is designed to resemble a mechanical flower upside down. This can be considered an allusion to a major antagonistic entity in the Drakengard/NieR universe called "the Flower" or "Black Flower" whose goal is to bring about complete annihilation. The Flower is directly responsible for the birth of the Intoners in Drakengard 3 and the Cult of the Watchers in Drakengard, which in turn is indirectly responsible for the Red Eye Disease from the same game, the White Chlorination Syndrome, Legion and Red Eye creatures from NieR:Gestalt/Replicant and the Logic Virus from Nier:Automata.
- The battle against the 905P-operated Heavy Artillery Unit features the remnants of Operator 21O, a supporting character from NieR:Automata.
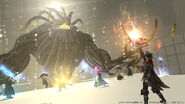
- The Compound is a reference to the form the machine lifeforms assume to create Adam in NieR:Automata. Compound 2P's appearance as a colossal white figure with glowing red eyes is likely a reference to The Giant, the final boss of Ending E in Drakengard.
- The energy rings generated by the Serial-813P-operated Aegis Unit feature symbols taken from the Celestial Alphabet, which is used frequently throughout the Drakengard and NieR games. The same symbols later appear during the battle with the False Idol/Her Inflorescence.
- The Tower at Paradigm's Breach is modeled after the Tower, the final area in Nier:Automata. The Ego Collective areas are based on the 'hacking spaces' periodically visited throughout the game. The transformed appearance of the "Beyond", where the final battle against Her Inflorescence takes place, is based on the appearance of Tokyo in Ending E in Drakengard.
- The Tower features numerous bosses from NieR and NieR:Automata; the Knave of Hearts, Hansel and Gretel are all fought in the original NieR, while the battle with Xun-Zi and Meng-Zi on the elevator is based on a similar sequence in NieR:Automata, where A2 and 9S must battle Ko-Shi and Ro-Shi during their ascent to the top of the Tower. The Red Girl, an important character in the latter half of NieR:Automata, is fought as a regular boss before later merging with the Seed of Destruction; her habit of creating multiple copies of herself inside the virtual space is directly based on a similar scene in NieR:Automata.
- The appearance of the final boss of The Tower at Paradigm's Breach, Her Inflorescence, is reminsicent of both The Giant in Drakengard and the final boss of Drakengard 3. The prominence of the flower in its design is likely a reference to the character of Zero in Drakengard 3, who has a flower growing in her right eye socket. Her Inflorescence's name is also a direct reference to the aforementioned entity known as the Flower.
- The featureless white orb discovered by Konogg is a Seed of Destruction. Seeds of Destruction are highly mysterious and dangerous objects which appear in Drakengard and Drakengard 2, usually with disastrous results for everybody. They have the ability to replicate whatever is placed inside them.
- The Red Girl's transformation into the False Idol upon entering the Seed of Destruction is similar to the events of Ending B in Drakengard, where Inuart places Furiae's corpse in a Seed, hoping that she will be revived - only for the Seed to resurrect her as a hideous creature that sets about killing everything.
- The description for the Breach Coins, which are obtained by completing the Tower at Paradigm's Breach, mentions that they are "stamped with the words “The Arc.”" This is possibly a reference to the "ark" that is launched into space by the Tower in Ending D of NieR:Automata.
- The interface of the Portable Archive acquired during the quest line is modelled after the main menu in NieR:Automata.
Gallery[]
- Artworks
- Screenshots

