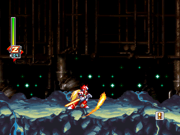
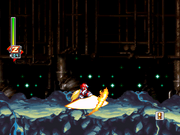
Shoenzan (翔炎山 lit. "Soaring Flame Mountain") is the special technique that Zero learns after defeating Blaze Heatnix in Mega Man X6. When pressing UP on the D-pad and the attack button while on the ground, Zero swings his Z-Saber upwards similar to the third slash of his triple-slash, with the difference of the blade being infused with fire energy and the attack creates a fireball that rises like a wall along the slashing motion that can reach enemies above him. Although Zero doesn't jump up to perform this move as compared to previous upward attacks like Ryuenjin or E-Blade, the upward reach of the attack is somewhat compensated with a vertical flame wall that is created with the flame-infused Z-Saber, in which the speed of performing this technique is much faster as compared to its previous upward attacks.
Both the flame-infused Z-Saber as well as the wall created with it can damage enemies in the same manner as X's variation of this weapon, Magma Blade. Because of Zero standing on the ground when this move is performed with the addition of post-technique lag, Zero may be open to attack after performing this move. However, this technique can actually replace the third slash of his Z-Saber combo if the timing of the slash moves are done correctly, resulting in a more devastating combo since this technique does more damage than the third Z-Saber slash.
Shoenzan is Blizzard Wolfang's weakness.
Damage data chart[]
Damage values in units in Mega Man X6.
Gallery[]
See also[]
Similar Techniques[]
- Ryuenjin from Mega Man X4
Counterpart to this Technique[]
| Fire Special Weapon and Techniques | |
|---|---|
| Special Weapons | |
| Mega Man series | Fire Storm (1) • Atomic Fire (2) • Pharaoh Shot (4) • Flame Blast (6) • Scorch Wheel (7) • Flame Sword (8) • Magma Bazooka (9) • Solar Blaze (10) • Blazing Torch (11) • Wave Burner (M&B) • Pharaoh Wave (PF) • Torch Arm (3DOS) • Flame Shower / Flame Mixer (R&FWS) • Yoga Inferno (SFxMM) |
| Mega Man X series | Fire Wave (X) • Speed Burner (X2) • Rising Fire (X4) • Ground Fire (X5) • Magma Blade (X6) • Circle Blaze (X7) • Melt Creeper (X8, X's) • Flame Burner (X8, Axl's) • Fire Wave (Xtreme 2) |
| Zero's Techniques and EX Skills | |
| Techniques | Ryuenjin (X4) • Quake Blazer (X5) • Shoenzan (X6) • Bakuenjin (X7) • Enkoujin / Enkoukyaku (X8) • Fire Wave (Xtreme 2) |
| EX Skills | Blast Shot (Z2) • Tenshouzan (Z2) • Burst Shot (Z3) • Split Heavens (Z3) • Soul Launcher (Z3) • Burning Shot (Z4) • Flame Fang (Z4) |
| Mega Man X6 | |
|---|---|
| Nightmare Investigators | |
| Commander Yammark • Ground Scaravich • Blaze Heatnix • Blizzard Wolfang • Rainy Turtloid Metal Shark Player • Shield Sheldon • Infinity Mijinion | |
| Other Bosses | |
| D-1000 • Zero Nightmare • Dynamo • Nightmare Mother • High Max • Gate • Sigma | |
| X's Special Weapons | |
| Yammar Option • Ground Dash • Magma Blade • Ice Burst • Meteor Rain • Metal Anchor • Guard Shell • Ray Arrow | |
| Zero's Special Techniques | |
| Yammar Option • Sentsuizan • Shoenzan • Hyoroga • Ensuizan • Rakukojin • Guard Shell • Rekkoha | |
| Armors | |
| - X - Falcon Armor • Blade Armor • Shadow Armor • Ultimate Armor - Zero - Black Zero | |
| Stages | |
| Opening Stage • Amazon Area • Central Museum • Magma Area • North Pole Area • Inami Temple • Recycle Lab • Laser Institute • Weapon Center • Secret Lab | |
| Miscellaneous | |
| Walkthrough • Another Route • Parts • Injured Reploids • List of Enemies Damage Data Chart (X) • Damage Data Chart (Zero) • Game Script (X's story) • Game Script (Zero's story) | |


