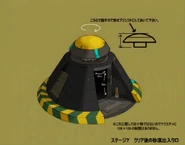
Screenshot from outside the base
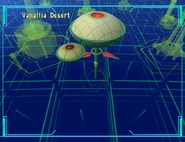
Vanallia Desert (バナリア大砂漠), also known as the Onovan Desert, is a location from Mega Man X: Command Mission. The area was originally a dome-shaped plate designed to test the specifications of robots by placing them in various environmental conditions. However, the environment control device went berserk and it turned into a barren desert. The Onovan Desert region has constant sandstorms and tornadoes, the surface only having sand. The underground facility was built to observe test runs, and is being used by the Rebellion Army to jam transmissions.
Areas[]
Open desert[]
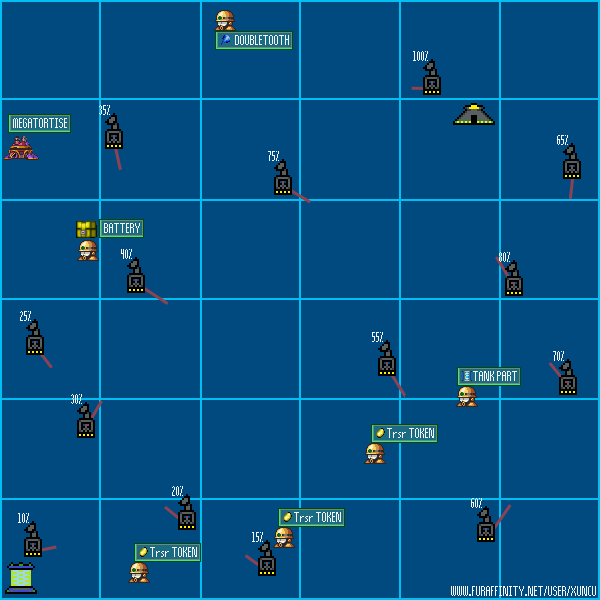
Upon your first visit to this island, you are instructed to follow the cables coming out of the transmitters scattered about the area. You can wander freely in a large square area that on your HUD map is a 6x6 grid (and beyond, but invisible walls restrict you to this space), where the ongoing sandstorm greatly reduces visibility. There are various kinds of broken Mets that hold items, and one deployable Mega Tortoise that requires a battery, one of which can be found in the nearby Metool wreckage (though you may want to consider also the other batteries - one earlier in the Ulfat Factory, the other later in the Melda Ore Refinery - and the other mechaniloids they go to; one where you fought Silver Horn, the other in Gimila Mine, which blocks a path: the Mega Tortoise is the least hassle to access later).
Ultimately, the chapter progresses when you trigger a cutscene in the area to the west of the dome/door in the north-east corner of the map.
Catacombs[]
A simple maze-like area with laser-locked doors and a few large rooms: you wake up at one near a save point. Using it to teleport out is an option, and the dome outside is already unlocked, so there is no penalty or game bugs for retreating. Either way, the central elevator reaches through the entire facility.
Beam Floor[]
The next floor up from the catacombs, in this section you must alter the beams to short out the locking mechanisms for the floor above: you need not keep the beams on these devices to keep the upper rooms unlocked: once they're done, you can reset the beams to unlock the various treasures.
Transmitter Floor[]
Once the doors are unlocked, simply deactivate the transmitters via the control panels in all four corner rooms. After that is done, the last floor is unlocked by Botos, who will invite you to confront him. Of course, you may hold off and finish going up and down, and switching the beams, to collect all the boxed treasures.
Boss Floor[]
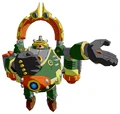
Here you will encounter Botos, who'll show off a shard of the new SupraForce Metal by using it on himself. Slap him around to show him who's boss, and he'll eventually drop the shard at your feet, and retreat, finishing the chapter.
Items[]
There are 37 items.
| Area | Description | Item Boxes |
|---|---|---|
| Quicksand |
The entrance of the area, with a teleport system. The area is very wide and has poor visibility due to the sandstorm, but a light points the entrance of the area after X goes inside. There are 6 items here and counted as item boxes: There are broken Mechaniloids in the area, which include two Mettaurs (one with a Tank Parts and other with the weapon Doubletooth), three Mettaurcures (each with one Figure Token), one Gold Mettaur with a Mini Battery, and a Mega Tortoise that can be repaired with a Mini Battery to be used in the Deployment Center.
When X's party first visit the area, after X examine the Jamming Tower with 100% signal strength and follow the cables off into the desert, Ferham makes them fall in quicksand, but they survive and end in the Quicksand South Side. |
None |
| Quicksand South Side | Underground area. There a Save Device in this area. There 3 red switch to push that deactived the locked door with 3 red lasers located in Quicksand North Side; also a blue switch deactived the locked door with 1 blue laser; and finally a yellow switch. Has a broken Liquid Glob for deployment that requires a Cyber Liquid. | Tank Energy 50 Vaccine Program Build Power Build Armor Build Shield Build Speed Cooler |
| Quicksand North Side | Underground area. The second yellow switch is here, and also the door with 2 yellow lasers; otherwise the door with 3 red lasers also is here. The Ball & Chain Hammer don't counted as item box. There a Save Device in this area. Has an elevator to the above floors.
The elevator area is the only place in the entire game to find Gold Bladers, so this is where X need to come in order to farm Item Captures and hopefully, Good Luck Force Metals. |
Cure All Build Hyper 400 FME 400 FME 2000 Ƶ 1800 Ƶ |
| Quicksand Central Passageway | First floor. | Tank Energy 100 Gain Hyper |
| Signal Jammer Laser Energy Control Room | First floor. Is divided in five areas, the exit to the Quicksand area and four rooms with lasers that opens doors and Item Boxes in the second floor. If green laser hit the symbol of Rebellion Army emblem, then set off an alarm and X'll be force to fight a random encounter.
The west block has a broken Pararoid for deployment that requires a Mini Motor. |
North block: Figure Token Figure Token West block: Tank Energy 50 East block: Figure Token Figure Token South block: Cyber Liquid |
| Signal Jammer Laser Energy Generator | Second floor. First, only the north block is available, and after active the panel in this section, unlock the other doors in the first floor. | Figure Token (x4) North block: Thunder Stella West block: Fire Resist Combat Absorber East block: Build LE Build WE South block: Shot Absorber |
| Quicksand Security Room | Third floor. X's party face Botos in this area. | None |
Enemies[]
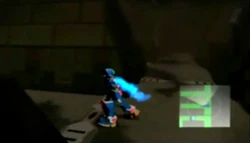
Screenshot from inside the base
Mega Man X DiVE[]
In Mega Man X DiVE, a modified version of the Oil Field represented Vanallia Desert in the event stage "Faithful Guardian". It starts in the sandstorm above, before Ferham sends the Hunter Program underground into a facility. The stage then ends in a boss battle with Ferham.
Enemies[]
| Image | Enemy |
|---|---|
| Ferham (boss) | |
| Sine Faller | |
| Mega Tortoise | |
| Golem | |
| Guardroid | |
| Refleczer | |
| Cannon Driver |
Gallery[]
Trivia[]
- The Mega Man X DiVE event stage The Faithful Guardian takes place in a modified Oil Field, which represents the Vanallia Desert. Ferham is the boss of the stage.
| Mega Man X: Command Mission | |
|---|---|
| Main characters | |
| X • Zero • Axl • Steel Massimo • Marino • Cinnamon • Spider | |
| Other characters | |
| Chief R • Nana • Aile • Professor Gaudile | |
| Rebellion Army | |
| Epsilon • Botos • Ferham • Scarface • Wild Jango • Silver Horn • Dr. Psyche • Mach Jentra • Incentas | |
| Other Bosses | |
| Hippopressor • Shadow • Depth Dragoon • Colonel Redips • Great Redips Duckbill Mole • Rafflesian • Tails Clan • Ninetails | |
| Locations | |
| Giga City • Lagrano Ruins • Central Tower • Tianna Camp • Gaudile Laboratory • Ulfat Factory • Gimialla Mine Vanallia Desert • Melda Ore Plant • Grave Ruins Base • Far East HQ • Orbital Elevator: Babel | |
| Related Items | |
| Action Trigger • Hyper Mode •Final Strike • Force Metal • Deployment Center • Sky Room Enemies • Item Box • Items • Script (NPC Dialogue) | |

