Friday, February 17, 2017
Gable Box
Hello Everyone!! I've got fun and EASY 3D project today using this TOTALLY AWESOME new die called Glorious Gable Box!!! I mean....who doesn't love a gable box?? :) The really cool thing about this die is you can also leave the insert dies out and just have a plain sided box - two different styles in one die set!! Can you tell I'm happy.....yeppers!! :)
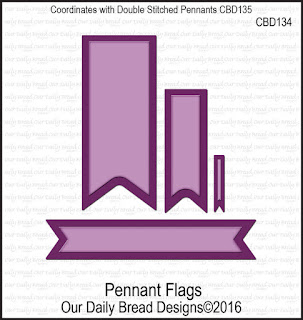
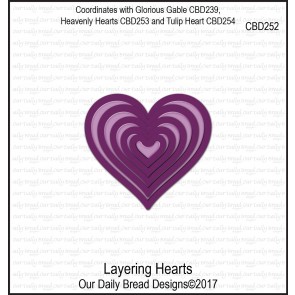
So this box is super easy and quick to make and perfect for those extra special little Valentine's gifts! I've cut two pieces of black card using the Glorious Gable Box Die and inserts. I've then put it together using some X-press It High Tack Double Sided Tape - a stronger tape adhesive will help keep it together! I've then used the Layering Hearts Dies and cut four hearts in two sizes. I've popped the smaller one up on the larger one using foam tape. I've also taken the Pennant Flags Dies and cut two of the double notched tag die and glued them together to make it long enough for the front of the box. I've added a bow using a sheer red and white satin ribbon to the top of the box to finish it off! How easy it that!!! The question is......can I stop at just one??? Probably not.... :)
Stamps - None
Paper - Black, Cherry Cobbler, White
Ink - None
Accessories - ODBD Dies: Glorious Gable Box, Layering Hearts, Pennant Flags, Red and White Ribbons
Don't miss all the inspiration the Breadsticks have for you today!!! Check out these blogs.....
That's all from me today, thanks for visiting and hope you are inspired to....die cut!! :)
Sunday, February 12, 2017
Valentine's Balloons
Hello Everyone!! I busy making things for Valentine's Day and today I have a pretty quick and easy card to make! I've made some heart balloons using Our Daily Bread Designs Layering Hearts Dies and although I've made a smallish bunch of balloons, you could make it as big or as small as you'd like! You could also make some 3D which would be fun, or different colours, or make them for birthdays instead of Valentine's Day......so many options!! :)
I've used a base of Cherry Cobbler and layered with white cut with Double Stitched Rectangle Dies and a piece of black card. I've taken another piece of white card and cut it with Double Stitched Rectangles and while still in the die, I've airbrushed it with R24 Copic. I've stamped the Happy Valentine's Day stamp in Versafine Black and then created a bunch of balloons using Layering Hearts Dies. (I've used Balloons and Streamers for the kraft coloured streamers.) To finish I've added some silver sequins for just a touch of sparkle! :)
Stamps - Happy Valentine's Day (ODBD)
Paper - White, Cherry Cobbler, Black, Kraft
Ink - Versafine Black
Accessories - ODBD Dies: Layering Hearts Dies, Double Stitched Rectangle Dies, Balloons and Streamers Dies, Silver Sequins
That's all from me today, thanks for popping by and hope you are inspired to stamp! :)
Wednesday, February 1, 2017
ODBD February Release!
Hello Everyone!! It's time for the ODBD February Release!! You are going to *LOVE* what's in store this month!! :) Whether you are creating for Valentine's Day or simply something special for someone you love, there's stamps and dies galore to choose from! You can see the full range HERE!
So what did I use?? I've chosen Happy Valentine's Day stamp and the adorable Tulip Heart Die and matching Layering Hearts dies and combined those with some older dies - Bitty Blossoms, Leaves and Branches, Double Stitched Rectangles, Pierced Circles and Asters and Leaves Dies!! I figured may as well go BIG!! LOL!!
I've used a base of Flirty Flamingo and layered with cream cut with Double Stitched Rectangles and topped with Snowflake Season Collection paper. Yep - I did say Snowflake Season....always have a peek, sometimes you find the perfect paper in your Christmas paper stash!! I've then stamped Happy Valentine's Day in Memento Rich Cocoa onto cream card and cut it with Pierced Circles and attached to the front.....then the fun really got going. I've used cream and Flirty Flamingo card and Tulip Heart, Layering Hearts, Bitty Blossoms and Asters and Leaves to create the dimensional hearts and garden around the sentiment and then cut some green card with Leaves and Branches for the leaves. Add some bling to the centres and you're done!
Stamps - Happy Valentine's Day (ODBD)
Paper - Snowflake Season Collection, Flirty Flamingo, Cream, Green
Ink - Memento Rich Cocoa
Accessories - ODBD Tulip Heart, Layering Hearts, Double Stitched Rectangle, Pierced Circles, Bitty Blossoms, Leaves and Branches, Asters and Leaves, Rhinestones
The second project I have for you today is using the ADORABLE Glorious Gable Box Die along with the Heavenly Hearts inserts (separate set). You can cut the heart as part of the insert so the whole panel is cut out, or, as I have done, leave the heart insert out so you are left with a solid heart shape in the middle. And in case you are wondering, the Tulip Heart centre is an exact match for the larger Heavenly Heart insert - but I wanted the frilly edge, so I've used the Tulip Heart.
I've cut two pieces of cream card to cut the Glorious Gable Box with the Heavenly Hearts insert (instead of the panels that come with the Glorious Gable Box Die set). I've left the centre Heart piece out so I have a solid heart piece in the middles. I've used Layering Hearts to cut a piece of Flirty Flamigo and Tulip Heart Die to cut a piece of cream card and then glued them together. Behind this I've added some Flirty Flamingo cut with Pennant Flags Die and then popped the whole panel up on foam tape. I've then used Bitty Blossoms Dies to cut all the flowers and leaves, added a dark cream pearl to the centres and decorated as shown.
Stamps - None!
Ink - None!
Paper - Cream and Flirty Flamingo
Accessories - ODBD Glorious Gable Box Die, Heavenly Hearts Dies, Bitty Blossoms Dies, Pennant Flags Dies, Kaisercraft Chino Pearls
I know you are can't wait to see what the Breadsticks have been making, so pop by these blogs!
Subscribe to:
Posts (Atom)


