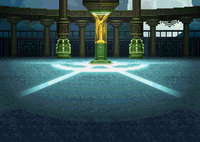
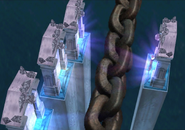
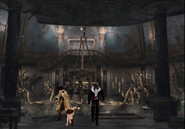
Ultimecia Castle is the final dungeon of Final Fantasy VIII. It features every randomly-encountered monster at random levels. Transport to and from Ultimecia's world and the normal world can be done via four portals outside the castle, which lead to various locations on the world map. Towns are sealed, but the player can still access optional dungeons, chocobo forests and the Ragnarok.
The player's abilities are initially locked while inside the castle and the player must unlock them by defeating the bosses found in the castle's various rooms. The castle has a non-linear design and the player can form two parties to explore it, and switch between them via party switch points, similar to the final dungeon of Final Fantasy VI. Some puzzles at the castle require using two parties to solve.
The game's most powerful superboss resides in the "cloud" in the cathedral. The player can summon it by ringing the bell outside the Art Gallery.
Story[]
Squall and his friends travel to Ultimecia Castle in the future to fell Ultimecia, a powerful sorceress who wants to compresses time into a world where only she can live. The time compression spell she cast never fully completes—it is temporarily halted by Ellone when she severs Ultimecia's mental link to the past—and the party counteracts it by believing in each others' existence, becoming able to exist in Ultimecia's world by traveling through the partially compressed time.
The party emerges on the shore at the site where Edea's House used to be back in their own time. Bodies of the White SeeD lie on the shore, Squall mentally noting that the SeeD have been fighting sorceresses through generations. The party finds a massive chain anchored at the shoreline and walks it to find Ultimecia Castle floating in the middle of the world with portals to various places in the world outside. Entering the castle, the party's abilities are sealed and they need to defeat Ultimecia's eight minions to regain access to them. After the party regains their sealed abilities, they prepare to battle Ultimecia herself.
Upon confronting Ultimecia in the master room she does not act surprised, as if she had been waiting for them to show up. She only comments that the party must be the "Legendary SeeD" she must face. Ultimecia reaches into Squall's mind to discover the strongest force he can visualize, and creates Griever from his impression of an ultimate Guardian Force, summoning it against him and his friends.
The party perseveres and Ultimecia begins to absorb all of time and space into her body to become a living god. The SeeDs destroy her and Ultimecia evaporates in a large explosion, sending her body along with Squall's back in time. The others find their way back to their world by believing in each other's existence and focusing their thoughts of a place they want to return to. The time compression spell breaks and the timeline reverts to normal.
Geography[]
Overview[]
Ultimecia Castle, when available, is connected to Edea's House by long, immense chains that serve as bridges. It is placed atop a floating metal platform, which the chains are connected to.
Ultimecia Castle is an immense building with an ominous, gothic, medieval design. The castle is mostly lit by candles, including in chandeliers, and has glass mosaic windows, statues, gargoyles, and is mostly made of stone. Many cobwebs hang from the walls, and bottomless pits can be seen below several bridges. The castle also has a tall clock tower.
Front gate[]
The front gate is placed atop a tall set of stone stairs, which itself is placed on the metal platform on which the castle is located. The gate itself is a tall, wooden door leading to the hall inside.
On the outside of castle the party can find a save point and a hidden draw point.
Hall[]
The hall is the lobby that welcomes the SeeDs stepping into the castle. It is a large room with several bending staircases leading to the different branching paths, lit by candles surrounding the room.
This area branches into four paths. The first one is to the left leading to the Grand Hall. Right of the staircase leads to the right Stairway Hall A. The door across it leads to the chandelier above the Grand Hall leading to the Terrace. Left of the staircase leads to the left Stairway Hall A. At the staircase, one of Ultimecia's minions, the Sphinxaur, awaits. There is also a party switch point. Sphinxaur does not have any GFs to draw.
Grand hall[]
The Grand Hall is a round room with a large chandelier in the center and two staircases at the back. The walls at the top are blue with figures painted onto them, vaguely resembling religious symbolism.
The Grand Hall Has two staircases leading to the Terrace, but both are broken. The door at the middle leads to the Courtyard. The trapdoor leads to the Wine Cellar, which can only be opened once the chandelier crashes against the door. There is a party switch point, adjacent to the lever that holds the chandelier in place to allow passage.
Terrace[]
The terrace is a balcony overlooking the pit below, with a view of the rest of the castle. Ultimecia's Tower can be seen in the distance. To get to the terrace, the player must affix the chandelier outside to work as a bridge via a lever in the floor below, or it will drop when stepped upon.
This is the area where Ultimecia's minion, Krysta, lingers.
Wine Cellar[]
The Wine Cellar contains several barrels of wine as well as large shelves with wine bottles stacked on them, each shelf reached with a ladder. The cellar is accessed via a spiraling staircase.
The spiraling staircase leads to a minion, Tri-Point. Tri-Point repeatedly uses Lightning magic, so the player should prepare with defensive elemental junctions.
Courtyard[]
The courtyard is a bleakly lit area with a fountain in the center.
The path diverges to the Waterway on the right and the Chapel at the middle. A party switch point is found here.
The Courtyard's fountain contains the Treasure Key, which can only be obtained in the fountain after the Waterway is drained from the Floodgate. The player can use the key to open the door to the Treasury.
Stairway Hall A[]
The stairway halls are entered from the hall. Both are wide rooms in which the staircase takes up most of the space. The left path has a large mosaic window, while the right path has a large bell in the ceiling at the top.
There are two paths. The path left leads to the Treasury and the Elevator Hall, while the path right contains a party switch point.
The path right leads to the Art Gallery, and is where the player rings a bell to summon the Omega Weapon.
Treasure Room[]
The room is a bleakly-lit dungeon with coffins around the room, filled with cobwebs.
The Treasure Room is accessed from the left Stairway Hall A, in the path leading to the Elevator Hall. The player needs the Treasury Key to get in, found in front of the fountain on the Courtyard after the Floodgate has been closed. Inside are four crates with a puzzle. Solving this puzzle summons Catoblepas, one of Ultimecia's eight minions.
The goal is to open all coffins.
- Opening/closing the first coffin will open/close the first and second coffins
- Opening/closing the second coffin will open/close the first, second and third coffins
- Opening/closing the third coffin will open/close the second, third and fourth coffins
- Opening/closing the fourth coffin will open/close the third and fourth coffins
From the default position the puzzle can be solved by touch the first, second, third and then fourth coffins in this order.
Art Gallery[]
The Art Gallery is well-lit with bright candles, and features artwork across its walls.
A picture gallery entered from the right Stairway Hall A, this path leads to the Stairway Hall B. The area contains a puzzle; naming the large painting in the left of the room ("Vividarium", "Intervigilium" and "Viator") summons Trauma, one of Ultimecia's eight minions.
Stairway Hall B[]
Stairway Hall B is a stone room with five large mosaic windows letting in light, and suits of armor guarding the staircase down in the middle.
This area diverges to two: the Passageway on the left, and the Floodgate down the staircase in the middle.
Passageway[]
Contains a hidden save point. This path leads to the Elevator Hall and must be used if the player wants to reach the Storage Room.
Elevator Hall[]
The Elevator Hall contains two elevators, which are operated by weighing one down heavier than the other, and two levels. The upper level has balconies leading to different areas; the path on the left on the upper balcony leads to the Storage Room, where the Floodgate Key is found, and the path on the right leads to the Passageway.
To operate these elevators, the player must use two parties. Party B must be heavier than party A (using Enc-None will make the transition smoother).
To do this, party A (the lighter party) must access the Elevator Hall by entering from the left Stairway Hall A and stand on the left elevator, while party B (the heavier party) enters through the Passageway to the upper balcony entrance on the right. Party B will then stand on their elevator on the right, lifting up party A's elevator, allowing them to access the Storage Room.
Storage Room[]
The Storage Room is a dead-end. It is a circular room with wooden shelves.
The Storage Room contains the Floodgate Key, which is used to access a hidden area in the Waterway. It can only be reached by operating the elevators in the Elevator Hall, which requires both parties.
Floodgate[]
The floodgate is a mostly stone room controlling the flow of water through it, and bridges to cross the water. No enemies are encountered here.
The path diverges to two; the right door leads to the Armory (initially locked, opened with the Armory Key), while the left door leads to the Prison. The lever before the left door controls the drainage in the Waterway, but the player must use the Floodgate Key (obtained in the Storage Room, accessed by using the elevator) to activate the lever; pulling the lever drains the water, making the Waterway accessible, and also allowing a Treasure Key in the Courtyard to be picked up from outside the fountain.
If the Armor Key fell from the Bridge, it can be obtained here, allowing the player to enter the Armory.
Prison[]
The prison is a dead-end. It is a dungeon filled with cobwebs.
The door will be locked once the player enters. This room contains a corpse holding the Prison Key. Once the player retrieves it, Ultimecia's minion Red Giant will appear to stop the party from escaping. The door to the left leads to a ledge overlooking the Waterway. The Red Giant is easily defeated by inflicting it with Vit 0 or using Demi, Cactuar or Diablos.
Armory[]
The armory is a dead-end, mostly containing suits of armor.
Accessed from the Floodgate via the Armory Key retrieved at the Bridge (the player must walk across the bridge so the key will not fall; if the key fell, it can be found in the Waterway after it is drained of water. Here, the player enters a fight with a Vysage, Lefty, and Righty, which is revealed to be Ultimecia's minion Gargantua.
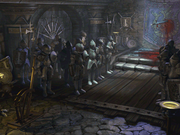
Castle Armory with red blood.
The armory originally had red blood on the wall, but was turned green in the localized versions.
Chapel[]
Accessed from the Courtyard, contains an organ and a strange, dark, purplish cloud that is actually the Omega Weapon that can be summoned out of the cloud via the bell in the right Stairway Hall A. The organ also has a function—striking all the keys on the organ at the same time will open the access to the Waterway from the Courtyard. Although the party leader has no animation for striking the organ keys, the sounds still play and the bars will be lowered.
In the PlayStation version, the keys to press correspond to ![]()
![]()
![]()
![]()
![]()
![]()
![]() and
and ![]() .
.
In the PC version, the buttons are [TALK/CONFIRM], [WALK/CANCEL], [TALK] and [MENU].
The Remastered version follows the PC version that had fewer buttons to press than the PlayStation version: ![]()
![]()
![]()
![]() .
.
Waterway[]
Initially flooded, the waters can be drained using the lever in the Floodgate. Divided into the top level and the bottom level. The top is accessed through the Bridge, and the bottom through the Courtyard—a fence bars access until all the organ keys in the Chapel are struck.
Bridge[]
Accessed through the Chapel, a rickety wooden bridge connects the Clock Tower. There is an object, the Armory Key used to access the Armory, retrieved by walking slowly on the bridge above the waterway. If the key falls, it can be found in the Floodgate room. Across the bridge, the path diverges: right goes to the Waterway, and left to the Clock Tower.
Clock Tower[]
A spiraling staircase accessed from the Bridge. A hidden save point is at the base. Along the way, the player can reach the swinging pendulum, grab it and cross to the other side, where one of Ultimecia's eight minions, Tiamat, awaits.
While inside the clock tower, the player can observe the gears moving, yet, on the outside, the clock is stopped. It may be due to the Stop draw point inside the tower, or because the castle exists in a state of compressing time.
Master Room[]
Ultimecia awaits at the tower's Master Room. It is reached via the Clock Tower, by entering the tower through the Chapel, climbing it, crossing the clock handles, and then descending down. This leads to an extremely long bridge, at the end of which is the Master Room.
A save point can be found at the end of the path near the entrance to the room.
Quests[]
Unlocking sealed abilities[]
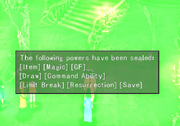
The party's abilities are locked.
The castle is a maze-like structure. Ultimecia's Chamber, where the final battle is staged, can be accessed right from the beginning, but when the party first enters they can only select the Attack command, as all their other commands have been sealed. To get the abilities back the player must locate and defeat Ultimecia's minions. After each defeat, the player can select one ability to unlock.
The following powers are sealed until the player unlocks them:
- Draw (if the player wishes to draw missed Guardian Forces, this command should be unlocked first)
- Save (though save points will provide the normal dialogue, the Save command will be grayed out in the menu)
- Resurrect (if a character is in KO status, they will remain so until the Resurrect ability is unlocked. Even Phoenix and Angelo Reverse will miss)
- GF (all GF abilities accessible in battle and from the menu, such as Card Mod, are also sealed until this is unlocked)
- Item (disabled in both battle and from the field menu, though Auto-Potion still works)
- Command (in-battle commands, such as Devour)
- Magic
- Limit Break
If the player exits the castle, a message will say the seal has been temporarily broken. The seal is only in effect inside the castle.
There are eight minions in total, and it is possible to flee when fighting them. From each of the minions beyond Shinxaur, a Guardian Force that may have been missed previously can be drawn. Tiamat, for instance, holds Eden, and is an easier way to get it than from the Ultima Weapon. This feature is not included in the original Japanese version of the game.
See the bosses' individual articles for how to get to and defeat each of them. See layout section of this article to see where in the castle the bosses are.
Rosetta Stone[]
The castle's waterway is flooded, but the player can drain the waters to reveal a box containing a Rosetta Stone, an item that teaches Ability x4 to a GF. The player can find the Armory Key from a bridge on the way to the top of the castle, but the key will fall if the player runs on the bridge; if the player walks they can pick it up from the bridge. If the player lets the key fall it can be picked up from the canal in the dungeon where water runs from the waterway. In the dungeon the player must use the lever to open the Floodgate and drain the waterway.
There is a way to the waterway through the Courtyard, but fence bars deny access. Each of the fence bars corresponds to a key in the organ in the Chapel, and if all keys are pressed exactly the same time the bars will disappear; the player must do this perfectly—if even one bar remains they can't get through.
Entering the waterway from the Courtyard when the water has been drained finds a box with the Rosetta Stone inside. There is a door the player can open nearby to get to the dungeon.
Party weights[]
The two elevators in the Elevator Hall are operated by the weights contained in them. To have a party be lifted in an elevator, the other must contain a heavier trio of characters. Each character is assigned a weight:
| Character | Weight |
|---|---|
| Irvine | 68 |
| Squall | 62 |
| Zell | 60 |
| Quistis | 52 |
| Rinoa | 48 |
| Selphie | 45 |
Given these values, the potential party combinations for tilting the elevator are:
| Party A | Weight | Party B | Weight |
|---|---|---|---|
| Quistis, Rinoa, Selphie | 145 | Irvine, Squall, Zell | 190 |
| Zell, Rinoa, Selphie | 153 | Irvine, Squall, Quistis | 182 |
| Squall, Rinoa, Selphie | 155 | Irvine, Zell, Quistis | 180 |
| Zell, Quistis, Selphie | 157 | Irvine, Squall, Rinoa | 178 |
| Squall, Quistis, Selphie | 159 | Irvine, Zell, Rinoa | 176 |
| Zell, Quistis, Rinoa | 160 | Irvine, Squall, Selphie | 175 |
| Irvine, Rinoa, Selphie | 161 | Squall, Zell, Quistis | 174 |
| Squall, Quistis, Rinoa | 162 | Irvine, Zell, Selphie | 173 |
| Irvine, Quistis, Selphie | 165 | Squall, Zell, Rinoa | 170 |
| Squall, Zell, Selphie | 167 | Irvine, Quistis, Rinoa | 168 |
Omega Weapon[]
The optional superboss, Omega Weapon, is found within this castle and is the strongest monster in the game. The Final Fantasy VIII Omega Weapon is among the strongest of its kind in all of the Final Fantasy series. To reveal Omega Weapon the player must ring the bell in the room right outside the Art Gallery with the "reserve" party, and switch parties and hurry to the Chapel where Omega Weapon has appeared out of the black cloud.
Musical themes[]
"The Castle" is the theme of Ultimecia Castle. A piano arrangement is included on the Piano Collections: Final Fantasy VIII album, and the theme is also downloadable for Theatrhythm Final Fantasy. An 8-bit variation is included on the Final Fantasy VIII Chips album.
Other appearances[]
Dissidia Final Fantasy[]

Ultimecia's Castle.
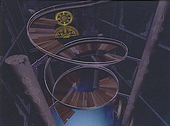
The Clock Tower arena is the representative arena of Final Fantasy VIII under the name Ultimecia's Castle. Squall and the Warrior of Light fight Ultimecia in their storylines, and Zidane battles Garland. It is also where the Warrior talks with Cosmos and where Cloud departs from Firion, Cecil, and Tidus.
Concept Art.
The arena features a large open central area with four tall pillars in the corners and a spiral wooden platform with railings. The wooden platforms are destructible, and also break if a character stands on them too long. The side of the area has a long alcove lined with gears, and the top has a small balcony that can be destroyed if a character is knocked into it. This stage is notably the only one to have a Banish Trap set in the ceiling as well as in the ground.
In the stage's Ω version, at times during a battle the screen will blur as time compression magic takes effect: any destroyed platforms will reverse and reform, the gears will begin to spin, damaging any character that touches them, and the Bravery pool rapidly randomizes. After a period of time the effects end and the stage returns to normal.
The Time Warp is the battlegen item obtained through stage destruction in Ultimecia's Castle. After clearing Inward Chaos, the Mallet becomes available as a rare battlegen item obtained through stage destruction.
Dissidia 012 Final Fantasy[]
Ultimecia's Castle is the location where Tifa battles Ultimecia.
Mallets become unavailable to obtain in this stage, becoming the battlegen item for the M. S. M.S. Prima Vista instead.
Theatrhythm Final Fantasy Curtain Call[]
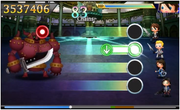
The Master Room
The Master Room of Ultimecia Castle appears as the BMS for "Premonition", and "Maybe I'm a Lion".
Pictlogica Final Fantasy[]

