| | |
- "My lord, the fleet has moved out of lightspeed. Com-scan has detected an energy field protecting an area of the sixth planet of the Hoth system. The field is strong enough to deflect any bombardment."
"The Rebels are alerted to our presence. Admiral Ozzel came out of lightspeed too close to the system."
"He...He felt surprise was wiser—"
"He is as clumsy as he is stupid. General, prepare your troops for a surface attack."
"Yes, my Lord." - ―General Maximillian Veers and Darth Vader
The Battle of Hoth was a major victory for the Galactic Empire and among the worst battlefield defeats suffered by the Alliance to Restore the Republic during the Galactic Civil War.[30] The battle was an Imperial invasion aimed at destroying the Rebel Alliance's Echo Base hidden on the remote ice world Hoth. The base's location was compromised when a viper probe droid deployed by Darth Vader landed on Hoth. When the Death Squadron fleet commanded by Admiral Kendal Ozzel left lightspeed too close to the Hoth system, the Admiral inadvertently alerted the Alliance of the Imperial's presence, giving the Rebels time to prepare for the necessary evacuation and raise the planetary shield. Thus, Vader executed him for that fatal mistake and immediately promoted Captain Firmus Piett to replace him.
The Imperial attack force consisted of primarily AT-AT walkers, commanded by Major General Maximilian Veers. His army was tasked with destroying Echo Base's main power generator to allow orbital bombardment of the planet. Spearheading the defense of the generator was the elite Rogue Squadron, manning snowspeeders, commanded by Luke Skywalker, renowned for being the pilot who destroyed the first Death Star. The snowspeeders did not have the necessary firepower to bring down the walkers, so Skywalker suggested an alternative tactic to trip up the walkers with the tow cables issued to every snowspeeder.
Despite the efforts by Rogue Squadron, the power generator was eventually destroyed by Veers. The remaining base personnel proceeded to evacuate, as the 501st Legion, led by Darth Vader, entered the base. It would prove a major victory for the Galactic Empire, and would heavily stymie the Rebels. The Alliance's loss was so great at the time, at least one member of the 501st Legion considered the Battle of Hoth to be the end of the rebel movement.
Prelude[]
- "My men and I spent long, arduous hours setting up the perimeter defenses, doing what we could in case we were ever found here. Then this morning Captain Solo made scrap out of an Imperial probe droid that slipped past our proximity sensors… We knew they'd be coming—and we were ready for them."
- ―Corporal Jobin
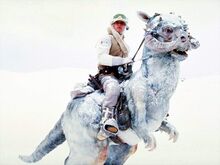
Commander Luke Skywalker patrols the icy plains on a tauntaun.
Following the Rebel Alliance's major victory at Yavin, Imperial forces eventually forced the Rebellion to abandon their base on Yavin 4.[26] A holocron created by Bail Organa, one of the founders of the Rebel Alliance, contained a list of possible hideouts in the event that the Yavin 4 base was lost. This list led the Rebellion to the "graveyard world" Boz Pity, but the Empire quickly discovered this base and forced the Rebellion to abandon Boz Pity as well.[21]
Despite the loss of both the Yavin 4 and Boz Pity bases, around 1 ABY, Hoth was chosen by Luke Skywalker as the Rebellion's new main base after he was stranded on the planet for a period of time.[31] During an assault on Zaloriis City to punish the Zaloran separatists between 2.5 ABY and 3 ABY, Lord Darth Vader and General Maximilian Veers discovered archives of the library which showed the new location to be somewhere near the Elrood system.[19]
Ironically, an Imperial unit uncovered Echo Base during a mission on Hoth and attacked it, only for the Rebels to wipe out all but a handful of survivors. The survivors attempted to report their discovery, but their superior, General Nevar, deleted their report due of incompetence.[32]
The battle[]
Preparations[]
- "No one ever complained about the cold on Hoth. We never felt it. Even though we were blinded by blizzards, we could see the final end of the Rebellion in our blaster sights. Was it only a mirage? Perhaps; but on that day, on that planet, our blood ran hot with dreams of victory, melting the ice that stood in our way."
- ―An Imperial retired clone trooper
Vader's personal Death Squadron fleet reached the Hoth system, following a chance discovery made by a Viper probe droid that was sent to the planet. The landing of the Viper droid was briefly witnessed by Luke Skywalker during one of his patrols, believing it to be a meteorite, although he was unable to investigate the issue further before he and his tauntaun were ambushed by a wampa.[1]
Luke's disappearance did not go unnoticed, with Han Solo (who had originally planned to depart Hoth due to his status as a wanted criminal by Jabba the Hutt, with the main motivating factor behind the decision being an encounter with a bounty hunter at Ord Mantell) eventually deciding to go into the snowstorm to find Skywalker when he failed to report back before the personnel were forced to close the base due to the blizzard. Skywalker managed to escape the wampa cave, also amputating one of the occupants in the process, although he was left barely alive from the encounter due to both the attack as well as from being caught in the blizzard. He eventually saw the ghost of his deceased Jedi mentor, Obi-Wan Kenobi, who told Skywalker to head to the Dagobah system to seek training from the Jedi Grand Master Yoda just as Solo arrived and found Skywalker. Because Solo's own tauntaun perished from the blizzard, Solo and Skywalker were forced to camp out for the night, with the former using the latter's lightsaber to split open his deceased steed to offer them some warmth, choking back the stench.[1]
The next morning, Zev Senesca, using the moniker Rogue Two, was dispatched to scout for them and bring them back to base, with Solo responding to his hailing of them. Upon being recovered and brought back to Echo Base, Skywalker was subject to a bacta tank for his injuries. The Viper was later discovered and encountered by Solo after investigating suspicious radio transmissions picked up near the shield generator, who alongside Chewbacca fought it. The probe droid ended up self-destructing shortly after Solo attempted to disable it with a blaster, although not before it transmitted evidence of their shield generator. Their discovery turned out to be the main base of the Rebel Alliance, located on the sixth planet of the system. Although Death Squadron's commander, Admiral Kendal Ozzel, felt the evidence only suggested that it was a base for smugglers rather than the Rebels, Vader believed otherwise.[1] To oversee the vital assault on the heart of the Rebellion, Grand General Malcor Brashin and his talented second-in-command General Brenn Tantor were summoned to the Hoth system.[4]
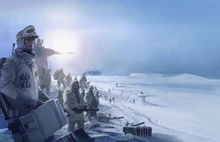
Rebel troops prepare the Empire's ground assault
Vader and many of his top officers had planned a sneak attack, jumping out of hyperspace at some distance from the planet and taking advantage of the fact that the meteor activity made it difficult for the Rebels to spot approaching ships. They would then initiate limited long-range orbital bombardment to destroy the base, along with any spacecraft and defenses. Major General Maximilian Veers would then mount a sweeping ground assault to capture any survivors.
The plan would have likely allowed the Imperials to easily take the planet with few casualties. However, Ozzel made his own assault plan. He exited hyperspace close to the star system, hoping to surprise the Rebels before they could prepare their defenses. However, this backfired when the Rebels' early-warning sensors detected the fleet. The planetary shield protecting Echo Base was activated, which precluded any aerial bombardment. Veers notified Vader, who immediately realized that Death Squadron would have to mount a full-fledged ground assault to take the base rather than simply destroy it from the air. An incensed Vader Force choked Ozzel to death for his incompetence and promoted Firmus Piett, then chief fleet captain of the Star Dreadnought Executor, to Admiral.[1]
Having assessed the situation, Vader ordered General Veers to land beyond the range of the energy shield and begin a surface assault aimed at knocking out the Rebels' power generator and thus bringing down the shield, while Death Squadron took up a blockade formation in an effort to prevent any fleeing Rebel starships from escaping.[1] Veers would command the situation on the ground while Tantor oversaw the entire engagement and issued Veers's orders from orbit via the Battlefield Holographic Control Interface.[4]
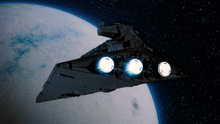
The Imperial fleet attacks Hoth.
Various landing craft deposited the Imperial landing force at the Moorsh Moraine.[20] The Imperial landing force, dubbed Blizzard Force, consisted of several battalions of cold-weather equipped 501st Legion Stormtroopers (known as Snowtroopers), some squads equipped with heavy repeating blasters. This infantry force was carried aboard All Terrain Armored Transports and A5 Juggernaut transports, which in turn were supported by All Terrain Personnel Transport,[20] All Terrain Scout Transport, and All Terrain Advance Raider walkers,[20] and with Viper probe droids providing extra sensory-support. In addition, the Blizzard Force also had five heavy anti-air troopers to take down any aerial threats, themselves also being heavily guarded due to their relative vulnerability. This mechanized force was deployed by several Y-85 Titan dropships,[20] and larger landing assault craft.[11]
An individual served in the defense of Echo Base. Using a lightsaber or blaster, the individual defeated attacking troopers, creatures, and droids. The Rebels also defended against AT-ATs and raids into Echo Base.[33]
The Alliance employed snowspeeders, light aircraft modified for arctic combat conditions. The Rebel snowspeeders were led by the elite Rogue Squadron. Ground troops were armed with A280 blaster rifles and several types of artillery emplacements, including DF.9 anti-infantry laser batteries and the Clone Wars–era P-Tower anti-vehicle laser cannons.[1]
A large ion cannon, the v-150 Planet Defender, provided fire support for the departing transports, disabling the Imperial-class Star Destroyer Tyrant long enough for the first evacuating Rebel transport, Quantum Storm, to escape. Like all their defenses, the Rebels' ion cannon was remotely hooked up to the stolen reactor equipment of a Praetor-class battlecruiser, feeding more power to Echo Base's defenses than the previous stolen Star Destroyer reactor had done to their Massassi Base. This enabled the Rebel forces to withstand bombardment from even a top-of-the-line Star Dreadnought like the Executor. To protect the interior of the base, Rebel troops employed small repulsorsleds, each armed with a blaster cannon, to form the last line of defense against the Empire's troops.[20] The ion cannon also disabled a Star Destroyer, the Corrupter, allowing the civilian freighter Otana and its escorts to escape, although Otana sustained damage.[7]
Imperial offensive[]
- "There is no tomorrow, men. Today, we crush the Rebellion, once and for all."
- ―Unnamed Imperial officer during the Battle of Hoth
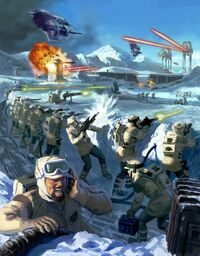
The Rebels are attacked in their trenches.
The Imperial assault was primarily aimed at destroying the Rebel's main power generators, which would shut down the planetary shield protecting the base from orbital bombardment. General Veers led the assault personally, commanding his AT-AT walker Blizzard 1, and crushed the Rebel defenses.
The Imperials suffered casualties before the battle even begun when Blizzard 4 attempted to make its way through the Kerane Valley, hoping to impress Vader. Veers lost three walkers to crevasses ice. This prompted the force to retreat to the safer western route.[20] As the Imperials advanced, one of the gunners obliterated Echo Post 64, killing the scout manning it.[34]
Rogue Squadron had destroyed a group of probe droids that blocked the transporter's escape route, after which Rogue 10 was shot down. Skywalker and his wingmen destroyed three AT-STs threatening the pilot before rescuing him. Then Rieekan ordered them to defend the shield generator and Outpost Beta. The squadron proceeded to destroy three AT-ATs and five more AT-STs on their way.[29]
Prior to Blizzard Force's arrival, a task force encompassing three medics, four AT-ARs, two heavy energy pummels, four heavy artillery platforms, eight heavy mounted troopers, six AT-PTs, five thermal detonator troopers, 10 repeater troopers, 3 74-Z speeder bike-mounted troopers, and one Viper droid attacked Echo Station 3-T-8 and then Echo Station 5-7, which contained some of the evacuation transports. Both bases along with the six ships were soon destroyed by the overwhelming Imperial forces.[19]
Eventually, several Acclamator-class transport drop ships unload several AT-ATs and Juggernauts. The 4th Squad of the Alliance Special Forces' Wilderness Fighters, led by Jobin, the son of Rebel Alliance leader Mon Mothma, attempted to attack the forces. The Wilderness Fighters were later forced to split in half upon learning from Ion Control that a squad of snowtroopers and an AT-ST had arrived at the ion cannon to attack it, with Jobin personally leading the attempt to defend the ion cannon with his half, composed of Roj, Grond, Sora, and another rebel. He and his squad then attacked the stormtroopers, with Jobin, Roj, and another member of the squad directly attacking the AT-ST while Grond and Sora flanked it. The AT-ST eventually was destroyed by a satchel explosive, before moving on to the ion cannon.[11]
The Imperial force then moved against the Rebel base. A task force composed of three squads[35] of AT-ST walkers,[8] AT-ARs, and a few AT-ATs[19] moved toward the Outpost Beta ion cannon to prevent any Star Destroyer casualties in the space battle.[19] Snowspeeders from Rogue Squadron flew in and destroyed the attackers before they reached the cannon. The Rogues also eliminated AT-ST reinforcements brought in by Imperial loader shuttles.[8] In addition, to back up Rogue Squadron, various Rebel Thermal Detonator troopers and repeating blaster troopers destroyed various All Terrain Anti-Air walkers, although with a significant cost on the troopers end.[19] Blizzard Force came under harassing fire from the Alliance emplacements, but the walkers' armor plating was too strong for Rebel lasers. Only Rogue Squadron succeeded in toppling one assault transport,[8] using an unorthodox tactic imagined by Luke Skywalker and Alliance tactician Beryl Chiffonage, which relied on magnetic harpoons and tow cables to entangle the walker's feet.
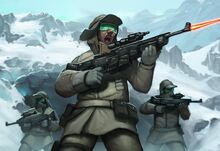
Rebel Soldiers defending the Echo Base
Unfortunately, the tactic's success was minimal, and the AT-ATs downed many snowspeeders with deadly volleys from their blaster cannons. The rebels dove into the trenches, seeking cover. Luke's craft was hit by walker fire, killing his gunner Dak Ralter instantly, and was then shot down shortly after. Skywalker barely managed to escape the speeder wreckage before it was crushed by a walker, with Ralter's body still inside.[1] Because of this, Wedge Antilles was granted command of Rogue Squadron for the duration of the mission.[8] In an act that seemed to give Palpatine's concern about Skywalker's burgeoning power of a potential Jedi credibility, the young pilot decided to attempt to bring down two AT-ATs (one of them Blizzard 4) on his own. Using only a grappling hook, his father's lightsaber, and a concussion grenade, Luke managed to do precisely that, before heading off to rejoin the rebels. Afterwards, he managed to mount a tauntaun upon being pointed to one by Wedge Antilles, and, along with Derlin, rode them towards the south part of the base, cutting a swath through the Snowtroopers along the way. Likewise, Rogue Squadron, under the command of Wedge Antilles, managed to down three more AT-ATs.[5]
Most of the rebels in the trenches were wounded, dying or dead, or scared, captured, or demoralized by the unstoppable Imperial attack. The rebel gun emplacements fired on the walkers, to little avail. Many rebels met their deaths from the walkers' ripping rays. AT-STs and snowtroopers body-mopped up what they could.
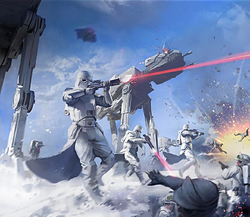
The Imperial forces reach the trenches.
As the armored assault force reached the trenches, the Alliance soldiers, with most of their laser cannon emplacements destroyed, came under heavy fire, and the order to retreat was issued. With the other AT-ATs providing cover fire, Veers in Blizzard 1 broke through the defensive lines and proceeded to annihilate the shield power generators.[1] Blizzard 1 provided the coup de grace on the shield generator shortly after eliminating its core and a turret guarding the generator, while the repeating troopers and AT-ARs provided backup by wiping out any remaining resistance.[19] Imperial forces then used airmobile tactics to deploy snowtroopers onto the surface. Rogue Squadron was also redirected to aid the remaining grounded transports and stop the bombing runs from various TIE Bombers until they were ready for liftoff.[8]
Just before departing to aid the grounded transports, Antilles inspected the remains of the shield power generators, and managed to recover a tech upgrade for advanced lasers/blasters.[5]
Skywalker and Derlin arrived too late at what was originally the power generator. Derlin, feeling that was as far as he could go, had Skywalker go aid a remaining rebel squad that was fighting some snowtroopers, and advised him to take out the snowtrooper manning the tripod gun and use it against the Imperials. Shortly afterwards, Imperial reinforcements in the form of two snowtrooper companies and three AT-STs arrived via loader shuttles, but Skywalker managed to eliminate the AT-STs.[5]
During this time, the Rebel pilot also destroyed one of the AT-ST containers with the E-Web heavy repeating blaster and recovered some advanced cluster missiles.[5]
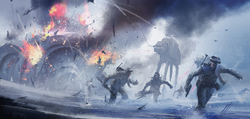
Blizzard 1 destroys the shield generator
Having earlier anticipated that the ion cannon was giving the Imperial fleet trouble, Blizzard Force was redirected to target the ion cannon again, with the AT-ARs and repeater troopers escorting the surviving AT-ATs, also wiping out dozens of surviving Rebel troopers and airspeeders who intended to halt the advance. The Imperials ultimately destroyed the ion cannon, although not before most of the Rebel transports escaped the planet. Around the time of the destruction of the ion cannon, Darth Vader arrived onto the battlefield with reinforcements. Blizzard Force, intending to rendezvous with Vader and his reinforcements, managed to take down any remaining minor Rebel bases in their way, including turrets, troop centers, mech factories, power cores, and a fortress. Afterwards, they arrived at Echo Base proper.
Some of Blizzard Force decided to attack Echo Base directly. Avoiding the two advanced turrets that guarded the main wall of the complex, the soldier succeeded in blowing up a vulnerable corner in the wall, and proceeded to attack the soldiers inside, also destroying fortresses within the compound.[19]
Several Blizzard Force units proceeded towards the southern canyon with the intention of causing as much destruction as possible to draw out all remaining personnel at Echo Base, including at least two medium turrets and a troop center. The surviving troops who hadn't escaped yet charged at the Blizzard Force, being wiped out in the process. Afterwards, the AT-ATs then destroyed the fortress and surrounding troop centers as the snowtroopers held back the soldiers.[19]
Infiltration of Echo Base[]
- "Imperial troops have entered the base! Imperial troops have entered the [static]"
- ―Grond
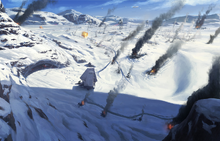
Lord Vader arrives on Hoth.
Jobin's squad then reached the ion cannon, and fought the snowtroopers. Grond attempted to radio to Echo Base's command room that Imperials had infiltrated the base but was shot in the back. He and another soldier were killed in the fight. Jobin stabbed one of the snowtroopers with an icicle, and managed to fire the ion cannon before setting it to self-destruct.[11] The staff then evacuated to the remaining transports, specifically the Bright Hope.[1]
Lord Vader personally led troopers of the 501st Legion into Echo Base, cutting down any who stood in his way,[26] and, in one case, choking a soldier to death. Alliance troops attempted to delay Imperial progress, but were swiftly overwhelmed by the mechanized assault. As the snowtroopers breached the icy bunker walls of Echo Base and entered close range combat with the defenders, Rebel personnel were forced to flee. However, members of Renegade Squadron, who were defending the ion cannon team, put up a determined defense. They inflicted moderate casualties on the 501st Legion and engaged Darth Vader, managing to force him back, at least temporarily.[21]
After the route to the rebel transports was blocked by a collapsing ceiling brought about by Imperial bombardment, Han Solo was forced to escape in the Millennium Falcon with Princess Leia Organa. The Medical Bay suffered relatively little damage, from which Solo and Organa retrieved some medical supplies. Another cave-in resulted in dislodged stalactites destroying most of the walkways, resulting in the two hopping across the remains of the walkways, while the 501st, under the direction of Vader, attempted to gun them down. Some Rebel soldiers arrived to back Solo and Organa up while the latter two escaped. They then had a brief run-in with Vader, but a cave-in prevented Vader from intercepting them, buying them enough time to arrive at the Falcon.[5]
Because C-3PO had trouble keeping up upon arriving at the hangar, Solo yelled at 3PO to pick up the pace unless wanted to have a permanent residence at the doomed base. However, the Millennium Falcon still was in a significant state of disrepair (with Solo ultimately restoring cockpit power by punching a wall after it prematurely blacked out), thus forcing Solo to hold off an advance group snowtroopers via an automated Ax-108 "Ground Buzzer" surface-defense blaster cannon, also telling Organa that the ship still had its surprises when she expressed doubt about them being able to leave beforehand. Besides fending off Snowtroopers before they could set up an E-Web emplacement, he also used the "Ground Buzzer" to prevent any Snowtroopers from entering the ship.[5] Solo, Chewbacca, Organa, and C-3PO then managed to escape after a close encounter with an advance group of snowtroopers, with the Falcon departing the hangar just seconds after Vader arrived. Luke also briefly witnessed their departure.[1]
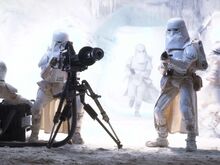
A group of Imperial snowtroopers fires at the Rebels and Millennium Falcon as it departs.
The 501st moved through the base and into the back hangar and landing area. There, the last of the Rebel troops were loading onto a last transport. The elite shock troops led by Vader pushed them back, but took several casualties at the hands of DF.9 anti-infantry laser batteries and E-Web heavy repeating blaster encampments. As the Rebel and Imperial forces were engaged in a firefight, an orbital strike beacon that had been placed in the hangar was positioned under the transport ship by the Imperials. The 501st managed to protect the beacon from the Rebels long enough for an orbiting Star Destroyer to lock in the co-ordinates of the beacon. The 501st and Vader then vacated the area as the Star Destroyer descended into the atmosphere and bombarded the ship from above. Most of the Rebel infantry were killed, though stragglers remained.[26] Vader and the 501st later tracked down the 4th Squad of the Wilderness Fighters, led by Corporal Jobin, at Hangar 10. The Imperials fatally wounded Jobin, although not before he ensured the rest of his squad's escape as well as the delivery of a letter to his mother. Vader attempted to interrogate Jobin, who refused to answer. His defiance led to Vader snapping his neck.[11]
One other Rebel, Dash Rendar, was trapped inside Echo Base in the hangar bays. His YT-2400 light freighter, the Outrider, was on the other side of the base, where the power was out. He used the station's supply of captive wampas as an advantage, setting them free to help his slaughter of the Imperial infantry. After restoring the power allowing the rest of the Rebels to escape, his troubles got worse; a lone AT-ST walker managed to slip behind the base's defenses and penetrated the base. Rendar nevertheless managed to destroy it, and he escaped in the Outrider.[24]
Rogue Squadron and Luke Skywalker pushed into the atmosphere and defended the three remaining fleeing transports. As TIE/sa bombers moved in, the X-wings swooped and pushed back the attackers.[5] The remaining transports fled, but the battle was not yet over. Clone X2 was about to confront his brother, X1.[17]
Rebel retreat[]
- "Our mission today is not to defeat the Empire. What we must do is to keep the Rebel Alliance alive."
- ―Leia Organa, before the battle begins
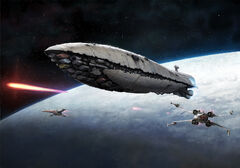
A GR-75 medium transport escaping from Hoth
X2 landed on the Avarice and killed all the stormtroopers in his path. X1 was waiting for him, and he had Falon Grey's lightsaber, as well as some skill with the dark side. They shortly fought, but as the ship exploded, both of them withdrew in their starfighters.[17]
Approximately thirty Rebel GR-75 medium transports managed to take off along with six Kleeque-class transports and a number of other lighter craft. Despite the cover provided by the v-150 Planet Defender and starfighter escorts, the Imperial naval squadron blockading the planet managed to disable or destroy seventeen Rebel GR-75 Transports. The ion cannon crew, made up of Alliance troops from Alderaan, were among the last to leave, blowing up the cannon to mask the sensor reading of their escape.[11] In addition, Renegade Squadron was the last squadron off Hoth.[21] Despite the escape of most senior personnel, the loss in material and men proved a disaster for the Rebel Alliance, and was a terrible blow to its war effort.
Renegade Squadron was called into orbit to help escort the last of the transports out of the system, and were forced to engage with Darth Vader, piloting his TIE Advanced x1 starfighter, and forced him to retreat. The resistance of Renegade Squadron forced the Empire to test its new line of TIE fighters, the highly advanced TIE Defender. After fighting off some of these TIE Defenders, commandos part of Renegade Squadron managed to infiltrate the hangar bay of the TIE Defender's Star Destroyer and hijack one of them, returning it to their Mon Calamari Star Cruiser to await further analysis by Alliance technicians.[21]
Likewise, the Millennium Falcon managed to escape orbit, as well as cause a near-collision between three Star Destroyers.[1] Their escape route was cut off, however, so they ended up having to disable a Star Destroyer that was already damaged from the battle—having its left shield generator destroyed—before they had enough of an opening to escape.[5] However, due to a hyperdrive malfunction, they weren't able to escape through hyperspace and were instead forced to enter the asteroid field to elude the Imperial forces. At least four TIE fighters pursuing them and an Imperial II-class Star Destroyer ended up destroyed from the asteroids. Death Squadron continued to pursue them into the asteroid field, as well as sending TIE/sa bombers to force them out of hiding, only briefly disengaging when Palpatine wanted to contact Vader regarding Luke Skywalker's growing threat to him.[1]
Afterwards, Vader proceeded to hire bounty hunters to commence the search for the Millennium Falcon, even deliberately holding the meeting with the bounty hunters out in the open on the Executor's command bridge as a subtle means of expressing his displeasure at the failure of the Imperial personnel. However, during the meeting, he learned from Piett that the Avenger had spotted the Millennium Falcon and was currently in pursuit. After the Millennium Falcon escaped from a space slug's jaws that they unknowingly hid inside, the Millennium Falcon managed to shoot down several squadrons of pursuing TIE fighters before hiding behind the Avenger by exploiting a blind spot in its sensors and then powering down and landing behind the conning tower.[1][5] This feint ultimately resulted in Captain Lorth Needa, the commanding officer of the ship, personally reporting the failure to Darth Vader on the Executor, knowing full well this would most likely result in his execution by the Dark Lord, in the hopes that the Avenger's crew would be spared. Afterwards, Piett reported to Vader that, if the Millennium Falcon entered hyperspace, they were likely to be on the other side of the galaxy. Undaunted, Vader ordered Piett to put a notice out to all Imperial outposts to be on the lookout for the ship, and then warned him not to fail again before taking his leave.[1]
The battle was not without loss for the Empire: at least one Star Destroyer was temporarily placed out of commission by the orbital-range ion cannon, and several AT-ATs were destroyed by Rebel defenders, with more lost when the treacherous ice floes gave way. Despite forcing the Rebels to flee, the Imperial forces were unable to destroy all of the transports, while Lord Vader failed in what he considered a primary objective, namely capturing Luke Skywalker.[1]
Aftermath[]
- "As the Rebels fled, the 501st gathered around a burning bunker, and let out a cheer that shook the stars. The Rebellion was done; the Death Star was being rebuilt bigger than ever. Order had finally returned to the galaxy. In no small part due to the efforts of the fighting men of the 501st."
- ―Retired clone trooper
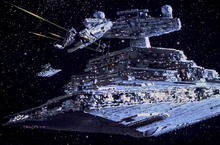
The Millennium Falcon is pursued by Imperial Star Destroyers.
The Battle of Hoth was a major disaster for the Rebel Alliance. The Rebels lost thousands of soldiers and pilots who either died during the defense or were killed when the ships transporting them off Hoth were destroyed. The loss of the base itself put the Rebels on the run once again, struggling to reorganize its battered forces. Of the thirty medium transports that fled the planet, seventeen were destroyed, resulting in massive material and personnel losses. The sheer loss of men and materials severely weakened the Alliance's combat capabilities in the war, giving the Empire an edge over the Rebels for some time as they pursued their fleet.[6] Likewise, those personnel that did survive the battle but weren't able to evacuate the planet, such as Karie Neth, were found by the Imperials, placed under arrest for their loyalty to the Rebel Alliance, and sent to various Imperial prisons around the galaxy, including facilities at the Maw,[8] Bakura,[5] and Bundil II.
Some Imperials went as far to call the war over.[26] The Empire's victory at Hoth was significant enough that Emperor Palpatine, a short while after the event, had supplied a speech promising that the Galactic Civil War would soon end with the Empire's victory at hand, even redirecting all but the most essential elements of the Imperial Naval forces back to Coruscant due to the necessity of the speech.[6]
Despite the failure of the battle, the Rebels were not defeated. Most of their leadership was able to escape the planet, which ultimately secured the Alliance's survival for some time more. Also, Darth Vader failed in his ultimate goal to capture Luke Skywalker, forcing him to pursue his allies on the Millennium Falcon in order to lure Luke out into the open.[1]
Some time after the battle, a painting, Battle of Echo Base, was made in honor of the battle. Similarly, a holographic simulation of the battle was also presented to various Spacers across the galaxy.[37]
Jobin's mother, Mon Mothma, would eventually receive his message a few months later via General Crix Madine, as well as confirmation of his death during the battle of Hoth. She then gave her speech to the Rebel Alliance regarding the development of the second Death Star and the Emperor's inspection.[11]
After the Alliance was reorganized into the New Republic, the Battle of Hoth served as the basis for a historical training simulation designed to test New Republic officer cadets.[38]
Behind the scenes[]

Collapsed AT-AT, concept art by Ralph McQuarrie
The Battle of Hoth and the events leading up to and following it formed the first half of The Empire Strikes Back. Since then, the battle has been expanded in many Expanded Universe works. It has appeared as a campaign mission in the Star Wars: Battlefront series and was also featured in the non-canon games LEGO Star Wars II: The Original Trilogy and LEGO Star Wars: The Complete Saga. In the 2004 entry into the series, Battlefront, the Battle of Hoth has its own mission, although the Rebels win the battle, although Leland Chee, the keeper of Lucasfilm Ltd. Holocron continuity database, refers to the the game's events as being s-canon.[39] In 1998, Star Wars: Rogue Squadron included the battle as the third bonus mission. The 2001 video game Star Wars: Galactic Battlegrounds features two separate versions of the Battle of Hoth, one during the Darth Vader (Imperial) campaign and the other during the Leia Organa (Rebel/New Republic) campaign. The first was a main mission, and the second was a bonus mission. This article incorporates the mission from the Imperial campaign, with some elements from the Rebel/New Republic campaign. In the Imperial campaign, there were two methods nearing the end of winning the mission: One involved breaking into Echo Base via breaching a wall guarded with a pair of advanced turrets, as well as destroying both the fortresses inside and the troops, while the other merely requires going southbound to destroy enough targets to draw out the Rebel forces within Echo Base, and then using the AT-ATs to destroy the Fortresses and Troop Centers. Between the two, the first option has a significant casualty rate for the Imperial forces, while the second option is easier to accomplish.
During the escape from Echo Base, when arriving at the Millennium Falcon, Han Solo yells to C-3PO, "Hurry up, goldenrod! Or you're gonna be a permanent resident!" This was similar to a line made by Belloq in Raiders of the Lost Ark when he tells Indiana Jones that the latter will be a permanent addition to the Well of Souls after stealing the Ark of the Covenant from him. Due to Harrison Ford playing both Han Solo as well as Indiana Jones as well as both films being made by LucasFilm, the reference was most likely deliberate.
The Battle of Hoth also appeared in all three installments of the Rogue Squadron series of flight simulator video games. In the case of the first game, it appeared exclusively as an unlockable bonus mission. In the latter two installments, Rogue Leader and Rebel Strike, it had both a main mission and a bonus mission dedicated to it. In both of the second and third games, the main missions dealt with the Battle of Hoth proper, while the bonus missions focused on Han and Leia's escape from Hoth. In Rebel Strike, although the player has to board a T-47 Airspeeder in the hangar area to proceed with the mission, the player doesn't actually use it in the mission itself, as the mission takes place after Skywalker was shot down. Factor Five admitted in their commentary for Rebel Strike that they made the level a ground level for the most part to do something different, and to recreate the situation Luke was in when he was shot down. They also did it to focus on the Imperial aspect of the battle. They cited the programming of the cable hook aspect as being the most difficult part of testing.
The cross-section of Echo Base seen in Inside the Worlds of Star Wars Trilogy shows 15 T-47 airspeeders, 9 in Hangar 7 and the rest in the transports hangar. Whether or not all of these participated in the battle is not known.
The Battle of Hoth was the focus of Star Wars: Force Collection's December 2013 event "Operation Hoth Defensive." Players could join the event and face troops and probe droids, and battle AT-AT "raid bosses," including Blizzard 1. The optional Event places the player as part of the Rebel Alliance, using their character.
The Wampa attack in the beginning of Episode V during the prelude to the battle was added in primarily to explain Luke's facial scars that were present for the remainder of the film, as his actor, Mark Hamill, had just recovered from a severe motorcycling accident that left him with permanent scarring.
Alternate timeline I[]
- "You are strong, Skywalker. But only your hatred will give you the power to save your friends. Give in to the dark side."
- ―Lord Starkiller, corrupting Luke Skywalker
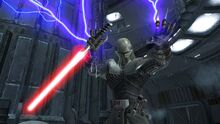
Lord Starkiller, Darth Vader's successor and Emperor Palpatine's Sith Assassin
The Force Unleashed: Ultimate Sith Edition features two non-canon events that followed the dark-side ending of the game. The second of the two events takes place on the planet Hoth. In an effort to eradicate the Rebel Alliance, the Galactic Empire searched much of the galaxy for the Rebels' hidden base. After discovering said base to be located on Hoth, the Imperial Navy was dispatched in full force to annihilate the Rebel forces and bring an end to the Rebellion once and for all. But unlike the Battle of Hoth in the original timeline, the Sith Lord Darth Vader was not involved in the alternate battle. In his place, leading Imperial troops on Hoth, was his successor Lord Starkiller. Rather than spare Vader's life as he had done in the canon timeline, Galen Marek submitted once more to the power of the dark side by slaying his former master in cold blood. In doing so, Marek replaced Vader at Emperor Palpatine's side and became known as Lord Starkiller.[40]
Unlike his predecessor, Lord Starkiller chose to partake in the Battle of Hoth, rather than watch from the orbiting Executor as the fighting unfolded. The Sith Lord personally aided his soldiers by infiltrating the Rebel Base as the Imperials' pushed towards the shield generator, eventually destroying it by the time Starkiller entered deep inside the base. After killing many Rebel soldiers and wampas that stood in his way, Lord Starkiller finally met Luke Skywalker, the son of his former master, for the first time. Skywalker refused to believe that he was Darth Vader's son and asserted the lie that was told to him, leading him to think that Anakin Skywalker and Darth Vader were literally two separate individuals. But as the Sith Lord and the pseudo-Jedi fought, Skywalker quickly discovered that he was utterly outmatched by the more powerful and experienced Starkiller, and thus chose to break off from the duel and retreat to the Rebel hangar.[40]
Lord Starkiller pursued his target objective all the way to the Rebel hangar, where he fought Skywalker for a second time while the Millennium Falcon prepared to evacuate Princess Leia Organa before the battle was lost. Once again, Starkiller effortlessly dodged and countered Skywalker's sloppy and unrefined attacks. When Starkiller threatened to kill Skywalker just as he had killed his father, Skywalker finally lost control of his anger and succumbed to the dark side of the Force. With the dark side enhancing his strength and abilities, Skywalker launched a frenzied assault on the Sith Lord, driving Starkiller back with a combination of powerful lightsaber strikes and Force lightning.[40]
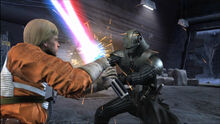
Luke Skywalker versus Lord Starkiller
But even under the influence of the dark side, Skywalker still failed to kill his enemy and lost his right hand as a result. It was at that moment that Starkiller forced Skywalker to choose between the lives of his friends or staying true to the Jedi way. Desperate and angry, Skywalker gave in to his hatred once more, creating a window of opportunity for the Millennium Falcon to escape from the hangar. But in doing so, he had fulfilled his journey down the path of the dark side, just as Starkiller intended. Standing above the fallen Jedi, Lord Starkiller congratulated Luke Skywalker on his descent into darkness and chose to take Vader's son as his own Sith apprentice.[40]
Thus, the alternate Battle of Hoth resulted in a far worse outcome for the Rebel Alliance than its canon counterpart. The Rebels still lost and suffered severe casualties and loss of vital supplies, such as weapons and ships. Even though Leia Organa, Han Solo, Chewbacca, C-3PO and R2-D2 were able to escape from Hoth on the Millennium Falcon as they had in the canonical storyline, it was a calculated risk that Starkiller was willing to make. Ultimately, the greatest difference between the original and the alternate Battle of Hoth was the fall of Luke Skywalker, an accomplishment that both Palpatine and Vader failed at achieving in the other timeline.[40]
Alternate timeline II[]
- "After my brother fell on Hoth, I fulfilled the destiny that he could not. Now I am a Jedi."
- ―Leia Organa, speaking to the Dark Apprentice
The Force Unleashed II featured its own alternate timeline that was based on the game's dark-side ending, just as the first game had done. Although only mentioned, another alternate Battle of Hoth took place. But unlike the battle in the canon timeline, in which Luke Skywalker escaped from Hoth, and the battle in the first alternate timeline, in which Skywalker fell to the dark side and became Lord Starkiller's apprentice, Skywalker never lived to realize his destiny as a Jedi. His untimely death saw his destiny placed on the galaxy's last hope, his twin sister, Leia Organa. When the Battle of Endor took place in the second alternate timeline, Organa was already well trained in the Jedi arts.[41]
During the construction of the second Death Star, Darth Vader dispatched his Dark Apprentice, the "only perfect" clone of the original Starkiller, to Endor in order to prevent the Rebels from destroying the Endor shield generator bunker. After killing hordes of Rebels and Imperials alike, including Han Solo and Chewbacca, the dark clone finally encountered his master's daughter, Princess Leia Organa. Before the two fought, Organa told the clone about how Luke Skywalker died during the Battle of Hoth and how that unexpected setback forced her to become a trained Jedi in order to fight the Sith. Despite her exceptional skills, which even impressed the Dark Apprentice, Leia Organa was ultimately outmatched and overpowered by the clone's superior power and fighting prowess. Just as her twin brother had died on Hoth, Organa fell on Endor, effectively ending any hope of restoring the Old Republic.[41]
Alternate timeline III[]
In Star Wars Infinities: The Empire Strikes Back, when Solo finds Skywalker in a Hoth snowstorm, Skywalker dies in his arms, having been attacked by an additional wampa in the cave. Skywalker's dying words tell Solo to go to Dagobah to train as a Jedi. The Empire catches the Rebels unaware during Skywalker's funeral. Wedge Antilles and Wes Janson died in the battle. Solo and Chewbacca take Princess Leia and the droids on the Falcon during the melee.
Non-canonical history[]
The Battle of Hoth was referenced a few times in skits from the Star Wars specials of Robot Chicken. In one skit, Luke manages to use a cable, a lightsaber, and a concussion grenade to down an AT-AT similar to the movie, only unlike the movie, he threw the grenade inside an occupied lavatory, in which a snowtrooper is reading a magazine. Later, it was referenced as "Empire on Ice." Another skit showed the Imperial attack on Hoth fail before it could even begin due to the drivers of two AT-ATs deciding to race like two street racing teenagers, complete with expected recklessness an AT-AT crashing and burning to avoid a crossing wampa family, causing the other AT-AT to win and celebrate. This left a dumbfounded Major General Veers to express inaudible, gaping shock at what happened, and place a plastic cup over Vader's holoprojection when he wanted to know how the invasion was progressing.
Appearances[]
Non-canon appearances[]
- Choose Your Own Star Wars Adventure: The Empire Strikes Back
 "Tall Tales" — Star Wars Tales 11 (Mentioned only)
- ° Star Wars Infinities: The Empire Strikes Back
- "Perfect Evil"
- LEGO Star Wars II: The Original Trilogy
- LEGO Star Wars: The Complete Saga
- Star Wars: The Force Unleashed — Ultimate Sith Edition
- LEGO Star Wars: Microfighters video game
Sources[]
Notes and references[]
External links[]
 Battle of Echo Base on the SWG Wiki
