| | |
- "The Seventh Fleet carries a lot of firepower. It's sent to major conflicts, where there are powerful and desperate enemies. If you don't command it, someone else will."
- ―Arihnda Pryce, to Mitth'raw'nuruodo
The 7th Fleet, or Seventh Fleet, was a fleet of the Imperial Navy during the reign of the Galactic Empire. Years before the outbreak of the Galactic Civil War, the fleet was considered an effective and powerful force as it had resolved major conflicts on the behalf of the Empire. The fleet was commanded by Fleet Admiral Sartan, until Sartan was replaced with Grand Admiral Thrawn around 2 BBY. At this time, Governor Arihnda Pryce of Lothal requested the aid of the Seventh Fleet to deal with the rebel Phoenix Cell.
Thrawn used the 7th Fleet to blockade Lothal, where he had set up his TIE Defender factory, and later to drive Phoenix Group from their base on Atollon. The fleet was defeated in 1 BBY during the Liberation of Lothal, where the Jedi Ezra Bridger called upon purrgil to defeat the fleet over Lothal, and then to make Thrawn's flagship, Chimaera, with himself and the admiral on its bridge, jump into hyperspace.
Description[]
Fleet composition[]

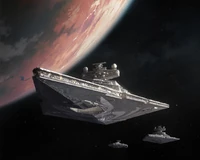
The Seventh Fleet
A fleet in the Imperial Navy, the 7th Fleet's[18] flagship was the Chimaera and later the Dark Omen, and consisted of Imperial-class Star Destroyers, including multiple Imperial I-class Star Destroyers.[5] At least two Interdictor-class Star Destroyers—the Constrainer and Kassius Konstantine's Interdictor—were utilized.[11] It also possessed Arquitens-class command cruisers, Gozanti-class cruisers,[5] and at least four Dreadnought-class heavy cruisers.[19] During the fleet's operations on Lothal, at least five ICM-092792 construction modules were placed in the planet's orbit.[20]
Organization[]
- "This information is highly confidential, Admiral. It cannot and will not by handed off to random people."
"The Chimaera's analysis group is completely trustworthy." - ―Assistant Director Brierly Ronan and Grand Admiral Thrawn
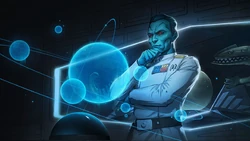
The genius Grand Admiral Thrawn, commander of the 7th Fleet
The Seventh Fleet had a range of organizations and groups under its umbrella. There was at least one squadron of Star Destroyers led by the Dark Omen that was present during the Battle of Atollon.[15] During the Skirmish over Mykapo the 7th Fleet dispatched a task force to the planet.[5] The Chimaera's analysis group was the tactical analysis group aboard the Chimaera. At the time of the Lothal campaign, they were considered completely trustworthy by the Grand Admiral, and were to assist in analyzing gralloc movements and cargo shipments and related data. Despite this, Imperial Military Department of Advanced Weapons Research Assistant Director Colonel Brierly Ronan denied that the analysis group could see the sensitive information as it related to Project Stardust. Also under the 7th Fleet, was the Defender program, a TIE fighter series initiative instigated by Grand Admiral Thrawn and under his auspices.[7]
Due to Thrawn's relationship with Emperor Palpatine, the Grand Admiral was assigned a contingent of death troopers. The 7th Fleet utilized ground units, with Major Carvia commanding the Chimaera's stormtrooper forces.[7] The 7th Fleet also maintained an armored division that was deployed in the Battle of Atollon.[11]
History[]
Early campaigns[]
- "My sources tell me that Fleet Admiral Sartan of the Seventh Fleet is going to be replaced soon. Batonn is just the kind of victory that could put you in line for that command."
- ―Arihnda Pryce, to Mitth'raw'nuruodo
The Galactic Empire's Seventh Fleet carried a superior firepower against its enemies and participated in several major conflicts. Fleet Admiral Sartan acted as the fleet's commanding officer[4] until they were replaced by Grand Admiral Thrawn, after Governor Arihnda Pryce advised the former-admiral of the 96th Task Force to volunteer for the position following his victory at Batonn.[4] Following Thrawn to the new fleet, the fleet became headed by the Imperial I-class Star Destroyer Chimaera,[5] named after a creature with same name. Both the ship's belly[21] and the fleet's emblem bore a stylized version of the chimaera.[22]
The Lothal campaign[]
Eliminating the Phoenix Cell[]
- "I want the Seventh Fleet."
- ―Arihnda Pryce, to Wilhuff Tarkin
Some time after the battle of Batonn, Governor Arihnda Pryce of Lothal requested the aid of the Seventh Fleet to deal with the growing rebellion against the Empire, which was granted by Grand Moff Wilhuff Tarkin.[1] After a group of rebels traveled to Mykapo in order to extract another group of rebels, the Chimaera traveled to the planet to support Admiral Kassius Konstantine, although the rebels were able to escape the battle.[5]
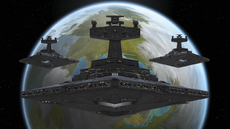
The Seventh Fleet above the planet Lothal
As Thrawn continued the hunt, he sent out E-XD-series infiltrator droids to search for the rebel base. One of the droids infiltrated the base, but was reprogrammed by the rebels to self destruct upon returning to the fleet. After Imperial weapons technicians discovered it had been hijacked, the droid self-destructed its proton bomb, destroying the Imperial-class Star Destroyer it had docked with. The Chimaera was present for this, and as a result, Agent Kallus boarded the ship to inform Thrawn of this development. The Grand Admiral was relatively unconcerned by it, as the sabotage only narrowed his search from a thousand systems to just ninety-four.[23]
As the Seventh Fleet continued to blockade Lothal, Grand Admiral Thrawn called many Imperial officers to the fleet to try and uncover the identity of the Rebel spy Fulcrum. The spy, Agent Kallus, attempted to be rescued by Ezra Bridger. However, Kallus eventually declined, as he understood that he could frame Lieutenant Yogar Lyste, who was already suspected as the rebel spy, and continue feeding the rebellion information. However, Thrawn caught onto the carefully orchestrated deception Kallus put in place and finally confirmed who he really was.[16]
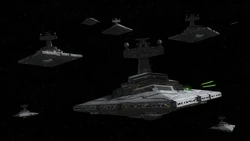
The Seventh Fleet bombards Atollon.
After capturing Agent Kallus in the act of warning the rebels, Thrawn was able to deduce the location of Chopper Base by calculating the trajectories of both General Jan Dodonna's Massassi Group and Fulcrum's transmission. Thrawn ordered Admiral Kassius Konstantine to deploy the Seventh Fleet to the planet Atollon. During the Battle of Atollon, Thrawn's fleet inflicted heavy casualties on the Phoenix Cell and the Massassi Group, destroying numerous ships and starfighters. This allowed Imperial ground forces to storm Chopper Base. However, the Imperials also lost two Interdictor vessels, which allowed the surviving rebel forces to flee into hyperspace.[11]
Temporary leadership under Wilhuff Tarkin and Woldar[]
Despite Thrawn's failures at Atollon, the Seventh Fleet wasn't taken away from him by Emperor Palpatine, due to the factors of the failure not being under his control. However, the Grand Admiral was summoned by the Emperor to Coruscant in the Chimaera, after which he was sent to Batuu with Darth Vader to deal with a disturbance in the Force felt by Palpatine. While Thrawn was away, the fleet was run by Commander Woldar, who worked on tracking down the rebels who escaped Atollon with alongside Grand Moff Tarkin, until his new assignment was prepared.[10]
Blockading Lothal[]
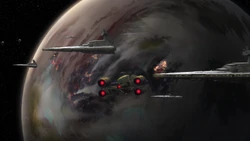
The Seventh Fleet over Lothal
Eventually Thrawn and the Seventh Fleet returned to Lothal. There, the fleet continued to blockade the planet, which was being heavily mined for resources.[17] Despite the blockade, Rebels managed to sneak their way through the blockade, with the intent to disrupt Thrawn's plans there. Some attempted to escape the fleet in a UT-60D U-wing starfighter/support craft. Despite bombardment from three Imperial I-class Star Destroyers, including the Chimaera, the ship managed to escape by jumping to hyperspace through an Imperial construction module.[20]
Following the ship's escape, the Rebels returned with a force of T-65B X-wing starfighters and BTL-A4 Y-wing assault starfighter/bombers to attack the fleet so as to bomb the Imperial Armory Complex on the surface. They initially seemed to have an advantage, as they managed to destroy a TIE Defender Elite, its pilot Vult Skerris, an Arquitens-class command cruiser and an Imperial I-class Star Destroyer. However Thrawn, from the bridge of the Chimaera, allowed the Rebels to enter the planet's atmosphere, where the squadron was shot down by a large force of hidden TIE/ln space superiority starfighters. Later, Thrawn dispatched his agent Rukh to capture the Rebel leader, Hera Syndulla, from her crashed ship, which he did.[13]
Grallocs, Stardust and against the Third Fleet[]
- "You're insane. You're spitting words with no meaning"
"Am I?" - ―Grand Admiral Savit and Thrawn
After Hera Syndulla's attack on the Lothal Factory, and during Syndulla's interrogation, Grand Moff Tarkin informed Thrawn that Director Orson Krennic had been quite persuasive about diverting funds to his Stardust project, the first Death Star, which had been under construction for around 2 decades. And that he had organized a meeting between him and the Emperor. Thrawn departed immediately and returned to Coruscant aboard the Chimaera.[7]
En route to his meeting with the Emperor, Tarkin contacted Thrawn and told him to rendezvous with him in the Sev Tok system aboard the ISD Firedrake, the flagship of the Third Fleet, led by Grand Admiral Balanhai Savit. There he met with Krennic, Tarkin, Savit and Palpatine, who attended via hologram. Stardust had a supply issue due to Grallocs attacking power cables and couplers at equipment transfer points for his Project. Tarkin and the Emperor agreed that if Thrawn dealt with Krennic's Grallocs, funds would be diverted to Thrawn's Defenders, if not they would go to Stardust, and the need for Thrawn being in the Empire would be questioned.[7]
The Chimaera, flagship of the 7th Fleet participated in the Skirmish against the Third Fleet, an attempt to arrest Savit, the one behind the supply issues of Stardust. The attempt was successful, and was led by Commodore Karyn Faro, as Thrawn was in the Firedrake with Assistant Director Brierly Ronan, however he had taught Faro about Savit's music compositions, which is art too. Shortly before Thrawn was shot by Savit, Ronan stopped Savit from shooting by covering Savit's face with his Assistant Director cape, which made Savit lose control of his blaster, and save Thrawn. ISB's Dayja Collerand boarded the bridge shortly afterwards and arrested Savit by stunning him and his stormtroopers in the bridge. He then gave temporarily command of the third fleet to Captain Boulag.
Shortly afterwards, Tarkin and Krennic contacted Thrawn and Ronan, a strong believer in Stardust and a big follower of Krennic. Ronan told Tarkin and Krennic that Thrawn didn't fullfill his part of the agreement, as he had not technically destroyed the Grallocs, though he had been successful in arresting traitorous Grand Admiral Savit.[7]
Further actions[]
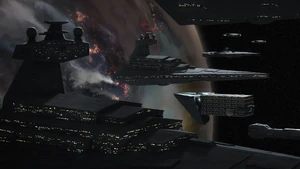
The Ghost sneaking through the Seventh Fleet's blockade
Thrawn was requested to appear on Coruscant by Grand Moff Tarkin, so he could make a case directly to the Emperor concerning the future of the TIE Defender program, in regards to increasing competition from Director Orson Krennic and his Death Star project. Thrawn then left immediately for Coruscant in the Chimaera.[6]
While Thrawn was away, Governor Pryce managed to kill the Jedi Kanan Jarrus during the rescue attempt of Syndulla, although the rest of the Spectres managed to get away and the Lothal City fuel depot was destroyed, completely stalling production of the TIE Defender.[24] Soon after, Pryce launched an attack on the rebels' base, in order to avoid execution from Thrawn. Although the attack was nearly a victory, the rebel ship Ghost managed to sneak through the Seventh Fleet's blockade by attaching itself to a class four container transport, allowing it to then destroy Pryce's forces. The rebels then captured the governor and set their sights on taking over Lothal's Imperial complex. However, Rukh survived, and warned Thrawn of the rebels' intentions.[19]
Bombarding Lothal[]
- "Governor Pryce is our prisoner, and we have complete control of the Imperial dome. With every trooper, pilot and officer trapped inside. You've failed, Thrawn. Leave Lothal and we might let your troops out before we blow the dome to pieces."
"Are you quite finished? If you truly wish to save Lothal, Commander Bridger, the only term I'll accept is your immediate and unconditional surrender."
"Why would I surrender when I hold your entire army prisoner?"
"No. You've simply moved my assets to a safe position, so that I can bombard the civilians of your home without incurring Imperial casualties." - ―Ezra Bridger and Thrawn, upon the latter's return to Lothal
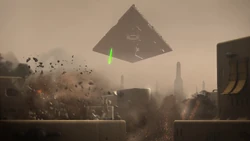
The Chimaera bombards Capital City.
The group managed to infiltrate the facility, and initiated Protocol 13, which summoned all Imperial forces to the complex for evacuation. The rebels then planned to launch the Imperial Planetary Occupation Facility into the air, and then activate its self-destruct mechanism to kill all Imperials aboard. However, before this could be enacted, Thrawn returned from Coruscant in the Chimaera, and held position directly over the complex, which forced the rebels to abort their launch out of fear of crashing into the Star Destroyer and destroying Capital City.[3]
Thrawn then contacted the rebels, and revealed that they had inadvertently allowed him to commence an orbital bombardment on the city without having to worry about damaging Imperial assets, as they were all inside the Imperial complex. Although the rebels then attempted to activate the facility's city-wide shield, this failed, as Rukh had already deactivated it. Then, to demonstrate his power and force the rebels to surrender, Thrawn started attacking Capital City from the Chimaera.[3]
However, the Grand Admiral stopped firing once Commander Ezra Bridger surrendered, although only upon the condition that he came aboard the Chimaera alone. Once Bridger had been escorted to Thrawn's Office, the Grand Admiral revealed that he never intended to utterly destroy Lothal, although that had become inevitable. Following their discussion, Thrawn then brought Bridger to a hologram of the Emperor, who tried to seduce the Jedi to the dark side of the Force. Once Thrawn had returned to the Chimaera's bridge, he ordered that the bombardment of Capital City continue. However, the rebels in the Imperial Complex had managed to kill Rukh, and activate the city-wide shield, making Thrawn's attack redundant.[3]
Defeat[]
- Imperial officer: "Sir, several unidentified objects have just entered orbit."
- Thrawn: "My blockade will intercept them."
- Imperial officer: "They've destroyed the blockade. Our ships are just…gone."
- Thrawn: "Get Captain Pellaeon."
- Gilad Pellaeon: "Sir, they came out of hyperspace! I've never seen…"
- Imperial officer: "Admiral, we have incoming."
- ―An Imperial officer, Grand Admiral Thrawn and Captain Pellaeon, upon the arrival of the purrgil[3]
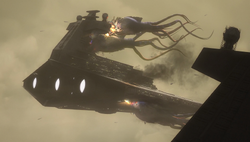
An Imperial I-class Star Destroyer is destroyed by the purrgil.
Meanwhile, Bridger had escaped the Emperor, and managed to infiltrate the Chimaera's bridge, taking out Thrawn's death trooper guard and holding the rest of the crew at gunpoint. Then, an officer informed Thrawn that several unidentified objects had entered orbit. Although Thrawn was adamant the Seventh Fleet would intercept them, the officer told him the blockade had been destroyed, further stating that the Imperial craft were simply gone. Then, Thrawn contacted Captain Gilad Pellaeon,[3] on assistance from the Third Fleet,[7] who confirmed that the objects had come out of hyperspace. The objects were actually purrgil, a species of space-dwelling creatures capable of traveling through hyperspace, who had been called upon by Mart Mattin in the Ghost, which was leading the assault. As the creatures began destroying the Chimaera's accompanying two Star Destroyers in Lothal's lower atmosphere, Thrawn told Bridger that what happened next would happen to both of them. Then, the purrgil's tentacles smashed through the forward viewports, knocking down several stormtroopers and trapping Thrawn, although he managed to shoot Bridger in the back, prompting the Jedi to then Force-push him back against the wall. Then, three purrgil attached themselves to the Chimaera's hull, and jumped into hyperspace with the vessel.[3]
With the 7th Fleet gone from Lothal, the remaining rebels managed to destroy the Imperial Complex, completely removing the Imperial presence from the planet. The Empire never returned, as shortly after Lothal's liberation, the Battle of Scarif occurred,[25] which furthered the Galactic Civil War[26] that would eventually see the defeat of the Empire.[27]
Under Corf Ferno[]
Following the Battle of Yavin, Supreme Commander Grand General Cassio Tagge promoted Captain Corf Ferno, who had participated in the Battle of Atollon to Vice Admiral and placed him in command of the remains of the 7th Fleet, tasking him and the fleet to patrol the Outer Rim Territories. His Star Destroyer, the Dark Omen was made the flagship of the 7th Fleet.[9]
For a period of time prior to the Battle of Hoth in 3 ABY, the Rebel Alliance had been transporting supplies through the Derra system in the Outer Rim. The Alliance convoys contained a range of weapons and equipment, food and medicine that were in need by various Rebel Alliance cells throughout the galaxy. After Imperial Vice Admiral Rae Sloane and the 7th Fleet were able to establish a list of the most probably candidates for rebel shipping routes in the Expansion Region, Imperial forces closed in on Derra and located a rebel convoy. As it was Sloane's plan, the admiral and the ISD Vigilance were placed in command, and was capably supported by the Dark Omen and the Interdictor cruiser Retention. Retention aided in isolating the convoy, resulting in its destruction during the ambush.[9]
Legacy[]
Morgan Elsbeth was an industrialist whose coven were massacred during the Clone Wars. She used her fury over of this to fuel the construction of the Imperial Navy.[28] In 9 ABY,[29] former Jedi Ahsoka Tano tracked Elsbeth down and waged a one-woman insurgent campaign against her forces to liberate the oppressed people of Corvus and to learn the location of Thrawn. During the liberation of Calodan, Elsbeth's HK-87 assassin droids bore a depiction of the 7th Fleet's insignia on the side of their heads.[28] In that same year Captain Pellaeon, who was leading his own delegation in the Shadow Council bore the 7th Fleet's insigna on his uniform's left shoulder.[30]
Appearances[]
|
Non-canon appearances[]
- LEGO Star Wars: The Skywalker Saga (Mentioned only) (DLC)
Sources[]
 Star Wars Helmet Collection 54 (Databank A-Z: Tauntaun–TIE Craft)
 Star Wars: Armada — Chimaera Expansion Pack (Card: Seventh Fleet Star Destroyer)
 Star Wars Helmet Collection 70 (Highlights of the Saga: Liberating Lothal)
 Star Wars Helmet Collection 70 (Weapons & Uniforms: Grand Admiral Thrawn) (First identified as 7th Fleet)
- Ultimate Star Wars, New Edition
 Star Wars: Build Your Own X-Wing 76 (Starfighter Aces: Hera Syndulla — A Thorn in Thrawn's Side)
 Star Wars: Card Trader (Card: Governor Pryce - Topps' Women of Star Wars)
"Imperial Troops" — Star Wars Encyclopedia
 Star Wars: Armada — Upgrade Card Collection (Card: Seventh Fleet Star Destroyer)
- Star Wars: Battles that Changed the Galaxy
 Star Wars: Unlimited — Spark of Rebellion (Card: Chimaera—Flagship of the Seventh Fleet) (backup link)
 Governor Pryce in the Databank (backup link)
