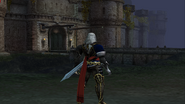
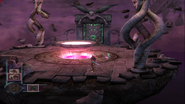
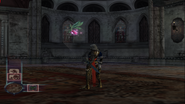
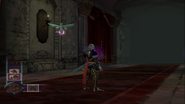
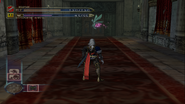
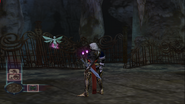
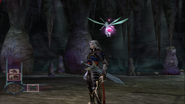
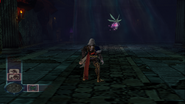
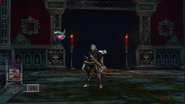
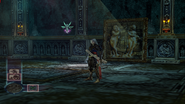
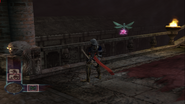
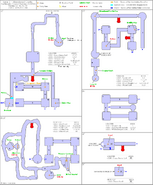
The Abandoned Castle (Abolition Castle in the Japanese version) is the first area of Castlevania: Curse of Darkness. It is the ruins of one of Dracula's Castles and is the starting point for Hector's quest. This level represents a 3D interpretation of most of the areas in the original NES Castlevania game. It lies in the north-west portion of the Wallachia map. To the south it is connected to the Baljhet Mountains. To the east it is connected to the Forest of Jigramunt. To the north, it is connected to the Aiolon Ruins. It also serves as a gateway to the Infinite Corridor.
Geography[]
- Note: The location names in this section are descriptive only. See Abandoned Castle Labeled Map for room numbers referenced.
Outside the castle walls (Rooms 1F S/1)[]
The game starts within the courtyard. Hector can backtrack outside of the castle walls for a Potion in addition to a Moai, provided there exists a Castlevania: Lament of Innocence game save on the same memory card. This item was an item in the original Castlevania game found in stage 1 that was worth a lot of points. It can be sold for a pretty penny or can be used to replenish your health.
A moat of turbulent waters guards the entrance side of the Castle. A large wall with several towers faces these waters, with a draw bridge in the center. On either side of the draw bridge are two towers, the same ones that appear in Castlevania (N64), Castlevania: Circle of the Moon, Castlevania: Harmony of Dissonance, Castlevania: Dawn of Sorrow and other games. You cannot enter these towers in this game, however.
Backtracking: At a later point in the game, the Aiolon Ruins can be reached through the mountainside in this area.
Courtyard (Room 1F 2)[]
The courtyard of the castle resembles the entryway section from before you enter the Castle in the original Castlevania.
Outer sections[]
Entry hallways (Rooms 1F 3-6)[]
The front section of the castle represents the mansion portion of the Castle and is a 3D interpretation of Stage 1 from the original Castlevania, which has appeared in so many other Castlevania games. The entrance to the hallways appear to be sealed off by a wall. However, a powerful Executioner breaks through the walls and is your first opponent in the game. Defeating him leads to the first save point in the game, as well as a Memorial Ticket that can take you back to it. The castle halls stretch to the left and to the right. Heading left takes you toward the outer wall section, while heading right takes you toward the underground section.
Toward the left is a battle room that contains the Quick Step skill. It leads to the outer wall section, which is where you can find the Dragon Crest.
On the right is a section representing Block 2 of Stage 1 in Castlevania and is inhabited by Mermen. You cannot move forward without the Dragon Crest though. Once you have the Dragon Crest, the next room will be a battle room consisting of Skeletons and a central Executioner and holds a Potion and the Bestiary. Once the enemies have been defeated, you can enter the underground caverns through a hole in the wall.
Outer wall (Rooms 2F 1-5)[]
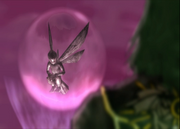
Hector finds the Infant Fairy.
The outer wall is a 3D interpretation of Stage 2 from the original Castlevania game. Skeletons and Fenrirs roam this area and the Abandoned Castle Map can be found here. A battle room that contains a Cyclops is ahead. Beyond this is a Treasure Chest that cannot be opened yet. There is then a tower where Hector will find his first Innocent Devil, the Infant Fairy, and also encounters Zead, who tells you where to find Isaac (Trevor instead finds a HP Max Up here). The Infant Fairy has the ability to open chests and the Dragon Crest is found in the one nearby, so you can now head back to the other side of the Entry Hallways.
Backtracking: At a later point in the game, the Forest of Jigramunt can be reached from this area.
Underground caverns (Rooms B1F 1-11)[]
This section consists of a series of tunnels and caves underneath the Castle and represents Stage 4 of the original Castlevania game. It consists of path that leads straight toward the Underground Dungeon and downward, and a looping area to the right, with a few small rooms on the side. Ghosts now join Fenrirs and Skeletons throughout this section. Off of the looping section is a Cellar room. This consists of a whole bunch of barrels that block the way to the back part of the room. These barrels can be destroyed, however, and some will drop Wine. Behind them is a chest that contains Aluminum (Trevor instead finds a DEF Up). The cave section at the end of the looping section requires you to defeat the Ghosts before continuing. There is a battle room on the right side ahead which will give you $100 for fighting Ghosts and Fenrirs (Trevor instead finds an ATK Up here). At the end is a path that leads to an area that contains the Weapon Combining skill.
This is your first opportunity to create new weapons and armor with the materials you have collected. At this point, you should have an abundance of Wild Memory (from Fenrirs) and Bronze (from Skeletons) and the Aluminum you had found in a chest this level. This will allow you to create a Leather Helm, Soft Leather Armor, new Short Swords, and Gano (axe class) without any trouble. You will have to choose what you want to spend the Aluminum on, though. You can use it to upgrade your Short Sword to the Foil (Sword Type, but Rapier moveset), combine it with Bronze to create Punch Rings (Knuckle Type), or upgrade your Leather Helm to make a Corinthian Helmet. You will not gain an opportunity to get any new materials in this stage that can help you create new items, but is is possible an Axe Armor will drop additional Aluminum.
While you decide what to make, the Infant Fairy will alert you to a wooden support beam. Destroying this leads to a ramp, where you can find the I.D. Evolution Crystal. This will cause enemies to occasionally drop different colored Evo Crystals depending on what type of weapon you are using (Sword, Axe, Spear, Knuckle or Special). When you collect enough crystals of a certain color, the Innocent Devil you have out will evolve to the next level, depending on the color. You can decide now what you want to evolve your Infant Fairy into by choosing what weapon you want to use most for a while. Using a Sword or Knuckle type will drive evolution toward a Leaffle, while using an Axe (or later obtainable Spear or Special Types) will drive it toward an Herbest. After that, it can still evolve into any type of fairy, except that only a Leaffle can evolve into a Honey Bee and later a Proboscis Fairy (good for exploration, comic relief) and only an Herbest can evolve into a Hornet and later a Comet Star (has good combat skills). Of more immediate concern, the Leaffle will eventually gain the Time Heal and Poison Powder abilities, while the Herbest will eventually gain the Antidote abilities Heal Lv. 2.
This area also contains a door that leads to the interior sections of the castle, starting with the Underground Dungeon.
Interior sections[]
The interior sections represent the different blocks of Stage 5 of the original Castlevania game. It consists of four towers (rooms) connected by hallways which form a rectangle which spiral upward.
Underground dungeon (Rooms B1F 12-18)[]
When you reach the castle from the tunnels, you will find yourself in the south-east tower of the basement level of the castle, in the dungeons, which represents the first floor of Stage 5 of the original Castlevania game. None of the rooms contain any reward. Zombies make their first appearance here. They don't drop anything new though (Wild Memory). After traveling north, west, then south, you will enter stairs that lead to the Laboratory.
Laboratory (Rooms 1F 8-14)[]
The Laboratory is the ground level of the Castle interior and represents the middle portion of Stage 5 of the original Castlevania game. You enter the lab in the South-West tower. The South-East tower contains stairs leading upward to the Gallery, but you can also go "off the map" to the north. This section contains more powerful enemies, like the Skeleton Blaze and the Wizard and holds a Potion. There's a rare chance you might get a Spirit of Fuji from the Wizard (which cannot be used to create anything yet). The Therapeutic Chair can also be found here. You can then enter the Gallery from the North-West tower.
Gallery (Rooms 2F 6-12, 3F 1-8)[]
The Gallery is the upper levels of the Castle interior and represents the top floor of Stage 6 of the original Castlevania game. It is populated with powerful Armor Knights and Ghosts. You normally enter it from the south-east tower (where you can earn the Double Step move), but you can also enter it from the north-west tower by taking a path that's "off the map". Either entrance can lead to the North-East tower (the north-west tower is connected to the south-west tower, which is diagonally connected to this tower), which leads to the next floor of the gallery.
The next floor consists mainly of Skeleton Blazes, but also introduces the White Dragon (which doesn't drop anything except hearts). After spiraling once more, this will lead to the Castle Keep.
Castle keep (Rooms 3F 1-7, 4F, 5F)[]
From the top floor of the gallery, you will go outside of the castle and travel along a set of stairways that are between the four towers and lead to the Keep. This represents the final stretch of Castlevania I as found in Stage 6 of the original game. The keep is notably decorated with bust statues of Gaibon and Slogra. You will face the Crazy Armor boss. Once defeating it, you can take the Gondola to the ground will take you to the ground which leads to the Baljhet Mountains.
Backtracking: At a later point in the game, a secret room above the one the Crazy Armor was fought in is revealed. Trevor will enable Hector to go to the Infinite Corridor from here.
Enemy Data[]
| Enemy Data: Abandoned Castle | |||||
|---|---|---|---|---|---|
| Image | Name - Game Description |
Statistics | Items | Location | Notes |
| Enemies | |||||

|
|||||
| Human bones reanimated as a monster by evil magic. Slow-moving but equipped to kill. | Strong: Dark Weak: Fire Level: 1 HP: 21 Exp: 0 |
Common Drop: Bronze Steal: $10 |
Abandoned Castle, Baljhet Mountains, Tower of Eternity |
||

|
|||||
| An abomination created from numerous dead bodies. Smashes anything in range with a massive hammer. | Strong: Thunder, Light Weak: Earth Level: 2 HP: 210 Exp: 4 |
Rare Drop: Hamburger Steal: $50 |
Abandoned Castle |
||

|
|||||
| A floating spirit able to pass through walls. Keeps eternal watch. Carrying a knife and lantern. | Strong: Dark Weak: Light Level: 3 HP: 44 Exp: 2 |
Steal: $50 |
Abandoned Castle, Baljhet Mountains |
||

|
|||||
| A pure-blood merman. Attacks by ramming or shooting water from its mouth. Also found on dry land. | Strong: Ice Weak: Fire, Thunder Level: 4 HP: 77 Exp: 5 |
Steal: $50 |
Abandoned Castle |
||

|
|||||
| A quick-moving, ninja-like skeleton. Uses razor claws and swift footwork to confuse and then kill. | Strong: Dark Weak: Fire, Light Level: 5 HP: 150 Exp: 7 |
Common Drop: Wild Memory Steal: Potion |
Abandoned Castle, Baljhet Mountains, Tower of Eternity |
||

|
|||||
| The guard dogs of hell. Hunt and attack in packs. | Strong: Ice Weak: Fire Level: 5 HP: 95 Exp: 6 |
Common Drop: Wild Memory Rare Drop: Hot Dog Steal: $10 |
Abandoned Castle, Baljhet Mountains |
||

|
|||||
| A corpse brought back to life by the power of hate. Fairly weak, but a legitimate threat in packs. | Strong: Ice Weak: Fire Level: 5 HP: 50 Exp: 4 |
Common Drop: Wild Memory Steal: $10 |
Abandoned Castle, Baljhet Mountains, Tower of Eternity |
||

|
|||||
| A magic user who moves via levitation. Attacks with long-range magic and heals other monsters. | Weak: Thunder, Earth Level: 6 HP: 71 Exp: 5 |
Rare Drop: Spirit of Fuji Steal: Memorial Ticket |
Abandoned Castle, Baljhet Mountains |
||

|
|||||
| Armor given a mind of its own through evil magic, yet completely empty inside. Slow but extremely powerful. | Strong: Wind Weak: Thunder Level: 7 HP: 185 Exp: 10 |
Common Drop: Aluminum Rare Drop: Gano Steal: Magical Ticket |
Abandoned Castle, Baljhet Mountains |
||

|
|||||
| A huge one-eyed giant. Slow, but few can compare for raw power. Fires a beam from its mono-eye. | Strong: Earth Level: 8 HP: 276 Exp: 16 |
Rare Drop: Rice Steal: Jet Black |
Abandoned Castle, Baljhet Mountains, Garibaldi Temple, Tower of Eternity |
||

|
|||||
| The bleached white bones of a dragon, it will wait patiently for human to pass by. | Strong: Fire Weak: Ice Level: 10 HP: 97 Exp: 14 |
Steal: $50 |
Abandoned Castle |
||
| Bosses | |||||

|
|||||
| Cast-off pieces of armor brought together by an evil intent. Does nothing but attack all it sees. | Weak: Thunder Level: 9 HP: 1330 Exp: 50 |
Drop: Crest Steal: Galtite |
Abandoned Castle |
||

|
|||||
| A true Vampire Hunter and hero of the Belmont family. Agrees to lend his strength to Hector. | Strong: Light Weak: Dark Level: 40 HP: 4700 Exp: 2220 |
Steal: Curry |
Abandoned Castle |
Weapons: Vampire Killer, Cross (Cross Boomerang, Grand Cross) | |

|
|||||
| ' | Strong: Dark Weak: Light Level: 40 HP: 4700 Exp: 2220 |
Drop: Crest |
Abandoned Castle |
Weapons: Vampire Killer, Cross (Cross Boomerang, Grand Cross) | |
Item Data[]
| Item Data: Abandoned Castle | ||||||||
|---|---|---|---|---|---|---|---|---|
| Image | Name - Game Type - Users Description |
Attributes / Consume | Statistics / Sell | Found | Notes | |||
| New Usable Items Found | ||||||||

|
||||||||
| Medicine that recovers 50 HP. | HP +50 Sell: $100 |
Buy: $200 Find: Abandoned Castle, Baljhet Mountains, Garibaldi Temple, Mortvia Aqueduct, Tower of Eternity Rare Drop: Spirit Lv.4/19/32, Wolf Skeleton Lv.17/23 Steal: Skeleton Blaze Lv.5 |
||||||

|
||||||||
| Ancient Moai stone carvings. Very valuable to those who are interested. | HP +100% Sell: $5,730 |
Find: Abandoned Castle |
Notes: A Castlevania: Lament of Innocence save data is required to exist in the memory card. | |||||

|
||||||||
| Warps to last registered save point. | Sell: $10 |
Buy: $20 Find: Abandoned Castle, Baljhet Mountains Steal: Wizard Lv.6/8 |
||||||

|
||||||||
| Vintage 1476, brewed to commemorate the fall of Dracula. | HP +5 Sell: $1 |
Find: Abandoned Castle Rare Drop: Dead Baron Lv.12/31 |
||||||
| New Rare Items Found | ||||||||

|
||||||||
| An overall map of the area, lacking in finer details. | Find: Abandoned Castle |
|||||||

|
||||||||
| A crest made from a carved dragon bone. Looks like it should be placed into something, somewhere... | Find: Abandoned Castle |
|||||||
| New Materials Found | ||||||||

|
||||||||
| A strange stone fragment with ancient memories carved on it. Used for simple weapons. | Sell: $25 |
Common Drop: Skeleton Blaze Lv.5, Fenrir Lv.5/10, Zombie Lv.5/26/42 |
||||||

|
||||||||
| Deep bluish bronze. Pretty common as a material and not that strong, but has many uses. | Sell: $25 |
Common Drop: Skeleton Lv.1/9/38 |
||||||

|
||||||||
| A very light metal used by some alchemists, but mostly unknown. Makes very light armor. | Sell: $30 |
Find: Abandoned Castle B1 Common Drop: Orc Lv.7/14, Armor Knight Lv.7/15, Lesser Demon Lv.13/23 |
||||||

|
||||||||
| A godly material from a distance mountain in the East. Prized for its use in many different weapons. | Sell: $75 |
Find: Mortvia Aqueduct F1, Aiolon Ruins, Infinite Corridor 3F Rare Drop: Dark Warlock Lv.17/42, Necromancer Lv.31/35, Wizard Lv.6/8 Steal: Lesser Demon Lv.13/23 |
||||||

|
||||||||
| A heavy red metal in many layers. Said to draw out a human's latent power, but who really knows? | Sell: $50 |
Steal: Crazy Armor Lv.9, Red Ogre Lv.25/48/75 |
Evolve: Force Glove, Hien | |||||
| New Skills Found | ||||||||
| This volume contains detailed information on every monster you have fought. | Find: Abandoned Castle |
Effect: Allows the player to consult a list with detailed information (weaknesses, tolerances, drops, descriptions, etc.) of each enemy defeated in the game. | ||||||
| Highest Grade Items Available | ||||||||

|
||||||||
| A simple, functional sword. Sturdy, good for taking on groups, and easy to keep under control. | ATK +10 Sell: $50 |
Buy: $100 Find: Julia's Shop Rare Drop: Great Armor Lv.25/35/46 Create: 2 Bronzes |
Evolve: Broad Sword, Ada, Sword Breaker, Bastard Sword, 7 Bladed Sword, Zweihander, Foil, Gano, Ring, Pata, Laser Blade | |||||

|
||||||||
| A rapier used when learning fencing. Light, easy to grip, and serviceable in real combat. | ATK +10 Sell: $200 |
Create: Short Sword + Aluminum |
Evolve: Main Gauche, Rapier | |||||

|
||||||||
| A simple, one-handed axe comprising a triangular head on a pole. Easy to use, but not that effective. | ATK +15 Sell: $50 |
Buy: $100 Find: Julia's Shop Rare Drop: Armor Knight Lv.7/15 Create: Short Sword + Wild Memory |
Evolve: Bullova, Club, Mace, Zaghnol | |||||

|
||||||||
| A metal weapon that strengthens punches. Easy to use but simply made, and thus not too strong. | ATK +7 Sell: $50 |
Buy: $100 Find: Julia's Shop Rare Drop: Blaze Phantom Lv.39/44 Create: Aluminum + Bronze |
||||||

|
||||||||
| Light and easy to wear, cheap and easy to find. Just don't expect it to protect your head that well. | DEF +2 Sell: $50 |
Buy: $100 Find: Julia's Shop Rare Drop: Lizardman Lv.6/23 Create: Bronze + Wild Memory |
||||||

|
||||||||
| A beautiful piece, but its total coverage of the ears may make hearing orders a little tricky. | DEF +4 Sell: $100 |
Create: Leather Helm + Aluminum |
||||||

|
||||||||
| Cheap and easy to find, great armor for the beginner. Crafted with love and care. | DEF +5 Sell: $50 |
Buy: $100 Find: Julia's Shop Rare Drop: Iron Gladiator Lv.31/47 Create: Wild Memory |
Evolve: Hard Leather Armor, Hide Armor | |||||
Gallery[]
Screenshots[]
Maps[]
Trivia[]
- The stage could be an homage to the first stage of the 1994 Sega Genesis game, Castlevania: Bloodlines. Further supporting this theory, the Crazy Armor (called "Armor Battler" in Bloodlines) is fought at the end of both stages.
- "Abolition Castle" may be a mistranslation of 廃城 (Haizō), which is a castle that is no longer in use. The attempt may have been to indicate that the castle was abandoned, which got translated as "Abolition" in the Japanese version before being corrected in the official English version.
External links[]
- Combine System Guide by djwassabi at GameFAQs
- Enemy/Steal Guide by DanteRules at GameFAQs
- Guide and Walkthrough by Berserker at GameFAQs

