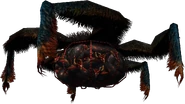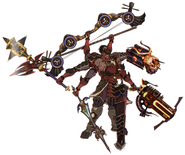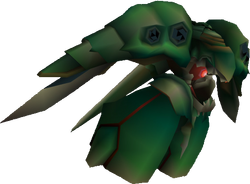
The Emerald weapon, a superboss from Final Fantasy VII.
A superboss is an optional boss that is very powerful, even more so than the game's final boss, and generally gives either large amounts of experience, rare items, or both. In the Final Fantasy series, they are usually found deep at the end of optional dungeons, or discovered after a series of sidequests. They normally have no bearing on the storyline, and their existence is rarely explained. Some superbosses even appear as regular, if rare, enemies and can be fought repeatedly.
Likewise, the rewards gained from defeating a superboss are often not particularly useful—sometimes they only give a key item as a proof of defeating the boss—as the player must already be extraordinarily skilled to defeat the boss in the first place; they thus have no need for further battle enhancements afterwards. Superbosses exist to challenge the player and give them something to do once the main storyline is finished, or simply for "bragging rights".
The quintessential Final Fantasy superboss is Omega, a robot often implied to originate from an ancient civilization. Omega's counterpart or nemesis is said to be Shinryu, a dragon who also frequently appears as a superboss. Weapons are colossal monsters that have appeared as superbosses since their introduction in Final Fantasy VII.
Appearances[]
Final Fantasy[]
Warmech (NES).
Though a very-rare random encounter, Warmech in the NES version can be considered a superboss, as its attacks are more powerful than the Four Fiends'. The Abyss Worm encountered in Earthgift Shrine and Labyrinth of Time in applicable versions is a similarly rare and dangerous enemy, boasting the highest HP of any non-boss enemy with hard hitting attacks, blocking the party from escaping, and most crucially potentially appearing in pairs.
Shinryu and Omega in the Lifespring Grotto, and Death Gaze in the Whisperwind Cove, appear in the Dawn of Souls, the 20th Anniversary edition and mobile platform remakes based on the latter. In the 20th Anniversary editions, the final form of Chronodia is the strongest boss in the game, fought at the end of the new bonus dungeon Labyrinth of Time.
Final Fantasy II[]
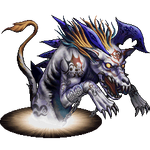
Phrekyos.
The Ultima Weapon and the Light Emperor appear in the Dawn of Souls version.
In the 20th Anniversary edition and later versions based on it, Phrekyos is a boss fought to gain each character's ultimate weapon. It can be fought an unlimited number of times, provided the player first clears each Arcane Labyrinth. Deumion can also be challenged and is the one who summons Phrekyos to test the player's skill. He uses the Starfall attack the final boss uses.
Final Fantasy III[]
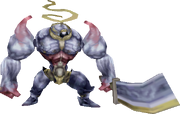
Iron Giant (DS).
Iron Giant, a boss in the 3D remake versions, can be found at the bottom of the optional ??? dungeon, available after unlocking the Mognet sidequest.
Final Fantasy IV[]
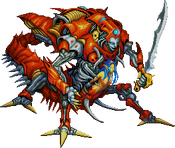
Zeromus EG.
In the Game Boy Advance and PlayStation Portable versions, the Lunar Ruins dungeon is unlocked after beating the main game. "Lunar" versions of Rydia's Eidolons inhabit these caves and Zeromus EG waiting at the end of the ruins. Another boss, Brachioraidos, can be found on one of the ruins' lowest floors.
In the 3D remake versions, Geryon and Proto-Babil are the biggest challenges added exclusively for this game. Proto-Babil can be faced in New Game Plus after stealing the Dark Matter from Zeromus during the first playthrough, while Geryon is unlocked after beating the Elemental Archfiends in the Giant of Babil. Proto-Babil can be fought on the Moon's Surface, while Geryon can be fought either at the Giant of Babil or at Mount Ordeals.
Final Fantasy IV: The After Years[]
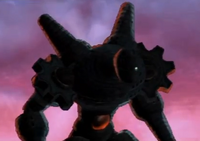
Lost Babil.
Three superbosses are found in the Depths, including Omega and Nova Dragon (otherwise known as Shinryu) from Final Fantasy V, and the Ultima Weapon from Final Fantasy VI. They have some different attack patterns and abilities and defeating them earns powerful equipment.
Final Fantasy IV: The Complete Collection for the PlayStation Portable adds a new post-game boss called Lost Babil. The player must talk with Challengingway at the secret location on the True Moon to fight it. They must assemble three parties to fight three separate bosses, which consist of Lost Babil's torso, head and CPU. This could be seen as a reference or reappearance of previous superboss Proto-Babil.
Several of the lunar Eidolons—namely Lunar Dragon (who guards the Dualcast ability), Lunar Odin (who guards Ragnarok), Lunar Leviathan (who guards the Hero's Shield), and Lunar Bahamut (who guards the Ultima Weapon)—are exclusive superbosses for the 3D remake.
Final Fantasy V[]
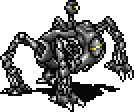
Omega, the first superboss.
The original game included the first two proper superbosses to appear in the series, Omega and Shinryu. Their designs are palette swaps of earlier enemies. The Advance version adds stronger versions of these bosses, Omega Mk.II and Neo Shinryu, in the optional post game Sealed Temple dungeon. The final boss of the dungeon is also a superboss, Enuo.
Famed Mimic Gogo can be considered a superboss if the player decides to fight him instead of doing nothing as his attacks deal devastating damage to the party.
Final Fantasy VI[]
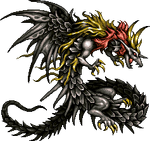
Kaiser Dragon.
Kaiser Dragon was planned to be the superboss, but was dummied for unconfirmed reasons prior to the game's SNES release. Deathgaze acts as a sort of superboss, due to its end-game level of power, but its difficulty is diminished since the player is not intended to defeat it in a single encounter, but to weaken it over time.
In the Game Boy Advance and 2014 Matrix Software ports, Kaiser Dragon, a finished version of the dummied boss CzarDragon, awaits the player in the heart of the Dragons' Den after the player has defeated stronger versions of the eight legendary dragons found within. Once Kaiser Dragon has been defeated, the Omega Weapon, will appear in its place.
Final Fantasy VII[]
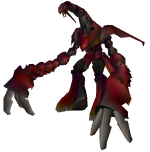
Ruby Weapon.
The North American and following versions feature two superbosses. The Emerald Weapon appears at the Bottom of the Sea at select locations at random, and yields a key item that can be traded for (some of) the most powerful Materia in the game. The Ruby Weapon is found by making contact with its head as it is sticking out of the sand on the world map in the Corel Desert at Gold Saucer Area, and grants the player a key item that can be traded for the game's most useful mount Chocobo (however, the player can also breed one).
They did not exist in the original Japanese version and the Diamond Weapon was not able to be fought, making the Ultimate Weapon the strongest optional boss.
Final Fantasy VII Remake[]
Pride and Joy Prototype is a boss fought at the end of the Shinra Combat Simulator mission "Three-Person Team vs Top Secrets". To access this mission, the player needs to clear the main story, finish all Battle Intel reports, finish all the fights in Corneo Colosseum, as well as all the other simulation missions, and be in Hard Mode. Pride and Joy Prototype is the fifth fight in a boss rush of Shiva, Fat Chocobo, Leviathan, and Bahamut. It is debatably easier than Bahamut, but the party is usually softened up before fighting Pride and Joy.
In Final Fantasy VII Remake Intergrade, in "Episode INTERmission", Pride and Joy Mk 0.5 can fought at the end of the Shinra Combat Simulator mission "Yuffie & Sonon vs. Top Secrets". It is the hardest battle in "INTERmission".
After completing "Episode INTERmission", Weiss can be fought in the Combat Simulator mission "Three-Person Team vs The Immaculate One". This new mission is available at the same time "Top Secrets" is. The leader of Deepground, Weiss, can be considered the most powerful boss, even exceeding the "Top Secrets" gauntlet, taking little damage unless staggered with many unblockable and powerful attacks. He can replicate the weapons of Azul and Rosso from Dirge of Cerberus and even kill the party with Immaculate End if not finished off quickly enough.
Final Fantasy VII Rebirth[]
Gilgamesh is fought at the end of the protorelic questline. To reach him, the party needs to not only complete the protorelic quests in every region, but also obtain all of the game's summoning materia, after which they must re-battle each of the game's summons in pairs (Titan and Bahamut, Phoenix and Kujata, and Alexander and Odin) on Gilgamesh Island. Gilgamesh then welcomes the party into his sanctum, where he may be challenged. As a reward, the party receives the Gilgamesh summon materia, the ability to transmute Genji equipment, and access to Brutal and Legendary VR Missions.
The Brutal and Legendary VR Missions are fought under Hard Mode conditions, and may be considered the toughest challenges in the game. The first five Brutal Missions set three party members against ten rounds of combat per mission (twice the usual five), and completing these unlocks the final mission, "Rulers of the Outer Worlds", a final five-round bout against the three pairs of summons (in the same arrangement as on Gilgamesh Island), Gilgamesh, and then Virtual Sephiroth, who boasts a unique moveset compared to his non-virtual counterpart, as well as the advantage of the party being worn down by the preceding four bouts.
The first seven Legendary Missions test one's mastery of individual party members, setting each of them individually against five challenging foes. The reward for completing these missions are character manuscripts as well as access to the eighth Legendary Mission: "Bonds of Friendship". This mission sets Cloud and Zack against the summons and four other powerful bosses, requiring players to work around Zack's preset materia and overcome their lack of experience controlling him in combat to achieve victory. Completion of this mission unlocks a Ribbon as well as the final Legendary Mission: "To Be A Hero". This final mission is similar to the preceding one, setting Cloud and Sephiroth against the summons and four other bosses (different from "Bonds of Friendship") and pre-setting Sephiroth's materia. Completing this mission unlocks Cloud's final Manuscript. The strength of the enemies faced during all of these missions, combined with these challenges, make for highly difficult fights.
Before Crisis -Final Fantasy VII-[]
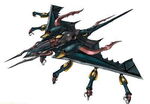
The main superboss of the game is the Jade Weapon.
Dirge of Cerberus -Final Fantasy VII-[]
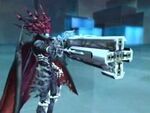
The last enemy that the player fights in the Extra Missions is Chaos. He is extremely fast, and can deal devastating damage both with Death Penalty and melee attacks, being capable of killing Vincent with only two or three shots. However, much like other bosses in the Extra Missions, he is weak defensively.
Crisis Core -Final Fantasy VII-[]
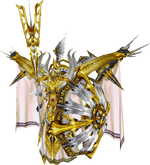
Minerva.
Minerva is a boss in the final mission of the M9: Great Cavern of Wonders group, Mission 9-6-6. She has the highest HP at 77,777,777 HP in Crisis Core -Final Fantasy VII- Reunion Hard Mode, and uses some of the strongest attacks. As the player can battle her repeatedly, the boss can be used for item and gil farming.
Final Fantasy VIII[]
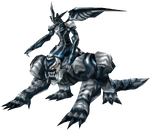
The Omega Weapon.
The Ultima Weapon is found at the bottom of the Deep Sea Research Center, and is based on the Ultima Weapon from Final Fantasy VII, even wielding Cloud Strife's best sword, which was a drop from its counterpart in Final Fantasy VII.
The Omega Weapon lies hidden in Ultimecia Castle, and to reveal it, the player must ring the bell in the Art Gallery to have it appear out of the purple cloud in the chapel. Defeating the Omega Weapon grants the Proof of Omega.
Final Fantasy IX[]
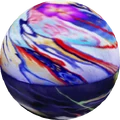
Ozma.
Ozma is found in the Chocobo's Air Garden, a location which becomes accessible after completing most of the Chocobo Hot and Cold sidequest. To hit it with the Attack command, the friendly monsters must have been given their requested gems. Ozma is a large spherical entity that is released from an eidolon cave, giving credit to the idea it may be a forgotten eidolon. Ozma's unique attack pattern makes it especially difficult; its A.I. knows if a move will be ineffective against the player and thus will not use it. Ozma is the only enemy with an ATB that instantaneously fills when the player inputs a command.
Hades is a hidden boss fought in Memoria. If the player finds and defeats him, they gain access to his unique synthesis shop. His existence is hinted at the start of the game in Mogster's tutorial Active Time Event about Synthesis, who mentions a Legendary Synthesist that can create the best items. Hades will comment about Ozma if the player has already defeated it.
Friendly Yan in the Vile Island forest is a difficult enemy if challenged. While giving it a Diamond finishes the friendly monsters sidequest, the player can instead try to defeat it to gain 50 AP and a Rosetta Ring; it yields this every time it is defeated, and it can be encountered repeatedly until appeased. It has the highest stats with 255 Evasion, Magic Evasion, Defense, Magic Defense, and tied for highest HP with Quale at 65,535. Its only attack, BAAAHHH!!!, is a strong physical attack with 158 power and hits everyone. Friendly Yan is the only enemy that is impossible to beat with a level 1 team. When given a Diamond, Friendly Yan will comment about Ozma if the player has already defeated it.
Final Fantasy X[]
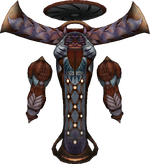
Penance.
The Ultima Weapon and the Omega Weapon can be found in the Omega Ruins. Many of the Monster Arena creations are stronger, especially Nemesis. Both the Ultima Weapon and the Omega Weapon are much more powerful in the International, PAL and HD Remaster versions, the Omega Weapon being on par with most Monster Arena creations, though still weaker than Nemesis.
The International, PAL and HD Remaster versions include the Dark Aeons. Once they have been defeated, Penance appears in the Calm Lands.
Final Fantasy X-2[]
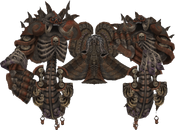
Angra Mainyu
The player can gain access to Via Infinito through Bevelle in Chapter 5 where many unsent characters became powerful fiends. The strongest opponent fought in the final floor is Trema, a former denizen of Yevon. Angra Mainyu in Bikanel Desert can be encountered multiple times during routine dig sessions, and can be fought and finally defeated after completing a quest in Chapter 5.
The International and HD Remaster versions include the boss Major Numerus, a four-headed snake in another league relative to other superbosses. Although not quite as powerful, the fiend version of Shinra, titled Almighty Shinra, is also a superboss.
Final Fantasy XI[]
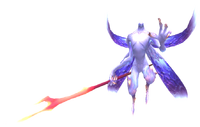
Absolute Virtue.
A few event bosses and High Notorious Monsters have been regarded as the most challenging encounters. This list has changed over the years, as the game evolves and new content influences the difficulty of older ones. Most superbosses from before the introduction of Item Level gear range from trivially easy to possibly difficult if unprepared.
Of the High Notorious Monsters (HNMs) in Vana'diel, the reigning superboss used to be Absolute Virtue from Chains of Promathia. It was notorious for being undefeatable without using some form of exploit, as all prior successful methods of defeating it were patched out because it had not been killed the "proper way". Although it remained undefeated for years, within two months of the Level 80 cap raise, Absolute Virtue was finally defeated legitimately, but still posed a considerable challenge without the right alliance set-up.
An updated version of Absolute Virtue, known as the Warder of Courage, was added to the game's Geas Fete system in 2015. While difficult, it is eclipsed by many of the bosses further along the Geas Fete progression.
Notable former HNM superbosses are Kirin, the first HNM that initially took nearly two hours to defeat, and Pandemonium Warden, which had its difficulty reduced due to it taking far too long to kill (a linkshell fighting for eighteen hours could not defeat it, an incident which generated a wave of bad press in gaming media). Updated versions of both bosses have been added to the game as well. The new version of Kirin transforms into Kouryu (an earth Wyrm) midway through its Geas Fete battle in Escha - Ru'Aun, and the new version of Pandemonium Warden is currently the strongest Wanted boss known as Tumult Curator.
Dynamis Lord, the final boss of Dynamis, was formerly the greatest event superboss. It initially required a minimum of forty players to defeat under a specific strategy (Red Mages using Chainspell Stun while everybody else dealt damage as fast as possible, which is still the main viable strategy used to defeat him). Dynamis Lord can annihilate entire alliances of players with a single use of its many special attacks, the most damaging of which is Oblivion Smash. Since the updates to the Dynamis system when the level cap was increased to 90, a revamped version known as Arch Dynamis Lord has been introduced. Other notable bosses include Odin, the boss of Einherjar who as Odin II is much stronger after the first time he is defeated as Odin I.
Final Fantasy XI: Seekers of Adoulin introduced a form of combat content called Wildskeeper Reives, where players were able to challenge The Naakuals, the guardians of the jungle and the most ferocious beast on Ulbuka. There were six Naakuals: Colkhab The Matriarch Naakual, Tchakka The Riptide Naakual, Achuka The Firebrand Naakual, Yumcax The Ligneous Naakual, Hurkan The Booming Naakual, and KumhauThe Flashfrost Naakual. These naakuals would be reused as the megabosses for the battle content, Delve, with the names Tojil, Dakuwaqa, Muyingwa, Cailimh, Wopket, and Utkux.
Seekers of Adoulin also introduced High Tier Battlefields, which are more difficult versions of the mission battlefields from the story. Players were again able to battle against the Shadow Lord, Promathia, and Lady Lilith at max level and still be forced to strategize. High Tier Battlefields have five difficulties ranging from 'very easy' to 'very hard'. The 'very hard' variants of these fights were some of the most challenging content upon their release.
Dynamis - Divergence offers one of the toughest event superbosses in the wave three bosses, which are the Disjoined Elvaan, Disjoined Galka, Disjoined Tarutaru, and Disjoined Mithra. They have 80% damage reduction, which can be reduced by 10% for each of the eight elemental circles defeated before engaging them. They have 20 million HP, summon minions at 80, 60, 40, and 20 percent HP, and are the only enemy in the game that can summon Odin for a possible instant-death for anybody that does not have Reraise. They also have a 30-minute time limit, and unless all eight circles are defeated, they gain a dramatic stat boost and start using massive area of effect attacks that will quickly wipe an alliance.
Currently the most difficult category of fights is known as "Master Trials" with each trial presenting the ultimate challenge for 6-man parties. While the prizes from these fights are merely cosmetic, the difficulty is extremely high. Currently seven battles in this category exist. Very few people have cleared the first four, which were released in Final Fantasy XI: Rhapsodies of Vana'diel. Fewer still have cleared the last three, which came in Final Fantasy XI: The Voracious Resurgence. The Oathsworn Blade master trial released on February 13, 2024, and has yet to be cleared. As a result, no significant progress has been made on the most recent master trial, Wings of War, which was released on May 13, 2024.
Final Fantasy XII[]
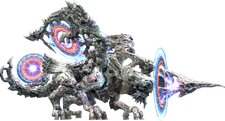
Yiazmat.
Hell Wyrm can be fought in the Sochen Cave Palace after the conclusion of the Wyrm Philosopher sidequest. It is considered a mere prelude to Yiazmat. Yiazmat is an Elite Mark accessible after defeating Hell Wyrm and completing all Rank VII Marks. It is found at the Ridorana Cataract coliseum, and had the most HP in the series until Lightning Returns: Final Fantasy XIII was released, weighing in at just over fifty million (50,112,254). Yiazmat took several hours for the average player to kill in the original version of the game. Later Marks can be considered superbosses due to their powerful and devastating attacks.
Omega Mark XII is a less time-consuming superboss that can be accessed once the Mark for Yiazmat has been accepted.
Also, the dark Esper, Zodiark—found at the end of the sealed area of the Henne Mines—can be considered a superboss. He is difficult due to his high defense and devastating attacks.
In the Zodiac versions, the five Archadian Judge Magisters are fought at the stage 100 of Trial Mode. This is considered the hardest challenge.
Final Fantasy XII: Revenant Wings[]
Yiazmat is a superboss sheltered within the dark confines of Midlight's Deep. Though not as powerful as its Final Fantasy XII incarnation, Yiazmat has gained the elemental affinity of lightning and has retained most of its devastating attacks. It is a Ranged unit.
If the player completes all missions, the final boss and all of his minions will be on level 99, making for the game's hardest battle.
Final Fantasy XIII[]
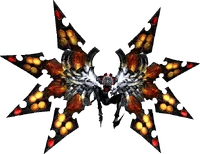
Vercingetorix.
Vercingetorix is the final Cie'th Stone mission. For his mission to become available, the player must have defeated Missions 27 to 51. Vercingetorix is a flying Undying with 15,840,000 HP. Defeating Vercingetorix, and as such completing all missions, earns the Galuf's Grail achievement/trophy and the Exorcist achievement/trophy for defeating the final Undying Cie'th.
Another superboss is Long Gui, a massive oretoise that becomes available once the player completes the fal'Cie Titan's trials, as well as missions 56–62, at which point every oretoise on the Archylte Steppe, except one, will become a Long Gui or a Shaolong Gui. Long Gui has 16,200,000 HP, while its two front legs have 1,080,000 HP each. Defeating Long Gui earns the player the Adamant Will achievement/trophy.
Final Fantasy XIII-2[]
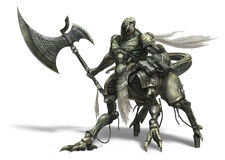
Valfodr.
The two most powerful enemies in the Archylte Steppe could be considered superbosses: The Long Gui from Final Fantasy XIII returns with the highest HP. Another enemy, Yomi, is similar in appearance to, and uses the same battle tactics as, Vercingetorix from the original game. Defeating him along with the Long Gui, Ochu, and Immortal will award the player the Big Game Hunter achievement/trophy.
Raspatil is a superboss found on the Ashensand of Oerba in 400 AF. She boasts 3,666,000 HP and can call other powerful Cie'th into battle. Defeating her awards the player 25,000 CP (the most of any enemy) and the Fair Fighter achievement/trophy if the player defeated it in Normal Mode.
Other superbosses released as downloadable content may be fought at the Coliseum upon purchase. These battles (most notably Snow, Gilgamesh, and Valfodr) are much more difficult than any battle encountered in the game's regular content. Both Snow and Gilgamesh sport 9,999,999 HP, while Valfodr increases in difficulty each time he is defeated, starting at 5,172,000 HP at level 1 and ending at 15,516,000 at level 99 (and a "HALVED" resistance to all damage, effectively the same as if he had 31,032,000 HP), in his fifth incarnation. For a fully-leveled party, only the DLC superbosses will still pose a significant challenge.
Lightning Returns: Final Fantasy XIII[]
Aeronite must be defeated to complete the "What Rough Beast Slouches" sidequest in the Dead Dunes. It appears as a "black hole" similar to rare enemies in Final Fantasy XIII-2 and moves around the Giant's Sandbox on a timed schedule. It boasts 11,000,000 HP on Normal Mode, which means 17,500,000 HP when encountered in a Chaos infusion or fought on the Ark, 38,500,000 HP on Hard Mode, and 57,750,000 HP on Hard Mode when encountered in a Chaos infusion or fought on the Ark.
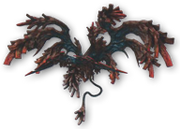
Ereshkigal.
Ereshkigal is encountered on the 33rd and final floor of the optional dungeon, the Ultimate Lair, available on Day 13 if the player completed enough quests to salvage an extra day. While its HP is lower—7,500,000 on Normal—it is less reliant on magic attacks than Aeronite, which means the player cannot use Lightning's potential magic immunity to survive. As with Aeronite, Ereshkigal may be fought on the Ark with the same stats it would have if encountered in a Chaos infusion (giving it a maximum potential of 39,375,000 HP on Hard Mode).
On a New Game+ playthrough, the final boss may also be considered a superboss, as his HP rearranges and his attacks become much stronger. Where he has four forms with HP of 600,000, 700,000, 900,000, and 1,050,000 on an initial playthrough, on a New Game+ he has two forms with HP of 4,000,000 and 5,000,000 (or 14,000,000 and 17,500,000 on Hard Mode)—nearly three times more. Additionally, his attack pattern changes (unlike Aeronite and Ereshkigal, who are no more or less aggressive on New Game+/Hard Mode). He is more aggressive, uses more powerful spells, and requires a more specific strategy based on his current form.
Final Fantasy XIV[]

Nael Deus Darnus in Rivenroad (Hard).
The original release had two battles designed to be extremely difficult, both released late in the release's lifespan. The first was the fight against Ifrit in the Bowl of Embers (Extreme), a required step for the Relic Weapons quest. The other fight was a rematch against the Seventh Umbral Era final boss, Nael Deus Darnus, in Rivenroad (Hard).
As of A Realm Reborn, there are many duties that are not part of the storyline. Among those are Trials and Raids, both of which have high difficulty versions known as Extreme and Savage modes, respectively. Bosses encountered in these duties can be considered superbosses, as they represent the hardest content in the game at the time of their release, with Savage raids generally seen as being more difficult than Extreme trials. In addition to these, the Binding Coil of Bahamut, Second Coil of Bahamut, and Final Coil of Bahamut raids, which do not have Savage modes with the exception of the Second Coil, could be considered superbosses as well, as they were very difficult and represented the hardest content of A Realm Reborn before the Savage raid difficulty was fully established in Heavensward.
As players improve in levels and equipment, duties routinely see drastic falls in difficulty, particularly given the Duty Finder option to run these duties "unsynced", allowing players to run these duties without enforcing level or item level syncs. Duties that once represented the pinnacle of difficulty for eight players can often be defeated by a single player under these circumstances. Players seeking to challenge these duties at their original difficulty can instead use the Duty Finder option to enforce a duty's minimum item level, syncing all participants item level to the minimum required to enter the duty.
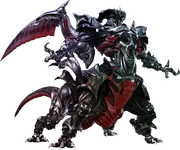
The Ultima Weapon.
Stormblood introduced ultimate raids, high-end raids that host a gauntlet of bosses from previous duties that must be defeated in a single attempt. Failing will reset the entire gauntlet. Ultimate raids can only be unlocked by completing the prior Savage raid tier, and unlike other duties cannot be run unsynced. Ultimate raids are designed with the purpose of being the hardest content in game.
In addition to the above, alliance raids, open dungeons, high-end FATEs and S-rank Hunts can also be considered superbosses by virtue of the sheer amount of players needed to complete them. Alliance raids require parties of 24 and open dungeons parties of 56, while FATEs and Hunts have no limit on how many players can participate as they occur in the open world.
Final Fantasy XV[]
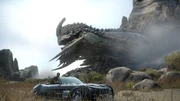
Adamantoise.
Adamantoise is fought in the level 99 hunt Lonely Rumblings in Longwythe, unlocked by the sidequest Let Sleeping Mountains Lie that becomes available upon returning to Lucis with Umbra from Chapter 9 onwards (or the royal vessel in the Windows and Royal Editions). It is on level 99, has 5,000,000 HP, and it drops either some Adamantoise Meat or Adamantite. The Adamantite Bangle (+10,000 HP*HP is capped at 9,999), one of the best accessories, is a reward for completing the hunt. While the hunt can be repeated to procure more Meat or Adamantite, the Bangle is only rewarded for the first completion. Defeating the adamantoise also awards the Tortoise Toppler achievement/trophy.
Ayakashi is a level 110 superboss and is the target of the only other level 99 hunt, Dead General Strikes Down the King. Ayakashi's attacks deal heavy damage or kill the player instantly, so one should stock up on Phoenix Downs. The first completion of the hunt is one of the only sources of the rare Ribbon accessory.
Bilröst is a superboss found at the end of the toughest dungeon beneath Costlemark Tower, for the level 99 sidequest A Menace Sleeps in Costlemark in Chapter 15. Much of the challenge from the dungeon comes from the inability to use items, potentially leaving the party in a weakened state when they finally reach Bilröst. However, Bilröst as well as some of the more challenging enemies in this dungeon, use elemental attacks, and there are recipes that render the party immune to elemental damage. A Menace Sleeps in Costlemark is the highest level, and typically last completed, portion of the Menace Beneath Lucis sidequest, which awards the Hunter's Medal. The Hunter's Medal is a powerful elemancy catalyst, but not as powerful as the Adamantite, and since only one Hunter's Medal can be acquired compared to unlimited Adamantite, the Medal is seen as a trophy item.
Melusine is a level 99 enemy that can challenged in the quest, O Partner, My Partner. She has over a million HP, can deal heavy damage, and inflicts status aliments. Unlike other daemons, Melusine will vanish at daybreak, so the player needs to finish Melusine off quickly.
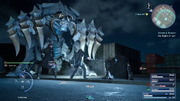
Naglfar.
Naglfar is a superboss in the Wondrous Weapon sidequest in Chapter 15. It is level 120, making it and Ayakashi the only enemies above the level cap of 99 at the time of release (patch 1.05 increased the level cap to 120). It drops the Squirming Bone item, which can be given to Randolph to obtain the Zwill Crossblades, the best daggers.
MA-X Angelus-0 is a superboss that can randomly attack from imperial dropships in Chapter 15. It is a powerful magitek armor, and while it has only 202,000 HP, it takes only 10% damage from all sources. It has a 5% chance of dropping a Magitek Suit V2 (+2000 HP, 100 Strength, and 70 Vitality), a top accessory. It can be fought repeatedly to try and get this rare item. If it does not drop the Magitek Suit V2, it will instead drop a Magitek Suit, a slightly worse version of the accessory.

Dread Behemoth and Tyraneant quest.
The Dread Behemoth and Tyraneant are superbosses fought during daily Timed Quests. The Dread Behemoth is level 140 and can be fought every 10th of a month, whereas the Tyraneant is level 130 and can be fought at the 24th of every month. At the 31st of a month both can be fought at the same time. They are the only two enemies that surpass the player level cap of 120 and have attacks that deal huge amounts of damage. Defeating one of them alone grants 200 QP and defeating both simultaneously grants 500 QP, the highest amount any Timed Quest grants. Both originally appeared on several occasions in online-based Timed Quests.
The DLC episodes have several optional fights against other player characters. In Episode Gladiolus the player can fight Cor. In Episode Prompto the player can fight Aranea. In Episode Ignis, the player can fight Noctis. These three fights are considered the greatest challenge in the relevant episode, and can be undertaken after completion. Additionally, there are two level 99 enemies in Episode Prompto that can be considered superbosses, the Kaiser Behemoth and MA-X Angelus Casus. The rematch against Bahamut can be considered an original superboss of Comrades.
Two more superbosses were added in patch 1.23—the MA-X Angelus-0 can be fought in Comrades multiplayer expansion, and is one of the most powerful enemies there. The player must fight the magitek armor alone. The rematch against Ifrit is another superboss from Comrades.
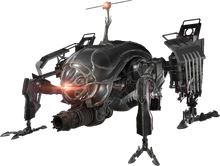
Windows/Royal Edition adds Omega as a new strongest opponent in the main game. It is nearly immune to anything other than Thunder magic and royal arms (including summons) and still damages those wearing the Exosuit attire.
The Adventurer from Another World quest adds a Lv.120 fight against Garuda, the primal from Final Fantasy XIV, who resists Alterna and the Magitek Exosuit and can eject the player from the battle.
Patch 1.29 adds Kenny Crow as the ultimate challenge of Comrades, who can only be fought once the player has beaten every other challenge.
Final Fantasy XVI[]
Final Fantasy XVI has several high-level enemies that are similar in strength to that of the final boss.
Behemoth King is a massive orange Behemoth with purple horns and wings encountered as a Lv.47 S-rank notorious mark under the name "Masterless Marauder". While Behemoth King has a similar moveset to the Behemoth encountered at Drake's Spine and the Kuza Beast, its moveset also includes extremely powerful spells, such as Four Horsemen, Reign of Fire, and Apocalypse.
Svarog is a large red dragon encountered as an S-rank notorious mark under the name "Ruin Reawakened". It is highest level enemy in the base game, being level 50 on normal difficulties and level 93 in Final Fantasy mode. Like Behemoth King, Svarog shares many moves with other dragons encountered throughout the game, but also has exclusive moves, such as Blazing Legion, Embroil, Red Dawn, and Last Dance.
Omega was added with the Echoes of the Fallen DLC and is the final boss of this DLC. When his HP is depleted around 15%, Omega absorbs the Mothercrystal's aether to augment itself, sprouting two extra arms and become Omega Aionios. Once dropped to 20% HP, Omega attempts to compress the dimension itself, initiating the final phase of the fight in a tight DPS check. After its defeat, it ejects the Mothercrystal from within it. The Omega Weapon sword can be crafted for Clive with materials obtained from Omega and other enemies in the Sagespire.
Leviathan is the final boss of The Rising Tide DLC and is fought using Ifrit like most other Eikon battles. It is easily the most difficult one in the game. Leviathan does massive damage to Ifrit and can easily kill the player within a few hits. It can quickly wear out their Firelights out of a desperate need to heal. Just like most other Eikon battles, the boss goes through multiple phases, including a phase halfway through with a tight DPS check to prevent Leviathan from cast Tsunami; failure to do so results in a game over, as Leviathan does everything in its power to halt the player by relentlessly attacking them, and pushing them back. If the player did not use their abilities effectively, they will be overwhelmed. Leviathan's final phase at low health is to use Waterspout, which can instantly kill a player if they are caught in it, or do not use firelights to outpace the damage if they are caught up. Immediately after using Waterspout, Leviathan unleashes Angry Seas, relentlessly unleashing all of its attacks back-to-back, hoping to overwhelm the player.
The Shadow Within, also added in The Rising Tide, is a secret boss found in the Kairos Gate. It is a stronger version of the Infernal Shadow that can only be accessed in Final Fantasy mode, being the only boss with this distinction, and to reach it the player must attain an S rank on all circles of the Gate in a single run. With Kairos Gate being locked behind the DLC and the boss being accessible only in Final Fantasy mode, it acts as the true final challenge of Final Fantasy XVI. Being defeated by the Shadow Within will force the player to return to the start of Kairos Gate, requiring them to complete the S-rank gauntlet once more for a rematch. There is no reward for beating the Shadow Within, other than a proof the player defeated them.
Final Fantasy Tactics[]

Elidibus is a mysterious character similar to the Lucavi fought in the final level of the optional dungeon, Midlight's Deep, but he is not significantly more difficult than the final boss, Ultima. The challenge comes from winning the battle while learning Zodiark, a "secret" summon spell, and/or recruiting the Byblos, a unique monster.
Final Fantasy Tactics Advance[]
The Corrupt Judges await as a post-final boss challenge. Though technically classified as superbosses, they exist in a gray area of this term, as this classification is based on them being encountered after defeating the final boss, Li-Grim. Li-Grim, however, remains the most difficult boss.
Final Fantasy Tactics A2: Grimoire of the Rift[]

The Upsilon class of enemy, one being the red Smoldering Incubus, a rather weak superboss, can be fought in the optional Heritor ability quest tackled before the final ability quest. It is only a prelude to the true superboss, the Magick Weapon, a possible incarnation of the Omega Weapon (it was built on the same model, like Smoldering Incubus, a possible incarnation of the Ultima Weapon). It can be fought after defeating the Neukhia, the final boss.
Clan Cinquleur members also are superbosses, as the second and third time the player encounters them, they are level 99 and are very difficult to defeat (albeit not as difficult as the Magick Weapon). Other superbosses are the bosses of Brightmoon Tor sidequest, and the clans of "The Final Mission," which encounter the party at level 99, and ban the summoning of scions (they can still be summoned, but if the player uses one, they lose the judge's protection).
Final Fantasy Type-0[]
Nox Suzaku appears from the second playthrough, making it impossible to harvest any phantoma until either Nox Suzaku is defeated or goes away after absorbing enough phantoma. The player needs to ram into the Nox Suzaku with their airship to begin the battle in an alternate dimension. Even though defeating all the shades that appear will cause Nox Suzaku to leave, it will not defeat it. The only way to damage Nox Suzaku is to make it appear first by having a party member die, then attacking it in the brief moment it comes to collect the party member's phantoma.
Gilgamesh in his eight-armed form is an easier superboss than Nox Suzaku. He appears in one of four locations in Orience, and is available to fight from the third playthrough after Chapter 4. He behaves much like his earlier counterparts, requiring Breaksights to do sizeable damage, but also has a few more attacks.
Vagrant Story[]
Asura appears as the superboss found at B3 of the Iron Maiden Dungeon. She is difficult to deal damage to and has the highest HP at 999. Story-wise she is the reason for the filling of the Iron Maiden with The Dark (and is also the namesake of the dungeon) after being imprisoned and experimented on by Müllenkamp.
Final Fantasy Crystal Chronicles: My Life as a King[]
Omega appears as the 50th floor boss in the optional DLC dungeon Infinity Spire. He is far more powerful than regular Infinity Spire floor bosses and uses an attack called Wave Cannon that will hit every Adventurer inside Infinity Spire for 1,000 damage, even if they are not fighting him (although any Adventurer not in battle at the time cannot be knocked out by it). Defeating Omega rewards one of the surviving Adventurers with the Omega Symbol, a level 50 necklace that adds +27 to all stats, as well as a regular medal for completing the floor.
A Wyrm appears as the 99th floor boss of the same dungeon. It is by far the most powerful opponent and is similar to Omega except even more powerful. It has an attack called Tidal Wave that will hit every adventurer in the dungeon for 3,000 damage. On defeat, one surviving Adventurer will get the Ragnarok Prime, a sword that gives +52 to all stats, as well as a regular medal for completing the floor.
These two superbosses are the only ones in the series the player does not get to fight directly.
Final Fantasy Crystal Chronicles: Echoes of Time[]
Great Galdes, the final boss from Final Fantasy Crystal Chronicles: Ring of Fates returns as a superboss. The battle is identical to the Ring of Fates encounter, although the difficulty is ramped up significantly.
Dissidia Final Fantasy (2008)[]
Inward Chaos is the final storyline and pits the player against all twenty-two playable characters of escalating level, ending with a battle with Chaos at Level 110. Opponents ranging from Level 100 to Level 150 can be fought in the Blackjack Course in the Duel Colosseum, including a Level 130 Chaos. At these levels opponents have much higher stats than the player's character, and due to being at a higher level gain a bonus to their base Bravery.
Dissidia 012 Final Fantasy[]
The superboss is provided by Feral Chaos. At the end of Confessions of the Creator, the player must battle a Level 130 Feral Chaos with over a hundred thousand HP and unique accessories that grant him powerful support effects. A Level 95 Feral Chaos can be fought earlier in the same storyline as a manikin of the true boss, and is itself the most difficult opponent up to that point.
A Level 100 Feral Chaos serves as the boss of the Labyrinth, encountered on the 98th floor guarding the exit to the final floor, where the last piece of the Final Strike set can be acquired.
Final Fantasy Legend II[]

The Haniwa functions as a superboss similar to Warmech from the original Final Fantasy, in that it appears rarely randomly in a certain area, which in this case happens to be the final area. It is a very dangerous enemy, but is arguably not as powerful as the final boss.
It can use Quake and Flare against the party, but can drop the powerful Seven Sword, which Haniwa will occasionally use against the party during battle and it will deal damage in the high thousands.
Final Fantasy: The 4 Heroes of Light[]
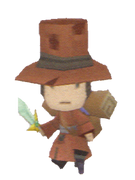
The Adventurer.
There are six optional bosses that could be consider superbosses.
Each boss is located at the 100th floor of each bonus tower:
- Krinjh: Located at the top floor of the Moonsand Ruins.
- Torte: Located at the top floor of the Holy Tree Tower.
- Rolan and Rekoteh: Both located at the top floor of the Mysterious Lighthouse.
- The Adventurer and the Faithful Fox: Both located at the top floor of the Trial Tower.
Final Fantasy Dimensions[]
There are three post-game superbosses all accessible through Gladiators' Hall:
Each superboss can gain levels, up to a maximum level of 6. Adamantoise and the Omega Weapon gain 1 level every two times they are defeated, while Gigantuar gains 1 level every three defeats.
Final Fantasy Dimensions II[]
The post-game floors of Babil Tower house some of the strongest bosses in the game; Omega, Golden Dragon, Chaos, the Ultimate Weapon, Mech Chocobo, and rematches against all seven Prismatic Gods.
Once reaching the final floor of the tower, they will encounter the game's strongest boss, the Proto-Babil. The boss is fought in three different phases, and requires the player to defeat each part of its body before fighting against its face. It has access to a variety of special attacks that deal heavy damage to the party, and the deadly Celestriad to reduce the party's HP to critical and completely reduce the party's MP to 0.
Final Fantasy Brave Exvius[]
Due to the game's nature, content is updated on a regular basis. Notably, the Chamber of the Fallen and the Chamber of Arms feature Trials that test the player's strength and strategy through different means. The bosses released in both can be considered superbosses, because they are far more difficult than any content at the time of their respective release. However, many of them—especially older content—are easily manageable due to future content power creep.
Many of the bosses are unique, although the Chamber of the Fallen features regular foes from the series, such as Gilgamesh, Malboro, Iron Giant or Omega.
Although both Chambers have no relation to the main story, the Dragon King, Bahamut, appears in an optional continent on the world map after beating all the main content from season one. He is an extremely difficult foe and could be considered the superboss from season one, being more faithful to the tradition of superbosses being unlocked post game.
The Chamber of Arms features an additional boss known as Warden Welter faced after all other twelve bosses have been defeated, thus acting like the superboss of the Chamber of Arms.
On later updates, new sets of trials are added, one which is the Chamber of the Indignant where the player faces remakes of previous trials with enhanced difficulty and revamped mechanics for the bosses. The Series Boss Battles, where the player faces against previous Final Bosses of the Final Fantasy series.
More recent updates include the Twelve Types Takedown, which involves a series of twelve different battles against bosses from each of the twelve monster types that exist. These Bosses are inspired on notable monsters and bosses from earlier installments, such as Octomammoth, Cerberus, Archaeoaevis and many others. By defeating these Bosses while fulfilling the missions, players are awarded with crafting recipes and materias effective against the respective enemy type as well as a killer materia effective for next boss (the Avian Eater Sense, being available in the Scorn of the Genies trial which predates this subset).
The latest series of trials are the Advent of Purgatory which includes a set of Boss gauntlets in which a field effect applies benefiting a specific element for the player to use. In this series, players face past enemies from the Brave Exvius roster. Lapis is awarded for defeating them within a certain number of turns.
The Dark Visions event, is a ranking event monthly event in which players face an array of multiple bosses in separate battles with different weaknesses while being awared a score for defeating them. Typically this event houses three powerful bosses which serve as gatekeepers between newer and veteran players thus creating a difficulty barrier. The final boss of each event season normally has a more complex set of moves and higher stats. Because of the event's score system which grades players based on damage taken, maximum damage inflicted in a turn, amongst others, it creates a more complex set of dynamics in which players have to adjust and perfect their runs to achieve the highest score.
The Global Version of the game includes two unique sets of trials. One is the Chamber of the Vengeful which houses bosses related to the Precursors. In this setting players are encouraged to defeat extremely powerful bosses by using different units, being granted rewards based on the total number of different units used, thus encouraging replayability. The second is the Clash of Wills series of ranking events which house a single very powerful Boss enemy, whose level maximum level can be adjusted based on how many times it has been defeated. As a further layer of difficulty, the player can choose to activate challenge modificators which can greatly strengthen the boss stats, change its AI behavior or even weaken the party. Although none of these are mandatory to use to defeat the boss, they are necessary to maximize one's score. Unlike Dark Visions, multiple players can achieve Rank 1 if they earn the maximum score possible.
Notably as of latest updates, most trial/ranking event bosses possess billions of HP points, far exceeding that of any previous installment in raw number. However, with the changes on damage limit caps to 9,999,999,999 per hit and a maximum of 99,999,999,999 in a burst, it remains relatively easy to inflict large damage, provided the player's party is up to date and employing proper strategy.
World of Final Fantasy[]
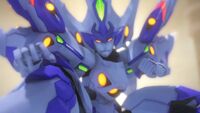
After defeating Exnine Bahamut in the Postscript and completing every Intervention Quest, three doors leading to unnamed dungeons (Dubbed "EX Dungeons A, B and C" in the official strategy guide) spawn in the Girl's Tearoom. Each is designed to resemble various previous locations and contain stronger versions of normal enemies.
The completion of all three "EX" dungeons reveals a fourth, EX Dungeon Z, which serves as an even greater challenge. At the end of the dungeon is a Cogna named XG, with approximately 100,000 HP and incredibly high Strength and Defense. Defeating XG rewards the player with Girl's Diary, Entry 15 and an XG eldbox, allowing XG to be summoned as a Mega Mirage.
The Maxima version adds several new superbosses after finishing the Postscript and completing every Intervention Quest.
At Nine Bean Coffee in Nine Wood Hills, Enna Kros can be challenged to a fight, with Tama and Serafie accompanying her in battle. Serafie can use "Rumor Radar" to point out one of the player's stack's elemental weaknesses (if any), which Enna Kros follows up with a "-ja" spell of that element on her next turn, but otherwise uses Flare if the stack does not have any weaknesses. If any one boss's health goes to zero, Tama automatically uses an all-targeting ability "Timewalk" to fully revive any fallen allies. Tama will use Timewalk eight times and will not use it after that. To win this battle, the player must force Tama to use Timewalk that many times by depleting any boss's HP, and then defeating all three. Defeating them rewards the player with a Megalixir, two Mega-Ether, and an Initial Regen Mirajewel.
After clearing EX Dungeon Z, the Hidden Dungeon is unlocked, and can be accessed by a new purple gate on the seventh floor of the Crystal Tower. The Hidden Dungeon has four elemental routes with a member of the Four Fiends at the end of each route and must be defeated to clear that section. Defeating Marilith and Lich in particular rewards the player with their prismariums. Clearing all four routes unlocks a fifth final route with a boss fight with Garland at the end. This battle consists of Garland and all of the Four Fiends, and defeating a Fiend changes Garland's weakness to -100 of the element of that Fiend. Defeating all five bosses rewards the player with a Megalixir, a Mega-Potion, an Elixir, and Garland's prismarium.
Also at the Crystal Tower is a portal at the entrance that leads the player to a similar area where the Ultima Gate is. Reading a passage on the gravestone, the player must travel by airship to six remote areas in Grymoire to press down on elemental seals. After activating all six, and returning to the area in the Crystal Tower, the player can fight The Immortal Dark Dragon. Defeating him rewards the player with a Megalixir, two Mega-Potions, and an Initial Haste Mirajewel.
After defeating Enna Kros, The Immortal Dark Dragon, and Garland at least once, a rainbow gate appears in Plaza 99 of Nine Wood Hills that allows the player to face a much stronger version of Exnine Bahmut in both forms, the first form having a much wider arsenal of abilities and the last form having an altered moveset and weaknesses. When defeated, a new post-credits cutscene plays after the credits, and the player is rewarded with a Megalixir, two Mega Phoenixes, and a Conserve AP Mirajewel that can be found near the foot of the gate.


