Because the development of Final Fantasy VII took place in such a short period of time, there was a lot of leftover data in the ROM that became dummied content. Because the size of the ROM would change once unused data was removed, all the debug work done up to that point would become useless, meaning that if a glitch occurred, the staff's efforts would be unrecoverable. Therefore, some flawed or stored data was left in place, just to be safe.[1]
Dummied battle content[]
Dummied enemies[]
The enemies Tonberry and Ho-chu are found exclusively in the Battle Square in the final game, but evidence exists they were originally part of formations in other places. The Tonberry was set to appear in the Northern Cave on the first visit (after passing through Whirlwind Maze), and the Ho-chu was part of an inescapable formation in the final cave of the Ancient Forest. Because they only appear on the Battle Square in the finalized game, the player can never fight the enemies' "true" forms, as all Battle Square opponents have more HP than their regular counterparts. The player can also never receive any item drops from these enemies, even if they were programmed with items to drop.
There are nine "Test" enemies, the most famous one being êúô0(äñ). êúô0(äñ) could be fought in the original Japanese release. Some of these can be fought in debug rooms, while the majority cannot be fought at all without editing the game or directly entering formations of specific battles.
In the Japanese version the test enemies were named as "Test", followed by a number, and then followed by the model the enemy used. For the International releases the enemies appear with the Pyramid battle model instead of the ones used in the original release. In the English releases, the Japanese-characters were converted into gibberish.
Two additional enemies appear as dummied in both the original and International Japanese versions. ふせ��� かずまさクン (Fuseya Kazumasa-kun?) and まつむら やすしクン (Matsumura Yasushi-kun?) appear as enemies, named after a battle programmer and battle planner respectively. Both were removed from the western PlayStation release and all future releases.
There are a number of unused enemy IDs; however, despite them being unused there are still models corresponding to them. Some may have been fillers, or planned for the game. There was one additional Pyramid after the test enemies, indicating there was another test enemy. An ID with the Bullmotor model appears close to other IDs relating to the Gold Saucer, possibly suggesting another enemy (whose model had not been created) was going to appear there.
Two IDs with the Toxic Frog model (one of which is broken) appear with the enemies related to the Temple of the Ancients. Four additional chocobo enemy models appear alongside the existing chocobo IDs, and three unused Corneo's Lackey models also exist. An ID with the model of Turks:Rude appears.
There is an ID that appears with a completely unused model: a cyan sphere. The sphere has two floating animations, neither of which loop, nor connect directly onto each other, making it an unusable enemy. The ID of the enemy appears near the enemies fought on the Mako Cannon on Disc 2. It can be seen as a palette-swap of the Waterpolo and Mover enemies; however, the cyan sphere is not semi-transparent like the aforementioned enemies.
Other[]
A nameless attack included in the Dual Horn enemy's AI script is never used. The attack has no stats attributed to it, and therefore inflicts 0 damage and attacks a random target in the player or enemy party. While the attack was programmed to be used by the Dual Horn, the attack costs 65,535 MP, and therefore the Dual Horn will not use it under normal circumstances. The attack was supposed to be used when Dual Horn's HP falls below 50%. If the attack is used with sufficient MP, the battle message bar will be blank.
There are two dummied status effects. The Seizure status is the reverse of Regen and continually drains a target's HP. A similar status is used by Bottomswell, but the Seizure status itself is dummied out. There is also the mysterious Dual status, but there is no hint as to what the status may have been intended to do.
Dummied locations[]

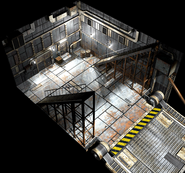
Test battleground in JORG release.
Two dummied battlegrounds appear, one being dummied because it only appears in test battles not playable in the final release. Both battlegrounds are black. The battleground used for test enemies is not empty in the original Japanese release, and features an orange sky and a Shinra logo on the ground.
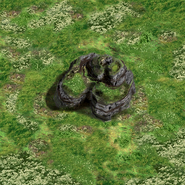
There is also a cave visible in the Corel Valley forest exit area that has a vine leading up to it, but the cave does not have exit data, and the vine has no climb data. It is unknown what purpose the cave served, however, it is indicated that it was originally the exit of the Ancient Forest due to the dummied dialogue from Bone Village, an unrelated location. Also the order of the fields in-game is almost entirely in visit-order, but places the Ancient Forest fields after the Sleeping Forest fields (which are after the Bone Village fields).
Many rooms use texts intended to be displayed in the menu that never get displayed, while others use them, but the menu can never be accessed in the area. This includes the area where Dyne is found, which is called "Dyne", and the area where Seto can be seen, which is called "Cet Wall". There are also two regions of the world map that have names in the menu, but can never be visited naturally: in the sea areas, the location name reads "Bottom of the Sea", while if the player were on the Great Glacier area, the location name would read "Glacier". The former, "Bottom of the Sea", can be read if the player uses a GameShark code to remove the water, and then runs into where the ocean would be and open the menu.
Many rooms are never used. An area identical to the inside of the Cargo Ship exists without the cargo. A different angle of the place in Northern Crater where Sephiroth's body is found on the first visit in Part 2 also exists. The location has "Aerith's Theme" playing in the background, which helped fuel rumors of Aeris originally being intended to die at the Northern Cave.
Honey Bee Inn[]
The Honey Bee Inn in Wall Market has many dummied rooms and characters, as well as some scenes and even a music file. The bulk of this was dummied early and can only be unearthed from the original Japanese version.
Debug room[]
A debug room exists, accessible through Gameshark. There are ten rooms, with Room 1 to Room 8 going clockwise around the blue circles from the northern one. Moving off the top of the screen takes the player to Room 9, and the bottom to Room 10. On the left is just a "wall" and moving off the right of the screen takes the player outside Midgar. The names on the blue circles, starting from Room 1 and ending with Room 8 are: 北 (lit. North), 野 (lit. Field), 鳥 (lit. Bird), 松 (lit. Pine tree), 千 (lit. Thousand), 秋 (lit. Autumn), 吉 (lit. Luck), 京 (lit. Capital). Yuffie also appears in this room.
Each room has a practical testing use. Some of them send the player to particular points in the game, although many leave the player wedged in walls and unmovable. The player can also face a variation of the Pyramid enemy, which works well for grinding. Here, FMVs can be watched, and minigames can be played in both their original forms and their Wonder Square forms if applicable. There are also ways to get 99 of every item, a lot of gil, and a lot of GP.
Dummied story scenes[]
There are many scenes that have dialogue in the game data, but do not ever occur in the game, such as Cait Sith explaining to the party what Sephiroth-clones are, and a more detailed scene involving Johnny and his departure from the Midgar Slums. When the player is at the Marshes each character present will have a line, and despite not being available at this point, Yuffie has a line as well, which will never be seen in a normal playthrough. The speech can still be seen via the Skipping the Midgar Zolom scene glitch.
There is a dummied scene here that could take place before the events at the Temple of the Ancients, after talking to villagers in Gongaga, after observing the Gongaga Reactor, and if Barret were in the party, and the scene had not already been seen (to prevent repeats). Due to a programming error the flag for whether this scene has been viewed is set automatically in the Sector 5 slums church during story events, so this scene cannot be viewed in a normal playthrough. In the scene Barret speaks about Shinra doing things for money and uses its power to control people, which is why he formed AVALANCHE. Barret asks Cloud if he still plans to fight with them, and Cloud's answers would have affected Barret's love point value.
If Cid is in the party when the party first visits Nibelheim, he will comment on the town being there even if it was supposed to have burned down, but it is impossible to get Cid into the party for this scene as he is only recruited later at Rocket Town. Aeris also has lines in the scene where the party first arrives in the Great Glacier, even if she can't normally be in the party at this point. Characters' lines given in scenes have a priority, with the character with highest priority in the current party speaking their line for a given situation. Thus, characters with the lowest priority never say their lines under normal circumstances.
How summons came to be is never explained, but there exist dummied lines in the original Final Fantasy VII by Sephiroth in the Temple of the Ancients, who explains that during the times of the Ancients there were beings created by the Planet that sealed their life energy in Materia. It is suggested the creatures that protect the temple were created by the Planet, and it could be assumed the Red Dragon turns itself into the Bahamut Materia upon defeat.[2]
Dummied dialogue suggests a person in Bone Village gives details on the puzzles in Ancient Forest. The dialogue would allow the player to find information about Pitcher Plants (ウツボカズラ, Utsubokazura?) (which carry insects and launch the character), "Big Eaters" (大喰らい, Ō Kurai?) (not translated in the English version; shut and damage the player when ran over), and Inchworms (しゃくとり虫, Shakutori Mushi?) (the pink bouncy rope-like things that can be jumped onto). A dialogue-option for Scent Balls (くす玉草, Kusudama Kusa?) (which neutralize Big Eaters) exists, but no dialogue for its explanation exists in the data.
The game contains an alternate version of the scene where Bugenhagen bequeaths Red XIII his ultimate weapon. In the alternate version Cloud and the party don't leave Red XIII alone with Bugenhagen, but stand back to witness. After Bugenhagen tells Red XIII the latter should leave the valley and travel, he falls motionless. Red XIII panics, but Bugenhagen then presents the ultimate weapon, as if as an afterthought. Red XIII asks Bugenhagen to not scare him again like that. Bugenhagen tells the party they should not worry and that he will look after the Planet's future, but if the player returns to his room after this scene, he will be gone for good. It is ambiguous whether Bugenhagen dies in this alternate version, and the party doesn't meet at the Cosmo Candle afterward.
Dummied items, equipment and Materia[]
A further two items were at one point intended to be in the game: dialogue in Cosmo Canyon suggests that a Telpostone (a mistranslation of Teleport Stone) could be obtained in the Item Store. During the flashback in Kalm, Cloud's mother would have given Cloud a "Homemade Potion!". The dialogue for this is still found in the game (See also: Final Fantasy VII items#Trivia).
Many differences made in the North American and PAL release that didn't appear in the Japanese version were still present on the game disc. Though the Diamond Weapon battle doesn't take place in the Japanese version, the item stolen from it, the Rising Sun weapon for Yuffie, can be found hidden in the data.
A number of unused Materia are present on the original Japanese game disc. A Materia literally translated as Underwater Breath had no effect, and Booster is a blue Materia with unknown effects. The yellow Law Materia was a merge of Coin Toss and Throw. Designated green Materia existed for Barrier, MBarrier, and Wall, and the latter required the Materia to be Level 2 before learning the spell. Each of these Materia exist in the North American and PAL version, untranslated but still present. The exception is the Underwater Breath Materia, given a use during the Emerald Weapon battle as Underwater to remove the 20 minute time limit.
The Mystery panties key item exists in the game data, but cannot be obtained. It was intended to be one of three items the player could have obtained in the Honey Bee Inn sidequest. The Honey Bee Inn contains plenty of other dummied content as well (see the Honey Bee Inn article for details).
Other dummied content[]
In the races at the Chocobo Square, each chocobo is named. The system used in the English version is different to the Japanese; in the English version there are 46 chocobo names coded into the game (excluding Teioh, who is treated separately). However, the game only ever uses the first 45; this means the name "Julia" is a dummied chocobo name.
Within the game data, there are eighty shop menus; however, the final thirteen remain unreferenced within the game's field code. None of these shops hold anything particularly interesting, and they are almost entirely duplicates of each other; multiple leftover entries at the end of a series is normal within the game. One other shop remains unused, however. Judging by the game's system, this shop was meant to be the second version of the Materia store in Junon.
After a specific story advance, the shops in Junon update, except for the Materia shop. The Materia shop is coded like the other shops, but instead of calling for the second version of the shop after the plot advancement, it calls for the original one. The unused shop is unique, as it would have sold Magic Plus Materia, a Materia not sold by any accessible store in the game. It also contains Revive, MP Plus, Barrier, and Exit.
A sidequest was removed from the game involving a Traveling Salesman in Gongaga. The character would ask the player to deliver two key items, the "Letter to Wife" and the "Letter to Daughter". He was meant to give a hint on the location of the Titan Materia, and since no other indication is given in the game, the Titan Materia can be difficult to find without a guide. Information in the game data indicates the locked chest in Kalm was meant to contain the Titan Materia.
The Temple of the Ancients clock puzzle was harder in the original Japanese version, as instead of moving the minute hand, the player had to "leave it up to the guard" and choose whether to move time backwards or forwards, then choose how much time should pass/revert. The challenge lied in memorizing the time interval each option corresponded to, as they did not point out the exact amount of time that would move. If the player stands on the hour or minute hand when the second hand moves across the one Cloud is standing on, the player will fall down the hole. In the original Japanese version falling three times would give the ability to move time precisely. In all later releases, including Final Fantasy VII International, this second method is activated by default rendering the more difficult puzzle unused in these versions.
In Holzoff's cabin the game forces the party to sleep, which will restore everyone's HP and MP. An unused option for this event is found in the game data, giving the player the option to choose whether to rest or not. If this event is activated the option outcomes are reversed: choosing "Rest" will lead the party not resting and vice versa.[3]
Gallery[]
External links[]
Citations[]
- ↑ Letter to a Staffer - the Mystery of the Travelling Salesman (dead) (Accessed: July 08, 2017) at GlitterBerri's Game Translations (dead)
- ↑ http://thelifestream.net/ffvii-the-unused-text-part-8/
- ↑ http://youtu.be/pphPG5bLEE4


