The Second Great War[2] was a conflict that broke out in 2504,[3] four years after the first Great War. The conflict was primarily between the Zerg Swarm and Terran Dominion, ending with their defeat and a zerg and rebel tactical victory. A major consequence that occurred midway through the Second Great War was the resurrection of the fallen xel'naga, Amon, which would lead to the End War.
Background[]
The Brood War[]
Kerrigan triumphant
The Brood War ended with the eviction of the United Earth Directorate from the Koprulu Sector,[4] and the Zerg Swarm, reunited under Kerrigan, as the Sector's dominant power.[5] Kerrigan allowed the other powers a reprieve,[6] and sensed a greater threat looming on the horizon.[4]
The lull was used for reconstruction. The Terran Dominion, restored to the rule of Emperor Arcturus Mengsk, made good its losses and emerged as the preeminent terran power; the alliances with the Kel-Morian Combine or Umojan Protectorate ended. Attempts by Raynor's Raiders to foment rebellion against the Dominion met with little success. The protoss were occupied by the rapprochement of the Khalai with the Nerazim. Integrating the two cultures proved difficult and the protoss found themselves sliding back into tribalism.[5]
The zerg involvement in the Sector's affairs, starting from the Great War, was the a result of manipulation in the distant past by Amon,[7] an ancient fallen xel'naga who had since died.[8][9] By the end of the Brood War, the secret efforts to resurrect Amon, and to create the protoss/zerg hybrids needed to fulfill its vision of the complete and apocalyptic restructuring of Creation.,[10] were nearing fruition. The future enemies of Amon began to uncover these efforts only at the end of the war;[5] it would be some years before enough intelligence was gathered to catalyze large-scale action.[10][11]
Four Years of Peace[]

Preparing for the next war
Over the next four years, the zerg were relatively silent.[5] From its holdings at the end of the Brood War[12] it continued to explore various worlds for resources and new species to assimilate.[13] Significantly, the zerg refrained from large scale armed conflict with the terrans and protoss,[14][15] and only took part in occasional skirmishes.[16] No expeditions to zerg-controlled worlds ever returned.[5]
The Dominion deployed new munitions in anticipation of the next conflict with the zerg. New war machines such as the thor,[17] banshee,[18] and viking[19] were pressed into service. However, Arcturus Mengsk spent a disproportionate amount on hunting down rebels such as Jim Raynor, leaving the Dominion Fleet neglected.[20]
The Swarm Stirs[]
- Maren Ayers warns her Dominion interrogator(src)
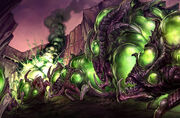
The Siege of Cask
Zerg activity increased toward the beginning of the Second Great War. On Sorona, the zerg tested its adaptability by laying siege to Cask for months; the Dominion passively sacrificed the colony to gather tactical data.[21] More telling was the deliberate and overt attack on Dead Man's Rock.[13] By 2504, the Dominion was keeping pace with developments as best it could. A marine squad was purposely expended at Roxara's moon to observe the changeling strain.[22] The Dominion Armed Forces also undertook a trio of emergency drills to assess response times and defensive capabilities.[23]
During this period of time, alien artifacts began unearthing themselves, such as xel'naga temples.[24] Emperor Mengsk expressed interest in these discoveries and placed a ban on the trade of alien goods.[25]
Long Shadows[]
Zeratul discovers dire portents for the future
In the closing days of the Brood War, Dark Templar Prelate Zeratul stumbled upon part of Amon's protoss/zerg hybridization project on a dark moon. At the facility Zeratul discovered a dormant hybrid, an entity whose power the prelate correctly appreciated, and was confronted by Samir Duran. Duran's words were cryptic as he claimed to serve a far greater power; he warned the prelate that the hybrid was the harbinger of the future and the completion of a cycle, and that it was merely one of many seeded throughout the galaxy. Zeratul was deeply disturbed by the hybrid and Duran's words.[5][26] After the war, Zeratul set off alone to discover the meaning and purpose of these discoveries.[27]
During the interbellum, the hybrid began awakening and Amon's forces took more direct action.[28] At the very least, elements of the Terran Dominion were aware of the hybrids' existence. In characteristic fashion, research on the creatures was done covertly.[29] Kerrigan was among the few to notice as well; her unsettling hunch from the end of the Brood War[4] grew to be even more foreboding and oppressive during the interbellum. Like Zeratul, Kerrigan sought answers, and like Zeratul, this would bring her to Ulaan.[30]
Eventually, Zeratul learned of a xel'naga prophecy, which he believed heralded the return of the xel'naga. The Dark Templar tracked it to Ulaan; he found Kerrigan and the zerg, seeking the prophecy as well, waiting for him. Zeratul received unexpected aid from a band of Daelaam, led by Praetor Karass, who had been tracking the Queen of Blades, and barely managed to recover and escape with the prophecy's fragments ahead of the zerg.[30]
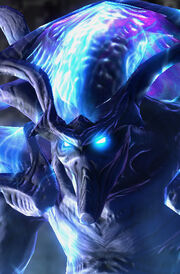
Zeratul journeyed to Zhakul where preservers could interpret the fragments. He arrived to find preservers held captive by the hybrid Maar, who had also corrupted local Zhakul Guardians to serve a "higher power." The Dark Templar slew Maar and freed the preservers.[28]
The preservers directed Zeratul to the Overmind's remains on Aiur.[28] The Dark Templar probed the dead zerg's memories and found his greatest fears realized. A victory by Amon meant the destruction of creation as it was known. Even more importantly, he learned that outcome might be averted if Kerrigan survived. Clinging to that one hope, Zeratul departed to make what preparations he could for the coming End War.[7][10]
By contrast, Kerrigan was apathetic; what she knew pointed to a future without hope[30] and she was resigned to her fate.[31] Nonetheless, she too resolved to fight the looming threat of Amon, though she did not yet know the xel'naga's name.[31]
Artifact Hunters[]
The sought-after device
In the Terran Dominion, two groups worked nearly independently to acquire alien artifacts, and for different ends. The first was driven by official policy banning the trading of artifacts.[32] The Dominion annexed Mar Sara from the Kel-Morian Combine shortly before the war[33] and in the final months of peace concentrated on excavating an artifact there.[34]
The second nominally-Dominion group was secretly sponsored by Prince Valerian Mengsk, in contravention to the decree by his father, Emperor Arcturus Mengsk. Valerian used the Moebius Foundation as a front to locate and acquire artifacts,[35] in particular the pieces of a xel'naga device that Valerian believed could deinfest Kerrigan.[36] Such a goal would inevitably lead to conflict with the zerg.[37]
But it was Kerrigan, more aware of the greater conflict than the terrans, who ultimately precipitated a sector-wide conflagration. Unbeknownst to the terrans, Kerrigan also sought the xel'naga device as a weapon against Amon.[31] She ordered the Swarm to invade the Koprulu Sector and scour it for the pieces.[38] Preparations for such a mammoth undertaking were detected by the Dominion's Satellite 1 in the Char System. The Dominion Fleet was put on alert.[39]
Four years of peace were about to end.
Course of the War[]
Mar Sara[]
Not long before the war's outbreak, convict Tychus Findlay was released by Arcturus Mengsk,[40] on the condition that his freedom would be granted if he assassinated the Queen of Blades.[41] Findlay was also employed by the Moebius Foundation as a contact between them and Jim Raynor in an effort to retrieve the xel'naga device's components.[42]
This was part of a long-range plan. Arcturus already knew of Valerian's plan. If successful, the Dominion would take Char and Findlay would kill a deinfested and weakened Kerrigan. Disaster and military losses would be blamed on the "traitorous" prince, allowing the emperor to use fear of the Dominion's weakened position as a rallying point against Jim Raynor.[43]
- Main article: Skirmish at Backwater Station
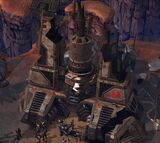
The Dominion logistics HQ is destroyed
Raynor was on Mar Sara leading the resurgent Raiders against the Dominion.[20] The Raiders instigated a planetary anti-Dominion rebellion after an attack on Backwater Station.[44]
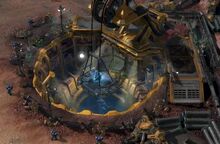
The Raiders secure the artifact
Afterward, Tychus Findlay succeeded in tracking down Raynor and made the proposition of hunting down the artifacts the Moebius Foundation sought. Raynor agreed[42] and the Raiders successfully retrieved an artifact from a Dominion dig site.[34] UNN put a negative spin on these actions, trying to distract its viewers from the fact that Mar Sarans truly desired independence.[32][39]
- Main article: Escape from Mar Sara

Conflict on Mar Sara
These events were quickly overshadowed by the zerg invasion of the planet; the Swarm landed near the abandoned dig site and tracked the component and the Raiders back to Backwater Station. The rebels were besieged but held long enough to be evacuated by Hyperion.[45] Mar Sara was not an isolated case. The zerg were invading the entire sector; billions were killed early on and the Swarm established itself on multiple worlds. The war had begun.[46]
The Dominion Front[]
- Matt Horner to Tychus Findlay(src)
The terrans reel from the invasion.
The Dominion Fleet withdrew[47][48] to fortify the Core Worlds,[49] but the zerg quickly pressed in on those defenses.[46]
The Fringe Worlds were left to fend for themselves.[48] The Outer Colonies were forced to seek aid from mercenaries and outlaws,[49] but this was insufficient and the colonists began evacuating their homes[46] in the millions[50] for the safety of the Core Worlds.[49] The dispossessed received little aid from the Dominion; refugee camps on Meinhoff were crowded, low on supplies,[49] and lacked adequate medical infrastructure.[51] As the crisis deepened, the Dominion Fleet was ordered to turn away refugee ships fleeing to the Core Worlds;[52] the flow toward the Core Worlds lessened as resentful refugees founded new colonies and declared independence from the Dominion.[53]

The Dominion devoted its attention toward stemming the zerg invasion. Emperor Arcturus Mengsk recalled General Horace Warfield from retirement to lead the Dominion Armed Forces. One of the general's first tasks was to lead a counter-offensive into the Sara System.[51] Munitions production and penal recruitment increased.[54] Penal troops were supplemented by Core World conscription[55] and a reduced minimum age of conscription.[52] Veterans who had fought the zerg during the Great War or Brood War were recalled.[56] Nonetheless, the Dominion remained on the defensive.[54] Some worlds fell[57] such as Tiria[56] and Braxis[58] while others such as Lakius held.[59] The First and Second Fleets were merged to protect the Core Worlds[60] and the Dylar system was the site of one such space battle.[52] The zerg made advances across all fronts[50] and the Dominion military suffered heavy casualties[61] but the Swarm's advance was slowed, largely thanks to Warfield,[38] who led five separate counter-attacks against the Swarm in the conflict's early stages.[37] However, over time, it became clear that the zerg's goal was not conquest, but something else...[62]
On the home front, survivors underwent viral testing[46] and new austerity measures were introduced.[51] Interplanetary shipping was brought to a standstill,[60] authorities impounded all privately owned vessels and Mengsk declared a moratorium on interplanetary travel.[63] This also reduced pirate attacks, as they had less commercial traffic to prey upon.[64] Land prices on Shiloh dropped due to the war.[56] During the conflict, the Dominion's populace experienced some knee-jerk reactions to the threat of the Swarm. A reported zerg sighting on Korhal turned out to be a hoax[65] and a rumor developed that zerglings were allergic to lemon juice.[62]

Public opinion turns against Mengsk
The Dominion suffered a blow to public morale via Raynor's Raiders, who had uncovered evidence of Mengsk's war crimes against Tarsonis during the Great War.[66][67] The Raiders infiltrated UNN Studios on Korhal[68] using a Dominion experimental heavy siege walker stolen from Valhalla.[69] The rebels transmitted the information across the Dominion using UNN's own broadcast towers.[68] The result was as hoped. Dominion citizens expressed outrage against Emperor Mengsk in riots and demonstrations.[70] Mengsk's approval rating dropped to a record low of 14%.[71] Heavy handed censorship and arrests followed as the Dominion attempted to stem the damage.[72] Numerous Fringe Worlds began open revolt,[73] while Bountiful declared its independence.[72]
Other Terran Politics[]
The Umojan Protectorate closed its borders[52] and mobilized.[55]
The Kel-Morian Combine was charged with perpetrating refugee massacres, a charge which it refused.[49] The Combine attempted to hold on to its outlying worlds, but was forced to follow the Dominion's example and abandon them when losses mounted,[55] such as on Redstone III.[74] The Kel-Morian military's performance was criticized by General Martin[54] and market confidence slumped.[55] A zerg sighting was reported on Moria but this turned out to be false.[63]
The following section contains information from StarCraft II that is ambiguously canonical.
|
The Combine had some success on a space platform above Braxis Alpha, where its ghosts used nuclear missiles to obliterate both Dominion and protoss forces. The ghosts were subsequently overwhelmed by the zerg however.[75]
Mercenaries and Rebels[]
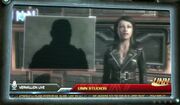
The shadow war waged by Dominion ghosts comes to light.
The war worked to the advantage of independent groups. Mercenaries were in great demand[76] and the chaos only encouraged rebels and revolutionaries. Even as it fought the zerg the Dominion continued to fight sedition through covert means[55] and propaganda.[77]
Gabriel Tosh, a former Dominion ghost turned anti-Dominion spectre, hoped to use the fighting to mask the acquisition of jorium, terrazine, and suitable candidates needed to augment Project Shadowblade.[78]
Raiding the Ancients[]

The collected device
While the Raiders resumed their anti-Dominion activities just before the outbreak of war, it was the contract with the Moebius Foundation to collect the xel'naga device's components that directed them during this phase. This was first for money,[42] and then as a way to strike against the zerg.[79] Jim Raynor would additionally become motivated by the prospect of deinfesting Sarah Kerrigan.[80][36]
The device consisted of five pieces scattered across the Koprulu Sector. Four pieces were in the custody of the Tal'darim —one in a shrine on Monlyth,[81] one was in a xel'naga temple on the dead world of Xil,[82] another one in a vault on the old world of Typhon XI[83] and the last on a xel'naga worldship in the Sigma Quadrant.[84] The Tal'darim viewed the components as holy relics and appointed themselves guardians against all thieves.[82]
The Raiders' main obstacle were these Tal'darim.[81][82][83][84]
- Main article: Battle of Monlyth
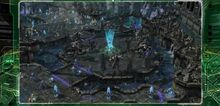
The Tal'darim defenders on Monlyth
The Raiders first collected a component on Mar Sara,[34] then moved on to Monlyth where the Tal'darim stood sentinel over another component. The Zerg Swarm arrived with the same objective as the terrans, and the Raiders secured the component while the Tal'darim were forced to split their forces against both invaders.[81]
- Main article: Battle of Xil
The Raiders collected the device's third component on the dead world of Xil. Again they clashed with the Tal'darim and again achieved victory. The Tal'darim Executor swore vengeance on Raynor.[82]
As the Raiders collected the components, Zeratul appeared aboard Hyperion and spoke privately with Raynor. The Nerazim was injured[85] and seemingly being pursued;[86][48] the prelate just stayed long enough to give the terran an ihan crystal recounting his discoveries since Ulaan, and a warning that Kerrigan's survival was necessary.[85]
- Main article: Battle of Tyrador VIII
The Swarm struggled to keep up with Raynor's recovery effort. Eventually, the Queen of Blades struck directly at the Moebius Foundation's base on Tyrador VIII,[87] the defenses of which had been criticized for lack of readiness.[62] However, the Raiders intervened and insured the zerg failed to gain access to the Foundation's data cores and research, which would have enabled the zerg to locate the other pieces.[87] Shortly afterward the zerg judged the race to the components as lost, and the impetus went out of the Sector-wide invasion.[38]
- Main article: Battle of Typhon
The Tal'darim guarded on Typhon XI. The Raiders arrived to collect it, but both sides were interrupted by a supernova. The Tal'darim recognized the Raiders' interest, but specific preparations to stop the terrans failed. The Raiders made off with the artifact piece.[83]
Terran Alliances[]
"Because I can offer you what you've always wanted. A chance to rescue Sarah Kerrigan..."
- Raynor confronts Valerian Mengsk(src)

Raynor confronts Valerian
With component recovery continuing apace, Prince Valerian Mengsk decided it was time to reveal his involvement with the Moebius Foundation to the Raiders. He went in place of Foundation representatives to a rendezvous with the rebel flagship, Hyperion, aboard the Dominion flagship Bucephalus. The rebels were taken aback by the appearance of Bucephalus and its battlecruiser escort and immediately attacked. Raynor boarded Bucephalus expecting to find and kill Emperor Arcturus Mengsk. Instead, he was doubly surprised to be met not only by the prince, but also the prince's offer of further cooperation.[35]
Valerian discussed the goal of deinfesting Kerrigan with the xel'naga device. This meant fighting the zerg on Char, and the prince wanted Raynor's assistance to do so; while Valerian could muster the Dominion's military for the assault, only the rebel had knowledge of the Queen of Blade's methods and tactics.[80][36]
Raynor agreed to cooperate over the objections of his crew. Matt Horner and Tychus Findlay warned against allowing personal feelings for Kerrigan to draw the rebels into a Dominion trap.[80] [48][88] The final component was retrieved from a Sigma Quadrant Worldship, a derelict xel'naga worldship.[84]
The Raiders were hardly reciprocal to this alliance—to those less acquainted with the rebel leader, he had simply abandoned the revolution. Raynor argued the Queen of Blades was a dire threat to terran freedom and the temporary alliance with the Dominion was the best opportunity to deal with it. The crew was only convinced after Raynor beat a drunken Findlay in a bar fight. The Raiders were impressed by Raynor's resurgent conviction and doubts about his leadership were dispelled.[79]
Battle of Char[]
- Raynor addresses his crew(src)
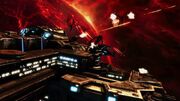
The Fleet engages at Char
With the xel'naga device now completed, it had to be brought within range of the Queen of Blades on Char. Valerian requisitioned half of the Dominion Fleet without immediately informing the emperor for the assault. General Horace Warfield was placed in command; the general was not keen on working with the Raiders. Warfield planned a frontal assault against Raynor's advice.[37]
The initial landing was a disaster and the terrans suffered heavy casualties. Only Raynor's initiative allowed a foothold to be secured. General Warfield's ship, Helios, was shot down.[89] Warfield was rescued by the Raiders, and marking the beginning of a much improved relationship between the general and Raynor.[90] Operational command was transferred from a wounded Warfield to Raynor.[91][92]
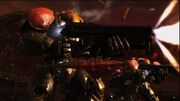
The DMC holds the line
The invaders were in a precarious position. A quick push to the primary hive was essential before they were overwhelmed by the zerg.[91][88] There was time to launch one secondary attack to weaken the hive's defenses. Tychus Findlay recommended disabling the nydus network near the hive,[93] while General Warfield was more concerned with striking enemy air power at Char Aleph.[94]

Kerrigan deinfested
Raynor chose the target and the secondary attack was a success. The terrans struck quickly at the primary hive's weakened defenses and emplaced the xel'naga device at the base of the hive. The remaining terran troops dug in and held off the Swarm's attempt to take the device. The device's fully-charged energy burst crippled the Swarm in the area and deinfested Kerrigan.[95]
Arcturus Mengsk made one final attempt to kill Kerrigan. Findlay revealed to the Raiders that he had agreed to kill Kerrigan for Mengsk in return for his freedom, and fired at a helpless Kerrigan. Raynor used his own armor to intercept the bullet, then shot[41] and killed Findlay.[96] That Kerrigan hadn't been killed at Char was a point of divergence from the apocalyptic future glimpsed at by the Overmind.[97]
The Flashpoint Conflict[]
Raynor's Raiders and Prince Valerian Mengsk refused to turn over Kerrigan to Emperor Arcturus Mengsk for execution. The Raiders and the prince fled Char with the survivors of the invasion fleet with Kerrigan and the xel'naga device. They were pursued by the Dominion Armada. The emperor was willing to kill his own son to ensure Kerrigan's death. Trackers planted on Bucephalus allowed the Dominion to track and intercept the rebels; numerous skirmishes reduced the rebel fleet to just Hyperion and Bucephalus.
Kerrigan needed medical treatment. The rebels hid at Dead Man's Rock, under the protection of dominant crime lord Mira Han. At Valerian's request, Emil Narud, an expert on the zerg, joined them to treat Kerrigan. Narud was secretly in contact with the emperor; Kerrigan did not trust Narud. The rebels were ambushed by a traitor in Han's organizations, but escaped with Han's help.
The rebels travelled to Space Station Prometheus, a secret Moebius Foundation installation in the Kirkegaard Belt. Kerrigan underwent preliminary tests aboard the station while the battlecruisers took on station repair teams. The station was a trap by Narud. The repair teams sabotaged the battlecruisers, allowing the Dominion fleet to attack.
Aboard Prometheus, Narud used two hybrids to prevent Raynor from rescuing Kerrigan. Emperor Mengsk remotely offered the rebels safe passage in exchange for Kerrigan's death. Kerrigan was enraged at hearing Mengsk's voice and destroyed the hybrids with her powers. Narud fled the station with the xel'naga device. Kerrigan held off another hybrid long enough for the rebels on the station to be evacuated by dropship. Hyperion and Bucephalus then fled.
Valerian directed the rebels to a secret Umojan Protectorate orbital platform where the battlecruisers could be repaired, and Kerrigan could receive treatment.[98]
Kerrigan was taken to an Umojan Protectorate[98] lab.[99]
A Brief Respite[]
Victory in the previous phase of the war had come at a heavy cost but Arcturus Mengsk remained secure on his throne.[96]
General Horace Warfield was charged with purging the remaining zerg on Char.[100] With the Swarm's power vacuum, broodmothers began vying for control.[101] Terrans and protoss analyzed the battles of the war and made adjustments/additions to their war machines accordingly.[102]
To Take the Queen[]
- Valerian Mengsk(src)
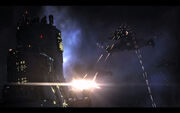
Dominion forces assaulting the Umojan facility
Three weeks after the Battle of Char,[103] the Dominion tracked down Kerrigan and those protecting her. They attacked the Umojan lab housing her, triggering an evacuation.[104] Kerrigan and Raynor fought their way through the base, but were separated. Raynor was subsequently apprehended by Nova.[105]
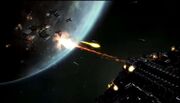
The fleets engage over Phaethon
The joint Raider/Umojan/Dominion rebel fleet rendezvoused over Phaethon. Kerrigan was a late arrival, and was distressed to find that Raynor hadn't arrived. Almost immediately afterwards, the pursuing Dominion Fleet arrived in the system as well, opening fire. Horner contacted the attacking ships, telling them that Valerian was on the Hyperion, but it made no difference—Kerrigan was the target. Valerian was expendable in regards to achieving that goal. Kerrigan, uninterested in the plight of the rebels, took her dropship down to the surface while the fleet engaged in a warp jump, the intent being to loop back to Phaethon to pick up Raynor. The Dominion ships in pursuit,[106] but not before dispatching forces to the surface.[107]
Arriving on the planet, Kerrigan found that the Dominion had set up a Drakken pulse cannon, capable of taking out any ships in orbit, including the one she hoped Raynor would arrive on. Her only recourse was to take control of a nearby hive cluster and the forces of Broodmother Naktul. Kerrigan denied that she had returned to lead the Swarm, but nonetheless, the Swarm was her only recourse in eliminating the Dominion forces. It was a task she succeeded in, and both the ground forces and pulse cannon were destroyed.[107]
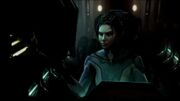
Charting the course of vengeance
Yet Raynor hadn't arrived, and after seeing a televised broadcast that had Emperor Mengsk declare Raynor dead, Kerrigan saw why. With nothing left save vengeance, Kerrigan embraced the darkness within her and set a course for zerg space, intent on reuniting the Swarm.[108]
The Swarm Resurgent[]
The title of this section is conjectural. The subject has no canonical name.
|
"That's why I'm here. They'll either accept me as their queen, or I'll start killing them one-by-one until they do."
- Kerrigan upon arriving on the leviathan, conversing with her dropship(src)
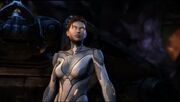
Kerrigan establishes control over nearby zerg
Kerrigan took the dropship to a leviathan. There, she met with the creature Izsha, a creation of hers from her days as the Queen of Blades. Kerrigan wanted the Swarm to move on Korhal, but as Izsha informed her, the Swarm was in disarray, the broodmothers vying for control in light of the power vacuum Kerrigan's de-infestation had created. It was a situation Kerrigan resolved to rectify.[109]
The following section contains timeline information which isn't necessarily in chronological order.
|
Zerg Recapture of Char[]
I'll see you on the Dauntless Plateau, old man."
- Warfield and Kerrigan spar(src)

A Gorgon-class battlecruiser bombarding the zerg
Since the Queen of Blades' fall, Broodmother Zagara had been continuing the attack, sending her zerg against Terran Dominion forces led by General Horace Warfield. The general's base was secure on Dauntless Plateau, and Zagara's troops had to cross the Bone Trench to get there. Without guidance from their leader, they were heavily defeated by Warfield's Gorgon-class battlecruisers on the way to Warfield's base, and most were never able to join the assault.[110]
Sarah Kerrigan took her zerg to Char in order to collect the Zagara Brood. Zagara refused to accept the "weak" queen. Kerrigan and Zagara fought over baneling eggs in the acid marsh. Kerrigan defeated Zagara and was about to kill her when Zagara reminded Kerrigan of her earlier instructions. Kerrigan admitted Zagara and her brood into her Zerg Swarm.[111]
Kerrigan consolidated her forces for another push against the Dominion on Char. She took advantage of scourge nests in the Bone Trench, whose inhabitants could destroy the Gorgon ships. Warfield could only launch one Gorgon at a time. Kerrigan's greater tactical abilities enabled her to defeat General Warfield, who kept throwing Gorgons at her until he ran out.[110]
Warfield's last stand
Kerrigan's forces moved toward the Dauntless Plateau. Her initial attack did great damage to the Dominion forces, but were almost destroyed by a barrage of nuclear missiles. Kerrigan rebuilt her forces, using Zagara's aberrations to assault the Dominion. She crushed Warfield's defense and defeated his forces.[112]
Battle of Angdra[]
Some time after the reclamation of Char, zerg forces descended on the planet of Angdra, seeking intellegence locked in the Terran Dominion government buildings there. While the main force engaged the terrans, Kerrigan sent a sentient zergling, Broken Horn, into the structure to find the data she sought. The operation was successful, but Broken Horn was captured, and presumed dead by Kerrigan, a loss that left an unexpected hollowness in her.[113]
The Battle of Kaldir[]
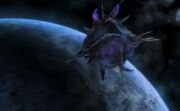
The leviathan descends towards Kaldir
A broodmother named Nafash had taken her brood to the frozen moon of Kaldir,[114] seeking to create her own Swarm.[109] She set up a base of operations, but was forced to retreat into the Ice Valleys due to the protoss presence on the moon.[115]
Kerrigan later arrived seeking Nafash. She was struck by extremely cold weather, which froze her zerg in place but not the local aggressive ursadons. She sought the essence of the local ursadon matriarch, granting her forces the same immunity.
The moon was occupied by protoss forces, which attempted to summon the Golden Armada to destroy her. However, the protoss were too far away to contact Shakuras through the Khala and had to use psi-link spires instead. Kerrigan's forces attacked and destroyed the spires, a task made easier because the protoss were vulnerable to the cold weather.[114] Abathur secured the capture of a protoss civilian, Lasarra.[116]
The protoss Expedition Leader tried to get word to Shakuras via shuttle, but Kerrigan foiled this plan too.[117]

The Daelaam Ark flees Kaldir
The protoss launched the Daelaam Ark, filled with refugees, which would eventually carry the survivors to protoss space. Kerrigan responded by implanting Lasarra with a larva and then allowing the protoss to transport her to the ship. The larva emerged, killing her. The larva collected biomass and eventually transformed into a queen, Niadra. Niadra created a brood and killed every protoss on the ship. However, the ship traveled too far from Kerrigan and Niadra couldn't contact her.[118]
Expedition to Zerus[]
Zeratul had traveled to Zerus earlier in the war, which was the Zerg's original homeworld before they had ventured to the Koprulu Sector. He discovered the primal zerg, free from a dark influence but they continually fought each other over essence. He confronted Kerrigan aboard her leviathan and after weathering her frenzied attack upon him, imparted this knowledge to her.
While Kerrigan had little interest in Zeratul's goals, the primal zerg could give her enough power to take revenge on Mengsk.[119]
Zeratul told Kerrigan that The Ancient One, a powerful primal zerg organism, was the key to Zerus restoring her powers.[120] Zeratul also informed her that xel'naga wished her to return to her old form. Zeratul claimed the protoss would have a hard time forgiving him for these actions. He later departed the world, willing to face the judgment of his people.[121][122]
Kerrigan's forces slaughtered quillgor and brought the meat to the Ancient One to awaken it. Primal zerg from Brakk's Pack massed to stop her from doing so. Brakk's flying primals attacked, prompting Abathur to reconstitute the mutalisk as a form of defense. During the battle, Brakk was killed.
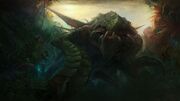
Zurvan became a key source of information for Kerrigan
When the Ancient One awoke, it revealed its name to be Zurvan, and told Kerrigan that her zerg bore the mark of Amon, a fallen xel'naga. Amon had forged most of the zerg into a weapon, but some of the primal zerg remained hidden away and were overlooked.[120] Zurvan would go on to explain that Amon's corruption was the creation of the zerg hivemind.[123][124]
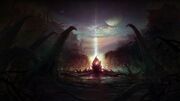
The first spawning pool
Zurvan told Kerrigan she needed to head to the first spawning pool to gain the power she needed to defeat Arcturus Mengsk, calling it a source of power more ancient than himself. However, she would have to make a sacrifice. On the way there, Kerrigan's forces were attacked by primal zerg, but the first attack was fended off.
Kerrigan was wrapped into a chrysalis there to transform, while the remnants of Brakk's Pack, and later Yagdra's Pack, attacked each other and her own forces. The pool could unleash swarms of locusts to attack the primals.[125]

Kerrigan reborn
Kerrigan emerged looking much like her old infested form.[126] Zurvan called her new form "primal" but they both wondered if she was as strong as Amon, or whether Amon was even alive.[124][9] Abathur said her new form was more powerful than the old infested one.[127][9] Kerrigan would go on to discover her form's new abilities.[128][129]
In addition, Kerrigan made a new ally, Dehaka, a primal pack leader. While the other pack leaders feared her, Dehaka believed Kerrigan would lead him to more essence.[9]

Kerrigan slays Zurvan
Zurvan instructed Kerrigan to kill the three remaining hostile pack leaders, Yagdra, Kraith and Slivan, who had sent the majority of their packs against Kerrigan's leviathan. Kerrigan went on a rampage, and with assistance from Dehaka's Pack destroyed all three. When she finished off Slivan, Zurvan announced his betrayal (though this didn't really surprise Kerrigan). Zurvan believed she would provide a boost to his evolution. The two fought, and Kerrigan eventually killed Zurvan and absorbed his essence too. Kerrigan then announced that Zerus was hers, and that she would return to the Koprulu Sector.[130] Despite her capture of the planet, the primal essence was Kerrigan's main objective and Zerus would remain largely uninvolved in the war against Mengsk, until Dehaka's return during the End War.
Return of the Swarm[]

Mengsk threatens Kerrigan by holding Raynor hostage
As Kerrigan returned, broodmother Kilysa asked to rejoin the Swarm. Kilysa's brood had many leviathans. Kerrigan accepted, as long as Kilysa destroyed Mistaff IV, a Dominion world, for her.[129] Kilysa's brood picked up a number of two-way communication devices on Char. These allowed Arcturus Mengsk to threaten Kerrigan. He had only captured rather than killed Jim Raynor, and was holding him hostage to protect himself from Kerrigan.[109]
During Kerrigan's struggles against Dr. Emil Narud, Ryloth requested to rejoin Kerrigan's swarm. Kerrigan allowed this, as long as Ryloth destroyed Jontur II, a Dominion shipbuilding world for her.[131]
As Kerrigan traveled through Dominion space, Naktul represented other broodmothers who wished to rejoin the Swarm.[132]
The following section contains timeline information which isn't necessarily in chronological order.
|
Skygeirr Platform[]
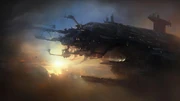
Skygeirr Platform
A broodmother picked up a psionic transmission from Alexei Stukov, describing a Terran Dominion hybrid breeding program and wishing to join Kerrigan in her opposition to Arcturus Mengsk. They made contact at Skygeirr Station.[133] Stukov himself had knowledge of the facility, as he had been experimented upon there.[133][134]
Stukov described this as the second most heavily-defended area in Dominion space. He guided Kerrigan through the first level of the platform. She infested large numbers of Dominion personnel, which responded with a gas that could destroy them. However, the gas did not affect other zerg (or Kerrigan), and could not be produced continually. Kerrigan built up her forces when the gas was being released and advanced when the gas wasn't available. Eventually, her army of infested terrans enabled her to break into the laboratory section.[135]

Kerrigan and Stukov
Before the next assault, Stukov told Kerrigan a bit more about the hybrid program. The platform was a Dominion weapons lab, creating impossible hybrids (as their DNA could not be combined). He said that Mengsk believed he could control the creatures, but doubted that would actually happen.[134][131] As the two infested terran commanders headed further into the lab, Stukov warned Kerrigan about Dr. Emil Narud, an ancient shapeshifter responsible for infesting Stukov. He served Amon, and despite the fallen xel'naga's demise, was still a dangerous foe.[136]
As Kerrigan's forces established themselves, Kerrigan fell under psionic attack by a hybrid dominator. While Kerrigan tried to resist, her forces had to hunt and kill it while dealing with Dominion forces. If the dominator wasn't killed fast enough, Kerrigan would perish. As Kerrigan's zerg traveled through the lab, more dominators awoke and these too had to be dispatched. Narud sometimes contacted Kerrigan to taunt her. Finally Kerrigan finished off the hybrids on that level.[136]
Kerrigan had been able to sense Narud's devotion to Amon, and had been trying to resurrect him for millennia. Stukov believed the entire zerg and protoss conflict had been engineered by Narud somehow.[137] When she and Stukov discussed how Amon could be resurrected, Kerrigan said that hybrids can collect energy, and Stukov said that the energy she lost when she was deinfested could have been collected by Narud.[137][134]
The final level was a xel'naga temple, defended by the Tal'darim, whom Stukov described as Narud's best troops.
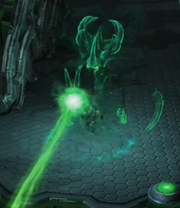
Narud, powered up, uses a null zone
Narud's opening move was to summon a null zone, which if it touched Kerrigan would kill her. Kerrigan fought back with her own powers, but was slowly losing. Narud was getting a boost of power from five xel'naga shrines. Stukov led Kerrigan's zerg into sealing these shrines, slowly depowering Narud, while Narud released hybrids in an attempt to stop Stukov. Eventually Kerrigan was able to overcome Narud, weakening him.[138]
Kerrigan and Narud battled. Finally Kerrigan triumphed, but Narud told her as he died that Amon had already been revived.[139]
Rescuing Raynor[]
The Dominion's holding of Raynor prevented an assault on Korhal.[140][129] Kerrigan intercepted the Hyperion in Dominion space and informed Raynor's Raiders that Raynor was alive. Though shocked by Kerrigan's return to the Swarm, Matt Horner immediately accepted her request for the Raiders aid to rescue Raynor. Crown Prince Valerian Mengsk, accompanying the Raiders, held reservations about trusting Kerrigan.[141]

The Hyperion departs to retrieve Orlan
The Swarm needed the Raiders to extract the location of Raynor's secret prison from the Dominion's deep-encryption network. The Raiders moved to retrieve Colonel Orlan, an expert hacker held by Mira Han[141] at Raynor's request after betraying the Raiders earlier in the war.[67] Han refused to release Orlan; professional integrity demanded she only release the hacker on Raynor's explicit orders. Han surrendered Orlan only after the Raiders inflicted significant losses on Mira's Marauders by attacking an asteroid field operation. Orlan agreed to cooperate to avoid being sent back to Han.[142]
The remaining broods rejoined the Swarm[132] as Orlan worked. Kerrigan impatiently demanded the work be done with undue haste, but Valerian refused to rush the hacker and risk failure. The prince's steadfastness impressed Kerrigan and she agreed to wait.[132][143] Their patience was rewarded. Orlan discovered Raynor was held aboard the Moros, a high security prison ship that jumped to a random set of coordinates every hour.[67]
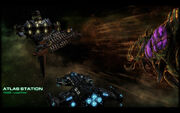
The Hyperion and leviathan close in on the Moros
Kerrigan boarded the ship when it stopped to refuel at Atlas Station; the Raiders did not take part in the boarding action at her insistence. Emperor Arcturus Mengsk anticipated Kerrigan's assault. The ship began to self-destruct as Kerrigan broke into the prison deck. She found Raynor in maximum security.[67] Raynor was angered by her return to the zerg, recalling the atrocities committed by the Queen of Blades. She returned his gun, but he resisted and then rejected the implicit offer to execute her. Instead, Raynor declared their relationship to be over.[144]
The Battle of Korhal[]
- Kerrigan leading the zerg(src)
- Main article: Battle of Korhal

The upcoming invasion is discussed
The path to Korhal was clear. The Swarm received Prince Valerian's tacit approval to invade Korhal and depose the emperor.[145] At the prince's urging, the Swarm's initial landings would be outside of Augustgrad; though this made the invader's task more difficult it would give time to evacuate civilians. For her part, Kerrigan approved of Valerian's imminent ascent to the throne.[143][146]
The arrival of the Swarm over Korhal elicited a strong Dominion response. Emperor Mengsk recalled all Dominion fleets to the defense of the throne world.[146][147] The Kilysa Brood's leviathans were deployed to destroy all ships entering the system.[146][148]

The zerg assault begins
The assault opened with millions of zerg drop pods launched toward the surface. The Dominion's orbital defense network inflicted heavy casualties. The Swarm needed only a fraction of the pods to survive and deliver bile launchers; the launchers would cripple the defense network. However, Dominion ground forces quickly destroyed launchers while they were vulnerable after landing. Kerrigan landed outside Augustgrad and secured a landing zone for the launchers. Once the launchers were emplaced, the broods began landing in strength and entered the city.[149]
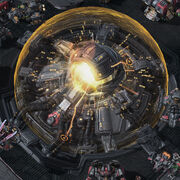
The Psi Destroyer
The Dominion had deployed the Psi Destroyer on an aerial platform over the city. It projected a field that destroyed Swarm zerg by weaponizing the hive mind. The Destroyer's activation inflicted severe casualties on several broods. The Dominion followed up with a counterattack to draw zerg away from the Destroyer. Dehaka's Pack spearheaded the Swarm's response; the primal zerg were without a hive mind and immune to the weapon's effects. Supported by Kerrigan and a hive cluster, the primal zerg crippled then destroyed the Psi Destroyer.[150]
Siege of Korhal Palace[]
- Kerrigan orders the final assault(src)
The Swarm entered the city's Imperial sector[150] and lay siege to the Korhal Palace. The Raynor's Raiders-led civilian evacuation was still in progress, but the Swarm could wait no longer. On Valerian's insistence, Kerrigan agreed to avoid civilian centers where possible. This pledge was silently witnessed by Jim Raynor.[151]

The final target
The Swarm attack on the palace was opposed by elite Dominion formations. The Swarm was unexpectedly reinforced by Raynor's Raiders, with Hyperion setting down and offloading troops. To Kerrigan's surprise, Raynor's rancor toward her since his rescue from the Moros had vanished. He was determined to be in at the kill. As the siege wore on, Mengsk deployed his forces piecemeal in unsuccessful attempts to destroy the Raiders. Finally, the palace gate was breached by the Swarm, and Kerrigan entered in search of Mengsk.[151] The palace's internal security was unable to stop her.[152]
Death of Arcturus Mengsk[]

Kerrigan triumphant
Kerrigan found an unperturbed Mengsk waiting for her in an office. His confidence stemmed from the xel'naga device, now installed in the office's floor, which had previously deinfested her. The emperor used the device to disable her. Mengsk gloated about her impending execution and did not notice Raynor approaching from behind. Raynor, in full armor, easily manhandled Mengsk and destroyed the device's remote control. Raynor withdrew and allowed Kerrigan to exact her revenge. She infused Mengsk with psionic energy, causing him to explode and destroy the office. Raynor and Kerrigan parted on good terms. As their leader had already claimed her vengeance and intended on preparing for the coming End War, the Swarm would immediately begin withdrawing from Augustgrad.[152]
The Aftermath[]
- Kerrigan's declaration(src)

The coming darkness
With her vengeance against Mengsk complete, Kerrigan departed to find and confront Amon. While she was aware of the immense power he wielded, the Swarm was once again hers.[152]
With his father's death, Valerian ascended to the throne, coming to rule over a Dominion in chaos. He began establishing new rules and regulations to weed out corruption in the senate and re-organize its armed forces.[1]
With the absence of the Swarm from the Koprulu sector, the Daelaam now finally had a chance to retake Aiur.[153] Hierarch Artanis declared that with the zerg no longer a threat, Aiur would be reclaimed. Dissenting voices went unheard as the Daelaam began making preparations for the invasion.[154] However, this would coincide with the return of Amon and his subsequent corruption of the Khala, heralding the beginning of the End War.[155]
Misc. Battles[]
The following battles are known to have occurred during the Second Great War, but their timing in relation to the above events is unclear.
Evolution Battles[]
Over the course of the war's second phase, Kerrigan would test zerg strains on various worlds to develop new evolutions. Often these tests involved conflict of some kind. These events included the following:
- On Astrid III, Kerrigan used swarmlings to defend a hive cluster against attacking Dominion forces.[156]
- On Cavir, Kerrigan's zerg fought against feral zerg in order to recover the lurker strain.[161]
- On Marek V, Kerrigan used impalers to repel Prometheus Company from a hive cluster.[161]
- On Brokas Hur, Kerrigen used vipers to support aberrations in destroying a Dominion base.[162]
- At Sigma Centari, Kerrigan used brood lords to destroy the entrenched Dominion forces.[162]
- On Cruxas III, Kerrigan used the carrion strain to destroy Dominion nuclear silos.[163]
References[]
|
