- "Starlight" redirects here. Not to be confused with the Starlight Carnival or the Starfall.
| << Previous Zone | — | Sonic the Hedgehog Star Light Zone |
— | Next Zone >> |
Star Light Zone (スターライトゾーン[1] Sutā Raito Zōn?), alternatively spelled as Starlight Zone,[2] is the fifth Zone of the 16-bit version of Sonic the Hedgehog (1991), and its numerous ports and remasters. It is a construction area in a city located on South Island.
Description[]
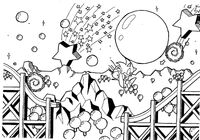
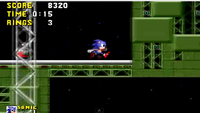
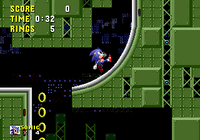
Star Light Zone is set a large construction site. It takes place at night and the highways are littered with street lamps, green girders, red traffic cones, pots with bushes. and flashing red lights. Yellow and black construction barriers surround various areas, and towards the bottom of the Zone are multiple brick flats that are yet to be finished. Otherwise, most of the Zone's roads and structures appear to to be made of a greenish-gray steel. In addition, in the background, one can see green and silver scaffolding and brick buildings, and in the far horizon, one can spot the stars in the black sky and the lights of the metropolis.
Story[]
Star Light Zone was one of the many regions on South Island affected by Dr. Eggman during his quest for the six Chaos Emeralds. There, the doctor kidnapped the local Animals and used some of them to power his Badniks, while leaving the rest of them in huge Capsules. When Sonic the Hedgehog arrived at the Zone however, he saved the Animals and defeated Eggman in his Egg Mobile.
Gameplay[]
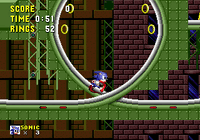
Star Light Zone is a rather speedy Zone that allows the player to build up speed. Its paths consist of many depressions and elevations in the terrain, as well as a large number of egg-shaped loops, many of which lead to sudden drops. Moving platforms also appear in midair, allowing the player to get to higher sections. Usually, these platforms are arranged in groups of four rotating around an empty center. There are also thicker platforms that appear by themselves. Some road sections are also made up of segments which, upon contact with the playable character, will turn into stairs leading downward. Like in Spring Yard Zone, there are also large segments made of individual bricks that move left and right. When utilizing them, the player must be careful not to fall off them.
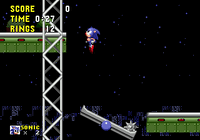
The main gameplay elements in Star Light Zone are horizontally-aligned fans that will activate and push the playable character in the opposite direction from time to time when they approach them from the front. While the player can only walk past these fans when they are turned off, some do not turn off at all, meaning the player cannot walk past them. Other gimmicks in this Zone includes see-saws. These gimmicks always have an iron ball as the counterweight. By jumping onto the free edge of the see-saw, the player will launch its iron ball upward. This iron ball will then land on the opposite side of the see-saw and launch the playable character upward, provided that they are standing on the see-saw's opposite side. Otherwise, the iron ball will damage the playable character when it lands. In addition, this Zone has spiky semi-spheres swinging on chains. The player can jump onto these hemisphere's top half and use them as normal platforms. Other obstacles found in this Zone are cannons on the walls that fire fireballs in straight lines.
Overview[]
Act 1[]
This Act forks into many paths. At the beginning, the player will come across a wall. This can be destroyed by Spin Attacking into it. From there, the player will drop down to a place where they can pick up a maximum of four monitors: three Super Ring and one Invincible. In this recess is also some red Springs to help them get out. Atop the aforementioned wall is a Bomb followed by a yellow Spring. From there, beyond this point is a platform with yellow-flashing lights. This platform will descend and turn into a staircase that the player has to climb. From there, the player will find a One-Up in the corner. To get to this power-up. the player must run a bit to the right, and then move back to the left. Resuming the playthrough, it should be noted that the aforementioned staircase will no longer block the passage the player can through. From here, spin along the road, which slopes downwards. The player will then blitz through a gap without requiring a Spin Jump. From here, the road slopes upwards into a wall with a platform and a Spring on its left. Here, the player must hold left to land on this platform. From here, use a nearby red Spring, which will result in the playable character rolling along the upside-down slant and up in the air, where a right-facing fan will keep the player from moving left.
Next, the player will come across an Uni Uni and a yellow-lit platform above. From here jump and bump into the underside of the yellow lit platform. This will turn the platform into a staircase which leads towards a yellow Spring that will help the player over a wall. From there, the player will come across another Uni Uni, which can be walked under. From there, to the right of the platform on top of the quarter-slant are three swings made of circulating platforms. Here, the player must not step on the stationary platform for too long as fireballs will approach from behind. Once the player has crossed these platforms, they must run up a quarter-slant, which is intercepted by a sideways fan, and then down along another fast road. From here, the player must jump over the first Uni Uni, but not the second one, which is followed by a loop and then a yellow-lit platform and a quarter slant. From there, dodge the Uni Uni approaching from the left. After that, the yellow-lit platform will disintegrate, which will pav the way to the Goal Plate.
Act 2[]
When beginning this Act, the road will slope up to a quarter-slant. From there, the player must use a red Spring at the start if necessary. From there, past the path-blocking fan to the right is an Uni Uni, which must be jumped over. After that, the road slopes down to some loops and past a disintegrating, yellow-lit platform. It then leads through another quarter slant with a temporary fan on the platform. After that, the road splits in two, with the platform above the high road containing two Bombs.
- If the player takes the upper road, they must head up and down a step to reach a yellow Spring that will help them ascend a wall. Atop said wall are then two Uni Uni, which can be dodged by Spin Attacking. From here, the incoming long road will meander up and down towards a yellow-lit platform and a reversed red Spring. After that, a staircase will form, leading up to a cyan-lit platform which will lower itself. By utilizing this platform, the player will arrive at an Uni Uni and another yellow-lit platform. However, the player must watch out for Bombs on the ceiling, especially when they explode. As the player then gets blown away by a fan, they will get sent to an upward step where there are two Seesaws. Utilize the Seesaw to get over the incoming wall. However, the player must watch out for more Bombs on the ceiling. To the right from there is a downward step, followed by a rotating platform swing. From there, up the ledge at the top are five Super Ring monitors. From there, aligned to the right for the player to land on are cyan-lit platform, which leads towards the Goal Plate.
Act 3[]
When beginning the Act, the player will quickly come across an Uni Uni, which must be jumped over. From there, spin down the road which steeply slopes downwards to a quarter-slant. If the player is lucky, they may land on a seesaw in mid-air. Otherwise, to the right in the incoming area is an approaching Uni Uni and a disintegrating platform, followed by some quarter-slants, which can be used to get up to the seesaw. However, the player must watch out for more Uni Unis and fireballs. From there, up and to the left are more seesaws. On the second seesaw in particular, the player can either step in the middle in of said seesaw for a lower, safer ascent, or stand on the end of said seesaw and land on a platform above, where an Invincible monitor can be collected, albeit at the risk of getting hit by Bombs. Furthermore, the platform above can only be reached with the seesaw beyond the left edge (hold down to see it).
Once enough height is gained, the player can head to the right to reach a quarter slant with a blocking fan, followed by a long road with a 3/4 loop that leads to a gap and an upwards slant along a wall with a platform and a Spring on its left. The player must take the Spring and continue to the right after a brief moment in mid-air. From there, a series of loops will lead the player to a cyan-lit platform, which ascends a bit. This will lead to a section with a closely-packed and long line of Bombs on the ceiling. Once up there, the player has to go left and up the quarter-slant. However, watch out for the large half-iron ball attached to a swing. Regardless, the player can jump onto this obstacle to collect up to twelve Rings. Furthermore, parked on the left hand side is a Shield monitor. On the right on the other hand is another moving platform, allowing the player to get over a wall. Once past the aforementioned way, the player will land on a road with a loop that is a quarter slant with a blocking fan at the end. From here, by jumping on the nearby seesaw twice, the player will gain enough altitude to reach a platform above. From there, it is a simple road to the boss. However, after the player touches the local Star Post, there will be no more Rings available beyond this point due to a blocking fan preventing the player from backtracking.
Boss[]
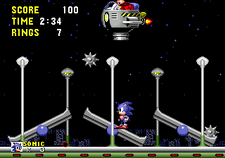
The Egg Spiker, from Sonic the Hedgehog (1991).
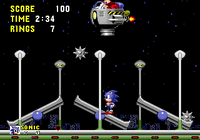
The boss of Star Light Zone is the Egg Spiker, an Egg Mobile with an iron ball cannon attached to it that is being piloted by Dr. Eggman. In addition, its arena is covered in three seesaws, which the Egg Spiker will drop iron balls on from time to time that will explode into fragments that will scatter across the arena. The player can either catapult these iron balls back up into the Egg Spiker or stand on one end of the see-saw and let a falling mine spring the playable character into the air to hit the Egg Spiker. Eight hits will send the mad doc packing.
Other game appearances[]
Sonic Drift[]
In Sonic Drift, Star Light is the fifth track of the game, following Labyrinth and preceding Scrap Brain (as in its original appearance).
Team Sonic Racing[]
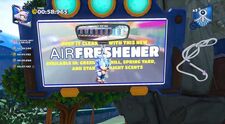
An air freshener ad promoting a Star Light scent, from Team Sonic Racing.
In Team Sonic Racing, an air freshener ad promotes a "Star Light scent", along with Green Hill and Spring Yard ones.
In other media[]
Animation[]
Adventures of Sonic the Hedgehog[]
In the Adventures of Sonic the Hedgehog television series, Star Light Zone is an area of the cosmos located near Mobius.
Books and comics[]
Sonic the Comic[]
In the Sonic the Comic series published by Fleetway Editions, Star Light Zone is a Zone on Mobius.
Sonic X[]
In the Sonic X comic series published by Archie Comics, Sonic, Amy, Knuckles and Rouge travel through Star Light Zone while trapped in a virtual reality world. While there, they managed to find and rescue Tails.
Archie Comics[]

Star Light Zone, from Sonic the Hedgehog #288.
In the Sonic the Hedgehog comic series and its spin-offs published by Archie Comics, Star Light Zone was a Zone formed by Dr. Eggman during Operation: Clean Sweep. Sonic, Sally and Rotor Walrus traveled through the Zone after making it through Labyrinth Zone.
After the Super Genesis Wave re-wrote history, Star Light Zone became a permanent part of Sonic's World with a history virtually identical to its game counterpart.
Trivia[]
- This is the last Zone to feature Giant Rings, meaning that this is also the player's last chance to get the Chaos Emeralds.
- This is the only Zone to feature scenery in the foreground as well as the background.
- The level layout of Star Light Zone Act 1 is replicated in Game Land 7-1 from Sonic Colors.
- A remix of Star Light Zone's music can be heard in the player's name and records menu of Sonic Advance. In Mario & Sonic at the Olympic Games (Nintendo DS version), a remix of the music in this Zone appears. The music for Star Light Zone appears as unlockable music in Sonic Generations.
- An orchestral remix of Star Light Zone's theme could be heard during the opening ceremony of the 2020 Summer Olympics alongside other tracks from famous Japanese video game franchises.[3][4]
- This Zone was originally intended to be the fourth Zone.
Gallery[]
Development images[]
Artwork[]
Screenshots[]
| Gallery |
|---|
Merchandise[]
Music[]
| Name | Artist(s) | Length | Music track |
|---|---|---|---|
| "Star Light Zone" | Masato Nakamura | 2:26 |
Videos[]
See also[]
References[]
- ↑ 1.0 1.1 Sonic the Hedgehog (Sega Mega Drive) Japanese instruction booklet, pg. 34.
- ↑ Sonic the Hedgehog (promotional comic), story one
- ↑ Phillips, Tom (July 23, 2021). Tokyo Olympic Games opening features suite of game music. Eurogamer. Archived from the original on July 23, 2021.
- ↑ McWhertor, Michael (July 23, 2021). Olympics 2021 Opening Ceremony: Tokyo Olympics video game music list. Polygon. Retrieved on October 7, 2023.
