- For other uses, see Spring Yard Zone (disambiguation).
| << Previous Zone | — | Sonic the Hedgehog Spring Yard Zone |
— | Next Zone >> |
Spring Yard Zone (��プリングヤードゾーン[1] Supuringu Yādo Zōn?) is the third Zone in the 16-bit version of Sonic the Hedgehog (1991). It is a city full of pinball obstacles and Springs.
Description[]
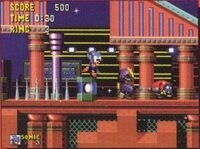
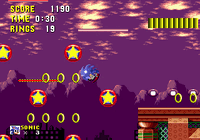
Spring Yard Zone is an amusement park located inside an urban city. In the background, one can spot trees and shrubs. A bit further into the background, one can see the silhouettes of city buildings: Finally, out in the far horizon are purple mountains. The sky above the mountains are similarly a dark purple and the clouds are wispy and light yellow.
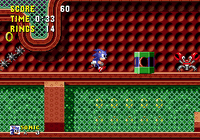
Spring Yard Zone is mainly made of orange-maroon metal connected by green wire fencing. The Zone is also decorated with blue pillars with pink tops and green bases, and rows of sparkling lights in various colors. There are also many visible neon signs. These signs form luminous words, such as "COPE", "CPU", "ON" and "UP", or just be basic lines.
Story[]
Spring Yard Zone was one of the many regions on South Island affected by Dr. Eggman during his quest for the six Chaos Emeralds. There, the doctor kidnapped the local Animals and used some of them to power his Badniks, while leaving the rest of them in huge Capsules. When Sonic the Hedgehog arrived at the Zone however, he saved the Animals and defeated Eggman in the Egg Stinger.
Gameplay[]
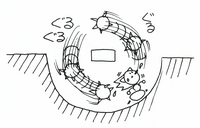
Spring Yard Zone has fairly steep structures, with numerous climbable ledges and steep falls. Significant depressions in the paths appear often, as well as U-shaped slopes. Thankfully, the player can get out of these sections with the aid of vertical and horizontal aligned Spring, which are attached to ground lights and green-brown bricks.
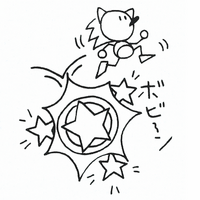
The main characteristic gimmick in this Zone is the bumpers, which the player can bounce. These bumpers come in various formations and award a small amounts of points when bounced on. They often appear in all sorts of depressions in the Zones. As in the zones, many secrets rooms containing Rings and monitors appear here, commonly behind walls.
Fixed platforms appear in some of the depressions in the Spring Yard Zone. Inside these depressions are often iron balls. These obstacles usually appear in pairs and orbit a certain point. They can also be found inside the corridors of the Zone, where they rise and fall. In addition to the larger, green-hued iron balls, there are also rows of smaller iron balls that rotate around a fixed point in narrow aisles. Some corridors can also be opened by pressing nearby switches.
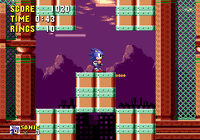
In addition to stationary platforms, there are also two other structures in this Zones that are be both an aid and an obstacle to the player. The first type of structure are big brown and green bricks that usually appear in rows of three. These bricks rise and lower themselves from time to time, with only the sides being synchronized with each other- While the side bricks of these structures move more quickly, the middle brick in these rows move at a different pace so that the player can move across these bricks and get to new sections. However, the player has to be careful not to get crushed by them. There are also columns of several individual blocks that slide left and right to create passages. However, the player has to be careful not to be thrown off them. Similarly, the green and brown platforms in this Zone allows the player to get to the various higher sections.
Overview[]
Act 1[]
The player will start behind a block, with two reachable Rings on top. Down the road from there is a line of three Crabmeats, with two Buzz Bombers swooping in to fire shots at the playable character. In front of the next block is a red Spring, which will take the player up the quarter-slant along the long wall and up into the air. If the player takes off to the left, they may jump onto the moving platform towards a hidden floating piece of land, where there is a Power Sneakers and One-Up monitor, along with seven Rings. From there, past the tunnel on the right is another red Spring, sliding the player along an unusual slant where they will hit some Bumpers at various spots. From there, at the bottom of the pit are two Springs: a yellow one on the left and a red one on the right. The red Spring slants up the wall to the next section, which has three columns of moving blocks that move in alternate directions. Along this path, four Buzz Bombers will attack. When the player reaches the bottom, they will encounter a Roller and land on a steep, downward slope. From there, as soon as the slope straightens out, a reversed yellow spring attached to a block will bounce the playable character back. Be careful here, as this may cause them to hit the aforementioned Roller. Another Roller will soon after appear once the player is back out in the open. Out here, there is a switch in the middle of the floor, along with a floating platform. Pressing this switch will send the platform up after a brief pause, giving the player enough time to jump and stay on this platform. Afterwards, the platform will not return to its original position, regardless of how often the switch is pressed.
- To the right of the switch is a tunnel with a descending slope that is intercepted by moving iron balls. Past this block is a Crabmeat, followed by a rotating spike swing, where the player must jump over the small bump to get past it. From there, beyond the next block is a narrow corridor with two more iron balls. These iron balls move from left to right and may block the pit at times. From here, past the next block is another rotating spike swing, followed by a Star Post parked next to a block with a yellow Spring. From here, the corridor bends upwards, leading to a vertical yellow Spring leading up to the three crusher block columns. Right of the wall here, a Spring can take the player to ten Rings that are free to be collected.
- Ascending up and to the left is a U-bend circulated by two iron balls. Past there, the player will find a Super Ring and a Shield monitor. To the right from here, the player will need to step onto the top square on some diagonal platforms as they swing back and forth. A floating platform here can be used to descend safely down to the road. The road from here bends sharply downwards for a short moment, before landing onto a Bumper if run across. From here, the trail of Rings will lead to turquoise platforms, which can be used to avoid the Crabmeat situated below. From here, the end of this brown road will quarter-slant to an upside-down Spring hanging on a ledge, which can be jumped onto with a well timed Spin Jump and enough momentum. Over said ledge is a Star Post and a block marking the next gap. In-between the gaps here is a moving step platform. Below the gap are also six red Springs with an Invincible monitor sandwiched in-between said Springs. Once the player gets past the Spring, they will be able to advance to the next section where Buzz Bombers will approach the playable character.
- From here, the road slopes down and quarter-slants to an upside-down red Spring. The player must then take the floating platform to ascend, but they must watch out for the Spikes Badniks on top of the ledge. Beyond the short road from here are two U-bends with circulating iron balls. From here, the player will drop down. The six red Springs in the pit can then be used to go up the wall. Be mindful of the two Crabmeats atop this wall however. This is followed by another pit with another six red Springs in it. Notably, in the middle pit is a Super Ring monitor. This pit also has a gap in the bottom right corner, which requires a careful Spin Jump. In addition, the player has to watch out for Spikes Badniks atop this wall that may lurch on the edge of the platform. From here, inside the gap, is a Switch which opens a hidden door with a Spring on the left. The player must then run past the hidden area and reach the Goal Plate, completing the Act. Otherwise, past the platform with the Spikes Badniks is the final block section, where two more Buzz Bombers will swoop in to attack the playable character.
Act 2[]
To the left of the starting point is a red Spring, which will take the player a short distance towards the Bumper and a steep drop. Along the U-bend from here are trails of Rings totaling up to 25. From here, there is a tunnel to the right of this U-bend, splitting the path into two.
- Beyond the U-bend are two Crabmeats on the platform. From here, the road bends up into a quarter slant with an upside-down Spring atop the ledge, and a floating platform beside it. Two Spikes Badniks crawl atop this small ledge. This is followed by two U-bends with circulating iron balls. Here, use the floating platforms for safety. From here, on the next platform are two more Crabmeats guarding a red Spring in the corner. Alternatively, the player can jump across the two floating platforms in this same area to take the diagonal stair platforms. From here, by ascending to the left, the player will find a long trail of Rings and an Invincible monitor. To the right from here are two Crabmeats, followed by a crusher block section (which the player should ignore) and another platform with three Spikes Badniks. Below the gap from here are six red Springs, with three on either side. A hidden area to the right of the pit from here will send the player up the Spring, allowing the player to collect eleven Rings. Afterwards, the player will arrive on a long slide which leads to a pit.
- Along the tunnel are two moving iron balls. From here, the road flattens out, with a block marking the next set of hazards. After the Crabmeat from here is a narrow corridor with a swinging spike rotating around a block. From here, after the next green block, the player will encounter two more moving iron balls along another narrow corridor, which must be jumped onto. Here, two red springs can be used to go up to the crusher block section, marked by a trail of Rings shaped like an arrow. Atop of this section to the right are three Spikes Badniks described in the paragraph above. To the right of the Springs from here is a hidden area. The player will need to time their running and jumping correctly here to avoid getting crushed by the blocks from both below and above. There are also 24 Rings that can be picked up along this trail, which ends at a One-Up monitor in the corner and a red Spring that allows them to reach the Bumper pit.
- The player needs to bounce on some Bumpers from here. At the bottom of the pit that the player is trying to cross are several Rings, a Shield monitor and six yellow Springs. From here, the player will need to reach the floating platform to get out. Hitting the top of the Bumpers here will give the playable character maximum ascent. After the next sprung slant from here, the player will reach another tunnel with some moving iron balls in. Here, the road bends into a flat surface and leads to a Star Post and a block. Past this block is a pit patrolled by another moving spike.
- The red Spring here will take the playable character up a vertical corridor, along a long trail consisting of twelve Rings. At the top, three Crabmeats are situated on the left. On the right on the other hand are three horizontally-stretching platforms. Jump across all the turquoise platforms to reach safety and the last section.
- Past the red Spring is a block. From here, the road dips where a Roller is situated, followed by another Roller that stands before the player before the road descends again. From here, a block will mark the next hazard, which is another U-bend with a fast circulating iron ball.
- A yellow Spring will take the playable character to a Bumper, which leads to a long slide. Spinning down this slide with a well-timed Spin Jump on the ramp will reward the player several Rings. There will be even more Rings if the player stops and takes the yellow Spring. A total of 43 rings can be collected here. From here, the Goal Plate will appear at the end of either road.
- The player needs to bounce on some Bumpers from here. At the bottom of the pit that the player is trying to cross are several Rings, a Shield monitor and six yellow Springs. From here, the player will need to reach the floating platform to get out. Hitting the top of the Bumpers here will give the playable character maximum ascent. After the next sprung slant from here, the player will reach another tunnel with some moving iron balls in. Here, the road bends into a flat surface and leads to a Star Post and a block. Past this block is a pit patrolled by another moving spike.
Act 3[]
At the beginning of the Act, the road meanders down as a long slide. From here, four Buzz Bombers will swoop in to attack. The slide will then drop the player into the pit with Bumpers. Furthermore, six red Springs and a Shield monitor will appear at the bottom of this pit. Past that is a Super Ring monitor and a floating platform, which, due to its height, is impossible to reach without the red Spring. From there, the player can pick up an Invincible from a monitor. Now back on the main route, inside the tunnel are two moving iron balls, followed by a rotating spike swing. From here, ahead of the next block is a Crabmeat, followed by a long vertical corridor with three columns of crusher blocks. Below and to the left from here is a hidden area where ten Rings can be collected. At the upper end of this corridor, the player will find the exit on the left, where two Crabmeats appear. In the left corner of this area is a yellow Spring that allow the player to reach the floating platform. A slow-moving platform may then appear above the player, along with a green block to the right. The player must step on this block from here to be able to reach the slow-moving platform. From here, another floating platform to the right will take the player to the top half of the Act.
- This area has a ramp above it. The player will need to build up some momentum and time their Spin Jump well to overcome the wall here. Atop this wall is then a yellow Spring on a block. In addition, two Buzz Bombers will swoop in to attack. Past the small area from here are a series of diagonal platforms, followed by three floating platforms that allow the player to reach the ledge above.
- The lower route from here is more accessible. Trip the local Switch here to open the door. Inside the tunnel from here, between two green blocks, are two Crabmeats. To the right from there are two circulating iron ball loops, followed by two Crabmeats. Following this section, ascend up the crusher-block columns. The exit from here is on the left where two Crabmeats will be perched atop of it. Fortunately, the floating platforms should help the player reach the ledge above.
- From here, the player will trigger a Star Post. Beyond there is a Bumper and a very long half-loop. Following this, there is a hidden area above the tunnel to the right, where the player can pick up a Power Sneakers and Invincible monitor. Inside this tunnel are also two moving iron balls. Following this, hitting the switch will move a block. The player will then need to get past two pits accompanied by more moving iron balls.
- If the player ignores the red Spring and is quick enough to reach the narrow tunnel before the block stops them, then the player can collect three monitors: two Super Rings and one Shield. Past the green block is then a rotating spike swing.
- Hitting the red Spring from here will launch the player back into the open, triggering a long route. Here, three floating platforms can be used to reach the top of a wall to the ledge, where two Crabmeats sit. This is followed by three U-bends with circulating iron balls, the middle of which has two slow-moving iron balls. From here, descend down the crusher-block columns. The player will then land on a slope, marking the final section before the Zone's boss.
- To the right of the slope is a narrow tunnel with a red Spring, leading to a long trail of Rings along an unusual slant. The player can then bounce off some Bumpers to land on a turquoise floating platform on the right. By following these platforms, the player will be led to a road with a trail of Rings, and a hidden area past the wall to the right, where the player can pick up a One-Up and Shield monitor. Otherwise, there is an Invincible monitor inside the pit on the left of the final Star Post. There are also six red Springs on either side. Beyond this Star Post, the player will need to land on the top step of a series of diagonal stair platforms, with floating platforms blocking the walls to stop the player from reaching a bottomless pit. The player will then land on a line of blocks, marking the Zone's boss arena.
- From here, the player will trigger a Star Post. Beyond there is a Bumper and a very long half-loop. Following this, there is a hidden area above the tunnel to the right, where the player can pick up a Power Sneakers and Invincible monitor. Inside this tunnel are also two moving iron balls. Following this, hitting the switch will move a block. The player will then need to get past two pits accompanied by more moving iron balls.
Boss[]
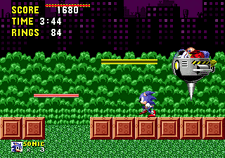
The Egg Stinger, from Sonic the Hedgehog (1991).
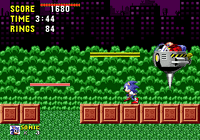
At the end of Spring Yard Zone Act 3, the player will fight the Egg Stinger, a modified Egg Mobile with an extendable spike on the bottom that is being piloted by Dr. Eggman. During this fight, the Egg Stinger will fly over the arena. Every now and then however, it will lower itself down towards a brick fragment of the road. The Egg Stinger will then tear the captured brick up and destroy it. In order to win this boss fight, the player must destroy the Egg Stinger before it deprives the playable character of the ground under their feet. Once Eggman has been hit eight times, Sonic wins.
Other game appearances[]
Sonic Drift[]
In Sonic Drift, Spring Yard is the third track of the game, following Marble and preceding Labyrinth (as in its original appearance).
Team Sonic Racing[]
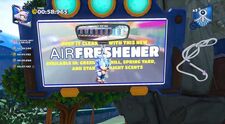
An air freshener ad promoting a Spring Yard scent, from Team Sonic Racing.
In Team Sonic Racing, an air freshener ad promotes a "Spring Yard scent", along with Green Hill and Star Light ones.
In other media[]
Books and comics[]
Sonic X[]

Sonic in the Spring Yard Zone, from Sonic X #11.
In the Sonic X comic series published by Archie Comics, Dr. Eggman trapped Sonic and his friends in a virtual world resembling the original Sonic the Hedgehog game. After making it through the Marble Zone, Sonic and Amy traveled through the Spring Yard Zone, finding Knuckles along the way.
Archie Comics[]
In the Sonic the Hedgehog comic series and its spin-offs published by Archie Comics, the Spring Yard Zone is a location on South Island. Its history is virtually identical to its game counterpart.
Films[]
Paramount[]
In the Sonic the Hedgehog film series produced by paramount Pictures and its spin-offs, Spring Yard Zone is an alien area that was once visited by Tails during his search for Sonic.
Trivia[]
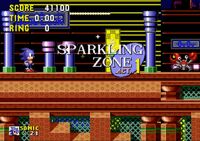
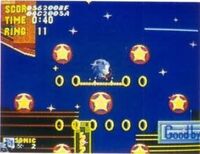
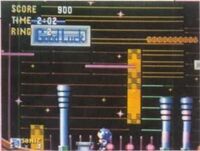
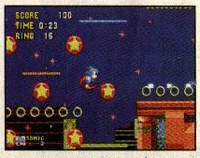
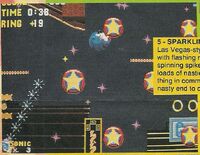
- Spring Yard Zone was supposed to be called Sparkling Zone. It also was originally not an urban city with mountains, but rather a luminous place with buildings at night time with neon signs and shiny stars just like a typical casino level that would feature in later Sonic games.
- Spring Yard Zone was originally intended to be the fifth Zone of the game.
- Spring Yard Zone was the first Zone created and finished.
- This is the earliest Zone by which all six Chaos Emeralds can be obtained in Act 2 of this Zone.
- The layout of Game Land 4-1 from Sonic Colors is based on that of Spring Yard Zone Act 1.
- The music of Spring Yard Zone is similar to the 1987 composition, "Lovin' You 'Sawako'," by famous Japanese jazz guitarist, Toshiki Kadomatsu. The background structure stripped of the solo/foreground instruments/harmony vocals part after solo in the early second minute mark is extremely easy to spot.[2]
- The music is also very similar to the 1988 song by Bobby Brown, "Every Little Step."[3]
Gallery[]
Artwork[]
Screenshots[]
Prototypes[]
| Gallery |
|---|
Final game[]
| Gallery |
|---|
Music[]
| Name | Artist(s) | Length | Music track |
|---|---|---|---|
| "Spring Yard Zone" | Masato Nakamura | 2:10 |
Videos[]
References[]
- ↑ 1.0 1.1 Sonic the Hedgehog (Sega Mega Drive) Japanese instruction booklet, pg. 32.
- ↑ Toshiki Kadomatsu(角松敏生) - Lovin' You 'Sawako'. YouTube. BB59 (12 July 2017).
- ↑ Every Little Step. YouTube. Bobby Brown (31 July 2018).
