| Junkrat | |
|---|---|
| "Plenty of bombs to go around!" | |
Real Name |
Jamison Fawkes |
Birth |
February 29th |
Age |
27 |
Nationality |
|
Occupation |
Anarchist, Thief, Demolitionist, Mercenary, Scavenger |
Base |
Junkertown, Australia (formerly) |
Affiliation |
Junkers (formerly) |
| Chris Parson (English)
Stéphane Ronchewski (French)
| |
Cosmetics |
Cosmetic page |
Quotes |
Quotation page |
Role |
Damage |
Health |
250 |
Character Video
| |


Junkrat is a Damage hero in Overwatch. He is one of the 21 heroes included in the game's release on 24 May 2016.
Overview
Junkrat's area-denying armaments include a Frag Launcher that lobs bouncing grenades, Concussion Mines that send enemies flying, and Steel Traps that stop foes dead in their tracks.
Abilities


-12.5% received (tanks)

- The grenades will be dropped at wherever Junkrat was killed, and do not inherit his momentum. Being killed while flying through the air will drop the grenades straight down to the ground.
- The grenades can be negated by D.Va's
 Defense Matrix, Orisa's
  Javelin Spin, and Sigma's
  Kinetic Grasp, and they can be deflected by Genji's
  Deflect before exploding.
  Amplification Matrix affects all damage dealt, if the projectile passes through it. Splash damage alone going through is not amplified.
- The grenades can penetrate barriers, but their explosions cannot.
80 - 10 (splash, enemy)
recovery stops while using melee
4.7 m/s (max, self)
- Damage per second: 180 while firing (124.13 overall w/reload)
- The grenades explode after:
- 2 times bouncing off the ground.
- Bouncing off the surroundings and landing on the ground afterwards.
- Getting contact with an enemy hitbox.
- 4.5 seconds of flight without hitting solid objects.
- Before a nade detonates, an audio cue is played and can be heard if nearby. The nade then freezes in place for 0,3 second pre-detonation, during which the explosion can't be stopped by any means. If the nade is shot bouncing on the ground, or just bounce off a wall/an object, it'll explode if it bounces a second time less than 1,5 second after the first bounce. Nades can bounce on walls and objects several times without exploding.
- The projectile size is decreased after its second bounce.
- The velocity of the projectile is slightly reduced after each bounce.
- The projectile can be destroyed while in air by Defense Matrix, Kinetic Grasp and Javelin Spin and reflected by Deflect, but the splash is unaffected.
- Amplification Matrix affects all damage dealt, if the projectile passes through it. Splash damage alone going through is not amplified.

2 charges
- The mine sticks to any terrain and bounces off of players and objects other than
 Petal Platform.
 - The mine bounces once upon hitting a barrier for the first time, but can then pass through it. The explosion is blocked by barriers.
- The mine can be destroyed by enemy players, causing no explosion.
- The projectile can be destroyed by Defense Matrix, Kinetic Grasp and Javelin Spin and reflected by Deflect before it attaches to a surface. The explosion is unaffected.
- Amplification Matrix affects all damage dealt, if the projectile passes through it. Explosion damage alone going through is not amplified.
- Upon cast time ends, you can change the future flight path.
- If the ability is interrupted before the mine begins to exist, the cooldown will not start and the charge will not be spent.
- If Junkrat throws another mine while one is already deployed the first mine will instantly and silently disappear.
- The mine does not deal self-damage, but still applies the knockback, making it usable as a mobility tool.
- Junkrat and enemies caught in the blast are knocked up 45° vertically, regardless of their position relative to the mine.
- Horizontal knockback is away from the center of the mine.
- If Junkrat is hacked, the remote will be disabled.

.75 second arming time
2.5 seconds (root)
- Similarly to his
 Concussion Mine, deploying a second Steel Trap will remove the first.
 - The trap sticks to ground and objects with a walkable surface, and bounces off of players, walls and other object surfaces.
- The trap bounces once upon hitting a barrier for the first time, but can then fall through it.
- An unactivated trap can be destroyed by enemy players.
- Junkrat can see the trap's location through walls.
- The player receives a cue when an enemy triggers or destroys the trap.
- Being in phased out state or affected by Zarya's
 Particle/Protective Barrier will prevent a trap from triggering, but will not free a player that is already trapped.
 - If a trapped player is moved sufficiently far from it, e.g. by using Symmetra's
 Teleporter or being lifted by Petal Platform or
  Ice Wall, the trap will break and the target will be freed. However, if the trap was placed on the object, the player will remain trapped even if lifted, as the trap can move with it.

2 meter radius (falloff start)
12 m/s (RIP-Tire)
- After the initial cast and gaining control of RIP-Tire, the ability will continue regardless of any crowd control or if Junkrat dies.
- RIP-Tire can jump and climb walls.
- Instantly restores Frag Launcher ammo
- It takes 0.9 seconds to regain control of Junkrat.
- The explosion is blocked by barriers, but the tire itself can travel through them.
Perks
Minor Perks
A Minor Perk can be chosen at level 2.
Major perks
A Major Perk can be chosen at level 3.
Hero-specific options
| Setting name | Options | Description |
|---|---|---|
| RIP-Tire automatically climb walls | Off (default) | While facing a wall, hold Jump to wall climb. |
| On | Face a wall to wall climb. |
Strategy
Junkrat is a hero that excels at defending an area through the use of traps and indirect fire; he is valued for his damage output and area denial capabilities. He has strong mobility thanks to ![]() Concussion Mine and deals high (if inaccurate) damage with his
Concussion Mine and deals high (if inaccurate) damage with his ![]() Frag Launcher. He also can push objectives as well, and he can still change the battle after death thanks to
Frag Launcher. He also can push objectives as well, and he can still change the battle after death thanks to ![]() Total Mayhem. The explosive and arcing projectile nature of his weapon, however, makes it challenging for him to fight at close range with most heroes.
Total Mayhem. The explosive and arcing projectile nature of his weapon, however, makes it challenging for him to fight at close range with most heroes.
Weapons & Abilities
- If you're about to die and confronting an enemy at close range, do your best to stay near to them, as Total Mayhem can net you a kill even after death.
- If you see a friendly Zarya use
 Graviton Surge, run into the Surge only as a last resort. you might just get a few people.
 - Do not worry about getting too close to your own bombs, as they cannot hurt you.
- When Junkrat dies, his bombs can still be deflected by Genji and or destroyed by D.Va's Defense Matrix.
- While these grenades deal high damage, they are hard to aim properly, especially at small targets or targets that are above Junkrat. They are best used to provide indirect fire, flooding an area with grenades in order to make traveling through it as dangerous as possible for Junkrat's opponents.
- The explosion from these grenades won't damage Junkrat due to Total Mayhem's passive.
- The fact that the grenades arc make it difficult to attack characters such as Pharah, as she can move in the air and dodge your grenades easily.
- Since Junkrat takes no damage from his own Concussion Mine, he can use its explosion to blow himself into the air to travel faster or reach higher ground.
- Try to lead the mine and predict the enemy movement as the mine has damage-falloff when the target isn't near the center of the explosion.
- The knockback effect can also be used to knock enemies into pits, or to knock them away from Junkrat in order to give him some distance.
- If you can't reach flying enemies like Pharah, using Concussion Mines would be recommended over the inaccuracy of Frag Launcher.
- The Concussion Mines can be used immediately at an enemy in up close combat, dealing way more damage along with Frag Launcher.
- The mine is ineffective for surprises, since it's flashing light is easily noticeable even at further distances.
- Try to plant this trap in shadowed areas or around corners where enemies will be less likely to spot them before stepping on them. In a pinch, you can toss this trap on the ground at close range in the hopes of an enemy accidentally stepping on it.
- The trap is less likely to be noticed outside of two flashing rings of blue light located on each end of the trap rod, and even more so during intense combats.
- Junkrat's Ultimate ability. When activated, Junkrat temporarily gains control of a fast-moving, explosive tire. His view switches to the RIP-Tire, which can be steered with your normal movement controls, and can climb walls by holding the jump button while next to them (much like Genji or Hanzo's passives). Pressing either your primary or secondary fire will cause the tire to detonate, dealing heavy damage in a decent area, or exploding automatically once the tire's duration runs out. The RIP-Tire has a Health pool that, if depleted, will cause the tire to disappear with no explosion.
- If Junkrat is killed while steering the RIP-Tire, he will still retain control of it until the tire either explodes or is destroyed.
- Make sure to steer the RIP-Tire left and right so enemy players will have a harder time trying to destroy it.
General Strategies
- While Junkrat can deal tremendous damage with his
 Frag Launcher, it takes a considerable amount of skill and practice to accurately land grenades. In general, it's best to launch your grenades at an area, rather than at a specific target, as Junkrat's biggest strength comes from his ability to make any area hazardous to travel through. If you're forced to fight an opponent head on, try to lead your Frag Launcher shots so that your enemy will run into them.
 - Placing your
 Steel Trap and Concussion Mine well are key when playing Junkrat. Your Steel Trap should be placed in spots without much room to maneuver in order to force enemies to either destroy the trap or step on it. This can be used to protect your flank by telling you when an enemy is coming through the area where you dropped your trap. Place your Concussion Mine above a doorway or next to a wall that you know your opponents will be traveling by. The explosion can be used to both damage and separate the enemy team, allowing your team to pick off whoever gets blown towards you.
 - RIP-Tire's loud engines can be heard clearly by your opponents, giving them a general idea of where it is. Avoid driving it straight at your enemies, as they'll most likely be able to destroy it before it gets to them, wasting your ultimate. Instead, use side routes to get the tire behind your enemies, either by driving the tire through these routes, or taking the routes yourself and then unleashing the tire once you're behind them. Keep in mind that Junkrat is completely helpless while controlling the tire and easily killed, so try to activate RIP-Tire from a safe position.
- Junkrat's Concussion Mine will stick to any surface, and can be used to surprise the enemy.
- A combination of the Steel Trap and Concussion Mine can instantly kill 200 HP characters. This strategy works best when placing it over a health pack or at a choke point.
- Junkrat excels at destroying stationary targets from a distance.
- Professionals use RIP-Tire to take out Supports, this is a very undermined tactic, as a team without any healing will be greatly disadvantaged.
- Junkrat's sit emote can be used to hide in a bush or cart, staying hidden while contesting the payload.
Match-Ups and Team Synergy
Tank
| Hero | Match-Up | Team Synergy |
|---|---|---|
| D.Va's massive health and armor supply can make it difficult for your Frag Launcher to chew through, and Defense Matrix can negate fired grenades or even Total Mayhem's bombs. Her mobility with Boosters can also make her hard to hit. However, D.Va's Mech is a large target that is easy to land direct hits on in both close to mid range skirmishes. If you take advantage of Defense Matrix's limited use and reload while it's active, you may be able to catch her in its down period and spam grenades on her in that brief window of opportunity. Overall, though, the matchup can be very difficult, and unless you catch D.Va on cooldown and/or with low health, you should try to stick with your teammates and gang up on her instead of letting her fight you one on one, as is preferred for her. Once D.Va is out of her Mech, catching her with Steel Trap can lead to a quick finishing blow. | (To be added) | |
| Steel Trap is your best friend against shieldless, mobile tanks - and Doomfist is one of the perfect examples of this. Placing a Steel Trap where you think a Doomfist might use his Rocket Punch to traverse through is an easy way to kill him, and if your whole team is present - can be melted even through his Power Block. Note that similarly in the Zarya matchup, you should not thoughtlessly spam a Doomfist during the pre-fight, as even one grenade is enough to charge his Power Block. Instead, throw some spam at the Doomfist's team as a bluff, then, when he uses his Power Block, throw a Concussion Mine behind him and detonate it to bounce him up in the air, forcing him to use a mobility cooldown to get out of sight of your team. Using a Concussion Mine to bounce a Doomfist about to punch you or one of your teammates is also a rarer, but no less viable way to deny him value. | (To be added) | |
| If a Hazard is giving your team a rough time, consider hanging back (but not too much) with them to throw a couple of grenades at Hazard. He will want to avoid prolonged engagements with you, so make sure to manage your health and position when he confronts you. Your Frag Launcher forces him to spend much more of his time using his valuable Spike Guard rather than shooting your team, and even moreso if you shoot him in the back, making you excellent at denying him from diving your team. | (To be added) | |
| Junker Queen's lack of a shield or effective mitigation against your grenades makes her easy to spam at, as long as you are not within her effective range. Always make sure to punish her if she becomes too aggressive, keep your distance and have a Concussion Mine ready if she decides to use Commanding Shout or Jagged Knife to close the distance with you. | (To be added) | |
| Though Mauga similarly has no shield or good mitigation like Junker Queen against you, you will still want to be careful as he can still do a fair bit of damage to you at mid-range. Keep in mind that in all times, exposing yourself in the open to a Mauga is the worst possible thing you can do, as he will feed off of your health using his Cardiac Overdrive or run you over with Overrun, so always find natural cover against him. | (To be added) | |
| Your Frag Launcher's damage and the immobilization of Steel Trap, combined with Orisa's large hitbox easily forces abilities out of her, such as her Javelin Spin and Fortify, which can make her engagements more difficult. Therefore, pressuring her during the early stages of the fight can be beneficial and helpful for your team. However, this should not mean you should get careless when fighting her and stand out in the open while spamming, as her Energy Javelin can kill you faster than you can. Play in positions where the Orisa cannot easily reach you, and abuse the fact that she has little mobility and verticality by taking multiple angles on her, where she will either be forced to use her cooldowns early or divert her attention towards you instead of your Tank. | (To be added) | |
| Without his Nemesis form, Ramattra is food for you and gets easily shredded by the damage of your grenades, and your Concussion Mine can also go over his Void Barrier to be detonated on him or his team. The key in this matchup is to predict when Ramattra will use Nemesis form, as he is the most threatening to you in it, and it will greatly improve your odds of surviving once he does. Always make sure to have an escape route ready if you know he has Ravenous Vortex, and place a Steel Trap down as you retreat when he attempts to chase you. | (To be added) | |
| While Reinhardt's Barrier Field is capable of withstand several grenades, its large area of coverage makes it a prime target for you to lob grenades at, and it's only a matter of time until you destroy it. Reinhardt can do little against your grenade spam other than block it; once his barrier is destroyed, with his slow speed and short attack range, his only options are to run or get hit by a volley of direct hits. Be careful about getting too close, though, as an accurate Charge will result in your death. If you're focusing on a Reinhardt at close range, a quick toss of a Steel Trap can snag him up, making him even easier to finish off. A quick Steel Trap can even stop Charge, so be ready to toss it should he come your way. While Concussion Mine can get behind his barrier for some solid damage, the knockback against Reinhardt will be minimal, but any teammates he's protecting will be knocked away. Reinhardt is one of your top priorities to kill with RIP-Tire, so try to get as close to him as possible with it without being blocked by his barrier. Be careful of his Fire Strike, as it can destroy RIP-Tire in one hit. | (To be added) | |
| Roadhog's large hitbox allows and lack of barrier makes him an easy target to lob grenades at. As long as you stay behind cover or a barrier, you can keep yourself safe from Roadhog's Chain Hook. Your traps aren't as effective on Roadhog, since Take a Breather can help Roadhog reduce oncoming damage even when under fire. | (To be added) | |
| Sigma's Experimental Barrier will be destroyed with only a few hits from your Frag Launcher, however his Kinetic Grasp will be his strongest tool against you, as your spam damage is easy for him to absorb, granting him a large amount of bonus shield health, allowing him to withstand more of your fire. Try to disorient him and knock him out of position with Concussion Mines, but avoid using them to jump directly into him, as your predictable movement path makes it easy for him to stun you with his Accretion. You can also use Concussion Mines to jump out of the radius of his Gravitic Flux before he finishes casting it. Despite Sigma's floating character model, he will still be affected by Steel Trap if he passes over it. | (To be added) | |
| Steel Trap is an excellent tool to counter Wrecking Ball. He will be travelling at high speeds and might not check his path, so place your Steel Trap in an area where you suspect he will attempt to flank from. If he gets trapped, immediately start firing at him, and try and get your teammates to shoot him too. | (To be added) | |
| While Winston's damage output his minimal, the consistent fire of his Tesla Cannon can inadvertently destroy your traps. If Winston decides you are his prime target, his Jump Pack can help him advance on you, so be ready to launch a Concussion Mine to widen the distance between the two of you. His Barrier Projector will only be able to block a few grenades before it's destroyed, but it may be enough for him to deal substantial damage to you before you manage to kill him. If his barrier is down and you have some distance between you, feel free to spam away, as his large hitboxes will make him an easy target to quickly kill. When Winston activates Primal Rage, a smart Steel Trap can freeze him in place, forcing him to waste a good amount of his Ultimate's duration while also rendering him an easy target. | (To be added) | |
Don't spam grenades willy nilly when Zarya is around, as she can easily gain a large amount of Energy from absorbing your grenades. She can just walk into oncoming fire with her active barrier or let her teammates be hit by grenades while under her Projected Barrier's protection. Zarya's secondary attack can hit you while you are on higher ground, and at high enough energy she can deal significant damage this way.
As long as you keep your distance from her, you should be able to stay out of range of her primary fire. If you do end up in a close-quarters situation, try to trip her up with Steel Trap and Concussion Mine. If these fail and you're forced into a close range fight, you're most likely going to end up run down. If you stop her movement with Steel Trap, be wary before spamming grenades; if she puts her barrier up, stop attacking, back off, reload, and be ready to attack again once the barrier goes down. If you catch her at very low health, though, it is sometimes worth it to brute force your way through her barrier; it may temporarily empower her, but if you can kill her before she can kill you, that won't mean anything. |
(To be added) |
Damage
| Hero | Match-Up | Team Synergy |
|---|---|---|
| Pressuring hitscans out of positions they want to be in is the best thing you can do against them, especially if they rely on their longer range, and your best way of doing that as a Junkrat is to deny that space in advance or at least throw some close to mid range spam at it.Due to Ashe being a sniper, she’s an effective counter to you. She’ll usually stay out of your effective range and shoot at you freely, so do try and close the distance with her, but don't do it by jumping around in the open with your Concussion Mines, for she will shoot you down. Instead, try and predict where the Ashe wants to position, take the necessary (and if possible, the safest) route to get there, and then deny her that space, or at least make her fight you for it. | (To be added) | |
| Bastion is usually an easy target for you to spam at due to his large hitbox and slow mobility. Still, you should be cautious around his Configuration and A-36 Tactical Grenade, so play near cover accordingly. Don't attempt to fight Bastion from greater distances, as your grenades will be incapable of reaching him while his bullets will have no problem reaching you. | (To be added) | |
| When you are attempting to go on flanks, it is not uncommon to meet a Cassidy contesting you. The Cassidy vs Junkrat matchup largely depends on the element of surprise, as whoever jumps who first is very likely to win.Take advantage of the fact that you outdamage him at close range with your primary fire and Concussion Mines, but also be careful that he beats you in mid range. Otherwise, if he is sitting with his team, lobbing grenades at him will suffice. If he is using Deadeye, NEVER use a concussion mine against him unless you are certain it will finish him off, as it will bounce him up and potentially kill your teammates. | (To be added) | |
| You should put flying heroes at the bottom of your priority list, as you cannot effectively or consistently deal with any of them with your kit without unrealistic amounts of mechanical skill. Play inside tight, enclosed spaces as much as you can against them to avoid being out-poked and finished off, and instead fish for opportunities on other members of the enemy team. You should still try and catch them out whenever possible if they are distracted and vulnerable, however. Echo will usually try to assassinate you by sneaking on you in the air with her Glide, then send her Sticky Bombs and Focusing Beam on you to kill you quickly. Always make sure to look up and behind you every now and then to prevent this, and possibly turn the tables on her instead. | (To be added) | |
| Concussion Mine is Genji's worst enemy - as it stops him from doing everything he wants to do. It is easy damage and displacement on him that is difficult to dodge or Deflect, which forces him to retreat quickly. This is no exception with Dragonblade, as simply bouncing him will deny him a kill on one of your teammates, as he will have already used a dash to close the distance once, and render his ultimate useless. Your Rip-Tire is also an effective tool at preventing Genjis from pushing in with their ultimate, as keeping it near you or your team will make Genji think twice before dashing, even if he is under Nano-Boost. Aside from this, in a 1v1 scenario, Genjis are very likely to use their Deflect against you in point-blank range, so be careful when you are dueling him and keep track of it. When he does use his Deflect, simply throw and detonate a Concussion Mine over his head and he will be an easy kill by then. | (To be added) | |
| Do not try to spam a Hanzo in large, open areas, as he will always beat you in those scenarios. Flanking and surprising him by popping out of rooms, doorways or tunnels is an effective way of dealing with Hanzo, whether you kill or make him retreat. Be wary that his Sonic Arrow can be used to reveal your location during flanks, so try switching up your positions to throw him off. | (To be added) | |
| In Junkrat mirror-matches, you should be denying the other Junkrat's RIP-Tire as much as possible by spamming tight areas where you predict the tire might come from. Otherwise, this matchup is also another one dependent on who attacks who first. Switch up your positions as much as you can to ensure you can have the upper hand. | (To be added) | |
| Your high burst damage makes you pose as one of the greater threats against Mei as it can easily force Cryo-Freeze and Ice Wall out of her. Make sure to use this to your advantage, especially if a member of your team has been walled off by quickly breaking it. Another technique to secure a free kill on her, is while Mei is using Cryo-Freeze, putting a Steel Trap right at the edges of her block will trap her once she exits. Do also make sure that you have a Concussion Mine ready to jump out of her Blizzard. | (To be added) | |
| You should put flying heroes at the bottom of your priority list, as you cannot effectively or consistently deal with any of them with your kit without unrealistic amounts of mechanical skill. Play inside tight, enclosed spaces as much as you can against them to avoid being out-poked and finished off, and instead fish for opportunities on other members of the enemy team. You should still try and catch them out whenever possible if they are distracted and vulnerable, however. Unlike Echo, Pharahs tend to stay more far back from you, unless they are directly going to use Barrage on you, in which case you should be prepared to both take cover, and use the mine-combo to instantly kill her while she is immobile. Always be suspicious if a Pharah is missing or going near you, and have a Concussion Mine ready for it. | (To be added) | |
| As long as you are not caught off-guard, Reaper is easily harassed by your Frag Launcher and Concussion Mines forcing him to use Wraith early, and when caught by a Steel Trap - becomes an easy kill as he cannot use Wraith to escape. Be wary and track his ultimate, as Death Blossom can shred through you if you're unprepared. | (To be added) | |
| Pressuring hitscans out of positions they want to be in is the best thing you can do against them, especially if they rely on their longer range, and your best way of doing that as a Junkrat is to deny that space in advance or at least throw some close to mid range spam at it. Soldier outranges you in open areas, but if you are able to gain distance on him, he has no choice but to use Helix Rockets or run, so always get on him through flanks and tunnels as much as you can. He will always want to be on elevated ground, so position ahead of time to catch him or throw spam at him in flanks. His Tactical Visor hard counters your RIP-Tire, so make sure you are certain their Soldier does not have his ultimate, or that the tire can reach the Soldier before he can mow it down when you use it. | (To be added) | |
| Pressuring hitscans out of positions they want to be in is the best thing you can do against them, especially if they rely on their longer range, and your best way of doing that as a Junkrat is to deny that space in advance or at least throw some close to mid range spam at it. Sojourn's Disruptor Shot can flush you out of spots and flanks that you would normally want to be in, which can make engaging her a bit more difficult compared to dealing with other hitscans. You do not need to necessarily kill the Sojourn in this matchup, but force her to retreat from a good position, or even better, make her use Power Slide, both of which can help your team pick her off. | (To be added) | |
| Sombra will always try to go for a pick on you if you are isolated or out in the open, so it's best to play in spaces where you can receive support from your team if you know she is currently being active. Otherwise, she poses little to no threat to you and a mine combo can shut her down from trying anything else. Hiding in enclosed spaces can also help against her EMP. | (To be added) | |
| If Symmetra's places her Sentry Turrets close to the ground, splash damage from rogue grenades will often be sufficient to destroy them. An accurate Concussion Mine can also help wipe Sentry Turrets out, ensuring safe passage for you and your team. Her Teleporter can be easily destroyed if you spot it. While you should be able to quickly kill Symmetra in a close range fight, be careful of her laser powering up, as once it's fully charged, her damage will exceed yours. Photon Barrier will be able to shrug off all of your grenades during its duration, so try to keep a fight on one side of the barrier, or retreat to your team if necessary. | (To be added) | |
| Although your weapon suffers from a long arc when shooting anything in long range, Torbjörn's Turret is stationary, making your low-accuracy shots a non-issue. As long as you can get in a position where you can safely fire at it from behind cover, you can quickly take it out in a few shots, so long as it's not being protected by a barrier. If Torbjörn is near his Turret, you can get him caught in the splash damage of your grenades. If Torbjörn activates Molten Core, try to use Concussion Mine to make a hasty retreat so you aren't splashed with magma. | (To be added) | |
| Tracer will always try to heckle you at ranges where your grenades cannot quite reach her, and eventually swoop in for the kill on you with her Blink. To mitigate this issue - play inside closed spaces where the Tracer has less room to dodge in, or jump up to high ground, taking advantage of her lack of verticality. If neither of those are possible, play near areas where you will receive help from your supports. One grenade or concussion mine is enough to scare a Tracer into using Recall or her Blinks to run away, though she may play mind games with you to throw your aim off, so it's important to keep calm and predict her movements based on your previous engagements with her. | (To be added) | |
| With both of their abilities, Venture has the upper hand against you in a 1v1 - even in an enclosed space, however, if you dodge their initial damage from the Burrow with a Concussion Mine jump, they will be forced to use Drill Dash to reach you, or disengage with you - both of these situations playing into your favor if your team is nearby. Treat Venture as a slightly more deadly Tracer to you, but with less options to get themselves out. | (To be added) | |
| Pressuring hitscans out of positions they want to be in is the best thing you can do against them, especially if they rely on their longer range, and your best way of doing that as a Junkrat is to deny that space in advance or at least throw some close to mid range spam at it. By her nature, Widowmaker hard counters your whole kit, especially on maps that favor long sightlines. There is not much you can do in most situations against Widowmaker, though it is still worth a try to flank her by setting up an ambush in positions she wants to be in. Be wary of her Infra-Sight as it can remove your element of surprise, so try not to isolate yourself from your team too much when you know it is up. If you are going to RIP-Tire against a Widowmaker, always make sure it is a close-range tire that gives the Widowmaker as little time to react to increase your chances of getting a kill with it. | (To be added) |
Support
| Hero | Match-Up | Team Synergy
|
|---|---|---|
Ana |
As a sniper, Ana is perfectly capable of heckling you from a distance. However, with her lack of mobility and headshots, she won't be quite as dangerous as the likes of Widowmaker or Hanzo. If you can catch her unaware from above, some grenade spam or traps can quickly kill her before she can notice you. If you catch her at close range, you have higher firepower than her, but you still need to be wary of both her Sleep Dart and Biotic Grenade. She has few means of destroying or escaping RIP-Tire, making her a prime target for it and any teammates near her. | (To be added) |
Baptiste |
Wait until Baptiste has used his Immortality Field before using RIP-Tire. However, even if he does deny kills, anyone caught by the blast will be momentarily left with very low health, and will be easy pickings for your team if they do not get quickly healed up. | (To be added) |
Brigitte |
Unless you're caught by surprise or you're at low health, Brigitte shouldn't cause much trouble, Both of you need to be in close range to deal effective damage, and while she has her whip shot, it isn't enough to kill you directly if you are above half health, If you see her approaching directly at you, place a steel trap directly infront of you to try to trap her should she use shield bash, in which case she's easy enough to throw grenades at, If the fight is turning against your favor place a concussion mine between you two to create distance, to which she has no means to catch up to you unless she's using Rally or try to use whip shot as a last resort to finish you off. | (To be added) |
Lúcio |
As Lúcio commonly stays with his team, targeting him will usually mean targeting several heroes at the same time. He excels at slowly recovering his team from damage over time, which makes your burst damage ideal for quickly killing him. If you catch him in your Steel Trap (which, due to his constant movement, can easily happen), you can quickly blow him away. If Lúcio attempts to knock you off a cliff with Soundwave, a quick Concussion Mine may be able to save you. | (To be added) |
Mercy |
Mercy can't heal her teammates at a high enough rate to withstand consecutive grenades. She may keep her teammate alive long enough to fight back against you, but in a group fight her healing will mean very little. Trapping her with Steel Trap can keep her from escaping with Guardian Angel. In some situations, Mercy might stay mid-air to support her teammate, which will make her a harder target to hit with your grenades. | (To be added) |
Moira |
In a 1v1 scenario at close range, you should come on top, she can’t heal herself quick enough to survive your grenades, however Moira will usually play mid range to avoid your grenades, and her primary fire easily allows her to play at a distance, should you try to close the distance with a concussion mine, she can just fade away, during coalescence, using your Rip-Tire on her is a good trade off, don’t worry about her fading since she can’t do so during her ultimate. | (To be added) |
Zenyatta |
Zenyatta's Orb of Discord will allow him to keep tab or your position from behind cover while it is attached to you. This will help him and his team force you out of cover, so try to hide long enough for the Orb to be forced off of you. Zenyatta has the upper hand at long distances with his powerful orbs. However, at close to mid-range scenarios when you can ambush Zenyatta, his low mobility and health makes him easy to kill. Your trap combo will instantly kill Zenyatta. Transcendence can outheal the damage from your grenades, but not the burst damage from RIP-Tire; don't be shy about using RIP-Tire during Transcendence, as while Zenyatta will survive due to his invincibility, without his teammates to protect him he's a prime target. | (To be added) |
Story
Junkrat is an explosives-obsessed freak who lives to cause chaos and destruction.[1] He is on a number of most-wanted lists.[2] He has a low opinion of omnics and those who believe they can be trusted. He likewise has a low opinion of "suits" (corporate businesspersons),[3] and Wastelanders, at least prior to the coronation of Odessa Stone.[4]
Junkrat's hair carries a burning smell with it. He lost his right leg to an accident with a home-made explosive. He dislikes shrimp.[2]
Background
| “ | Well then, Junkrat's the name, and junkratting's the...wait...junk... junk...junkrat-junk...Ugh, never mind! Joke cancelled! Move along! Blah! | „ |
| ~ Junkrat |

Junkrat's mugshot
The attack on the Australian omnium's fusion core forever altered the landscape of the Outback. After the detonation, the area was transformed into a harsh, irradiated wasteland, littered with debris and the twisted fragments of the ruined facility, and unlivable to most.
But there were some who survived. Calling themselves the Junkers, they scavenged the husk of the omnium and formed a lawless, cutthroat society in its shadow. Junkrat was one of them, eking out a living reclaiming metal and components from the ruins. Like many others, he was affected by the lingering radiation. This touch of madness made him ideal for handling dangerous explosives, a love which he turned into an obsession.[1]
The Wastelander
| “ | Yeah! Junker Queen! | „ |
| ~ Junkrat after the end of the fight |

Junkrat cheers for Stone after her victory
Junkrat was present for the Reckoning that saw Odessa Stone challenge King Mason Howl. Stone was a Wastelander, and Junkrat booed her along with much of the crowd. Made worse was the fact that with the activation of the Scrapyard's magnet, he lost his bucket of popcorn. Yet despite the odds, Stone succeeded in defeating Howl. In the aftermath of the battle, with a silent, shocked audience, Junkrat let out a cheer, yelling "Junker Queen!" The Junkers erupted in applause, and as Stone became queen of Junkertown, the nickname stuck.[4]
Wrecking Ball
Junkrat became a fan of Wrecking Ball; a mysterious mech who won numerous matches within the Scrapyard. His favorite match was where Wrecking Ball defeated Three-Arm Luke.[5]
Wasted Land
| “ | Gentlemen, gentlemen, this is all a misunderstanding. If I knew where a priceless treasure was buried, I'd be thrilled to tell the Queen all about it. But I don't, so...problem solved, yeah? | „ |
| ~ Junkrat tries to worm his way out of his predicament |

Junkrat's cornered by the Queen's enforcers
Junkrat came to notoriety when he discovered an extremely valuable secret in the bones of the omnium. Though few knew the nature of what he found,[1] he ran his mouth constantly, alluding to his discovery. As a result,[6] he was pursued by bounty hunters, gangs, and opportunists wherever he went.[1] He was cornered in a Junkertown bar by enforcers from the Queen of Junkertown herself. He'd blabbed on about his 'treasure' that she'd come to suspect that he was hiding something. Junkrat, desparate to get out of his situation, loudly announced that he'd share the location of the treasure...for a 10% share! He hoped that the man drinking at the bar would take him up on his offer, but he didn't respond, causing Junkrat to raise the offer to 25%. The man, whose name was Roadhog, came to Junkrat's aid, but more as an excuse to pummel the Queen's enforcers rather than aiding Junkrat himself.[6] Roadhog grudgingly agreed to be Junkrat's personal bodyguard in exchange for a fifty-fifty share of the spoils.[1] Junkrat tried to haggle him down, even going as high as 28%, but eventually relented at a 50% cut.[6]
On the Road
| “ | Well that's a fine 'how do ya do?'. What was it you think that got us the boot? The stealing the queen's cash? Blowing up her summer shack? The beatdown at the bar? | „ |
| ~ Junkrat after being kicked out of Junkertown |
For some reason, Junkrat and Roadhog were kicked out of Junkertown, following a string of incidents that included stealing the Queen of Junkertown's money, blowing up her summer shack, and a bar brawl (possibly the same one where they both met). Whatever the reason, Junkrat blamed Roadhog for it.[7] The Queen told Junkrat that if she ever saw him again, she'd rip out his tongue.[8] Still, as Junkrat was well aware, there were two things that solved every problem—money, and explosives. That gave him an idea...[7]

Junkrat & Roadhog
For a time, the pair wandered the irradiated Outback, to the puzzlement of many as to why the two had partnered.[9] Eventually, they left the Outback, and embarked upon an international crime spree leaving nothing but havoc and bedlam in their wake.[1] They were responsible for a string of robberies, arson,[10] murder,[11] and other crimes stretching from Sydney to King's Row.[10] They had a creed of "no job too big, no score too small."[11] It is known that they performed the heist of the Banco de Dorado[12] by digging a tunnel. In the United Kingdom, they stole the crown jewels.[13] Their spree of mayhem and chaos caused untold millions in property damage around the world.[11] In his crime spree, Junkrat tried to rob a number of trains, but ended up destroying them instead.[5]
British, French, and Latin American authorities offered rewards for information on the fugitives, and theorized that they were intent on crossing the Atlantic to North America.[10] Their activities were reported on by A Moment in Crime, by which point the bounty on their heads had reached $25 million.[11]
Going Legit
| “ | Yeah yeah, 'quiet.' You called the right people, mate. | „ |
| ~ Junkrat to "the Suit" |

The Junkers face off against the cop bots
At some point, Junkrat and Roadhog were called in for a job on behest of a "suit" from Hyde Global in Sydney. He claimed that a factory of his in downtown Sydney had been taken over by omnic terrorists, and its workers taken hostage. Wanting to keep the police out of it, he asked the pair to deal with the situation, as he knew there was no-one better for getting jobs done "quietly." Junkrat was onboard—he was happy to take out omnics, and the down payment looked enticing. Ergo, the pair set off to the factory, Junkrat even open to the idea of "going legit." This job could be a new start for them. What wasn't a new start was his approach to problems, namely to blow open a hole in the factory roof and jump straight in, any thought of the hostages barely registering. Only there were none, only a horde of cop bots. The two blasted their way through the opposition, exited the factory, and then set the whole thing crashing down in yet another explosion. Marveling at the destruction, Junkrat was reminded by Roadhog that there were meant to be hostages. Only, there were none, only the robots. And as he inspected them, Junkrat realized that they weren't omnics, but rather Hyde Global automatons.

Junkrat, enraged at the police
At this point the police arrived. Despite Junkrat's assertion that they were "professionals," that didn't prevent a shootout from starting (not that Roadhog being called "fat" by one of the officers helped his disposition). In the hail of gunfire, Roadhog helped Junkrat realize that the suit had set them up. It was a realization that was accurate, for in reality, the suit had intended for the pair to destroy the factory for the insurance payout. But the next day, Junkrat and Roadhog paid him a visit, stringing him up on a crane, and leaving him to die in an explosion that consumed the entire HG Sydney office block. As they made their escape, Junkrat was reaffirmed in his dislike of "suits," and could only ask whose idea it had been to "go legit" in the first place.[3]
Return to Junkertown
| “ | First, we light the fuse. Then, we put on our inconspicuous disguises and sneak into town. After that, we get our glorious blinged-out boom trolley right into the boss's place, reveal our ingenious deception, and boom! They'll never see it coming! | „ |
| ~ Junkrat's initial plan |

Going over the plan (again)
Their worldwide heist complete, Junkrat and Roadhog returned to Junkertown, with a hover-trolley loaded with gold and explosives. At the town gates, Junkrat laid out his plan—light the fuse, put on 'inconspicuous disguises', sneak into town, get the trolley to the queen's throne, reveal their deception, and kaboom! Roadhog had Junkrat refine the plan so that it included them escaping the detonation, and escaping with the gold at that. The plan was set in motion, only to be screwed up as Junkrat revealed their identities to the gate warden. The gates were barred shut, leaving the pair with a trolley of gold, useless disguises, and a ticking fuse.[7]
Together

The Junkers play volleyball
At Christmas, Roadhog and Junkrat played volleyball against each other. The Queen watched on, while Hammond rode on the ball.[14]
Achievements
| Name | Icon | Description | Reward |
|---|---|---|---|
|
|
Knock an enemy into your steel trap using Junkrat's Concussion Mine in Quick or Competitive play. | 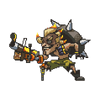 | |
|
|
Kill 4 enemies with a single use of Junkrat's RIP-Tire in Quick or Competitive play. |  |
Trivia
- Junkrat is 6'5" tall, and weighs 155 lbs (196 cm and 70 kg).[11] However, he appears shorter than he actually is in-game due to normally being hunched over.
- Junkrat eats his own toenails.[5]
- Junkrat keeps Milk Tea with Boba half sweetened in his canteen.[15]
- Junkrat is a big fan of Wrecking Ball, and was inspired to build his Rip-Tire by watching him compete in the Scrapyard.[16]
- Junkrat's buckle in his Fool and Jester skins have the letters "JSTR" on it (presumably standing for "Jester").
- Junkrat is the seventh playable hero in Heroes of the Storm.[17]
- Junkrat blew off his own right leg. How he lost his right arm is still unknown.[2][18] Junkrat also is now missing his index finger on his remaining hand as of Overwatch 2. All of his lost limbs have been replaced by makeshift junker prothetics.
- Junkrat made his own grenade launcher.[2]
- Oddly, Junkrat appears exactly the same in The Wastelander as he does in the original game, despite the fact the cinematic takes place at least a decade in the past (when he would have been around fifteen).
Cultural References
- Junkrat and Roadhog's shared backstory of Australia becoming a wasteland apocalypse bears strong resemblance to the setting of the Mad Max series.
- Junkrat's surname 'Fawkes' could be a reference to Guy Fawkes. This is evidenced by a voice line that references the opening line of the Guy Fawkes Day song "The Fifth of November"[19] that has a chance to trigger when he get a triple-kill or higher with his RIP-Tire.
- Junkrat's Fool and Jester skins as well as his Haystack and Scarecrow skins have some similarities to the DC Comics characters the Joker and Scarecrow respectively.
- The fact all three characters are in some way psychotic, reinforces the similarities.
- Additionally, his Elimination quote "Why so Serious?" is a quote used by the Joker in the 2008 superhero film The Dark Knight.
- Junkrat's Rip-Tire Ultimate ability is a possible play on the design of the rip-cord car toys.
- In World of Warcraft, another game produced by Blizzard Entertainment, the Iron Horde faction uses iron stars; giant rolling bombs that, once primed, would roll and crush anything in their path before exploding with enough force to wipe out whole squadrons. Considering the similarity between these iron stars and the RIP-Tire, it is possible that one of them may have influenced the other.
Merchandise

The Nendoroid Junkrat figure
- A Junkrat Funko Pop figure went on sale in 2018.[20]
- A Nendoroid Junkrat figure went on sale in Q1 2019.[21]
- A Dr. Junkenstein figure is available for sale from Hot Topic and Box Lunch.[22]
Development

An early iteration of Junkrat
- Junkrat went through numerous designs, beginning with a set of early concepts depicting him as a bulky robot, a cyborg, a mutant, and even an alien. The team then gravitated toward designs in which he wore heavy bomb disposal armor, one of which inspired the initial prototype for Wrecking Ball, but gradually peeled away the layers of armor to showcase more of his maniacal personality, eventually settling on a silhouette similar to his final incarnation. They explored several different flavors of this design with a variety of different possible origin stories, including ones with military overtones and a version of him as a member of Los Muertos, but ultimately decided to make him one of the Junkers.[23]
- Junkrat's original ultimate ability was a giant shoulder-mounted missile, but it was considered visually confusing during gameplay and the RIP-Tire was developed instead.[23]
- Junkrat was implemented in the game at some point after Torbjörn.[24]
Media
Concept Art

Beachrat Skin Concept Art by Anh Dang

Beachrat Skin Weapon Concept Art by Anh Dang

Bilgerat Skin Concept Art by Lipan Liu

Bilgerat Skin Weapon Concept Art by Lipan Liu

Dr. Junkenstein Skin Concept Art by Ben Zhang

Hong Hai Er Skin Concept Art by Emily Siu

Hong Hai Er Skin Weapon Concept Art by Emily Siu

Junkbot Skin Concept Art by Yiming Liu

Junkbot Skin Weapon Concept Art by Yiming Liu

Junkbot Skin Abilities Concept Art by Yiming Liu

Junkfood Skin Concept Art by David Kang

King Jamison Skin Concept Art by David Kang

King Jamison Skin Weapon Concept Art by David Kang


Videos
Balance Change Logs
- For more information, see Patch Notes.
- Hero Perks
- Steel Trap's throw range is increased by 50%.
- During RIP-Tire, use Ability 1 to gain a quick boost of speed. Doing so reduces RIP-Tire's damage by 50%.
- Frag Launcher's projectile speed is increased by 40%, but its max ammo is reduced by 1.
- Concussive Mine arms .5 seconds after landing, increasing damage by 50%, explosion radius by 50%, and health by 200%.
- Global Projectile Size Bonus
- Projectile radius large reduced from 0.15 to 0.12 meters.
- Cooldown increased from 7 to 8 seconds.
- Projectile size is now reduced by half after the second ricochet.
- Projectiles preserve slightly more velocity on ricochet.
- Impact damage increased from 40 to 45 (Total damage increased from 120 to 125).
- Cooldown decreased from 8 to 7 seconds.
- Maximum damage increased from 110 to 120.
- Minimum damage increased from 20 to 55.
- General updates
Most damage-dealing projectile sizes have been increased by a new global modifier added to their base size.
- +0.05 meters for hitscan projectiles with a high rate of fire or spread (e.g., Tracer's Pulse Pistols or Reaper's Hellfire Shotguns).
- +0.08 meters for hitscan projectiles that are more precise (e.g., Cassidy's Peacekeeper or Soldier:76's Heavy Pulse Rifle).
- +0.05 meters for travel time projectiles that are shotguns or have a very high rate of fire (e.g., Roadhog's Scrap Gun or Ramattra's Void Accelerator).
- +0.10 meters for travel time projectile with a speed greater than 50 meters per second (e.g., Zenyatta's Destruction Orb).
- +0.15 meters for travel time projectile with a speed less than or equal to 50 meters per second (e.g., Pharah's Rocket Launcher).
- Very large projectiles with a base size greater than 0.5 meters have been excluded from these increases (e.g., Orisa's Energy Javelin or Reinhardt's Fire Strike).
Hero combined HP (base health/armor/shields) increased by 15-25%.
- 150-175 HP heroes increased by 25 HP.
- 200-300 HP heroes increased by 50 HP.
- 300+ HP (Tanks) increased by 75-100 HP.
- Each hero's precise health increases are listed in their patch notes below.
Ultimate Charge
- All Ultimate ability costs increased by 10%.
Regenerative Passive for All Heroes
- All heroes now regenerate 20 health per second after 5 seconds of not taking damage.
Damage Role Passive
- Reload speed bonus on elimination has been removed.
- New role passive: Dealing damage reduces enemy healing received by 20% for 2 seconds.
Quick Melee
- Damage increased from 30 to 40.
- Hero updates
- Health increased from 200 to 250.
- Base projectile size reduced from 0.25 to 0.2 meters.
- Maximum damage increased from 100 to 110
- Maximum damage reduced from 120 to 100
- Arming time increased from .5 to .75 seconds
- Trapped duration reduced from 3 to 2.5 seconds
(beta)
- Fully locks movement again
- Projectile speed increased from 10 to 15
- Projectile size increased from 0.2 to 0.25
(beta)
- No longer prevents all movement for its target
- Now slows its target by 65% until they reach its max chain length, then it breaks
- Still prevents movement abilities from being activated
- Damage increased from 80 to 100
- Projectile speed increased from 10 to 17
- Trigger delay reduced from 0.156 to 0.1 seconds
- Time to take control of Junkrat post detonation has been reduced from 1.5 to 0.9 seconds
Developer Comment: These are a couple quality of life changes for Junkrat. This makes it possible to do some Concussion Mine jumps that were no longer possible after a previous increase to its projectile speed.
- Projectiles maintain slightly more velocity on ricochet
- Projectile speed increased from 20 to 25
- Ricochet distance off of enemy players greatly reduced
- Bomb detonation time reduced from 1 sec to 0.7
- Bombs spread increased 50%
- Projectile speed increased from 20 to 25
- Grenades now bounce less but explode sooner
- Now restores ammunition after completion
- Projectile size decreased from 0.3 to 0.2
- Tire movement speed decreased from 13 to 12
- Now will deal less damage to targets farther away from the explosion’s center
- Junkrat can now hold two mines
- Tire’s movement speed has been increased by 30%
- There is no longer a time limit when wall climbing
- Junkrat’s explosions no longer hurt himself
- Ability now activates more quickly
References
- ↑ 1.0 1.1 1.2 1.3 1.4 1.5 Junkrat (Overwatch), Blizzard Entertainment. Accessed on 2015-23-09
- ↑ 2.0 2.1 2.2 2.3 Heroes of the Storm
- ↑ 3.0 3.1 Overwatch: Junkrat & Roadhog: Going Legit
- ↑ 4.0 4.1 The Wastelander
- ↑ 5.0 5.1 5.2 Overwatch 2, Junkrat Quotes
- ↑ 6.0 6.1 6.2 Junkertown: Wasted Land
- ↑ 7.0 7.1 7.2 2017-08-21, "Junkertown: The Plan" | Overwatch. YouTube, accessed on 2017-08-25
- ↑ Overwatch 2, Junker Queen Quotes
- ↑ [https://overwatch.blizzard.com/en-us/heroes/roadhog/ Roadhog (Overwatch 2), Blizzard Entertainment. Accessed on 2022-10-05
- ↑ 10.0 10.1 10.2 2015-09-15, Teasing : Two new heroes on their way?. Blizzplanet, accessed on 2015-09-19
- ↑ 11.0 11.1 11.2 11.3 11.4 2015-09-21, A Moment in Crime Special Report: "The Junkers" | Overwatch. YouTube, accessed on 2015-09-27
- ↑ 2015-09-17, Overwatch Map Teaser: Banco de Dorado Robbery. Blizzplanet, accessed on 2015-09-21
- ↑ Overwatch, Junkrat Quotes
- ↑ Together
- ↑ 2016-06-09, What is in Junkrat's canteen?. Blizzard Entertainment, accessed on 2017-10-26
- ↑ Wrecking Ball Live-Drawing & Art Discussion
- ↑ 2017-09-15, Blizzard Virtual Press Tour: Ana, Junkrat and Volskaya Foundry Map coming to the Nexus. Blizzplanet, accessed on 2017-09-17
- ↑ 2017-05-18, Overwatch director wants more story for Symmetra and Pharah. Polygon, accessed on 2018-10-21
- ↑ 2016-01-09, Junkrat Voice Lines: (at 2:08) "Remember, remember... What the heck was I saying again?"
- ↑ 2018-02-19, New Overwatch toys and figurines coming to Toy Fair 2018. Blizzard Watch, accessed on 2018-02-20
- ↑ 2018-06-29, The new Junkrat Nendoroid is adorably terrifying. Blizzard Watch, accessed on 2018-07-01
- ↑ 2018-10-09, OVERWATCH HALLOWEEN TERROR GEAR AVAILABLE NOW. Blizzard Entertainment, accessed on 2018-10-10
- ↑ 23.0 23.1 The Art of Overwatch
- ↑ 2016-04-22, The Story of Overwatch: Return of the 90s Shooter. YouTube, accessed on 2016-09-08
External links
| Heroes in Overwatch 2
| ||||||||||
|---|---|---|---|---|---|---|---|---|---|---|
Tank |
||||||||||
Damage |
Junkrat |
|||||||||
Support |
||||||||||