 |
|---|

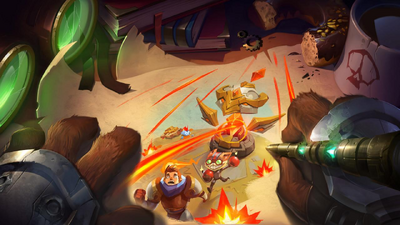
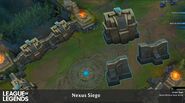
Nexus Siege mode
Nexus Siege was a Featured Game Mode in ![]() League of Legends that was available exclusively in patch V6.14.[1]
League of Legends that was available exclusively in patch V6.14.[1]
Description[]
Nexus Siege cuts the Rift in half, leaving just one base to raze/protect. If you're on the attack, blitz the base, shove waves, and deploy siege weapons to charge up your minions and destructify towers. When defending, break out tower upgrades and hold the line at all costs. Once the attackers crack the Nexus, teams switch sides. Victory goes to whichever team flattens the base fastest when attacking.
The draft type is Blind pick.
Stat Bonuses[]
Both team have a variety of teleport pads to warp out to from fountain. Use the Siege Warp trinket to get into battle faster!
The attacking team has 1.5% increased ![]() AD,
AD, ![]() AP and
AP and ![]() max HP. This bonus increases over time.
max HP. This bonus increases over time.
![]() Gold & EXP are normalised for Nexus Siege across both teams. This means don't worry about last-hitting, just push those minions as fast as you can!
Gold & EXP are normalised for Nexus Siege across both teams. This means don't worry about last-hitting, just push those minions as fast as you can!
Obliterator[]
The Defense team is rewarded everytime they manage to safely escort and push a minion into one of the Attacking team's fountains. If they can push 15 total minions up there, they trigger the Obliterator laser.
The Obliterator will kill all enemies in all lanes. This is also a great lane reset for the Defending team, buying them precious extra minutes to stall.
Siege Weapons[]
Crystal Shards[]
Siege weapons fill summoner spell slots. Snatch them up with an alternate currency called ![]() Crystal Shards (CR). Each side earns this kind of CR a little differently:
Crystal Shards (CR). Each side earns this kind of CR a little differently:
 Offense
- Earned over time
- Kill enemy champions; attacker kills net more Crystal Shards than defender kills
 Defense
- Earned over time
- Kill enemy champions
- Granted when the first tower in each lane is destroyed
- Earned for each minion shoved into the attacker's teleporters
- Defenders start the round with enough Crystal Shards to buy a siege weapon
Weapons[]
All Siege Weapons use the Summoner Spell slot to deploy. You can carry up to two different Siege Weapons at once.
| “ | "Hmmmm. These experimental siege weapons are more than prototypically destructive!" |
| — | |
-
- Cost:
 100 CR
 - Health: 3 ward health
- A long ranged siege engine that will hammer away at enemy towers. These are excellent for applying pressure on defending teams who continually turtle and never come out from under their towers.
- Visible through fog of war.
- Cost:
- "The bread and butter bomb lobber of the offense. Stick these somewhere safe-ish, and protect them from pesky defenders."
-
- Cost:
 100 CR
 - Health: 5 ward health
- Gives nearby allied minion significant combat stats for extra pushing power.
- Cost:
- "This minion might magnifier's like a Baron buff on a stick!"
-
- Cost:
 100 CR
 - Health: 3 ward health
- Nearby allied Siege Weapons gain a recharging shield making them tougher to destroy.
- Shield strength: +2 ward health (+1 for each additional Shield Totem)
- Visible through fog of war.
- Cost:
- "Listen for the pleasant humming of the Shield Totem between explosions. ~Wommmmmm~ "
-
- Cost:
 200 CR
 - Health: 3 ward health
- Deploy additional teleport locations for your team, moving your forward point closer to the enemy base.
- Cost:
- "When teleporting halfway across the map still doesn't land you close enough to the fighty spots, there's the Port Pad."
| “ | "They're trying to bomb our base? What if our base bombs them?!" |
| — | |
-
- Cost:
 100 CR
 - Attach to a nearby tower giving you control of 3 beam blasts from the tower. This does serious damage to enemy champions.
- Cost:
- "Fire turrets yourself with the Beam of Ruination. Unfortunately for you, they're skillshots."
-
- Cost:
 200 CR
 - An emergency Zhonya style shield for your tower that makes it invulnerable for a few seconds, then wrecks all enemies that were around it in a rain of missiles. Great for clutch saves on a tower about to go down, buying you precious extra time.
- Cost:
- "Invincible towers dispensing AoE true damage? This is fine."
-
- Cost:
 100 CR
 - Freezes all enemy minions and slows all enemy champs within it's zone. Can completely change the balance of a team fight.
- Cost:
- "Put your enemies in the danger zone, and keep them there with the slow dome."
-
- Cost:
 100 CR
 - Throw down a large area that gives all allied champions inside the zone unlimited Flash on a 1sec cooldown. Great for team engages or reaching hidden nests of Siege Ballistae.
- Cost:
- "Get in the zone and style on fools with one-second cooldown Flashes."
Strategy[]
Tactics[]
| “ | "The array of strategic options is positronically dizzying. I like it!" |
| — | |
- Head to base often for more siege weapons, even if it's against your incendiary instincts. All attackers should head back to base around three minutes to pick up their first siege weapon.
- Pushing one lane together can work, but often ends in Obliterator-ation.
- Nest siege weapons together and don't forget the . The grouped weapons bait disorganized defenders into your ambushes.
| “ | "Who needs strategy when you have AN OBLITERATOR???" |
| — | |
- If the enemy team groups in one lane, port to the opposite lane and split-push to unleash the Obliterator and blunt the offensive.
- Don't rush nested siege weapons alone. Go in groups and deploy and to outmaneuver and grey screen the attackers.
- As the game goes late, keep a handy. Hasty attackers can be baited into reckless dives.
Champions[]
| Tristana - the Yordle Gunner
Toting a and a bandolier of , Tristana's natural strengths line up well with the attacker's offensive goals. |
| Azir - the Emperor of the Sands
The Shuriman emperor's exert powerful zone control, pushing defenders away from your siege weapon nests and their own turrets. |
| Ziggs - the Explosives Expert
Extreme AoE damage and pose a substantial attrition threat to defenders. |
| Lux - the Lady of Luminosity
Impeccable and high pick potential keep Lux high on the defending tier list. |
| Malzahar - the Prophet of the Void
Because nothing's better than someone while the Obliterator charges up. |
| Maokai - the Twisted Treeant
The tanky tree combines well with the Zone and clears siege weapon nests with ease. |
Media[]


