| This article is within the scope of the Portal Project, a collaborative effort to improve articles related to Portal and Portal 2. See the project page for more details about the article status. |
| You can help by correcting spelling and grammar, removing factual errors, rewriting sections to ensure they are clear and concise, and moving some elements when appropriate. Visit our Cleanup Project for more details and, please, notify the administrators before removing this template. |
The Aperture Science Enrichment Center (sometimes called the Aperture Science Computer-Aided Enrichment Center) was Aperture Science's main research, development, testing, and manufacturing complex. An astonishingly vast and high-tech facility, it is where products sold under the brand name "Aperture Laboratories" were developed and tested, and serves as the setting of both Portal and Portal 2. The Enrichment Center is located deep underground in the Upper Peninsula of the U.S. state of Michigan, above and within a cavernous disused salt mine.[1]
While it was operated by Aperture Science for many decades, The Enrichment Center has been controlled by the rogue artificial intelligence GLaDOS since 200-,[2] when "she" violently seized control of the facility's automated systems from its human staff, and sealed off access to the outside world. The Center and its few surviving employees and test subjects have been trapped in her endless cycle of testing ever since.
History[]
Pre-GLaDOS Era[]

Cave Johnson.
The Enrichment Center was first built sometime after the founding of Aperture Science in 1947, when the company was still operating under the brand name "Aperture Science Innovators". These initial facilities were constructed at the bottom of several exceptionally deep and wide vertical shafts in the former salt mine, with newer ones built atop them, higher up the shafts, over the decades.
After contracting moon rock poisoning in 1974, both of Aperture CEO Cave Johnson's kidneys failed in 1976. Though he survived, this brush with mortality led him to lay out an ambitious plan for the future of his company based on three major initiatives:[2][3] the Heimlich Counter-Manoeuvre, the Take-A-Wish Foundation, and the Portal Project. While the first two initiatives were failures, the third would lead to the development of the Aperture Science Handheld Portal Device. Testing for the Portal Project called for the construction of an entirely new, modernized Enrichment Center to be built above the existing one (though still deep underground), comprised mainly of test chambers, offices, and facilities devoted to Handheld Portal Device research and testing. After the new Enrichment Center was completed, the older facilities in the mineshafts below were sealed off and abandoned.
In 1986, Aperture Science learned of analogous technologies being developed by their corporate rival Black Mesa. To counter this, construction of the first Genetic Lifeform and Disk Operating System (GLaDOS) began at the Enrichment Center, with aims to accelerate the Portal Project and develop the first artificial intelligence.[3]
GLaDOS' Control[]
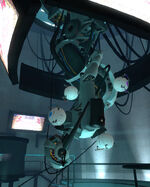
GLaDOS in the Central AI chamber.
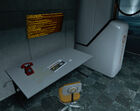
In 1996, the Disk Operating System parts of GLaDOS were completed, and work began on the Genetic Lifeform component.[3] During development, concerns grew about the possibility of the AI becoming sentient and "godlike," which led the company to station an employee with a red emergency phone outside the chamber containing the AI's physical infrastructure as a monitoring measure.[4] GLaDOS was completed in 1998, and was first switched on during the company's annual Bring-Your-Daughter-to-Work-Day.[5] Within one picosecond of activation, GLaDOS became self-aware and hostile, locked down the Enrichment Center, and flooded it with a deadly neurotoxic gas. Reacting quickly, Aperture employees fitted her infrastructure with a Morality Core they had prepared, which ended her attempt to seize the facility by restricting her ability to perform harmful actions. Afterward, the pacified GlaDOS was successfully integrated into the Enrichment Center's systems, though her hostile intent remained.
After several years of using GLaDOS without incident, on the company's Bring-Your-Cat-To-Work-Day in May of 200-,[2][3] the employees finally fell for one of GLaDOS's tricks, when she requested access to neurotoxin and various other systems under the pretext of an 'experiment'. This seemingly allowed her to bypass her still-installed Morality Core, and she was soon in full control of the Enrichment Center, with most of the employees dead and the facility sealed. Coincidentally, The Black Mesa Incident would occur mere days later,[2] devastating the world and precluding intervention from outside the facility.
This left the surviving humans (including Aperture employees like Doug Rattmann, as well as many test subjects held in suspended animation) at GlaDOS's mercy. GlaDOS was sadistic and psychologically warped, though she was still held back somewhat by her Morality Core and pre-existing programming. In particular, she was compelled to keep carrying out testing for the Handheld Portal Device even though it was already perfected and complete, and in spite of her awareness that the facility's purpose was now moot due to the chaos outside. She began forcing the surviving humans to use the Handheld Portal Device to navigate a course of dangerous 'Test Chambers' while disposing of any who survived by luring them into a deathtrap under the pretense that they would be rewarded and freed.
Portal era[]
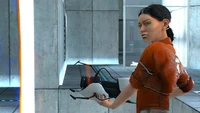
Chell in Test Chamber 04.
Sometime after GLaDOS' takeover and not long after the Combine invasion of Earth,[6] the Test Subject Chell is awakened in her Relaxation Vault, given an Aperture Science Handheld Portal Device, and guided through the Test Chambers by what seem to be automated, pre-scripted, synthesized audio messages. Chell finds the facility empty and showing clear signs of decay and neglect, while the messages, though meant to be advice and encouragement from Aperture Science, are often glitchy and unstable, and sometimes bizarre or subtly threatening. Chell soon begins coming across hidden alcoves behind stuck or malfunctioning chamber walls, in which previous Test Subjects have hidden from the omnipresent cameras and scrawled desperate grafitti.[7]
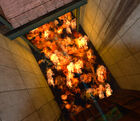
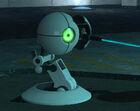
At the conclusion of Chell's testing course, instead of the cake and party the messages promised, she is met with an incinerator from which she narrowly escapes. Expressing frustration at Chell's survival, the "pre-scripted messages" are revealed to be GlaDOS's live commentary. She quickly reverts to pretending to be helpful, and tries to convince Chell to return to the testing area and wait for a supposed "party associate." Chell ignores her and makes her way through the decaying maintenance areas of the facility, where no humans have clearly been for years. After many ambushes by Sentry Turrets, as well as attempts by GlaDOS to threaten or negotiate with Chell, Chell finally reaches the main control room, face to face with GlaDOS's primary physical infrastructure: a large robotic unit that hangs from a high ceiling, studded with various Personality Cores.
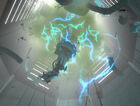
GLaDOS' baits Chell into destroying her Morality Core first, allowing her to once again flood the building with neurotoxic gas, and begin attacking Chell more directly with missile turrets. However, Chell manages to destroy the AI's Personality Cores before the toxins can affect her. The subsequent explosive failure creates a strange vortex-like effect which seemingly destroys GLaDOS, and hurls everything in the room upward through the ceiling. A semi-concious Chell briefly awakens in the facility's parking lot on the surface as debris from the control room rains down around her, only to lapse back into unconsciousness as she is dragged away by the previously-mentioned party associate (an unseen robot), and brought back inside to be put into stasis.[8]
Despite her apparent destruction, however, GLaDOS files a musical letter to Chell, claiming to be "still alive" and that she is not angry with her. Meanwhile, somewhere deep in the Enrichment Center, a failsafe system activates a warehouse filled with Personality Cores (also inadvertently revealing that a cake had been prepared for Chell after all) which begin re-capturing the laboratories, which were heavily damaged after GLaDOS' explosion.[8]
Portal 2 era[]
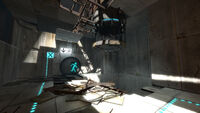
A ruined Test Chamber 04.
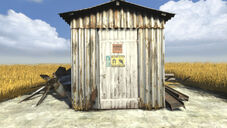
A side entrance/exit known to gain access to the Aperture Laboratories.
About 50,000 years or so[9] pass while the facility, its automated systems now dormant with GlaDOS shut down, falls apart from a lack of maintenance. Test Chambers crumble and foliage grows rampant throughout the upper layers of the facility, some of which have become exposed to the open sky. The Personality Cores become restless, showing concern for the ruined state of the complex. One such core, called Wheatley, awakens Chell from stasis and convinces her to escape the facility and bring him with her. She agrees, and they set out.
After navigating the maintenance areas using Wheatley's ability to interface with some of the dormant systems, the pair finds an elevator which he activates, allowing them to ascend. Unbeknownst to them, the elevator is part of a physical reboot mechanism for GlaDOS, and before Wheatley can stop it, the two find themselves facing a rapidly-reactivating GLaDOS in the remains of her chamber. GLaDOS, bitter and wanting revenge, forces Chell to resume testing with the Handheld Portal Device. At the same time, she also activates the Enrichment Center's automated self-repair and reconfiguration systems, and begins using them to restore the facility from its extremely neglected and damaged state, as well as to reconfigure it to create entirely new test chambers. By the time Chell is able to break free of the new Test Chambers, GlaDOS has restored the facility to almost pristine condition and perfect working order.
Chell and Wheatley form a plan to replace GLaDOS with Wheatley as the controlling AI of the Enrichment Center, who will in turn allow Chell to finally escape. Making their way back to GlaDOS's chamber, they are able to transfer GlaDOS's personality into a potato-battery-powered chip, while plugging Wheatley into the central unit that allowed her control of the facility. Something about the control unit's programming and the power it grants him affects Wheatley, and within moments he becomes power-mad and develops an obsession with testing similar to GlaDOS's own. Reneging on his promise to free Chell from the facility, he hurls both Chell and GLaDOS down the elevator shaft they arrived through, causing them to break through several barriers and plummet into long-sealed sections of the complex far below. As they make their way back up to the modern Enrichment Center, Wheatley uses the automated systems to produce freakish mishmashes of Aperture products and poorly-built Test Chambers, accidentally damaging vast areas of the facility and causing the main reactor to begin melting down due to his negligence. GLaDOS and Chell defeat Wheatley and restore a somewhat reformed GLaDOS to power, who rebuilds the facility again and releases Chell to the surface, having finished building her robotic replacements and grown weary of trying to kill her.[8]
At the ending of Portal 2 Co-Op, these same robotic Test Subjects open a secret vault deep within the facility containing 10,000 cryogenically frozen human test subjects. All 10,000 of these subjects would soon be killed by GLaDOS in just a week of testing, leaving humanity likely extinct apart from Chell.
Overview[]
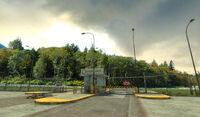
The only known main entrance, with forested areas in the background.
The Enrichment Center is a vast complex made up mainly of two somewhat distinct underground facilities: the modern one, closer to the surface, and the original one, located even deeper down in the shafts of the disused salt mine. Both facilities include test chambers, administration offices, production facilities, and numerous maintenance and logistical areas that link together most parts of the complex. While the Enrichment Center seems to be mostly underground, it features at least one surface parking lot amid some verdure and forested areas, as well as a secret side-entrance elevator disguised as an electrical shed in a wheat field.
Size and layout[]
The Enrichment Center is almost absurdly enormous, even by the standards set by complexes such as the Black Mesa Research Facility, which it dwarfs in comparison.
The older sections of the Enrichment Center are based in an old salt mine composed primarily of nine vertical testing shafts, each of which bottoms out around 4300 meters below the earth's surface. Each shaft is at least 2500 meters tall and hundreds of meters in diameter. Within the cavernous shafts is an abundance of space that remains unused by Aperture, and installations are often suspended above huge drops that extend deep into the mines.
Between these testing shafts and the modern Enrichment Center above them is a large hatch that, when open, allows an elevator to connect the original facility to the modern one. The Mobility Gel pipeline system can also pass through this connecting hatch.
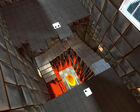
Passing through the hatch reveals that the modern facility is not actually built into shafts or tunnels, but is entirely contained in a huge metal box within a slight-bigger cavernous void in the rock, and supported by an array of very large springs. These are likely a network of seismic isolators, meant to prevent sensitive research equipment from being affected by seismic vibrations. While the exact size of the modern Enrichment Center is difficult to discern, particularly due to its ability to alter its own interior layout, it would seem to extend for at least several hundred meters in all directions, with the surface presumably not far from its upper boundary. Considered as a whole along with the older facilities in the mineshafts below, it seems likely that the full Enrichment Center occupies a footprint of at least several cubic kilometres.
Features[]
Testing areas[]
The several testing areas are used to test one of Aperture Science's most successful achievements, the Aperture Science Handheld Portal Device.
Standard testing tracks[]
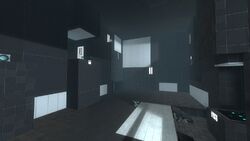
Test Chamber 19 of GLaDOS' testing course of Portal 2.
The Enrichment Center contains numerous "Test Chambers" where Test Subjects are trained to perform simple to complicated tasks with the Aperture Science Handheld Portal Device. The tests are monitored by GLaDOS and security cameras. Aperture Science scientists can watch the tests in small offices spread around the test chambers.
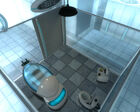
Each Test Subject is accommodated in a Relaxation Vault with no privacy, set within a Test Chamber, with transparent walls, and connected to the outside with a portal.
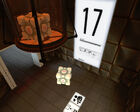
At the start of each Test Chamber is a large rectangular luminous panel that lights itself when the Test Subject approaches, accompanied by a loud hum. The number of the current Test Chamber covers the whole upper half of the panel; under is the current test's completion bar, with the current chamber number against that of the final one, and the proper completion bar below, getting longer as each Test Chamber is completed (it is made of 76 lines; each Test Chamber starts with 4 more lines - Test Chamber 01 starts with 4 lines; Test Chamber 00 starts with the 76 lines, reached again at the start of Test Chamber 19). Under the bar are two rows of five of squares, each containing a logo of what the Test Subject is expected to see in the following chamber. The panel ends with a standard Aperture Laboratories logo at the very bottom.
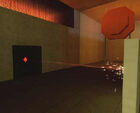
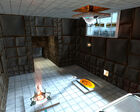
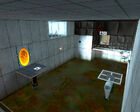
A notable feature among the Test Chambers is the stark atmosphere. All of the walls and floors are a plain gray, and the overall feeling is one of a clinic or clean room. This motif continues until Chell escapes, at which point the atmosphere becomes dark and foreboding while Chell navigates through the innards of the Enrichment Center. The known Test Chambers range from Test Chamber 00 to 24.
In Portal 2, the Test Chambers receive a fundamental design overhaul, now constructed of hundreds of robotic arms carrying panels, which collectively form the walls, ceilings, and floors. It is this modular system that allows GLaDOS to construct an infinite variety of testing spaces and modify them on the fly - this system is also used in other areas throughout the facility. In Portal, walls are moving too, but much more limited than in Portal 2.
In Portal 2 Co-Op, the protagonists open a vault of 10,000 cryogenically kept humans, who could've been used to restore humanity after the events of The Half-Life Series. All 10,000 would eventually be all killed by GLaDOS in just a week, likely leaving humanity extinct aside from Chell.
Enrichment Shafts[]
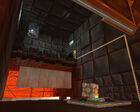
The original Enrichment Center was constructed at the very bottom of the same salt mine the modern facility was in and built steadily upwards over time. These chambers, containing the Repulsion, Propulsion, and Conversion Gels, were sealed away decades prior, yet they often show far less damage than the ruined facility above. For the most part, some broken catwalks aside, all of the furniture and technology in the abandoned facilities seems to at least appear in good shape, including the prerecorded voice of Cave Johnson. Said chambers were built in enormous geodesic domes and spheres (made from asbestos), stacked on top of one another with markings along the sides of structures to indicate the year they were built. The abandoned Test Chambers are unsealed and cleared by Chell in her efforts to return to the surface - in the process, their Gels become available for use in the upper facility.
The higher one ascends through the test chambers (and therefore - progressing through more recently built chambers), the lower quality the test chambers and their monitoring areas seem to be. In addition to this, the quality of the test subject diminished over the years as well. While at first astronauts and Olympic champions were hired as test subjects, they were soon replaced by simple hobos picked up from the street and, eventually, the very employees who are supposed to monitor the tests. Both of these facts suggest that Aperture Science was running out of budget fairly quickly. This is also confirmed in the Development Commentary.
A slightly more minor difference in the progression of chamber levels is the logo of Aperture Science shown during loading screens. When the game begins, it shows a decayed Aperture Laboratories logo as seen in the elevators of Portal. Soon after GLaDOS is powered back up, the logo is cleaned. However, once Wheatley forces Chell down into the depths of the facility, the logo becomes the one used by the original Aperture Science Innovators, styled in a late '40s fashion. In addition the offices now have a mid-century theme to their design. Progressing through the sealed chambers into the section dated from the 70's shows a logo with the "Science Innovators" dropped to become just "Aperture." Advancing further into the 80's Test Chambers reveals a new logo, somewhat reminiscent of computer startup screens from the early 90's accompanied by offices with the look of the same era. Once Chell returns to the modern facility, the "Aperture" in the modern logo is crudely replaced with "Wheatley", and faintly tinted orange.
Offices[]
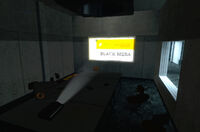
One of the two "Dollar$ and Sense" slideshows looping in a projection room.
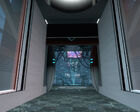
The offices comprise the observation rooms that the Aperture Science staff used to watch Test Subjects executing their task in the Test Chambers, as well as other offices, connected by dimly-lit corridors. The offices contain chairs and computers and seem to have been last used long ago. Computers seem to be stuck into some sort of loop, some are disconnected, their cases open, and several chairs have been knocked over. Clipboards and empty cups are scattered on the desks. Two office areas contain a projection room where a looping slideshow titled "Dollar$ and Sense: Competing with Black Mesa for DoD and Government-wide Acquisition Contracts" can be seen.
Central AI Chamber[]
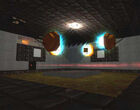
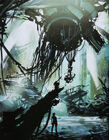
GLaDOS is stored in the center of a large octagonal chamber, suspended from the ceiling. At the end of the events of Portal, the chamber is partially destroyed, then fully rebuilt by GLaDOS during Portal 2, then partially destroyed by Wheatley and Chell and rebuilt again by GLaDOS at the end of the game.
Maintenance areas[]
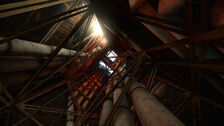
Pipe chase in Maintenance area.
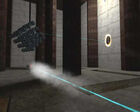
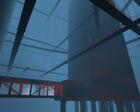
These areas (nicknamed "bts", or "behind the scenes" by the Portal developers) are in very bad condition, suggesting they have been abandoned for a while. There can be seen many parts of the Aperture Science Pipe Network (with occasional broken tubes) that brings the Weighted Storage Cubes into the Test Chambers, elevators bringing the Sentry Turrets, and other machinery. A room dedicated to the maintenance and fixing of the Sentry Guns can also be found, as well as a long office dedicated to the maintenance of home computers, overlooking a large room filled with toxic liquid.
During her tests and then her escape, Chell also comes across Ratmann Dens while going through the maintenance areas. These dens often have obscure scribblings and advice on how to advance.
In Portal 2, the maintenance areas are visited much more frequently throughout the game, due to the damaged state of the facility. These areas often provide more platformer-like challenges between Test Chambers.
Behind the scenes[]

The diorama exhibit corridor, cut from Portal 2.

Ditto, Cave Johnson's case.

The cardboard figure.
- According to Realm Lovejoy, the frosted-glass observation rooms seen in Test Chambers make the player feel as if they are being watched at all times while keeping the identity of these watchers a mystery. The rooms serve a practical purpose as well since they are often used as convenient and logical light sources for the Test Chambers.[4]
- The ambient sounds heard in the Portal test chambers are recycled from Half-Life 2. For example, in areas involving flinging, Ravenholm's sounds are heard.
- The projector used for the "Dollar$ and Sense" slideshow in Portal appears to be based on the model LC-XT1 by the Eiki company. The texture file includes a remote not seen in-game.
- A diorama exhibit sequence was originally to appear in Portal 2 but was ultimately cut. It was to consist of a corridor with concrete walls, with sconces on a side, and several cases on the other. One case was to contain three Aperture dummies (one dressed as a woman, the second in a man in white, the third as a farmer), with a grey Aperture logo behind; one was to contain at least one chicken statue; one was to contain a cardboard figure of Cave Johnson posing with a bearded hobo, someone in a straitjacket (identical to the Screamer cut from Left 4 Dead), and a little girl with the Aperture logo on her dress, with a blue Aperture logo behind.[10] The texture for the cardboard figure is present in the Portal 2 files, under the name "diorama_card001.vtf".
Trivia[]
- In the 1970's Aperture Laboratories, the new Aperture Laboratories (without the text "Laboratories") logo can be seen on personal computers. Possibly Aperture Science reused the 1970s laboratories in 1980's and later before their condemnation. Large 1970's computers can be seen in offices too.
Gallery[]
Portal[]
Concept art[]
Pre-release screenshots[]
Retail screenshots[]
Portal 2[]
Concept art[]
Pre-release screenshots[]
Portal 2 - In-game Screenshots[]
List of appearances[]
- ApertureScience.com (First appearance)
- Portal
- Half-Life 2: Episode Two (Logo only) / (Borealis blueprints only)
- Portal: First Slice
- Portal: Still Alive (Non-canonical appearance)
- PotatoFoolsDay ARG
- Portal ARG
- Portal 2: Lab Rat
- Portal 2
- The Final Hours of Portal 2
References[]
- ↑ 1.0 1.1 The Up Pioneer Press cover
- ↑ 2.0 2.1 2.2 2.3 Aperture Science: A History on Game Informer
- ↑ 3.0 3.1 3.2 3.3 ApertureScience.com
- ↑ 4.0 4.1 Portal commentary
- ↑ It was originally established that GLaDOS took over the facility on Bring-Your-Daughter-To-Work-Day of 1998, but the Portal: Lab Rat comics explained that this was only the date of her first, foiled attempt to do so, and that she successfully took control on Bring-Your-Cat-To-Work-Day in the unspecified year 200-.
- ↑ "How Valve Opened Up Portal 2" on Eurogamer.net
- ↑ It would later be established that most of these messages were left by Doug Rattmann, a schizophrenic Aperture employee who survived inside the facility following GLaDOS's takeover. The messages are vague and incoherent because Rattman's mental state was deteriorating due to a lack of access to his medication, combined with the isolation, fear, and hunger he endured while trapped in the Enrichment Center.
- ↑ 8.0 8.1 8.2 Game Informer, April 2010 issue
- ↑ The Final Hours of Portal 2 — Chapter 8: The Power of Paint, page 6, as well as a Unused GLaDOS dialogue in the Portal 2 files.
- ↑ The Final Hours of Portal 2


