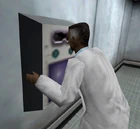
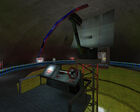
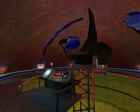
- "If anyone can handle this catastrophe, it's the science team in the Lambda Complex at the opposite end of the base!"
- ―Black Mesa scientist[src]
Sector F Lambda Complex[4][5] is one of the seven main sectors of the Black Mesa Research Facility. It is connected to the Yellow Line of the Black Mesa Transit System.[5]
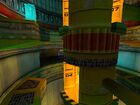
There can be found the heavily fortified Lambda Reactor Complex, the site of Black Mesa's top secret teleportation labs, mostly made of a huge reactor consisting of the Lambda Reactor Coolant System, and the cylindrical Lambda Reactor Core. The core of the reactor facility consist of four levels (A, B, C, and D) that fuel an extremely powerful interdimensional Portal located on Level A, where Survey Teams are equipped, and sent over to Xen.
One side of Sector F is linked to the rest of the facility through the Central Command and Communication Center, accessed through Waste Processing Area 3, and where Gordon Freeman accesses the facility. Another side is accessed via a Secured Access of the Lambda Sector Transport, located on level B of the Sector E Materials Transport. There Adrian Shephard confronts the Black Ops that have taken hold of the area. One vent found near the tracks directly links to Level A of Sector F, where Shephard witnesses Freeman's departure to Xen.
Central Command and Communication Center[]

The Lambda Complex logo.
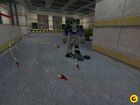
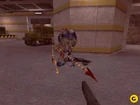
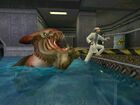
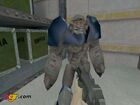
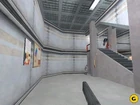
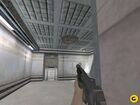
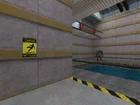
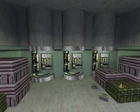
This area is mentioned in Black Mesa Announcement System announcements in Sector C and D. The only part of the Central Command that is visited is CenCom Bay 3 ("CenCom" referring to "Central Complex"), accessed by Freeman from a tunnel leaving Waste Processing Area 3. It contains a small communications office and several hangars protected by a Ceiling Turret, filled with Vortigaunts and Alien Grunts, as well as Snark Mines. An elevator leads to the Black Mesa Central Complex, but it cannot be accessed. CenCom Bay 3 Storage, heavily protected by Snark Mines, contains Alien Grunts, some supplies, and a Xen trampoline. Under is the CenCom Reservoir, a small HECU-controlled sewer accessed through a trapdoor trapped by a Snark Mine, with a few Barnacles, cockroaches, and an Ichthyosaur as well as Leeches underwater. There another trapdoor leads outside, where an M1A1 Abrams is stationed in front of the other elevator access to the Black Mesa Central Complex.
Gallery[]
Black Mesa Central Complex[]
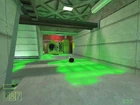
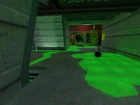
After the CenCom Bay 3 elevator, the Central Complex is found below. There, nuclear generators can be found. One of them is damaged and radioactive waste has spilled on the floor. Its name suggests it is located in the center of the facility, or that it is at the center of Black Mesa's activities, as it is the home of the Lambda Reactor Complex and its teleport.
Mechanized Infantry Repair Bay[]
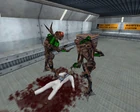
The next area is the Mechanized Infantry Repair Bay, a large garage where an Abrams was apparently being repaired before the Resonance Cascade. There, HECU soldiers are fighting with Alien Grunts. A tunnel with more Alien Grunts, Vortigaunts, and a Xen Sentry Cannon leads to the Lambda Reactor Complex.
Gallery[]
Lambda Reactor Complex[]

The Lambda Reactor Complex logo.
This area is accessed from a large elevator with an M35 cargo truck on it.
Hazardous Materials Handling Bays[]
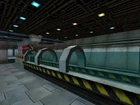
Features two Bays, Bay A and B. Before this area can be found a Bullsquid attacking Headcrabs at the foot of the elevator coming from the Repair Bay. Each Bay is separated by short tunnels with heavy blast doors on each side.
Hazardous Materials Bay A[]
Controlled by the Black Ops, Bay A is full of cargo crates, containers, and explosive barrels, and has a catwalk around its perimeter. A tunnel leads to Bay B.
Hazardous Materials Bay B[]
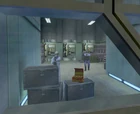
Two Alien Grunts are found in Bay B. It contains further explosive barrels and cargo crates. The tunnels continue, but cannot be accessed; what follows is unknown. On the right, a ladder leads to a small room where a scientist awaits Freeman. This is the last entrance to the Reactor Complex, as all the others have been sealed off.
Gallery[]
Test Firing Chamber[]
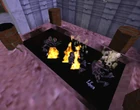
After a small elevator can be found the Test Firing Chamber, a target range for experimental weapons such as the Gluon Gun, which Freeman is given there by the scientist who designed it. He can then open two test firing tubes, one of which contains several Headcrabs, the other a Bullsquid, and test the weapon on them.
Gallery[]
Lambda Reactor Coolant System[]
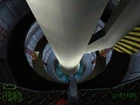
What follows is an elevator that goes deep under the facility, in the Lambda Reactor Coolant System, located at the foot of the Lambda Reactor. Maintaining the Reactor Core at the right temperature, it is swarmed with Vortigaunts and Alien Grunts, as well as a few surviving scientists and security guards.
Coolant System 01[]
A partly blue-colored room with a basin, Alien Grunts are encountered there. A ladder and a catwalk lead to Pump Station 01 that will fill the basin.
Pump Station 01[]
Here, a lever must be thrown to activate the pump that will fill up the Coolant System 01 basin.
Coolant System 02[]
A room with a basin and similar to Coolant System 01 but with a large piece of pipe hanging from a crane and partly orange-colored walls. Alien Grunts are also encountered there, as well as Barnacles. Again, a ladder and a catwalk lead to Pump Station 02 that will fill the basin.
Pump Station 02[]
Here, a lever must be thrown again, this time to activate the pump that will fill up the Coolant System 02 basin.
Auxiliary Coolant Tank[]
Once the pumps are activated, one must travel through a maintenance access in this tank to reach the foot of the Lambda Reactor. There the flow from the Coolant Systems can be activated, raising the water level in the reactor.
Maintenance Station[]
Here, a scientist urges Freeman to quickly activate the coolant pumps. It also contains some supplies, and has a direct view to the Auxiliary Coolant Tank.
Gallery[]
Lambda Reactor Core[]
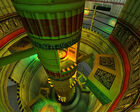
After going again through the Auxiliary Coolant Tank, the Reactor Core can be reached. Bolts of energy are being projected everywhere, killing the Vortigaunts there. A door then leads to Level D. Each level of the Reactor Core consists of several corridors, with labs and supply rooms. The area is filled with portals that allow Freeman to find his way through the facility.
Level A[]
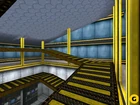
Using the yellow color, this is the highest level of the Reactor Core, where the large teleport is located. It is accessed either from level B through a ladder, or through a vent connected to a Secured Access of the Lambda Sector Transport located in Sector E Materials Transport. This is where Adrian Shephard comes from when he witnesses Gordon Freeman leaving for Xen.
Supply depot[]
In here, Freeman meets with a scientist armed with a shotgun, as well as a security guard. A supply depot used by the Xen Survey Teams, it contains three empty HEV Suit booths and numerous supplies, as well as the Long Jump Module that Freeman is given.
Dimensional Portal Device[]
Located on the top of the Lambda Reactor and right after the supply depot, Sector F's teleport, the Dimensional Portal Device, is operated by the Main Portal Controls. From there Gordon Freeman is teleported to Xen to defeat the Nihilanth. Another door leads to a corridor featuring the vent leading to Sector E Materials Transport.
Level B[]
Using the red color, it has a small security booth and several labs, as well as an unnamed room whose door cannot be opened and where the G-Man can be seen leaving through a portal. A door leads to the Reactor Core, and a ladder leads to Level C. Many Alien Grunts are also there, as well as orange pipes pouring steam. Level B of the Reactor Core contains itself 9 portals, one of which is malfunctioning.
Supply B-101[]
Located near the elevator leading to Level D and the shaft going through the whole Reactor Core's height, it contains some supplies.
Supply B-301[]
Located on the second level of Level B in a corridor accessed from the Reactor Core and leading to Level A with a ladder, its door is obstructed by debris.
Lab B-104[]
Contains two portal booths, with a yellow and a red.
Lab B-105[]
Cannot be accessed.
Lab B-106[]
Cannot be accessed.
Level C[]
Using the blue color, a small room contains schematics of the Reactor Core, showing its four levels. Its part of the Reactor Core can be accessed from above, through a portal.
Level D[]
Using the green color, this is the lowest level of the Reactor Core. It leads to Level B through an elevator.
Supply D-301[]
Located near the shaft going through the whole Reactor Core's height, it contains some supplies.
Gallery[]
Pre-release[]
Retail[]
Behind the scenes[]
- As seen in the Half-Life texture files, several unused sign textures suggest that the Black Mesa Central Complex originally contained more areas apparently located before the Lambda Reactor Complex. All of their file names bear the prefix "C3A1," used in all three maps covering the CenCom Bay 3 area. They are made in the same style as that of the "Black Mesa Central Complex" sign located above the two elevator doors, and include a "CenCom" sign ranging from 1 to 8, accompanied with four arrow signs indicating the left, right, up, and down directions, suggesting these areas were to spread on several levels. Another sign, "CenCom Reservoir Access," indicates that the small sewer system located near CenCom Bay 3 was to be indicated by a sign. Finally, the sign "Aero Bays" is also to be found, indicating that a helipad, a hangar, or an airstrip was to be located nearby.
Non-canonical appearances[]
Half-Life Deathmatch[]
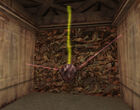
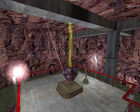
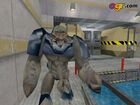
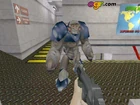
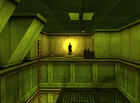
Two Deathmatch maps are set in the Lambda Complex. One is "lambda_bunker," a modified version of CenCom Bay 3, and "rapidcore," which mostly randomly reuses several Lambda Complex signs.
Half-Life: Uplink[]
In this non-canonical episode, Gordon starts in the Lambda Reactor Complex while it is under heavy bombardment, 48 hours after the Resonance Cascade occurs. The proper location would rather be outside one of the entrances to the Lambda Reactor Complex, while still being in Sector F.
There Gordon comes across a scientist and a security guard who wish to enter the Lambda Reactor Complex to get down to safety, but they cannot open the door until a signal is sent to the USNRC. However, the transmitter to be used to send the signal must be reconfigured manually in the Transmitter Dome located on the surface. Freeman is sent to do it. On his way to the dome, Freeman fights Vortigaunts and HECU soldiers in Hangar 16 (texture reused from Topside Motorpool's Hangar 16), and later sees HECU soldiers executing scientists and cremating dead Vortigaunts. Upon reaching the Transmitter Dome, Freeman tunes the Transmitter to the USNRC after and before fighting more HECU forces, and heads back to the scientist and the security guard by passing through sewers filled with radioactive waste and Xen creatures. After entering the Lambda Reactor Complex, the three get separated, and Freeman is confronted by a Gargantua while the G-Man watches, after which the game ends.
Gallery[]
Trivia[]
- The logos and signs seen in Sector F are very different in style from the other logos and signs seen elsewhere in the facility. That could either mean these levels were among the last to be designed, or that Sector F is one of the most recent sectors of Black Mesa (as one of the fonts is also used in the rather recent Biodome Complex). The particular font used for the large letters is Eurostile; the one used for the small letters is Helvetica LT Condensed Black.
List of appearances[]
- Half-Life (First appearance)
- Half-Life: Uplink (Non-canonical appearance)
- Half-Life: Opposing Force
- Half-Life: Blue Shift (Black Mesa Transit System map only)
References[]
- ↑
 Half-Life section on Karen Laur's official website (Archived)
- ↑
 Blue's Quake News - August 15, 1997 on Bluesnews.com (Archived)
- ↑
 Casali brothers on Wikipedia
- ↑ Half-Life
- ↑ 5.0 5.1 Black Mesa Transit System map
| Preceded by Waste Processing Area 3 |
Half-Life story arc journey |
Succeeded by Xen |
| Preceded by Sector E Materials Transport |
Half-Life: Opposing Force story arc journey |
Succeeded by Xen |


