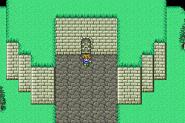
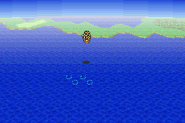
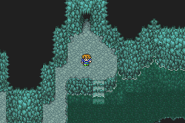
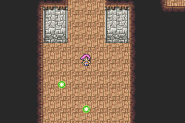
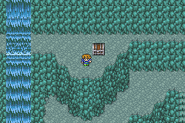
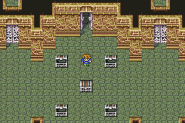
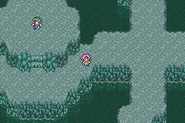
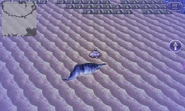
The Sealed Temple, known as ??? Cave before entering its depths, is a bonus dungeon in Final Fantasy V Advance and the defunct 2013 mobile/Steam versions. It is located underwater, south of Phantom Village, and contains four crystal shards with the jobs of Cannoneer, Gladiator, Oracle, and Necromancer, although the latter is not received until after the dungeon's main boss, Enuo, is beaten.
The temple can be entered after obtaining the tablets (and the twelve legendary weapons), where the party can acquire three of the four new jobs. After beating Neo Exdeath, the final boss of the main game, the switch at the first chamber unlocks the entrance to the Sealed Temple. The Cloister of the Dead opens by defeating Enuo.
Layout[]
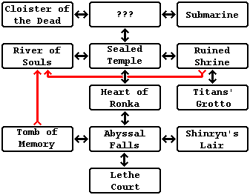
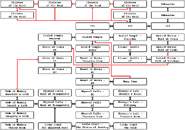
The Sealed Temple is divided into several wings; the use of the Read Ahead ability of the Oracle is recommended to explore all locations:
Entrance / ??? Cave[]
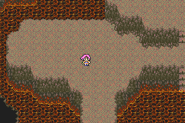
Divided into three rooms, the switch room has three doors. The western door, which is sealed until Neo Exdeath is defeated, leads through a save point room and deeper into the Sealed Temple. The central door, which is sealed until Enuo is defeated, leads into the Cloister of the Dead. The eastern door is the exit, leading back to the submarine.
Sealed Temple[]
Past the save point room in the ??? cave, the Sealed Temple wing is divided into four sections. From the central section, the northern door leads back into the save point room in the ??? Cave, the western door leads to the Dungeon, the eastern door leads to the Corridor, and the central door, initially sealed, leads to the Arena, and can be unlocked by giving a captured Behemoth to the NPC in B3 of the River of Souls. The Dungeon leads to the River of Souls, and has the Archeodemon boss, who is imprisoned behind a locked door, which can be opened with the Dungeon Key from an NPC in the Hall of Tranquility, defeating the Archeodemon unseals the teleporter from the Hall of Tranquility to Lethe Court.
The Corridor has a door to the Ruined Shrine, and two one-way teleporters to B1 of the Titans' grotto (the northwestern teleporter leads to the upper level, while the southeastern teleporter leads to the lower level). The Arena leads to the Heart of Ronka, however, the petrified Grand Aevis initially blocks the path. It can be unpetrified after talking to the NPC in the Hall of Watchmen in the Ruined Shrine.
River of Souls[]
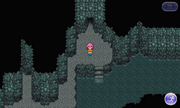
The River of Souls.
This is a three-floor cave where the player can have a rematch with the Gil Turtle on B2. It is connected to the Dungeon. Giving a captured Behemoth to an NPC in B3 opens the sealed Arena gate.
Ruined Shrine[]
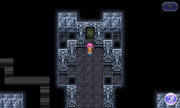
The Ruined Shrine.
Right area of the temple divided into the Hall of Souls, the Hall of Doubt, and the Hall of Watchmen (which can only be accessed through one-way teleporters or holes). The Hall of the Watchmen has an inventor who can unpetrify the Grand Aevis in the Arena, and a door to the Titan's Grotto and a one-way teleporter to B1 of the River of Souls.
Titan's Grotto[]
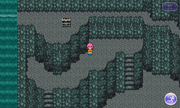
Titan's Grotto.
Cave with two floors where the player can find and catch a Behemoth to progress further in the dungeon. B2 connects to the Hall of the Watchmen.
Heart of Ronka[]
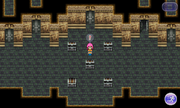
Heart of Ronka.
Ruins with the same architecture as the Ronka Ruins, from where the player can access the Abyssal Falls. Four floors, the Treasure Room (between the Arena and B1), B1, B2 (which connects to Abyssal Falls), and the Warp Zone. The Warp Zone includes a teleporter back to the Sealed Temple entrance.
Abyssal Falls[]
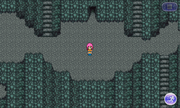
The Abyssal Falls.
Cave which gives access to Shinryu's Lair, the Tomb of Memory and the Lethe Court. Five sections: B1, B2, the Treasure Room, and the two rooms of the Hall of Tranquility. Entrance to Shinryu's Lair is initially sealed, but can be opened with a switch in Tomb of Memory: Decedent's Path.
Hall of Tranquility[]
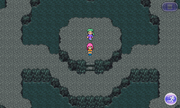
The Hall of Tranquility.
Westernmost section of the Abyssal Falls, divided into two rooms. From the main room, the player can access the Tomb of Memory and the Lethe Court, and an NPC who gives the party the Dungeon Key, which allows them to open the jail cells in the Dungeon and fight Archeodemon. The two-way teleporter to Lethe Court is sealed until the Archeodemon in the Dungeon area is defeated. To the north of the main room has a small save point room.
Tomb of Memory[]
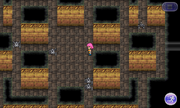
The Tomb of Memory.
Area with the same layout as the Pyramid of Moore where the player can find Omega Mk.II. Four floors: Decedent's Path (uppermost floor, contains a pit trap to B2 of the River of Souls and a switch opening the door to Shinryu's Lair), Incubi's Path (connected to the Hall of Tranquility), Iniquity's Path and the Throne Room (containing Omega Mk.II).
Every monster wandering visibly around the Incubi's Path floor is an Omega, each with the same stats as the one fought in the Interdimensional Rift during the main storyline.
Shinryu's Lair[]
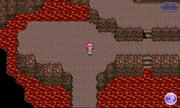
Shinryu's Lair.
Cave resembling the Great Sea Trench filled with lava where the player can find Neo Shinryu. It has three floors: the Entryway, the Treasure Room and Shinryu's Roost.
Lethe Court[]
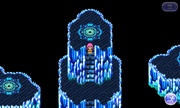
Lethe Court.
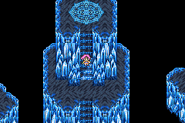
The final area of the temple, where the ultimate evil, Enuo, rests, protected by his mechanical Guardian. The player's reward for defeating the boss is the Necromancer Job and access to the Cloister of the Dead. The area bears structural similarities to the final area of the Interdimensional Rift, and is divided into three sections: The Shadowed Gate, The Stairs of Destiny (where the player fights the Guardian), and the third final area, where Enuo rests, is simply called The Void. Defeating Enuo teleports the party back to the dungeon entrance. If the party returns to the final area after defeating Enuo, they are simply teleported back to the entrance.
Cloister of the Dead[]
Similar architecture to the Lethe Court and the final area of the Interdimensional Rift. Divided into six floors. The player can rebattle most of the bosses here, in six groups of five battles. Leaving the Cloister resets battles. Clearing the final floor awards the Medal of Smiting. The player can repeat the battles as many times as they want.
Group 1[]
Group 2[]
Group 3[]
Group 4[]
Group 5[]
- Omniscient
- Wendigo x4
- Sandworm, Hole x2
- Atomos
- Halicarnassus
Group 6[]
Items[]
| Area | Items |
|---|---|
| Sealed Temple - Dungeon | |
| Titan's Grotto - B1 | |
| Titan's Grotto - B2 | |
| River of Souls - B1 | |
| River of Souls - B2 | |
| River of Souls - B3 | |
| Ruined Shrine - Hall of Souls | |
| Ruined Shrine - Hall of Doubt | |
| Sealed Temple - Arena | |
| Heart of Ronka - Treasure Room | |
| Heart of Ronka - B1 | |
| Heart of Ronka - B2 | |
| Abyssal Falls - B1 | |
| Abyssal Falls - B2 | |
| Abyssal Falls - Treasure Room | |
| Abyssal Falls - Hall of Tranquility | |
| Tomb of Memory - Incubi's Path | |
| Tomb of Memory - Iniquity's Path | |
| Tomb of Memory - Throne Room | |
| Shinryu's Lair - Entryway | |
| Shinryu's Lair - Treasure Room | |
| Shinryu's Lair - Shinryu's Roost |
|
| Lethe Court - The Shadowed Gate | |
| Lethe Court - The Stairs of Destiny |
Enemies[]
- Outside
- Dungeon
- River of Souls
- Soul Eater
- Skull Eater
- Nutkin
- Belphegor
- Crystelle
- Vilia
- Rukh
- Sea Devil
- Stingray
- Mover
- Gil Turtle (Boss)
- Ruined Shrine
- Grenade
- Fury
- Sword Dancer
- Mini Satana
- Flaremancer
- Chrono Controller
- Dark Elemental
- Exoray
- Mecha Head
- Level Checker
- Mindflayer
- Titan's Grotto
- Heart of Ronka
- Blue Dragon
- Red Dragon
- Assassin
- Mini Satana
- Iron Giant
- Exoray
- Mecha Head
- Level Checker
- Grand Aevis (Boss)
- Abyssal Falls
- Shinryu's Lair
- Great Dragon
- Dragon Aevis
- Shield Dragon
- Claret Dragon
- Crystal Dragon
- Red Dragon
- Yellow Dragon
- Blue Dragon
- Neo Shinryu (Boss)
- Tomb of Memory
- Medusa
- Mini Satana
- Dinozombie
- Mecha Head
- Necromancer
- Lamia Queen
- Omega (Boss)
- Omega Mk.II (Boss)
- Lethe Court
- Hades
- Behemoth
- King Behemoth
- Assassin
- Dinozombie
- Ironclad
- Claret Dragon
- Great Dragon
- Crystal Dragon
- Guardian (Boss)
- Wave Cannon (Boss)
- Launcher x2 (Boss)
- Enuo (Boss)
- Cloister of the Dead
- First Wave
- Second Wave
- Third Wave
- Fourth Wave
- Fifth Wave
- Last Wave
Musical themes[]
There are four musical themes used in the Sealed Temple. "Library of Ancients" plays at the main hub of the Sealed Temple. "Dungeon" plays at the entrance of the Sealed Temple, River of Souls, Ruined Shrine, Titan's Grotto, Heart of Ronka, Abyssal Falls, and Shinryu's Lair. "Slumber of Ancient Earth" plays at the Tomb of Memory. "In Search of Light" is used at Lethe Court and Cloister of the Dead.

