Oh, shut up and help me remodel the Garamsythe Waterway (Final Fantasy XII) page!
- Adding a Locations section, with images and brief descriptions of the areas within the location.
This request can be discussed on the associated discussion page. Remove this notice upon completion.
Hey, lock this place up for me, will you? If Migelo finds out we've been down here, he'll tan our hides.
Vaan to Kytes
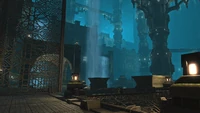
The Garamsythe Waterway is a location in the land of Ivalice in Final Fantasy XII. It serves as the sewer system for Rabanastre. The Garamsythe Waterway spans the underneath of the city, and is accessed via Lowtown. After the Esper Zalera is defeated deep within the Barheim Passage, a zoning point to the waterway becomes available.
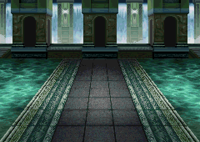
The waterway is a labyrinth of water and passages with monsters roaming the pathways. The water's level can be adjusted to reveal lower pathways through the opening and closing of the sluice gates.
Because parts of the waterway are of water terrain, all water and lightning attacks deal 20% more damage than normal when the target is standing in water, and earth damage is halved.
Sage Knowledge[]
An underground waterway running deep beneath the Royal City of Rabanastre. Built and rebuilt over the centuries, no one alive knows all of its labyrinthine ways. Some are said to lead even to the royal palace. There are stairs leading down to the waterway in Lowtown, but they are normally barred to keep unwelcome visitors down in the sewers where they belong.
Story[]
In the manga version, Princess Ashe and Lord Rasler fell into the waterway through a weak spot in a closed-off section of the Royal Palace of Rabanastre after Ashe spied on a Neo-Rozarria Faction meeting conspiring to kill her father, King Raminas B'nargin Dalmasca. Learning Rasler is not part of the faction, Ashe treated the wound he sustained when jumping in after her, but as it still smarted Ashe took his sword and led the way back to the palace.
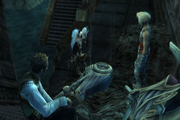
Balthier, Fran, and Vaan crash to Garamsythe Waterway.
Some years later, Vaan's adventure begins in the Garamsythe Waterway where he is hunting for rats until Kytes fetches him for Migelo. Vaan asks Kytes to lock the place up, because he does not want Migelo to discover he has been in the waterway. Vaan later enters the waterway having heard from Old Dalan it holds a hidden entrance to the Royal Palace. He is not the only one, as the Resistance moves their troops and supplies via the waterway to strike the palace on the night of the fete, the effort being led by Vossler and Amalia.
While in the palace Vaan runs into two sky pirates, Balthier and Fran, and they crash into the waterway as the piece of nethicite Vaan stole from the palace drains the power from the sky pirates' hoverbike. Escaping from the Imperial troops through the sewers, they come across Amalia and team up with her. After battling the Firemane the group is cornered by Rabanastre's new consul, Vayne Solidor, and separated, Amalia taken by the Empire and Vaan and the sky pirates thrown into the Nalbina Dungeons.
The manga version expands on the events. Vaan forms a temporary alliance with Balthier and Fran to escape the waterway during the Resistance attack on the palace. Vossler realizes the insurgence was led into a trap and orders a retreat, but Ashe, accompanying him under the alias "Amalia", refuses to admit defeat. Vossler orders Ashe taken to safety through the Garamsythe Waterway, but the troops he sends with her are imperial informants and aware of her identity as the Princess of Dalmasca.
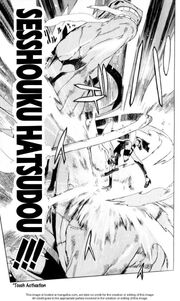
Fran kills a Firemane with a Quickening.
Ashe fights them off but is saved by Vaan. Vaan, Balthier, Ashe and Fran are met with a force of imperial soldiers with the insurgent traitors when a Firemane attacks them. Judge Ghis, who was appointed by Vayne to oversee the imperial counterattack, saves the insurgent traitors and defeats the Firemane, ordering the insurgents to take him to Ashe. The party defeats a second Firemane after which Ashe introduces herself as "Amalia" when Ghis finds them. Vaan attacks him and is thrown aside, and Balthier tells him Ghis is a Judge Magister who works for House Solidor. With Vaan knocked out and Ashe held captive Balthier and Fran fight Ghis, but are outmatched. Vaan, Fran and Balthier are sent to the Nalbina Dungeons, while Ghis has Ashe taken away aboard Dreadnought Leviathan.
Locations[]
- Overflow Cloaca (to Lowtown)
- Central Waterway Control
- No. 11 Channel
- No. 4 Cloaca Spur
- No. 1 Cloaca
- No. 3 Cloaca Spur
- No. 10 Channel
- West Sluice Control
- Southern Sluiceway
- East Sluice Control (to Barheim Passage)
- East Waterway Control
- East Spur Stairs
- Central Spur Stairs
- Northern Sluiceway
- North Spur Sluiceway (to Royal Palace)
Treasures[]

Vaan in the Garamsythe Waterway.
The waterway contains multiple treasures, but in the original version they are mainly common items and low level equipment, unless they have gil. With the Diamond Armlet equipped, the treasures contain Knots of Rust as a common item, and Elixir or Hi-Ether as a rare item.
When Vaan is on his way to the palace, he passes through the North Spur Sluiceway. In the original version, it is possible to obtain two weapons here. Oak Staff in a treasure right in the middle of the area that spawns 65% of the time, has 70% chance to contain items instead of gil, and when it contains items it can be either the Oak Staff or a Potion. The treasure respawns. Right before the stairs leading up toward the palace there is a treasure that spawns 65% of the time, and when it contains an item, it yields a Mage Masher.
In the Zodiac versions, the treasures are different. No. 4 Cloaca Spur (Drained) has the useful Achilles technick.
Northern Sluiceway[]
- Zodiac
| Chest | Spawns | Holds Gil% | Gil | Normal Treasure | Diamond Armlet Treasure | ||
|---|---|---|---|---|---|---|---|
| 1 | 75% | 30% | ≤ 80 gil | Potion | Common | Rare | |
| Knot of Rust | Meteorite (A) | ||||||
| 2 | 75% | 30% | ≤ 80 gil | Potion | Common | Rare | |
| Knot of Rust | Meteorite (A) | ||||||
| 3 | 75% | 30% | ≤ 80 gil | Eye Drops | Common | Rare | |
| Knot of Rust | Meteorite (B) | ||||||
| 4 | 75% | 25% | ≤ 80 gil | Antidote | Common | Rare | |
| Knot of Rust | Meteorite (A) | ||||||
| 5 | 75% | 35% | ≤ 80 gil | Item 1 | Item 2 | Common | Rare |
| Antidote | Broadsword | Knot of Rust | Meteorite (A) | ||||
| 6 | 75% | 40% | ≤ 120 gil | Phoenix Down | Common | Rare | |
| Knot of Rust | Meteorite (C) | ||||||
- Original
| Chest | Spawns | Holds Gil% | Normal Treasure | Diamond Armlet Treasure | ||||
|---|---|---|---|---|---|---|---|---|
| 1 | 65% | 40% | Gil | Item | Gil | Common | Rare | |
| ≤ 50 gil | Potion | ≤ 300 gil | Knot of Rust | Hi-Ether | ||||
| 2 | 65% | 40% | Gil | Item 1 | Item 2 | Gil | Common | Rare |
| ≤ 50 gil | Hi-Potion | Antidote | ≤ 300 gil | Knot of Rust | Float Moat | |||
| 3 | 65% | 40% | Gil | Item | Gil | Common | Rare | |
| ≤ 50 gil | Potion | ≤ 300 gil | Knot of Rust | Hi-Ether | ||||
| 4 | 65% | 40% | Gil | Item | Gil | Common | Rare | |
| ≤ 50 gil | Ether | ≤ 300 gil | Knot of Rust | Float Moat | ||||
| 5 | 65% | 40% | Gil | Item 1 | Item 2 | Gil | Common | Rare |
| ≤ 50 gil | Remedy | Antidote | ≤ 300 gil | Knot of Rust | Hi-Ether | |||
| 6 | 65% | 40% | Gil | Item | Gil | Common | Rare | |
| ≤ 50 gil | Potion | ≤ 300 gil | Knot of Rust | Float Moat | ||||
North Spur Sluiceway[]
- Zodiac
| Chest | Spawns | Holds Gil% | Gil | Normal Treasure | Diamond Armlet Treasure | ||
|---|---|---|---|---|---|---|---|
| 7 | 75% | 30% | ≤ 80 gil | Potion | Common | Rare | |
| Knot of Rust | Meteorite (A) | ||||||
| 8 | 75% | 30% | ≤ 70 gil | Antidote | Common | Rare | |
| Knot of Rust | Meteorite (A) | ||||||
| 9 | 75% | 30% | ≤ 80 gil | Potion | Common | Rare | |
| Knot of Rust | Meteorite (A) | ||||||
| 10 | 75% | 30% | ≤ 120 gil | Aero Mote | Common | Rare | |
| Knot of Rust | Meteorite (B) | ||||||
| 11 | 75% | 30% | ≤ 120 gil | Item 1 | Item 2 | Common | Rare |
| Potion | Javelin | Knot of Rust | Meteorite (A) | ||||
| 12[note 1] | 100% | 0% | N/A | Remedy | |||
| 13 | 75% | 30% | ≤ 80 gil | Potion | Common | Rare | |
| Knot of Rust | Meteorite (A) | ||||||
| 14 | 75% | 30% | ≤ 100 gil | Potion | Common | Rare | |
| Knot of Rust | Meteorite (A) | ||||||
- ↑ Chest does not respawn.
- Original
| Chest | Spawns | Holds Gil% | Normal Treasure | Diamond Armlet Treasure | ||||
|---|---|---|---|---|---|---|---|---|
| 7 | 65% | 45% | Gil | Item | Gil | Common | Rare | |
| ≤ 40 gil | Phoenix Down | ≤ 300 gil | Knot of Rust | Remedy | ||||
| 8 | 65% | 45% | Gil | Item 1 | Item 2 | Gil | Common | Rare |
| ≤ 40 gil | Hi-Potion | Ether | ≤ 300 gil | Knot of Rust | Elixir | |||
| 9 | 65% | 45% | Gil | Item 1 | Item 2 | Gil | Common | Rare |
| ≤ 40 gil | Phoenix Down | Potion | ≤ 300 gil | Knot of Rust | Hi-Ether | |||
| 10 | 65% | 45% | Gil | Item 1 | Item 2 | Gil | Common | Rare |
| ≤ 75 gil | Oak Staff | Potion | ≤ 300 gil | Knot of Rust | Hi-Ether | |||
| 11 | 65% | 45% | Gil | Item | Gil | Common | Rare | |
| ≤ 80 gil | Mage Masher | ≤ 300 gil | Knot of Rust | Gold Needle | ||||
| 12 | 65% | 45% | Gil | Item | Gil | Common | Rare | |
| ≤ 75 gil | Potion | ≤ 300 gil | Knot of Rust | Vanishga Mote | ||||
East Waterway Control[]
- Zodiac
| Chest | Spawns | Holds Gil% | Gil | Normal Treasure | Diamond Armlet Treasure | ||
|---|---|---|---|---|---|---|---|
| 15 | 80% | 40% | ≤ 80 gil | Potion | Common | Rare | |
| Knot of Rust | Meteorite (A) | ||||||
| 16 | 80% | 30% | ≤ 80 gil | Antidote | Common | Rare | |
| Knot of Rust | Meteorite (A) | ||||||
| 17 | 80% | 45% | ≤ 90 gil | Item 1 | Item 2 | Common | Rare |
| Potion | Altair | Knot of Rust | Meteorite (B) | ||||
| 18 | 80% | 40% | ≤ 100 gil | Item 1 | Item 2 | Common | Rare |
| Hi-Potion | Leather Breastplate | Knot of Rust | Meteorite (A) | ||||
- Original
| Chest | Spawns | Holds Gil% | Normal Treasure | Diamond Armlet Treasure | ||||
|---|---|---|---|---|---|---|---|---|
| 13 | 75% | 35% | Gil | Item 1 | Item 2 | Gil | Common | Rare |
| ≤ 45 gil | Potion | Eye Drops | ≤ 300 gil | Knot of Rust | Elixir | |||
| 14 | 75% | 35% | Gil | Item | Gil | Common | Rare | |
| ≤ 45 gil | Potion | ≤ 300 gil | Knot of Rust | Elixir | ||||
| 15 | 75% | 35% | Gil | Item | Gil | Common | Rare | |
| ≤ 80 gil | Hi-Potion | ≤ 500 gil | Knot of Rust | Hi-Ether | ||||
No. 11 Channel (Flooded)[]
- Zodiac
| Chest | Spawns | Holds Gil% | Gil | Normal Treasure | Diamond Armlet Treasure | ||
|---|---|---|---|---|---|---|---|
| 19 | 75% | 30% | ≤ 80 gil | Antidote | Common | Rare | |
| Knot of Rust | Meteorite (A) | ||||||
| 20 | 75% | 40% | ≤ 80 gil | Item 1 | Item 2 | Common | Rare |
| Potion | Light Woven Shirt | Knot of Rust | Meteorite (A) | ||||
| 21 | 75% | 40% | ≤ 80 gil | Item 1 | Item 2 | Common | Rare |
| Potion | Chromed Leathers | Knot of Rust | Meteorite (A) | ||||
| 22 | 75% | 35% | ≤ 110 gil | Ether | Common | Rare | |
| Knot of Rust | Meteorite (A) | ||||||
| 23 | 75% | 35% | ≤ 80 gil | Item 1 | Item 2 | Common | Rare |
| Potion | Oaken Pole | Knot of Rust | Meteorite (A) | ||||
| 24 | 75% | 40% | ≤ 90 gil | Item 1 | Item 2 | Common | Rare |
| Potion | Kotetsu | Knot of Rust | Meteorite (A) | ||||
- Original
| Chest | Spawns | Holds Gil% | Gil | Normal Treasure | |
|---|---|---|---|---|---|
| 16 | 80% | 30% | ≤ 45 gil | Item 1 | Item 2 |
| Potion | Ether | ||||
| 17 | 65% | 30% | ≤ 50 gil | Item 1 | Item 2 |
| Longsword | Antidote | ||||
| 18 | 80% | 30% | ≤ 45 gil | Escutcheon | |
| 19 | 70% | 50% | ≤ 50 gil | Item 1 | Item 2 |
| Leather Armor | Phoenix Down | ||||
| 20 | 80% | 30% | ≤ 100 gil | Item 1 | Item 2 |
| Potion | Eyedrops | ||||
No. 11 Channel (Drained)[]
- Zodiac
| Chest | Spawns | Holds Gil% | Gil | Normal Treasure | Diamond Armlet Treasure | ||
|---|---|---|---|---|---|---|---|
| 33 | 90% | 50% | ≤ 300 gil | Item 1 | Item 2 | Common | Rare |
| Chronos Tear | Serum | Knot of Rust | Meteorite (C) | ||||
| 34 | 90% | 50% | ≤ 300 gil | Item 1 | Item 2 | Common | Rare |
| Ether | Long Bolts | Knot of Rust | Meteorite (A) | ||||
| 35 | 90% | 50% | ≤ 300 gil | Item 1 | Item 2 | Common | Rare |
| Nu Khai Sand | Hi-Potion | Knot of Rust | Meteorite (A) | ||||
| 36[note 1] | 100% | 0% | N/A | Gilt Measure | |||
| 37 | 90% | 50% | ≤ 300 gil | Item 1 | Item 2 | Common | Rare |
| Ether | Aqua Mote | Knot of Rust | Meteorite (B) | ||||
| 38 | 90% | 50% | ≤ 300 gil | Item 1 | Item 2 | Common | Rare |
| Potion | Gold Needle | Knot of Rust | Meteorite (A) | ||||
- ↑ Chest does not respawn.
- Original
| Chest | Spawns | Holds Gil% | Normal Treasure | Diamond Armlet Treasure | ||||
|---|---|---|---|---|---|---|---|---|
| 21 | 60% | 60% | Gil | Item 1 | Item 2 | Gil | Item | |
| ≤ 100 gil | Knot of Rust | Potion | ≤ 2,000 gil | Knot of Rust | ||||
| 22 | 60% | 50% | Gil | Item 1 | Item 2 | Gil | Item | |
| ≤ 500 gil | Knot of Rust | Ether | ≤ 100 gil | Knot of Rust | ||||
| 23 | 60% | 60% | Gil | Item 1 | Item 2 | Gil | Item | |
| ≤ 100 gil | Knot of Rust | Potion | ≤ 1,500 gil | Knot of Rust | ||||
| 24[note 1] | 50% | 0% | Gil | Item 1 | Item 2 | Gil | Common | Rare |
| N/A | Knot of Rust | Ether | N/A | Mirror Mail | Knot of Rust | |||
| 25 | 60% | 50% | Gil | Item 1 | Item 2 | Gil | Item | |
| 500 gil | Knot of Rust | Ether | 100 gil | Knot of Rust | ||||
| 26 | 60% | 60% | Gil | Item 1 | Item 2 | Gil | Item | |
| 100 gil | Knot of Rust | Potion | 2,00 gil | Knot of Rust | ||||
- ↑ Chest does not respawn.
Southern Sluiceway[]
- Zodiac
| Chest | Spawns | Holds Gil% | Gil | Normal Treasure | Diamond Armlet Treasure |
|---|---|---|---|---|---|
| 25[note 1] | 100% | 0% | N/A | Hi-Potion | |
| 26[note 1] | 100% | 0% | N/A | Phoenix Down | |
- Original
| Chest | Spawns | Holds Gil% | Normal Treasure | |
|---|---|---|---|---|
| 27[note 1] | 100% | 0% | Item 1 | Item 2 |
| Leather Shield | Hi-Potion | |||
| 28[note 1] | 100% | 0% | Item 1 | Item 2 |
| Dagger | Phoenix Down | |||
West Sluice Control[]
- Zodiac
| Chest | Spawns | Holds Gil% | Gil | Normal Treasure | Diamond Armlet Treasure | ||
|---|---|---|---|---|---|---|---|
| 27 | 80% | 35% | ≤ 80 gil | Dark Mote | Common | Rare | |
| Knot of Rust | Meteorite (A) | ||||||
| 28 | 80% | 35% | ≤ 90 gil | Soleil Fang | Common | Rare | |
| Knot of Rust | Meteorite (B) | ||||||
- Original
| Chest | Spawns | Holds Gil% | Normal Treasure | |
|---|---|---|---|---|
| 29[note 1] | 100% | 0% | Item 1 | Item 2 |
| Phoenix Down | Red Fang | |||
- ↑ Chest does not respawn.
No. 10 Channel (Flooded)[]
- Zodiac
| Chest | Spawns | Holds Gil% | Gil | Normal Treasure | Diamond Armlet Treasure | ||
|---|---|---|---|---|---|---|---|
| 29 | 70% | 40% | ≤ 95 gil | Item 1 | Item 2 | Common | Rare |
| Antidote | Silken Shirt | Knot of Rust | Meteorite (A) | ||||
| 30 | 70% | 40% | ≤ 85 gil | Item 1 | Item 2 | Common | Rare |
| Potion | Bowgun | Knot of Rust | Meteorite (A) | ||||
| 31 | 70% | 40% | ≤ 300 gil | Item 1 | Item 2 | Common | Rare |
| Hi-Potion | Longsword | Knot of Rust | Meteorite (A) | ||||
| 32 | 70% | 45% | ≤ 80 gil | Item 1 | Item 2 | Common | Rare |
| Phoenix Down | Mace | Knot of Rust | Meteorite (B) | ||||
- Original
| Chest | Spawns | Holds Gil% | Gil | Normal Treasure | |
|---|---|---|---|---|---|
| 30 | 73% | 30% | ≤ 100 gil | Item 1 | Item 2 |
| Phoenix Down | Potion | ||||
| 31 | 65% | 35% | ≤ 200 gil | Item 1 | Item 2 |
| Cotton Shirt | Potion | ||||
| 32 | 73% | 30% | ≤ 400 gil | Item 1 | Item 2 |
| G-Foe: targeting self | Potion | ||||
| 33 | 73% | 30% | ≤ 300 gil | Hi-Potion | |
No. 10 Channel (Drained)[]
- Zodiac
| Chest | Spawns | Holds Gil% | Gil | Normal Treasure | Diamond Armlet Treasure | ||
|---|---|---|---|---|---|---|---|
| 39 | 90% | 50% | ≤ 300 gil | Item 1 | Item 2 | Common | Rare |
| Ether | Potion | Knot of Rust | Meteorite (C) | ||||
| 40 | 90% | 50% | ≤ 300 gil | Item 1 | Item 2 | Common | Rare |
| Phoenix Down | Gold Needle | Knot of Rust | Meteorite (B) | ||||
| 41 | 90% | 50% | ≤ 300 gil | Item 1 | Item 2 | Common | Rare |
| Dispel Mote | Gravity Mote | Knot of Rust | Meteorite (A) | ||||
| 42[note 1] | 100% | 0% | N/A | Hornito | |||
| 43 | 90% | 50% | ≤ 300 gil | Item 1 | Item 2 | Common | Rare |
| Nu Khai Sand | Silent Shot | Knot of Rust | Meteorite (A) | ||||
- ↑ Chest does not respawn.
- Original
| Chest | Spawns | Holds Gil% | Normal Treasure | Diamond Armlet Treasure | ||||
|---|---|---|---|---|---|---|---|---|
| 34 | 60% | 60% | Gil | Item 1 | Item 2 | Gil | Item | |
| ≤ 100 gil | Knot of Rust | Ether | ≤ 2,000 gil | Knot of Rust | ||||
| 35 | 60% | 50% | Gil | Item 1 | Item 2 | Gil | Item | |
| ≤ 500 gil | Knot of Rust | Potion | ≤ 100 gil | Knot of Rust | ||||
| 36 | 60% | 60% | Gil | Item 1 | Item 2 | Gil | Item | |
| ≤ 100 gil | Knot of Rust | Ether | ≤ 2,000 gil | Knot of Rust | ||||
| 37[note 1] | 50% | 0% | Gil | Item 1 | Item 2 | Gil | Common | Rare |
| N/A | Knot of Rust | Ether | N/A | Iga Blade | Megalixir | |||
| 38 | 60% | 50% | Gil | Item 1 | Item 2 | Gil | Item | |
| ≤ 500 gil | Knot of Rust | Ether | ≤ 100 gil | Knot of Rust | ||||
- ↑ Chest does not respawn.
No. 3 Cloaca Spur (Drained)[]
- Zodiac
| Chest | Spawns | Holds Gil% | Gil | Normal Treasure | Diamond Armlet Treasure | ||
|---|---|---|---|---|---|---|---|
| 44[note 1] | 100% | 0% | N/A | Jade Collar | |||
| 45 | 90% | 50% | ≤ 300 gil | Item 1 | Item 2 | Common | Rare |
| Potion | Aero Mote | Knot of Rust | Meteorite (B) | ||||
| 46 | 90% | 50% | ≤ 300 gil | Item 1 | Item 2 | Common | Rare |
| Echo Herbs | Aquara Mote | Knot of Rust | Meteorite (A) | ||||
- ↑ Chest does not respawn.
- Original
| Chest | Spawns | Holds Gil% | Normal Treasure | Diamond Armlet Treasure | ||||
|---|---|---|---|---|---|---|---|---|
| 39 | 60% | 60% | Gil | Item 1 | Item 2 | Gil | Item | |
| ≤ 500 gil | Knot of Rust | Ether | ≤ 1,800 gil | Knot of Rust | ||||
| 40 | 60% | 60% | Gil | Item 1 | Item 2 | Gil | Item | |
| ≤ 500 gil | Knot of Rust | Ether | ≤ 1,800 gil | Knot of Rust | ||||
| 41 | 50% | 50% | Gil | Item 1 | Item 2 | Gil | Item | |
| ≤ 700 gil | Knot of Rust | Potion | ≤ 100 gil | Knot of Rust | ||||
No. 4 Cloaca Spur (Drained)[]
- Zodiac
| Chest | Spawns | Holds Gil% | Gil | Normal Treasure | Diamond Armlet Treasure | ||
|---|---|---|---|---|---|---|---|
| 47[1] | 100% | 0% | N/A | Achilles | |||
| 48 | 90% | 50% | ≤ 300 gil | Item 1 | Item 2 | Common | Rare |
| Antidote | Ether | Knot of Rust | Meteorite (A) | ||||
| 49 | 90% | 50% | ≤ 300 gil | Item 1 | Item 2 | Common | Rare |
| Eye Drops | Chronos Tear | Knot of Rust | Meteorite (B) | ||||
- 1 - Chest does not respawn.
- Original
| Chest | Spawns | Holds Gil% | Normal Treasure | Diamond Armlet Treasure | ||||
|---|---|---|---|---|---|---|---|---|
| 42 | 60% | 60% | Gil | Item 1 | Item 2 | Gil | Item | |
| ≤ 100 gil | Knot of Rust | Potion | ≤ 1,500 gil | Knot of Rust | ||||
| 43 | 50% | 60% | Gil | Item 1 | Item 2 | Gil | Item | |
| ≤ 600 gil | Knot of Rust | Ether | ≤ 100 gil | Knot of Rust | ||||
| 44 | 60% | 60% | Gil | Item 1 | Item 2 | Gil | Item | |
| ≤ 100 gil | Knot of Rust | Potion | ≤ 2,000 gil | Knot of Rust | ||||
Quests[]
Hunts[]
The Wraith hunt can be undertaken after escaping from the Barheim Passage. It is found in the Overflow Cloaca area and will constantly cast Doom on the party. Its petitioner is Milha in Rabanastre's Lowtown. Defeating Wraith allows the player enter a private residence in Lowtown and pick up the Dusty Letter key item, part of a later sidequest (see below) that tells in which order the sluice gates must be operated in the waterway.
The White Mousse hunt can be undertaken after the player attains the clan rank of Vanguard. White Mousse is a breed of Flan that lives in the West Sluice Control area of the Garamsythe Waterway. The Sluice Gate Key is obtained from Sorbet after completion of the hunt.
Orthros is an Elite Mark located in the Southern Sluiceway. The earliest the hunt can be accepted is after obtaining the Dawn Shard, and reaching the clan rank of "Headhunter". Orthros will appear if the party consists of the three females. The player can swap the characters after Orthros appears. Guest characters, Larsa and Reddas, can be in the party as well. It is petitioned by Contrite Thief in Rabanastre's Lowtown (North Sprawl) after learning of the hunt from Montblanc. The player will receive the Stolen Articles after the battle, which the Contrite Thief returns to Samal. He comes by to give the player a Blackened Fragment, which is part of the three medallions sidequest.
Rare Game[]
The Gavial is a Trophy Rare Game that appears in the No. 10 Channel. Since it is a trophy monster, it will only spawn once the trophy quest has started and never spawns again when killed. The player must have spoken to the "Huntmaster" in Phon Coast and defeated Thalassinon, which will trigger the start of the Rare Game quest.
The player must close the no. 10 sluice gate and enter the area drained of water. Gavial is not found on one of the upper walkways, but down in the channel. After waiting 10 to 15 seconds, Gavial will come running towards the party.
Razorfin has a 10% chance of spawning instead of an Ichthon in the North Spur Sluiceway. It can be picked out from the Ichthons around it because it is larger and not docile.
The player must spend at least five minutes in the No. 4 Cloaca Spur after which the chances of the Drowned spawning increases by 8% every 15 seconds. The player should have drained the water in the No. 4 Cloaca Spur. One must enter the lower level of the southeast area, near to the Gespenst. If it has not appeared after eight minutes, it will not appear, so the player must re-zone and try again.
Sluice gates[]
Medallion quest[]
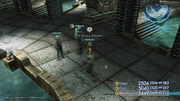
Finding the Dull Fragment.
After defeating the White Mousse mark the player gets the Sluice Gate Key that allows them to work the gates in the opening area of the waterway.
The Dusty Letter Key Item contains a clue to obtaining the Dull Fragment - "East Southeast East Southwest Southeast". The waterway controls in Central Waterway Control must be operated in this order.
The player must first turn all the switches off (turning the lights off) and follow the steps below:
- 1. Turn No.11 Waterway Control on
- 2. Turn No.4 Waterway Control on
- 3. Turn No.11 Waterway Control off
- 4. Turn No.3 Waterway Control on
- 5. Turn No.4 Waterway Control off
After the last gate is closed a click is heard, and on the south side on the ground, there is a glittering object, the Dull Fragment. This item is part of the three medallions sidequest.
Cúchulainn[]
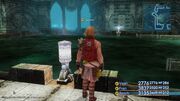
Cúchulainn's pool when it is full.
The Esper Cúchulainn can be fought in the middle of the waterway by working the sluice gates. The player must again work the sluice gates. The player must first switch on No. 3 and No. 10 sluice gates, by lighting up the panels, then move to the South-West (No. 3 area) and find the No.1 South Switch and activate it. Next the player must turn off No. 3 and No. 10 sluice gates, and switch on No. 4 and 11, then head to South-East (No. 4 area), locate and activate the No. 1 North sluice gate switch. After returning to the central, the player must finally turn off the No. 11 switch, and turn on the No. 3 panel.
Now only sluice gates No. 3 and No. 4 should be on and the player can access the area where Cúchulainn is fought, although the player must be quick because he disappears exactly 75 seconds after the player has pulled the switches.
Black bottle[]
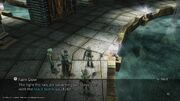
Rats congregate in the right spot.
The player can find a black bottle from the fishing minigame at Dalmasca Estersand with a hint to the control room of Garamsythe Waterway. The player can find a sparkling spot that shatters the black bottle to yield an Elixir.
Enemies[]
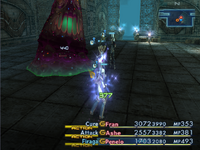
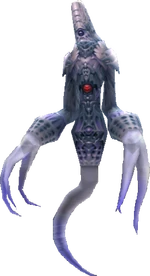
Orthros is an Elite Mark in the Waterway.
Different enemies appear in different areas determined whether the areas are flooded are drained. Thus, the player can spawn new enemies at the waterway after they get to operate the sluice gates.
- Dire Rat
- Steeling
- Ichthon (Docile)
- Gigantoad
- Lizard
- Malboro Overking
- Gespenst
- Ghost
- Garchimacera
- Water Elemental
- Baritine Croc
- Foobar (assist Cúchulainn)
- Imperial Swordsman (Event Boss)
- Flan (Event Boss)
- Firemane (Boss)
- Cúchulainn (Optional Esper)
- Gavial (Rare)
- Razorfin (Rare)
- Drowned (Rare)
- Wraith (Mark)
- White Mousse (Mark)
- Orthros (Elite Mark)
Other appearances[]
Final Fantasy XIV[]
The Garamsythe Waterway appears as a portion of the Royal City of Rabanastre raid, as part of the Return to Ivalice series. Stretching far below the streets of Rabanastre, this channel was constructed to carry in water from its source in the Skatay Range to the north. The lattice-like architecture of the waterway is confusing to navigate, and those who lose their sense of direction find it all but impossible to find their way out again. Within its depths are the ruins of Lesalia, ancient capital of the legendary kingdom of Ivalice.
It is also known to connect to Nalbina Fortress and the ocean. 30 years ago, Princess Ashe and Ba'Gamnan fled Nalbina after the Garlean Empire conquered it, but Ashe died "a stone's throw from where the waterway drains into the sea."
Pictlogica Final Fantasy[]
Final Fantasy Record Keeper[]
Vaan has snuck into Rabanastre Palace, where he meets a dashing man and his viera partner. The two help Vaan escape on their airbike before careening down to a crash landing in the Garamsythe Waterway.
Musical themes[]
"The Garamsythe Waterway" plays as the location background music. At the game's beginning where Vaan and Kytes are training in the sewers, the theme "Training in the Sewers" plays.
Map[]
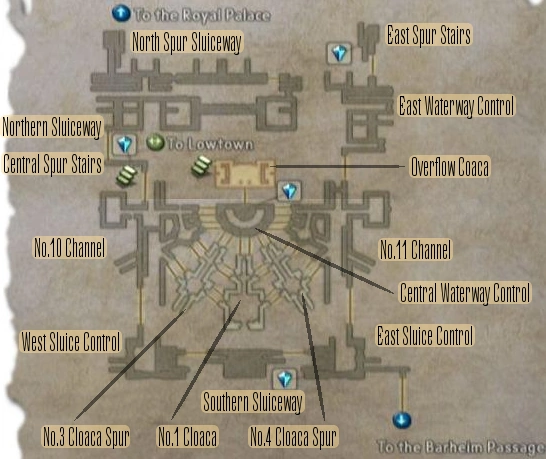
The map can be found in the East Waterway Control.
The candle to reveal the full map can be found in the East Sluice Control.
Map from the original Final Fantasy XII that includes all treasure information.
Behind the scenes[]
After Fran and Balthier join Vaan's party and Balthier explains the gambit system, the player can examine the fallen soldiers in the canal. Depending on who is in the lead, the message is different:
- Vaan: "I'd take you with us if I could...but there's just no time. Sorry..."
- Balthier: "They're equipped well enough, for all the good it did them. Boys with too much hate and too little experience. The insurgence must be desperate."
- Fran: "If they had allies who fled into the sewers, their pursuers will not be far."

