 Navarre: Scarlet Sword | |||
|---|---|---|---|
Hard/Lunatic                 Infernal/Abyssal                   | |||
| Level Indicator: | |||
| Stamina Cost: | 0 (Hard) 0 (Lunatic) 0 (Infernal) 0 (Abyssal) | ||
| Victory Requirements: | All allies must survive. Cannot use Light's Blessing | ||
| Reward: | |||
| BGM: | |||
| |||
Map availability[ | ]
This map was a Grand Hero Battle map which was made available:
- – (Notification)
- – (Notification)
- – (Notification) (Infernal difficulty added)
Daily GHB Revival[ | ]
This map is part of the Daily GHB Revival Rotation and appears weekly:
- (Notification)
This map is available periodically. It is scheduled to become available during – .
(Abyssal difficulty was added on , but was first playable on )
Unit data[ | ]
Hard
AI settings
| Group | Index | Unit | Start turn | Notes |
|---|---|---|---|---|
| 1 | #1 | Navarre | After group is engaged | Attacks breakable terrain |
| #2 | Axe Fighter | After group is engaged | Attacks breakable terrain | |
| #3 | Thief | After group is engaged | Attacks breakable terrain | |
| #4 | Thief | After group is engaged | Attacks breakable terrain | |
| #5 | Cleric | After group is engaged | Attacks breakable terrain |
See AI for a detailed description of the enemy movement settings.
Enemy units
| Enemy data | |||||||||||||||||||||||||||||||||||||||
|---|---|---|---|---|---|---|---|---|---|---|---|---|---|---|---|---|---|---|---|---|---|---|---|---|---|---|---|---|---|---|---|---|---|---|---|---|---|---|---|
| |||||||||||||||||||||||||||||||||||||||
| |||||||||||||||||||||||||||||||||||||||
| |||||||||||||||||||||||||||||||||||||||
| |||||||||||||||||||||||||||||||||||||||
| |||||||||||||||||||||||||||||||||||||||
Lunatic
AI settings
| Group | Index | Unit | Start turn | Notes |
|---|---|---|---|---|
| 1 | #1 | Navarre | After group is engaged | Attacks breakable terrain |
| #2 | Axe Fighter | After group is engaged | Attacks breakable terrain | |
| #3 | Thief | After group is engaged | Attacks breakable terrain | |
| #4 | Thief | After group is engaged | Attacks breakable terrain | |
| #5 | Cleric | After group is engaged | Attacks breakable terrain |
See AI for a detailed description of the enemy movement settings.
Enemy units
| Enemy data | |||||||||||||||||||||||||||||||||||||||
|---|---|---|---|---|---|---|---|---|---|---|---|---|---|---|---|---|---|---|---|---|---|---|---|---|---|---|---|---|---|---|---|---|---|---|---|---|---|---|---|
| |||||||||||||||||||||||||||||||||||||||
| |||||||||||||||||||||||||||||||||||||||
| |||||||||||||||||||||||||||||||||||||||
| |||||||||||||||||||||||||||||||||||||||
| |||||||||||||||||||||||||||||||||||||||
Infernal
AI settings
| Group | Index | Unit | Start turn | Notes |
|---|---|---|---|---|
| 1 | #1 | Navarre | After group is engaged | Attacks breakable terrain |
| #2 | Axe Fighter | After group is engaged | Attacks breakable terrain | |
| #3 | Thief | After group is engaged | Attacks breakable terrain | |
| #4 | Thief | After group is engaged | Attacks breakable terrain | |
| #5 | Cleric | After group is engaged | Attacks breakable terrain | |
| #6 | Blue Manakete | After group is engaged | — |
See AI for a detailed description of the enemy movement settings.
Enemy units
| Enemy data | |||||||||||||||||||||||||||||||||||||||
|---|---|---|---|---|---|---|---|---|---|---|---|---|---|---|---|---|---|---|---|---|---|---|---|---|---|---|---|---|---|---|---|---|---|---|---|---|---|---|---|
| |||||||||||||||||||||||||||||||||||||||
| |||||||||||||||||||||||||||||||||||||||
| |||||||||||||||||||||||||||||||||||||||
| |||||||||||||||||||||||||||||||||||||||
| |||||||||||||||||||||||||||||||||||||||
| |||||||||||||||||||||||||||||||||||||||
Abyssal
AI settings
| Group | Index | Unit | Start turn | Notes |
|---|---|---|---|---|
| 1 | #1 | Navarre | After group is engaged | Attacks breakable terrain |
| #2 | Axe Fighter | After group is engaged | Attacks breakable terrain | |
| #3 | Thief | After group is engaged | Attacks breakable terrain | |
| #4 | Thief | After group is engaged | Attacks breakable terrain | |
| #5 | Cleric | After group is engaged | Attacks breakable terrain | |
| #6 | Blue Manakete | After group is engaged | — |
See AI for a detailed description of the enemy movement settings.
Enemy units
| Enemy data | |||||||||||||||||||||||||||||||||||||||
|---|---|---|---|---|---|---|---|---|---|---|---|---|---|---|---|---|---|---|---|---|---|---|---|---|---|---|---|---|---|---|---|---|---|---|---|---|---|---|---|
| |||||||||||||||||||||||||||||||||||||||
| |||||||||||||||||||||||||||||||||||||||
| |||||||||||||||||||||||||||||||||||||||
| |||||||||||||||||||||||||||||||||||||||
| |||||||||||||||||||||||||||||||||||||||
| |||||||||||||||||||||||||||||||||||||||
Limited Hero Battle[ | ]
| Availability | Deployment limits | Rewards |
|---|---|---|
| – (Notification) |
|
Story[ | ]
Beginning of the battle
English・Japanese
 Navarreナバール | Good? Evil? I couldn't care less what Just keep one thing in mind—I don't | …雇い主の善悪に興味はない。 | ||
| Story | ||
|---|---|---|
| Previous: Paralogue 4-3: Spring Stars ← |
Next: Paralogue 5-1: Legendary Hero → | |
Strategy / General Tips[ | ]
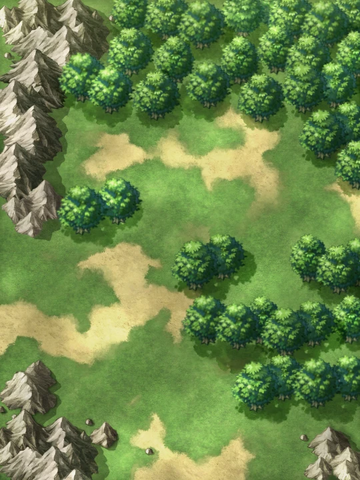
- Since most of the enemies on this map are physical fighters, baiting the enemy with a high DEF unit at the forest choke point is a viable strategy.
- Cavalry units will have a hard time maneuvering on this map due to the surplus of Forest terrain. On the other hand, fliers will excel on this map due to their movement not being inhibited by terrain.
Unit Recommendations
- Robin: High Deliverer is a strong unit for this map due to his advantage against Navarre (Red) and the Colorless units.
- From the Battling Navarre summoning focus:
- Kagero excels due to all the enemies being Infantry. This means her Poison Dagger / Poison Dagger+ will be amazing against all the enemies on the map.
- Effie has the ability to sit at the forest choke point and tank almost all the enemies thanks to her high DEF and Wary Fighter to counter Navarre's high SPD. She cannot however tank the Axe Fighter due to his Hammer.
- Caeda as a flier has the advantage of crossing Forest terrain uninhibited. Can be used to take out the Axe Fighter.
Enemy AI[ | ]
- Stationary until player contact.
In other languages[ | ]
| Language | Name |
|---|---|
| English (US) | Navarre: Scarlet Sword |
| Japanese | 紅の剣士 ナバール |
| German | Nabarl: Rote Klinge |
| Spanish (Europe) | Nabarl: Espada Escarlata |
| Spanish (Latin America) | Navarre: Espada Escarlata |
| French | Nabarl : Épée taciturne |
| Italian | La spada silente: Nabarl |
| Traditional Chinese (Taiwan) | 赤色劍士 拿巴爾 |
| Portuguese | Navarre: Espada escarlate |
Trivia[ | ]
- This map is a reference to Fire Emblem: Mystery of the Emblem - Chapter 7: The Scarlet Swordsman. (Map Image)
- The infernal difficulty of this map was introduced with its revival.
- Prior to version 2.4.0 the stamina costs for Hard, Lunatic and Infernal were 10, 15 and 15 respectively.


