This week's Colour Creations blog hop features another blue, but this time it's one that is much more within my comfort zone! Balmy Blue is a lovely soft blue, that I have used with the new Fields in Bloom stamp set, to create a couple of cards in this colour scheme:
CARD #1:
I have been itching to have a play with the Fields in Blooms stamp set. It has a lovely big "field of flowers" stamp, and a co-ordinating foliage stamp.
Starting off with a Basic White piece of card cut with a Deckled Rectangles Die, I stamped the grassy component. I inked up the stamp with Soft Sea Foam ink, and used the Granny Apple Green Stampin' Write Marker to add a bit of colour randomly using the "thumping" technique. This involves lightly holding the marker in one hand, and letting it fall against the inked stamp, bouncing it repeatedly (and randomly) on the rubber. The result is subtle, but hopefully you can see the colour variation. After stamping the grass/stems, I inked up the large flower field stamp with Balmy Blue ink, and stamped the flowers in the gaps left by the first stamp.

The background panel of Balmy Blue card was stamped with the smaller floral stamp in the set. I inked it each time with Balmy Blue ink, stamped off onto scrap paper to lighten the impression, and stamped onto the Balmy Blue card. I sponged the edges of this stamped panel, with Balmy Blue ink, and matted it on a layer of Soft Sea Foam card (the edges of which were sponged with Soft Sea Foam ink).
I used a Bright Skies Die to cut a cloud from Basic White card. After stamping the sentiment (from Simply Said) in Granny Apple Green ink, I added Balmy Blue ink using a Blending Brush.
The die-cut "friend" was created with Friends For Life Dies. I applied Adhesive Sheet to the back of the Balmy Blue and Basic White card pieces, before die-cutting them. This meant no glue mess, when sticking them down.
Before I adhered the Deckled Rectangle panel to the background, I added a thin strip of Granny Apple Green card. I stamped this strip with the grassy stamp and Granny Apple Green ink. Once I had glued everything down, I added a couple of little Soft Sea Foam flowers, die cut using a Flowers of Beauty Die. Balmy Blue dots (from the Rainbow Adhesive-Backed Dots pack) were added to the flower centres, and in the top left corner of the background.
CARD #2:
After making my card for this week, I had a few die-cut and stamped "bits" left over, so made a second card using the same colour combination.
To a Balmy Blue card base, I added a Basic White panel embossed using a Basics 3D embossing folder. The smaller Soft Sea Foam panel was stamped a couple of times using the larger flower field stamp, inked in Soft Sea Foam. I sponged the edges of this piece with Soft Sea Foam ink, too.
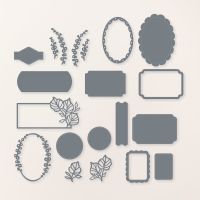
Don't you think the little oval element looks like a cameo brooch? I stamped the flowers and stems on Basic White card first, again inking the foliage in Soft Sea Foam ink, then "thumping" the stamp with my Granny Apple Green Stampin' Write Marker before stamping onto the card. I die-cut this piece, and a Balmy Blue piece of card, using a sweet Unbounded Love Die that cuts the scalloped outer, and the inner, separately. When I was ready to add it to my card, I first glued down the Balmy Blue frame, then inlaid the stamped Basic White piece.
A white baker's twine bow was added, along with some Flowers of Beauty flowers, die cut from Balmy Blue, Soft Sea Foam and Granny Apple Green card. I added Iridescent Pearls to the centres of the die-cut flowers.
Both parts of the sentiment on this card were created with the Friends for Life bundle. I stamped "Happy Birthday" in Balmy Blue ink, on Basic White card. After inking the "brush stroke" stamp in Soft Sea Foam, I stamped it off onto scrap paper, then stamped it over the top of my stamped sentiment. To cut it out, I used a sentiment label die from Delicate Forest Dies, running it through my Stampin' Cut & Machine twice (moving the die-cut piece for the second cut), to crop it to size. I sponged the edges of this sentiment label with Soft Sea Foam ink.
To decorate the inside of the card, I stamped the top portion of the field of flowers stamp in Balmy Blue ink, along the bottom edge of a Basic White panel. I then decided to add some greenery, so stamped the grassy bits in Soft Sea Foam. I didn't line it up as well as I would have, if I'd decided to stamp the foliage first, but it still works!
If you come across any broken links, or would like to see a full list of participants in this week's blog hop, head over to Catherine Proctor's blog.
Cathy does a fantastic job of co-ordinating our Colour Creations shares every week.
Listed below are all the products I used to make my cards. If you live in Australia, and would like to shop with me for your Stampin' Up! supplies, you can get to my online store by clicking on any of the thumbnail images below.
** NB: All curent stamp and die bundles, including the gorgeous and versatile Friends for Life bundle, are on special until the end of June. **
Product List


