Investigate the deaths in the Umar Hills is a side quest initiated by speaking to Delon, who can be found in Athkatla's Government District, or the boy will approach you after some time passed anywhere in the city if Minsc is in party. Delon was sent out to find aid to determine why people are being murdered in, or have disappeared from, the village of Imnesvale in the Umar Hills.
Imnesvale[]
Upon first arrival in Imnesvale, a scene unfolds between the Townsfolk and Minister Lloyd Wainwright. While the minister and his wife try to reassure the townsfolk, the villagers anxiously demand to know when the crisis will be over. Some blame wolves, others blame the ogres, and yet another suggests that the Witch "Umar herself, returned to haunt us and steal our children!" You also learn that you are not the first adventurers to be recruited. The first group is missing, presumed dead. Minister Lloyd replies that they must first determine what happened to their Ranger, Merella, and urges the townsfolk to remain calm as panic will not help. The crowd then disperses.
Walkthrough[]
Difficulty: 2.5/5 Length: 3/5 Rec pty lv: 10+
Gathering Clues[]
Talk with Minister Lloyd and his wife to get some clues of the mysterious goings-on here. They suggest that maybe the Ogres are to blame. Speak to Madulf to find out, which begins the side-quest, Madulf wants to make a deal with the village. Talk with townsfolk, and two different eye-witnesses who claim two different types of creatures are responsible. Madulf saw wolf-like creatures at Merella's Ranger Cabin, while the young Herder girl Kaatje saw shadow-like creatures in the same area.
Go to the Ranger Cabin at the far west side of Umar Hills where you can find Merella's Journal, as well as a note from Mazzy. The Temple Ruins will then be marked on your world map. (Note: You must have both the Journal and the note in inventory at the same time. If you drop one before picking up the other, the quest will not progress, until you pick up the first item again.)
Temple Ruins[]
In the extreme northwest quadrant (135.425) an unnamed Shadow Thief is dying, and with a last breath cries out, "Please... death... too many... aaaagh...." Check the body for Lellyn's Journal for important clues about what happened to Mazzy Fentan's group.
You will also encounter the Werewolf leader Anath who shouts out, "You will not steal my vengeance," before fleeing into her lair, marked "Wolf Cave" on the player's map.
Wolf Cave[]
Follow Anath into the Wolf Cave. Mangled corpses litter the floor. A treasure stash in the tree root (345.520) contains random treasure. A cave pool conceals a Gold Necklace, an Onyx Ring, and random treasure. Anath is near the back in human form, eating a freshly killed human. Agree to help her deal with the "Shade Lord" who is the true evil resident within the temple.
If you agree to help, Anath says meet her in the temple, east of her den. The rest of the woods has Shadows, Shadow Fiends, Shade Wolves, and Greater Shade Wolves, the majority in the northeast quadrant, just outside of a "Dungeon Entrance" as marked on the player's map.
Dungeon Entrance[]
Near the Dungeon Entrance to the Ruined Temple is an Empty Fountain, a Glowing Crystal, and a Ruined Window: "The polished glass of this ruined window catches some of the weak light that the darkened gem puts forth. You could arrange the pan in such a manner that it would reflect all of the light if you so wish." If you agreed to help Anath, she cries out, "...it's a trap! Use the mirror... to the left of the crystal, there... to gather what light is left and avenge my pack!" Clicking the window pane again reveals its purpose: "When you turn the pan of polished glass, it reflects from the gem and the area brightens." To the east of the fountain is a large stone-lined well, "The edges...scratched and torn, as if some large creature has moved through here..."
Beyond the crystal is a stairway down to the Ruined Temple.
Ruined Temple[]
For detail of the dungeon, see the page for the Ruined Temple.
Warning: Do NOT leave Companions or Loot within the Ruined Temple as it will be replaced by a newer version after the quest has been completed. (You will have no means to return to its prior version.)
After descending the stairs from the entrance into the Ruined Temple, the player soon discovers that the corridor is blocked by a "shadow door."
Amuana's Bones[]
An archway to the north leads into a room with a container housing Amuana's Bones. Grab the bones after fighting off the inhabitants (shade wolves and skeleton warriors). Beyond is area leading to prison cells.
Prison and Jailor[]
Fight through the shadows and kill the Shadow Jailor to obtain the Shadow Prison Key. Use it to open the cell and split 12,250 XP with the party. Mazzy Fentan will greet you, and be available for recruitment. Search the cell for a hidden treasure stash, and be sure to grab Tombelthen's Journal (second half), an item needed for the Ranger-Protector of the Umar Hills quest.

Releasing Mazzy Fentan, the halfling warrior
Sun Gem Pedestal[]
Check the pillar to the southeast of the prison for a scroll describing the Morning Ritual. Continue on to find a Pedestal of Light. After fighting off the shadows, grab the Sun Gem which you need to open the first Shadow Door back in the corridor.
Statue of Ritual[]
To the northeast of the Prison stands the Statue of Ritual. You will need find all the broken tablets describing the three holy rituals that Amaunator's faithful performed to honor dawn, midday, and dusk.
The statue will give you three tests. Complete all three successfully and the party will split 45,500 XP.
| Test 1 | Test 2 | Test 3 |
|---|---|---|
| I shall say a prayer to the light | I shall sing a hymn... | I will recite the Tenets of faith |
| I shall hold the Holy book... | I shall raise my hands to the light | I will hold high my children... |
| I shall reflect on the glory... | I shall rejoice at the dominance... | I shall mourn as I watch... |
You'll retrieve one of the three Symbol of Amaunator fragments (1/3) after the tests, the Sun Ray Symbol.
Lava Pool[]
Make your way back to the entrance corridor and go through the first shadow door. You will find your way blocked again by another shadow door. Go back to a room with a wooden bridge and fight the shadows and shade wolves there.
Beyond is a lava room with two treasure caches and a trapped mural. You can skirt the edges to help avoid fire damage, but it is recommended to boost fire resistance via spells or scrolls before attempting to cross.

Undead Room[]
To the east of the lava room is a small square chamber pyramid-shaped column/container. Before you can raid it for the Tome of Amaunator, Noon Ritual scroll, and a scroll of Wyvern Call, take care of the group of undead. What type of and how many of them are encountered, depends on Gorion's Ward's experience:
- < 400,000: Skeleton Warrior, Shadows (×2)
- 400,000 – 999,999: Skeleton Warriors (×2), Shadow Fiends (×2)
- 1,000,000 – 1,999,999: Greater Mummy, Bone Golem, Skeleton Warriors (×2)
- > 1,999,999: Lich, Greater Mummies (×2), Skeleton Warriors (×2)
Amuana's Tomb[]
To the west of the lava pool is another room with a tomb and two ghostly figures, Badon and Dettseh. They will trade Amuana's Bones for the second fragment (2/3), the Dawn's Light Symbol, and the Shadow Dragon Wardstone. The party splits 17,750 XP for the exchange. Be sure to check the tomb for a Sunstone Bullets (×20) and a scroll of Pierce Magic. Dettseh carried 250 ![]() . Head southwest across the chasm to the shadow corridor on the south side of the second shadow door, then turn left to proceed to the tile room.
. Head southwest across the chasm to the shadow corridor on the south side of the second shadow door, then turn left to proceed to the tile room.
Tile Room[]
To the east of the corridor is a short passage into the Tile Room where another pack of undead (of the same types and numbers described above) awaits you. You can fight them here, or lead them back on the lava. Go east into the Tile Room after the fight.
You need to walk "A - M - A - U - N - A - T - O - R" in the next puzzle grid.
Inside a far room to the right is the last fragment. Either kill the Shadow or help him to the other side where he tries to kill you anyway. The fragment is kept in his cell (3/3), the Lightstone Symbol. In the left room is a statue which is also a container. You can loot the container. Clicking on the statue will say that it looks like it's waiting for you to put something in its arms, but that is unrelated to this quest (see The final battle with Bodhi). Either way, go to the cell to the west of where the Shadow was, defeat the Bone Golem and take the loot, which includes the Shadow's key that unlocks the barrier to the southeast.
Shadow Dragon Lair[]
The exit to the southeast will lead to Thaxll'ssillyia, the Shade Lord's pet shadow dragon. With the Shadow Dragon Wardstone it will not become hostile right away, allowing you to walk past and take the stairs outside. Or, you can use the time to prepare, before trying to kill the dragon. Note that in BG2EE versions, setting traps or summoning help may turn the Dragon Hostile (even if you have the Ward Stone).
The Shade Lord[]
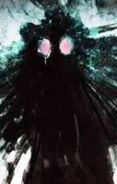
Once you get pass Thaxll'ssillyia, take the stair up to go back outside into a previously blocked area of the Temple Ruins. You will be confronted with the Shade Lord, his Shadow Altar, and Shadow Patrick. Have someone equip a sling with Sunstone bullets to kill the Shadow Altar in one hit. This will keep anymore shadows from spawning. Kill the Shade Lord who is worth 25,000 XP, and Shadow Patrick worth 7,000 XP.
Merella the Ranger[]
You will also find the dying Merella here. Talk to her once and she'll give up the ghost. Check her body for notable loot.
Back to Umar Hills[]
Head back to report your success to Minister Lloyd for your reward. Regardless of dialog choices, your Reputation increases by 1, and Lloyd gives you the The Night's Gift leather armor. Any additional gold, material, or experience awards depend upon the player's dialog choices:
- If your PC is not a Ranger, you have the options to:
- If your PC is a Ranger, Lloyd suggests, "with Merella now dead... I offer you her cabin" as "we could...use..your skills" granting you the position of Ranger-Protector, Merella's Ranger Cabin, and potentially an additional 95,000 XP for the group by completing all of the the Ranger Stronghold Quests. Dialog options then become:
- Decline: "I still need to track down [Imoen]" - Lloyd is disappointed but understands, then offers payment.
- Decline: "I seek a powerful mage [Irenicus]" - Same results as #1 above
- Accept the "honor" and do your "best to be here" - No experience is awarded immediately, but is gained later as you complete the Ranger Quests. The immediate reward is the Ranger Cabin, stocked by townsfolk with potions, magical weapons, magical missiles, 300
 , and the Ranger Stronghold quests that go along with the position. Also, you may also rest there peacefully with the same benefits as a royal suite at an inn.
 - Demand, "I expect to be paid!" gets 100
 and 28,000 XP.
Bugs[]
It is recommended to complete Madulf's quest, Madulf wants to make a deal with the village, before going to the Temple Ruins to free Mazzy. If you do not finish Madulf's quest before heading off to the Temple Ruins, and you later talk to Mayor Minister Lloyd with Mazzy in your party, she will have the extra dialogue with him, and you will no longer be able to send Lloyd to talk to the ogres to finished Madulf's quest. Also if you tell him you no longer want to do the quest Mazzy will get mad and leave the party.
Alternatively, it is possible to visit Mayor's house while leaving Mazzy outside. This way you can still turn in Madulf's request and - after a while - come back (once again without Mazzy) to check for the result of the talk between the Mayor and the ogres. Afterwards you can report the Shadelord's death and finish this quest as well. Above limitations about the quest reward still apply.
Gallery[]
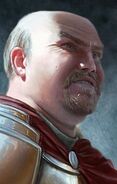
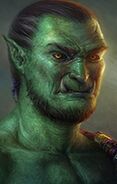
- Portraits from Portraits Portraits Everywhere
Mod Content[]
The Unfinished Business (Baldur's Gate II) Mod Restored Items component places the Bastard Sword Taragarth the Bloodbrand inside the Ranger Cabin.
The Sword Coast Stratagems mod revises all enemy creatures in the area and especially in the dungeons. Instead of a single lich within the temple, there can be two, depending on party XP.
The Shadow Magic mod adds extensive new content, an item for this dungeon, and upgrades the Shade Lord to utilize Shadow Magic instead regular arcane necromancy.


