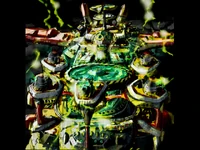
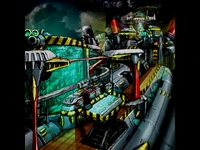
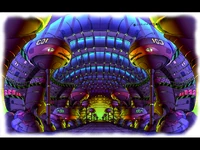
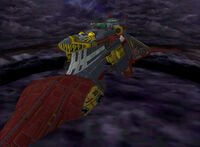
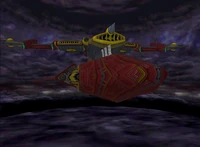
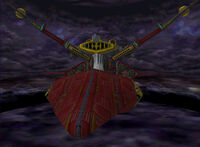
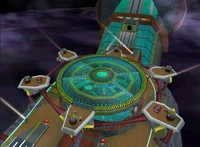
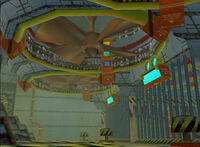
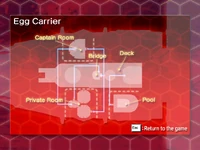
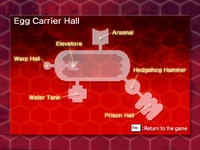
The Egg Carrier is an Adventure Field that appears in Sonic Adventure and its enhanced port Sonic Adventure DX: Director's Cut. It is located aboard the original Egg Carrier, the former flying fortress belonging to Dr. Robotnik. The Egg Carrier can be accessed through a watermill raft in the Mystic Ruins and a small vessel in Station Square. From this Adventure Field, a number of Action Stages and events can be reached.
The Egg Carrier was Robotnik's base of operation for the majority of his agenda to control Chaos. Due to the efforts of Sonic the Hedgehog and co. however, it ended up floating off the coast of the Mystic Ruins.
Description[]
Like the other Adventure Fields in Sonic Adventure, the Egg Carrier is comprised of a number of distinct areas and a Chao Garden. Unlike the others, however, the Egg Carrier's layout changes according to the vessel's transformation. When post-transformed, certain areas cannot be accessed directly. Additionally, according to each Egg Carrier mode, local water capacities, the heights of Springs, and trajectories of several Cannons will change.
Area A - Deck[]
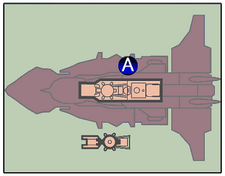
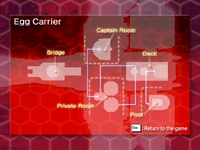
Map of the Egg Carrier (pre-transformed): (A) Deck.[1]
The Deck[1][2] serves as the Egg Carrier's outer top deck in its pre-transformed state. It possesses a different layout in comparison to its post-transformed state, and allows traversal across the vessel without interruption. When the player first gets here, the sky will be dark and covered in storm clouds. The spotlights onboard will also be emitting light beams. When the Egg Carrier has crashed into the ocean however, the spotlights will be turned off and the sky has become clear and calm. The Deck includes the following points of interest:
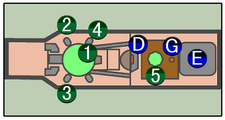
Map of the Deck: (1) Center Dome, (2) Ramp to Station Square, (3) Ramp to Mystic Ruins, (4) Monorail, (5) Radar Room, (D) Captain Room, (E) Pool, (G) Egg Carrier Hall.[3]
- Center Dome:[3] A tall, cylindrical glass structure with the ship's engine inside it. The top of it serves as a giant round arena. There are also small platforms with cannons and black boxes around its perimeter. The Central Dome is located in the center of the frontal half of the Deck.
- Ramp to Station Square:[3] A small dock on the side of the Egg Carrier's deck aisle that the player can go down to, and the passageway between the Station Area of Station Square and the Deck of the Egg Carrier. It is located on the right side of the Deck. Notably, when first arriving on the Egg Carrier, the Ramp to Station Square, along with all other routes off the Egg Carrier, will be unavailable. It will first become available after the Egg Carrier has crashed into the ocean. From then on, the player can utilize a boat to sail between Station Square and the Egg Carrier.
- Ramp to Mystic Ruins:[3] A small dock on the side of the Egg Carrier's deck aisle that the player can go down to, and the passageway between the Mystic Ruins Station Area of the Mystic Ruins and the Deck of the Egg Carrier. It is located on the left side of the Deck. Notably, when first arriving on the Egg Carrier, the Ramp to Mystic Ruins, along with all other routes off the Egg Carrier, will be unavailable. It will first become available after the Egg Carrier has crashed into the ocean. From then on, the player can utilize a raft to sail between the Mystic Ruins and the Egg Carrier.
- Monorail:[3] A railway line across the Egg Carrier, and a passageway between the Deck and the Egg Carrier Hall. It is located on the deck aisle between the Central Dome and the Captain Room. The player can press one of two large switches next to the Monorail to make a tram arrive. By then entering this tram, the player will be taken to the Egg Carrier Hall automatically.
- Radar Room:[3] A large rotating radio tower with two platforms on top of one another. The lower one serves as some kind of crow's nest, and the one on top is large and disk-shaped. It is located right behind the Bridge on the rear half of the Deck. Notably, on top of this tower is an Emblem.
- Bridge:[2] The main command center for the Egg Carrier. It is located in the center of the Deck. While the Egg Carrier is in its pre-transformed state, the Bridge features a door that leads into the Captain Room.
The entire Deck has an oblong shape and has both lots of spotlights and cannons. On the frontal half of the Deck is an elevated runway for airplanes with landing strips. It is located on the bow of the Egg Carrier, which can be accessed using a pair of elevators at the bottom of the structure holding it up. Behind the runway are as well an elevation that two elevators lead up along. There are also Springs around here that will take the player to the top of the Central Dome. The rear half of the Deck on the other hand is quite open and connected to the Central Dome by a pair of metal bridges on the sides. Right behind the Radio Room on the rear half of the Deck is also a round elevator platform that leads down into the Egg Carrier Hall when stepped on. All the way in the back of the Deck is also a large building that holds an automatic door leading into the Pool.
The bottom landing Cannons and the ones around the Center Dome can shoot Sonic to the middle of it, while the ones on the back can shoot him to the middle mast platform. Curiously, the blown-up glass Central Dome is also reconstructed and running after the fallen Egg Carrier is visited for the first time.
Area B - Forward Deck[]
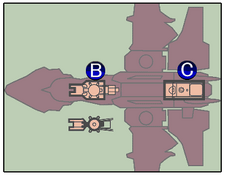
Map of the Egg Carrier (post-transformed): (B) Forward Deck, (C) Rear Deck.[4]
The deck of the Egg Carrier in its post-transformed state is divided into two sections: the Forward Deck and Rear Deck.[4] The Forward Deck in particular serves as the lower top deck of the Egg Carrier in this state. The Forward Deck includes the following points of interest:
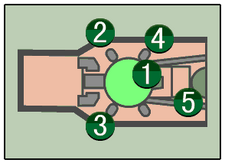
Map of the Forward Deck: (1) Center Dome, (2) Ramp to Station Square, (3) Ramp to Mystic Ruins, (4) Monorail Station, (5) Sky Deck Entrance.[5]
- Center Dome:[5] A tall, cylindrical glass structure with the ship's engine inside it. The top of it serves as a giant round arena. There are also small platforms with Cannons or black boxes around its perimeter. The Central Dome is located in the center of the Forward Deck.
- Ramp to Station Square:[5] A small dock on the side of the Egg Carrier's deck aisle that the player can go down to, and the passageway between the Station Area of Station Square and the Deck of the Egg Carrier. It is located on the right side of the Forward Deck. Notably, when first arriving on the Egg Carrier, the Ramp to Station Square, along with all other routes off the Egg Carrier, will be unavailable. It will first become available after the Egg Carrier has crashed into the ocean. From then on, the player can utilize a boat to sail between Station Square and the Egg Carrier.
- Ramp to Mystic Ruins:[5] A small dock on the side of the Egg Carrier's deck aisle that the player can go down to, and the passageway between the Mystic Ruins Station Area of the Mystic Ruins and the Deck of the Egg Carrier. It is located on the left side of the Forward Deck. Notably, when first arriving on the Egg Carrier, the Ramp to Mystic Ruins, along with all other routes off the Egg Carrier, will be unavailable. It will first become available after the Egg Carrier has crashed into the ocean. From then on, the player can utilize a raft to sail between the Mystic Ruins and the Egg Carrier.
- Monorail:[5] A railway line across the Egg Carrier, and a passageway between the Deck and the Egg Carrier Hall. It is located on the deck aisle between the Central Dome and the Captain Room. The player can press one of two large switches next to the Monorail to make a tram arrive. By then entering this tram, the player will be taken to the Egg Carrier Hall automatically.
- Sky Deck Entrance:[5] A door with an automatic hatch that leads out to the outer rims of the Egg Carrier. It serves as the entrance to the Sky Deck. It is located on top of an incline behind the Central Dome.
Being basically half of the deck, the front deck is virtually identical to the rear half of the deck, except for a few details: the central part of the runway on the bow has been lowered in relation to the sides, and the Central Dome is narrower. In the latter case, it allows the player to eliminate the black crates with the cannons. Notably, a Emblem on the Egg Carrier is hidden inside these crates. Also, to travel from the Forward Deck to the Rear Deck, the player either has to go through the Sky Deck or take the Monorail into the Egg Carrier Hall (which is not running when Sonic first arrives on the Egg Carrier) and use the elevator there to reach the Rear Deck.
The bottom and back landing cannons here can shoot Sonic to the Sky Deck Entrance, and those on the front can send him to the runaway on the bow. The ones around the Center Dome can send him to the opposite rotating platform at the top of the ship's mast.
Area C - Rear Deck[]

Map of the Egg Carrier (post-transformed): (B) Forward Deck, (C) Rear Deck.[4]
The deck of the Egg Carrier in its post-transformed state is divided into two sections: the Forward Deck and Rear Deck.[4] The Rear Deck in particular serves as the upper top deck of the Egg Carrier in this state. The Rear Deck includes the following points of interest:
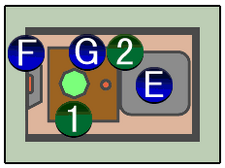
Map of the Rear Deck: (1) Radar Room, (2) Free Floating Platform, (F) Private Room, (G) Egg Carrier Hall, (E) Pool.[6]
- Radar Room:[6] A large rotating radio tower with two platforms on top of one another. The lower one serves as some kind of crow's nest, and the one on top is large and disk-shaped. Notably, on top of this tower is an Emblem. It is located right behind the Bridge on this deck.
- Free Floating Platform:[6] A round elevator platform that leads down into the lower decks when stepped on, and the passageway between the Rear Deck and the Egg Carrier Hall. It is located right behind the Radar Room.
- Bridge:[7] The main command center for the Egg Carrier. It is located in the front of the Rear Deck. While the Egg Carrier is in its post-transformed state, the Bridge is now raised higher up and consists of three floors, each with a door. It is through the lowest of these doors that the player can enter the Private Room.
Being basically half of the Deck, the Rear Deck is virtually identical to the rear half of the Deck, except for the Bridge's raised layout. Also, the two Cannons here can launch Sonic to the top of the quarter's roof. There are also several Ring-granting Item Box power-ups here, two at the utmost back of the vessel and one below the highest platform which only Tails can reach. Also, to travel from the Forward Deck from the Rear Deck, the player has to enter the Egg Carrier Hall using the Free-Floating Platform on the Rear Deck and then take a tram from the Monorail Station.
Area D - Captain Room[]
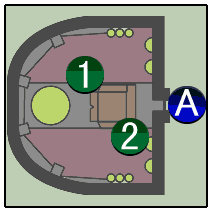
Map of the Captain Room: (1) Captain's Seat, (2) Transformation Switch, (A) Deck.[8]
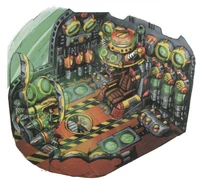
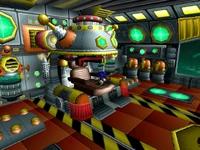
The Captain Room[7] is the main control room for the Egg Carrier where one can switch between its transformed states. Located inside the Bridge, it is presented as a highly technological room with windshields on the front and the main entrance in the back. It is connected to both the Deck and Rear Deck, depending on the Egg Carrier's transformed state: in its pre-transformed state, its main entrance connects to the Deck, and in its post-transformed state, it connects to the Rear Deck. The Captain Room includes the following points of interest:
- Transformation Switch:[8] A regular switch which serves as the main interface for switching the Egg Carrier between its pre-transformed state and its post-transformed state. It is located in front of the main entrance to the Captain Room. Sometimes though, it is covered by the Captain's Seat. When pressed, the player automatically splits the Deck in the outer Adventure Field into the Forward Deck and Rear Deck, and vice versa. Notably, while the Egg Carrier is in the air, a short animation of its transformation sequence is played when pressing the Transformation Switch.
- The Captain's Seat:[8] A large chair for the captain of the Egg Carrier. It is technologically-themed and throne-like in appearance. When jumping onto it, the chair will side either forward or backward on rails. When the seat is moved forward, it will reveal the Captain Room's Transformation Switch
Notably, the player may enter here with certain characters when the Egg Carrier is in its pre-transformed state. when the player needs to visit the Captain Room in its post-transformed state however, they have to go through the hatch on the floor in the front of the Captain Room. To do that, they must first enter the Private Room quarters. Inside these quarters there is a room connecting the Playroom and Study that contains a switch. Pressing this Switch will create a Ring trail into the Captain's Room that the player can travel along with the Light Speed Dash in order to reach the Captain Room.
Area E - Pool[]
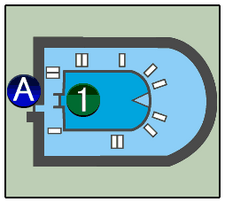
Map of the Pool: (1) Sky Deck Entrance, (A) Deck/Rear Deck.[9]
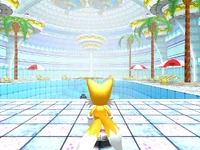
The Pool[7] is a water pool complex and one of Robotnik's extravagances. It is connected to both the Deck and Rear Deck, depending on the Egg Carrier's transformed state: in its pre-transformed state, its entrance connects to the Deck, and in its post-transformed state, it connects to the Rear Deck. In the middle of this room is the self-explanatory pool with an entrance at the bottom. The Pool is full of water in the Egg Carrier's pre-transformed state. In its post-transformed state however, the pool is empty. On the bottom of it is a Spring that the player can use to get out of the pool. The pool is as well surrounded by various sun loungers and umbrellas. There are also seven small platforms above the pool that hide items; six of them hold Ring-granting Item Box power-ups while the one on the opposite side of the pool from the entrance to this room holds an Emblem. Also, in Knuckles' storyline, the door at the bottom of the pool is open and leads into a small room filled with shallow water. The Pool includes the following points of interest:
- Sky Deck Entrance: A door with an automatic hatch that leads out to the outer rims of the Egg Carrier. It serves as the entrance to the Sky Deck. It is located inside the hidden room behind the door at the boom of the pool. Only Knuckles can utilize this entrance.
Area F - Private Room[]
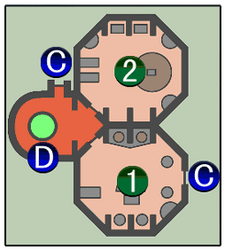
Map of the Private Room: (1) Study, (2) Playroom, (D) Captain Room, (C) Rear Deck.[10]
The Private Room[7] is the private quarters of Dr. Robotnik and consists of three separate rooms inside the Egg Carrier's Bridge. It has two entrances, both of which are found on different floors of the Bridge on the Rear Deck in the Egg Carrier's post-transformed state. It also has an one-way connection to the Captain Room. However, the Private Room is impossible to reach in the Egg Carrier's pre-transformed state. The Private Room includes the following points of interest:
- Study:[10] A hexagonal living room with a glass table and rotating figures of planets. It is located through the second door on the left when entering the Private Room from the Bridge's lowest floor on the Rear Deck. Notably, this room also contains a Switch there that, when pressed, will drop Robotnik's wall bed down from its wall. Worth noting is that the behind the wall bed is a hidden Emblem. It also holds its own entrance to the Rear Deck, which features its own balcony.
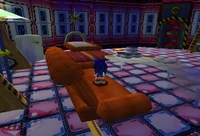
- Playroom:[10] A hexagonal game room used by Robotnik, it contains an inflatable chair in its center. All around it are also lots of funny gadgets, including vending machines, miniature Eggmobiles, and various rockets for decoration. Only the Eggmobiles are somewhat interactable. It is located through the first door on the left when entering the Private Room from the Bridge's lowest floor on the Rear Deck.
Notably, in the Private Room's third room that connects to the Study and Playroom, there is a Switch. When that is pressed, a trail of Rings will appear that lead into a hole in the ceiling. However, these Rings do not spawn like Station Square's equivalents. By using the Light Speed Dash on this Ring trail, the player can travel into the Egg Carrier's Captain Room.
Area G - Egg Carrier Hall[]
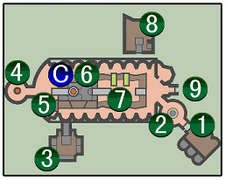
Map of the Egg Carrier Hall: (1) Prison Room, (2) Torture Chamber, (3) Water Reserve, (4) Chao Garden Portal, (5) Dr. Robotnik Buttons, (6) Free-Floating Platform, (7) Monorail Station, (8) Weapon's Storage, (9) Hot Shelter Entrance, (C) Deck.[11]
The Egg Carrier Hall[12] is a large subdeck of the Egg Carrier. It consists of a moderately large hall with a large three-part screen situated just in front of the western wall. Above ground level in the hall, on the south and north sides of the walls, are also narrow passages that are connected to each other by bridges across the Egg Carrier Hall. Additionally, in all versions and re-releases of Sonic Adventure, except for the original Sonic Adventure DX: Director's Cut on the Nintendo GameCube, there are robot maid cleaners and robotic mice that work around the entire hall. It is connected to the Deck in the Egg Carrier's pre-transformed state, the Rear Deck in its post-transformed state, and the Forward Deck in its post-transformed state. During Sonic and Tails' storylines, the player can also access it after completing Sky Deck.
- Prison Hall:[12] Also known as the Prison Room,[11] it is a prison corridor containing three cells. It is located at the end of the corridor found behind the door in the southeastern corner of the Egg Carrier Hall, right after the Hedgehog Hammer Sub Game. In this room, the player can open cells up standing on top of the respective buttons in front of them. Notably, the first cell here will contain one of Big's Lure Level Up Items. Also, in the second cell, there is a black Chao Egg which the player can take with them. While the third cell is empty, it does serve as the holding cell where Amy and Birdie were kept during the events of the game.
- Hedgehog Hammer:[12] Also known as the Torture Chamber,[11] this is a circular room in-between the Prison Hall and the Egg Carrier Hall's main hall. It is located behind the door in the southeastern corner of the Egg Carrier Hall. Here, the player can participate in the Hedgehog Hammer Sub Game, albeit only as Amy. In this Sub Game, the player's objective to earn points by destroying enough Sonic and Super Sonic puppets while avoiding the Robotnik puppets. When first arriving in this room, it is mandatory that the player participates in Hedgehog Hammer in order to move on. Breaking Robotnik's record of 2000 points will earn Amy the Warrior Feather Level Up Item. When later returning to the Egg Carrier, Amy can participate in Hedgehog Hammer again in order to earn the Long Hammer Level Up Item for 3000 points or more.
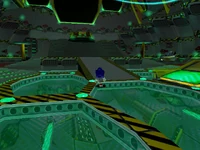
- Water Tank:[12] Also known as the Water Reserve,[11] it is the reservoir for the waste water of the Egg Carrier. It is located behind the door on the southern wall of the Egg Carrier Hall. Notably, only E-102 Gamma can access this room. Initially, this room will be flooded with water. After the Egg Carrier has crashed in the ocean however. The room will have been drained of water, this allowing the player to collect the Laser Blaster Level Up Item.
- Warp Hall:[12] Also known as the Chao Garden Portal,[11] this is a round with a teleporter pad in the center. It is located behind the door in western end of the Egg Carrier Hall. Once the player gets into this room, they can get onto the teleporter, which will take the player to the Egg Carrier Island. In order to access the Warp Hall however, the player must first crack its door's entrance with the Dr. Robotnik Buttons.
- Dr. Robotnik Buttons:[11] A set of orange-tiled buttons used to unlock the door to the Warp Hall. They are located in front of the Warp Hall's entrance. To open this entrance, the player must crack a simple code with the Dr. Robotnik Buttons. Here, the player has to jump on the tiles and press them in the correct order so that they form the word "EGGMAN". If the player makes a mistake, the mechanism will change the position of the letters and drop a bowl on the playable character's head.
- Elevatore:[12] Also known as the Free-Floating Platform,[11] it is a round platform that acts as an elevator. It serves as the passageway between the Deck and the Egg Carrier Hall in the Egg Carrier's pre-transformed state, and the Rear Deck and the Egg Carrier Hall in the Egg Carrier's post-transformed state. It is located on top of a sitting platform in the western part of the Egg Carrier Hall.
- Monorail Station:[11] A railway line across the Egg Carrier, and a passageway between the Deck and the Egg Carrier Hall in the Egg Carrier's pre-transformed state, and the Front Deck and the Egg Carrier Hall in the Egg Carrier's post-transformed state. It is located on the left side of the Elevatore. The player can press one of two large Switches next to the Monorail Station to make a tram arrive. By then entering this tram, the player will be taken to the Deck/Front Deck. Notably, the bridges connecting the opposing walls in the Egg Carrier Hall will narrow to make room for the tram.
- Arsenal:[12] Also known as the Weapon Storage,[11] it s small room on the Egg Carrier where equipment for the E-100 Series is kept. It is located behind the door on the northern wall of the Egg Carrier Hall. Notably, only E-102 Gamma can access this room. The player can obtain the Jet Booster Level Up Item here.
- Hot Shelter Entrance:[11] An Egg Carrier sub-deck that includes fish tanks and various industrial sectors, including an in-house train that transports robots and goods throughout the vessel. It serves as the entrance to Hot Shelter. It is located in the eastern end of the Egg Carrier Hall, right next to the entrance to the Hedgehog Hammer Sub Game. In Gamma's case, this door will open automatically. However, Amy and Big have to press the button in front of this entrance to open it. Amy can hit the button with her Hammer Attack and Big can just jump onto it.
Notably, on the left side of the Hot Shelter Entrance is another openable door. This door is locked to all playable characters, except E-102 Gamma, who can visit this room during his storyline in order to see E-101 Beta getting rebuilt.
Story[]
Sonic the Hedgehog[]
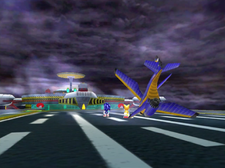
Sonic and Tails having landed on the Egg Carrier, from Sonic Adventure DX: Director's Cut.
Following an aerial battle with the Egg Carrier in the Tornado 2, Sonic and Tails try to hand on the vessel's landing stripes. However, Tails realizes that he has forgotten to add landing gear to the Tornado 2's current mode, much to Sonic's shock. What follows next is a rocky landing on the Egg Carrier, but Sonic and Tails make it otherwise. As Sonic marvels at how huge the Egg Carrier is, Tails reminds him that they need to find Amy. While miffed, Sonic acknowledges Tails' point and heads out. However, Dr. Robotnik quickly announces over the P.A. that they have yet to see the Egg Carrier's true power, prompting Robotnik to transform its shape. While Tails is amazed by the transformation, Sonic is more concerned with how they are going to get to the bridge now that the Deck has been split up and cutting the main route off. As Tails feels that Sonic is ignoring him, Robotnik gloats over the P.A. that the duo's only way to him now is through the Sky Deck. Accepting the challenge, Sonic heads through the Sky Deck with Tails, and eventually arrives in the Egg Carrier Hall. There, Tails suggests they check out the bridge.
Heading up to the Deck, Sonic spots Amy in front of Robotnik and his Eggmobile. As Amy calls out for Sonic, who hurries towards her, Robotnik says they are too late and takes birdie from Amy using a mechanical claw. Robotnik then takes what turns out to be a Chaos Emerald from birdie, much to everyone's surprise, and Robotnik tells them to be off now that he has what he needs, before calling in E-102 Gamma. Robotnik then orders Gamma to get rid of Sonic and his group before leaving in his Eggmobile, and Gamma obediently complies. Sonic proceeds to fight Gamma, but before he can destroy him, Amy gets in his way. Sonic tells her to get out of the way, but Amy refuses, insisting that Gamma is her friend and that he should not hurt him. Although confused, Sonic complies to Amy's request, believing that she has her reasons for it. Immediately after however, the Egg Carrier starts shaking, and Tails realizes that the vessel is losing altitude. Sonic thus has Tails get Amy to safety while he goes after Robotnik. In order to continue his pursuit however, Sonic sees that he has to change the Egg Carrier back to its original shape. After having taking care of that problem on the bridge, Sonic finds Robotnik and Big on the Central Dome. To his unnerved surprise however, he also finds Chaos, who has now transformed into Chaos 6. As Robotnik orders Chaos 6 to attack Sonic, Big says that he has to save Froggy, who is trapped inside Chaos 6. After promising Big to help save his friend, Sonic has a verbal exchange with Robotnik before fighting Chaos 6 and defeating it.
As Robotnik shows his disbelief at Chaos 6's defeat, Knuckles shows up on the scene. After Sonic has greeted Knuckles however, Robotnik flees from the Egg Carrier in his Eggmobile, prompting Sonic to follow him off the vessel.
Miles "Tails" Prower[]
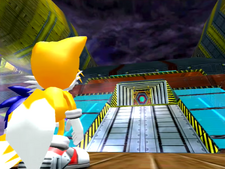
Tails and Sonic about to enter the Sky Deck, from Sonic Adventure DX: Director's Cut.
After having taken on the Egg Carrier in the Tornado 2 in an aerial dogfight, Tails and Sonic make an attempt to land on the vessel's landing stripes. However, Tails realizes too late that he has forgotten to add landing gear to the Tornado 2's current mode, much to Sonic's shock. What follows next is a rocky landing on the Egg Carrier, but Tails and Sonic make it otherwise. As Sonic marvels at how huge the Egg Carrier is, Tails reminds him that they need to find Amy. Acknowledging Tails' point, Sonic heads out with Tails. However, Dr. Robotnik quickly tell Sonic over the P.A. to not get any ideas before seeing what the Egg Carrier really can do, prompting Robotnik to transform its shape. While Tails is amazed by the transformation, Sonic is more concerned with how they are going to get to the bridge now that the Deck has been split up and cutting the main route off. As Tails feels that Sonic is ignoring him, Robotnik gloats over the P.A. that the duo's only way to him now is through the Sky Deck, and dares Sonic to attempt the trip. With Sonic accepting the challenge, Tails heads through the Sky Deck with Sonic, and eventually arrives in the Egg Carrier Hall. There, Tails suggests they check out the bridge.
Heading up to the Deck, Tails spots Amy in front of Robotnik and his Eggmobile. As Amy calls out for Tails and Sonic, with the former hurrying towards her, Robotnik says they are a bit late and takes birdie from Amy using a mechanical claw. Robotnik then takes what turns out to be a Chaos Emerald from birdie, much to everyone's surprise, and Robotnik tells them to be off now that he has what he needs, before calling in E-102 Gamma. Robotnik then orders Gamma to get rid of Tails and his group before leaving in his Eggmobile, and Gamma obediently complies. Tails proceeds to fight Gamma, but as he attempts to land the final blow, Amy gets in his way. Tails tells her to get out of the way, but Amy refuses, insisting that Gamma is her friend and that he should not hurt him. Although confused, Tails complies to Amy's request, believing that she has her reasons for it. Immediately after however, the Egg Carrier starts shaking. As Tails recognizes this as a sign that the Egg Carrier is losing altitude, he is told by Sonic to take Amy to safety while he goes after Robotnik. Complying to Sonic's request, Tails takes Amy and flies away with her, although not before taking a look back at Gamma as he too leaves the Egg Carrier.
Knuckles the Echidna[]
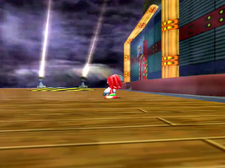
Knuckles on the Egg Carrier's deck, from Sonic Adventure DX: Director's Cut.
Having gotten onboard the Egg Carrier, which is holding the last shards of the Master Emerald, Knuckles makes his way up the Deck, determined to show Robotnik a thing or two after having been tricked by him earlier on. Sensing that the shards are indeed onboard the vessel, Knuckles starting making his way across the Egg Carrier, only for it to start changing shape, much to Knuckles' eternal frustration. Following the trail into the Pool's room, Knuckles senses the Master Emerald nearby and soon finds a way into the Sky Deck. After finding the remaining Emerald Shards in this area, Knuckles is ready to restore the Master Emerald when Tikal's spirit shows up and takes his mind on a trip into the Mystic Ruins' past.
Upon returning to the present, Knuckles finds himself back in the Pool, confused about what has just happened. As Knuckles makes his way across the deck, he realizes that despite having found all the Master Emerald's shards, he still has not figured out Chaos' deal. Immediately after, however, Knuckles notices a bright flash on the front deck. As he heads over there and arrives on the Central Dome, Knuckles finds Sonic and Robotnik having a showdown. As Sonic cheekily greets Knuckles upon his arrival, Robotnik leaves the Egg Carrier in the Eggmobile, prompting Sonic to follow him. While Knuckles thinks that he should let Sonic handle things from here and that he will be fine, he gets ready to return to Angel Island. However, Chaos 6 then shows up. Not going to let Chaos stop him from restoring the Master Emerald, Knuckles defeats the creature, who leaves behind the six Chaos Emeralds after vanishing. Taking the Chaos Emeralds with him, Knuckles leaves the Egg Carrier as it crashes into the Sea.
Amy Rose[]
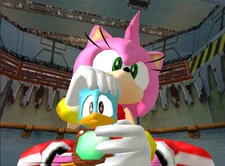
Amy and Birdie in Prison Hall, from the 2010 remaster of Sonic Adventure
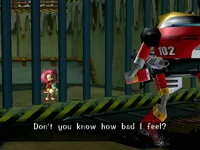
Having been captured by E-100 ZERO, Amy and Birdie are locked in the Egg Carrier's Prison Hall. While in her cell, Amy tries her best to calm down her Flicky companion until she notices that Gamma has arrived. As Gamma approaches her cell, Amy asks what he wants. Gamma demands Birdie, but Amy repeatedly refuses to hand him over. This prompts Gamma to ask Amy for her motivation for not complying, Amy retorts by asking Gamma why he wants Birdie. When Gamma does not provide a clear answer however, Amy instead tries asking Gamma to help them out. However, Gamma deems it illogical that Amy has feelings for something she knows nothing about. This makes Amy pity Gamma for not knowing about love. Suddenly however, birdie flies up in front of Gamma. This triggers something in Gamma, who tells them to escape as he unlocks Amy's cell. As a confused Amy leaves her cell, Gamma tells her that they are in danger as they are approaching the Mystic Ruins base. Seeing that Gamma has a good side to him, Amy offers him her friendship before departing with Birdie.
Escaping the Prison Hall, Amy and Birdie make their way through Hot Shelter while avoiding ZERO, who is pursing them. As Amy makes her escape however, Tikal's spirit appears and takes her mind into the Mystic Ruins' past. When Amy later regains her senses, she finds herself at the Pool, wondering if she had just been dreaming. Regardless, she and Birdie resume their escape. While out on the deck however, the pair are corned by Dr. Robotnik in his Eggmobile. Immediately after, Amy spots Sonic and Tails nearby and calls for the former's aid. As Sonic and Tails approach him however, Robotnik says they are too late, before using a mechanical arm to take Birdie from Amy. Fortunately, Robotnik releases birdie after taking the Chaos Emerald, which the heroes are all surprised to see, the Flicky had on him. Having no further use for Birdie, Robotnik calls in Gamma to dispose of Amy and her group. While Gamma complies, Robotnik takes his leave for other matters. Following a brief standoff in spite of Amy's protests, Sonic moves in to attack Gamma. Amy, however, gets in his way, telling him to stop. While Sonic insists on treating Gamma as an enemy, Amy tells him that Gamma is different and explains how he helped her. Ultimately, Sonic complies to Amy's request, saying that he will let him go. As the Egg Carrier then begins to shake, Tails notes that the Egg Carrier is losing altitude. Sonic thus tells Tails to get Amy off the Egg Carrier while he goes after Robotnik. As Sonic takes his leave, Amy thanks Sonic for having come to save her. Amy then turns her attention to Gamma and tells him to break off his affiliation with Robotnik. Gamma questions why she is helping him, to which Amy says that she is just returning his favor since they are friends. Amy even notes that Birdie wants Gamma to leave Robotnik. As Tails then tells Amy to hurry up, Amy bids farewell to the robot before she and Birdie are lifted off the Egg Carrier by Tails.
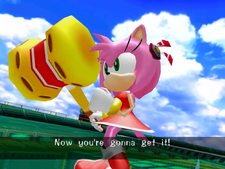
Amy standing up to ZERO, from Sonic Adventure DX: Director's Cut.
After the Egg Carrier has crashed into the Sea, Amy and Birdie return to the Egg Carrier to find Birdie's family. Upon arriving there, Amy sees Birdie fly off before returning with his family. As Amy gets happy over their reunion however, Birdie gets knocked out of the air by ZERO. After tending to the injured birdie, the furious Amy unleashes her anger on ZERO, and ultimately manages to destroy it. Amy then turns her attention to birdie, who fortunately recovers and begins flying around after some trouble. The Flicky family subsequently turns to Amy as their way of saying thanks, and Amy tells them to go live in peace. After the Flickies have then flown away, Amy takes her leave, determined to make Sonic respect her and make him hers.
Big the Cat[]
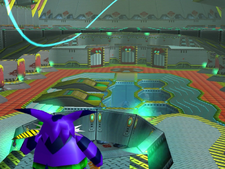
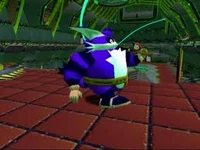
Big onboard the Egg Carrier, from Sonic Adventure DX: Director's Cut.
Having snuck onboard the Egg Carrier, Big wonders where Froggy could be, as the surroundings are not familiar to him at all. Still, Big is able to smell that Froggy is nearby, prompting him to investigate the doors in front of him. Eventually ending up in the Hot Shelter, Big enters a large aquarium which holds Froggy. After fishing Froggy out of his confines, Big is happy to together with his friend once more. Suddenly, however, Tikal's spirit appears and takes Big's mind into the past of the Mystic Ruins. When Big comes back to his senses, he finds himself and Froggy back in the Egg Carrier Hall. Not liking the looks of this place and feeling the Egg Carrier shaking, Big gets a bad feeling about this and decides that they should leave this place now or his rescue of Froggy will have been for nothing, as Big cannot think of someone else who would bother to save them both.
Eventually arriving on the Egg Carrier's Central Dome, Big and Froggy come across Chaos 4. Soon after, Dr. Robotnik appears on the scene in his Eggmobile. Seeing that Big and Froggy are trying to escape, Robotnik orders Chaos 4 to get Froggy while presenting it with a Chaos Emerald of his own. Not long after, Froggy spits out the Chaos Emerald he had swallowed previously, which flies at Chaos 4, while Robotnik throws the other Chaos Emerald at it too. Absorbing both Chaos Emeralds, Chaos 4 transforms into Chaos 6. Robotnik then tells Chaos 6 to go for Froggy, explaining that the frog has been possessed by its lost tail, and that regaining it will make it complete and ultra strong. As Big panics, Froggy jumps into Chaos 6, causing him to lose his tail while Chaos 6 regains its own. Immediately after, Sonic appears on the scene, not believing that Chaos has transformed again. While Big is confused, Robotnik decides to take his leave. Meanwhile, Big sees that Froggy is still alive inside Chaos 6, and promises to save him. Hearing that Big's friend is in trouble, Sonic promises to save him. As such, while Sonic distracts Chaos 6 by fighting it, Big fishes Froggy out of the creature. As Big celebrates his and Froggy's reunion though, Sonic tells them to get out of here while he deals with Chaos 6. Complying, Big thanks Sonic and heads for the Egg Carrier's landing stripes. There, he finds the Tornado 2, which he and Froggy use to leave the Egg Carrier as it crashes.
E-102 Gamma[]
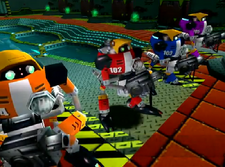
Gamma and the other E-Series robots in the Egg Carrier, from Sonic Adventure DX: Director's Cut.
Having been admitted into the Egg Carrier's crew, E-102 Gamma, along with E-103 Delta, E-104 Epsilon and E-105 Zeta, comes to Dr. Robotnik's attendance in the Egg Carrier Hall after the vessel has taken off. Following a showy display, Robotnik, after testing the P.A. system, tells his E-100 Series robots, who are serving as the Egg Carrier's elite crew, that they have been assembled for a special announcement. Robotnik proceeds to show them a picture of Froggy, who is possessing a tail, on the monitor while explaining that this frog is vital to his plans. He then orders them to find Froggy no matter what and bring it to him. Having no time to waste, Robotnik orders his crew to head out, prompting Gamma and his brethren to depart.
After awaking from a vision shown by Tikal, Gamma finds himself back on the Egg Carrier with Froggy in hand and heads up to Robotnik's assembly. As Robotnik sees that the other E-100 units have failed to bring him the right frog, Robotnik scolds them for their incompetence while underlining that he needs Froggy for both a Chaos Emerald and Chaos' tail, both of which the frog has swallowed. When he sees that Gamma has Froggy however, Robotnik is quick to praise him for his usefulness. As for the rest of the E-100 Series, Robotnik has them teleported away, with Delta looking at Gamma before disappearing. No sooner though is Gamma given his next assignment: go to the Prison Hall and get him the Flicky imprisoned there with Amy. However, Gamma ends up wandering into the wrong room. There, he finds his "brother", E-101 Beta, undergoing a terrifying rebuilding process, with his old pieces lying scattered about. This sight leaves a mark on the silent, yet shocked Gamma. Returning to his assignment, Gamma finds the Prison Hall where Amy tells him to go away from her cell. Gamma demands Birdie from her, but Amy repeatedly refuses to hand him over. Gamma questions why, but instead, Amy asks why he wants him, to which Gamma replies he has no data on it. Seeing that he does not know it himself, Amy believes that Gamma will hurt birdie and tries asking him to help them out instead. As she pleas to Gamma's sense of sympathy, he wonders why she would save something useless to her, prompting Amy to pity Gamma for his lack of emotions. Suddenly, however, Birdie flies up to Gamma and looks at him. As something triggers in Gamma, Gamma tells Amy to get going as he releases her from her cell, noting that she is in danger as they are approaching the Mystic Ruins base. Having seen that Gamma is a good person and not like Robotnik's other robots, she offers him her friendship and best wishes before taking her leave with Birdie.

Gamma ready for battle, from the 2010 remaster of Sonic Adventure.
Returning to the Egg Carrier Hall, Gamma is instructed to pick up an upgrade by Robotnik over the P.A. before being order to come to the Rear Deck. Upon arriving there, an obedient Gamma offers his services to Robotnik, who orders him to eradicate Sonic, Tails and Amy, who have gathered on the Rear Deck. After Robotnik has taken his leave, Gamma engages Sonic in a hostile fight. Just as Gamma gets ready to take a shot at Sonic however, Amy tells him to stop and gets in between him and Sonic. Expressing her belief in the good in Gamma, Amy asks if he remembers her. To Sonic's surprise, Gamma comes around and lowers his weapon. Not long after though, the Egg Carrier begins to shake, which Tails sees as a sign that the Egg Carrier is losing altitude. Tails is then told by Sonic to take Amy to safety while he goes after Robotnik. As Sonic takes his leave, Amy thanks Sonic for his heroic rescue before turning her concerns to Gamma, whom she asks to leave Robotnik and come with them. Gamma wonders why Amy is helping him, to which Amy explains that they are friends and that even Birdie wants the best for him by wanting him to leave Robotnik. As Tails' subsequent insistence, Amy takes her leave and is lifted off the Egg Carrier by Tails while bidding Gamma farewell, who proceeds to fly off the Egg Carrier, just as it crashes.
After the Egg Carrier has landed in the Sea, Gamma returns to the vessel to find Zeta and Beta and save them by destroying them. Accessing the E-Series data, Gamma pinpoints Zeta in Hot Shelter and unlocks its sector. Making his way into the center of Hot Shelter, Gamma finds a remodeled Zeta and destroys him, freeing the Peacock powering him. After returning to the Deck, Gamma reviews the missing E-100 units he needs to save, only to realized that he is one of them. Immediately after however, he spots E-101 Mark II fly over him. Recognizing him as Beta, Gamma goes after him and confronts him on the Central Dome. After a heated battle, E-101 Mark II falls down, prompting Gamma to move in on him. However, just before blowing up, E-101 Mark II shoots Gamma at point blank. An injured Gamma tries then to walk away. Meanwhile, a cream-colored Flicky is freed from E-101 Mark II and flies up to look at Gamma, who tries to walk away again, only to succumb to his damage. As an image of Birdie's family, which includes the cream-colored Flicky and a pink one, then flashes before his eye, Gamma collapses and blows up, releasing the pink Flicky that had been powering him. This Flicky then joins up with the cream-colored Flicky to find Birdie.
Gameplay[]
The Egg Carrier is an open world divided into a number of sections that the player is free to explore at their leisure. Its primary purpose is to serve as a hub world from where the player can reach the different Action Stages, Sub Games and boss fights in each storyline, as well as the Egg Carrier Island. However, within the different storylines of the games, some sections of the Egg Carrier may be inaccessible until the player reaches a certain point in their respective stories. In other cases, some sections may be closed off for the entirety of their storylines. Also, when the player first enters the Egg Carrier Adventure Field, they cannot leave the Egg Carrier in any way until the player has reached a certain point in the playable characters' respective storylines; even the passageways leading to other Adventure Fields will be closed off. It is only until after the Egg Carrier has crashed into the ocean in the storylines that it can be entered and leaved freely.
Unlike Station Square and the Mystic Ruins, there nearly no non-playable characters (NPCs) on the Egg Carrier that the player can interact with in order to get background information about the surroundings, hints about the gameplay, or just regular daily chat; only the playable characters whose storylines intersect with the player's current one will appear as non-playable characters and can be talked to. However, there are Hint Orbs and Hint Boxes around the Egg Carrier for aiding the player if they are stuck in the game or just providing them with information.
In terms of active gameplay, the playable characters have access to all of their abilities and movements on the Egg Carrier, meaning they are free to act as if this Adventure Field is an Action Stage. However, the Egg Carrier Adventure Field is mostly devoid of gameplay elements like gimmicks, obstacles and enemies. It also does not rely on the Ring-based damage mechanics or life system, as it is nearly impossible to lose a try here. Still, there are a few gameplay elements and gimmicks for the player to use. On the outer decks of the Egg Carrier are various cannons that Sonic can jump into in order to be fired into midair. The player can as well use the Cannons on the Central Dome to fire themself into the black crates around the Central Dome in order to destroy them. There are also Springs that the player can use to reach higher areas, and switches for triggering various reactions in the environment. Also, a number of Level Up Items can be found around the Egg Carrier. Some of them are optional, while others must be collected in order to progress with the storylines. There may also be interactable objects in the field that the player can use in order to retrieve items, like Chao Eggs. There are also a few Emblems and Ring-granting Item Boxes hidden in different places around the Egg Carrier.
At various points throughout the storylines on the Egg Carrier, a cutscene will automatically be triggered whenever the player approaches a certain spot in the field. These spots are sometimes marked by the presence of important story characters there, like another playable character or a boss.
Overview[]
Sonic the Hedgehog[]
After completing Sky Chase Act 2, the player will be treated to a cutscene, before finding Sonic on the Deck, namely on the elevated runway for airplanes on the bow of the Egg Carrier. From there, the player has to proceed towards the bridge. After getting somewhat ahead on the Deck, however, a few cutscenes will be triggered. When they are over, the Egg Carrier will be in its post-transformed state, separating the Deck into the Forward Deck and Rear Deck. Now finding themselves on the Forward Deck, the player has to travel to the Sky Deck Entrance. Upon arriving there, a brief cutscene will play before the player can enter the entrance, thereby allowing them to play through the Sky Deck. After having cleared this Action Stage, the player will arrive in the Egg Carrier Hall, where a cutscene will play. Once it is over, use the elevator in the area to enter the Rear Deck. Upon arriving there, a cutscene will automatically play before the player engages in a Character Conflict with E-102 Gamma. Once it is cleared, another cutscene will play before the player will be left to themselves on the Rear Deck. From here, go to the right side of the bridge to trigger another cutscene. After that, enter the doorway on the right side of the bridge to enter the Private Room. Upon arriving in the first room, the player must press a switch there to make a Ring trail appear. Use then the Light Speed Dash on that Ring trail to enter the Captain Room. In this room, jump onto the Captain's Seat to make it slide forward and reveal the Transformation Switch, and press then said Switch to merge the Forward Deck and Rear Deck back together.
With the Deck available again, enter it through the exit in the back of the Captain Room. From here, go to the Center Dome. This will trigger another cutscene that leads into the boss fight with Chaos 6. After clearing this boss fight, the player will be treated to another set of cutscenes that leads the player into the Mystic Ruins.
Miles "Tails" Prower[]
After completing Sky Chase Act 2, the player will be shown a cutscene, before finding Tails on the Deck, namely on the elevated runway for airplanes on the bow of the Egg Carrier. From there, the player has to go in the direction of the bridge. After getting somewhat ahead on the Deck, however, a few cutscenes will be triggered. When they are over, the Egg Carrier will have entered its post-transformed state, separating the Deck into the Forward Deck and Rear Deck. Now finding themselves on the Forward Deck, the player must go to the Sky Deck Entrance. Upon arriving there, a brief cutscene will play before the player can enter said entrance, which leads to the Sky Deck. Once this Action Stage is completed, the player will find themselves in the Egg Carrier Hall, where a cutscene will play. Once it is over, use the elevator in the area to enter the Rear Deck. Upon arriving there, a cutscene will automatically play before the player engages in a Character Conflict with E-102 Gamma. Once it is cleared, another set of cutscenes will play that will lead the player to Station Square.
Knuckles the Echidna[]
After entering the Location to the Final Egg, the player will be shown a few cutscenes that end with Knuckles finding himself on the Deck. From there, the player has to head towards the back on the Deck in order to trigger another cutscene. After it is over, the Egg Carrier will have entered its post-transformed state, separating the Deck into the Forward Deck and the Rear Deck. With Knuckles now on the Rear Deck, the player must enter the Pool through the doorway at the back of the Rear Deck. Inside this area, the player has to jump into the now-drained pool to trigger a brief cutscene. After it is over, enter the opened doorway in the pool to arrive in a hidden room with the Sky Deck Entrance on the other end. Enter it to play through the Sky Deck. After completing it, the player is shown another cutscene that transitions into the Mystic Ruins. Once the trip in the past is over, Knuckles will have been returned to the hidden room in the pool. From here, the player has to exit the Pool and return to Deck, which has been made available again on the other side of the doorway into the Pool. Upon arriving on the Deck, the player is shown another cutscene before they have to have to make their way to the Central Dome. There, another cutscene is played, before the player engages Chaos 6 in a boss fight. After completing it, the player will be shown another set of cutscenes before the credits for Knuckles' storyline rolls.
Amy Rose[]
After clearing Twinkle Park, a few cutscenes will play before Amy is taken to the Egg Carrier. After arriving there, another cutscene will player, after which the player will be deposited in the Egg Carrier Hall's Prison Hall. To exit this hall, go through the doorway in the northwestern corner of the room. This will lead to the Hedgehog Hammer room. Here, the player has to clear the Hedgehog Hammer Sub Game by beating Dr. Robotnik's record, which means scoring over 2,000 points. After clearing it, the player will granted the Warrior Feather and be allowed passage out of the room. In order to get out of here, the player has to go through the doorway in its northwestern corner. Finding themselves now in the Egg Carrier Hall's main hall, the player has to go to the Hot Shelter Entrance and press the button right next to it in order to open its doorway. Enter then this doorway to play through Hot Shelter. At the end of Hot Shelter, the player is shown another cutscene that leads them into the Mystic Ruins' past. Once that trip is over, Amy will be deposited into the Pool. From here, the player has to use the exit on the opposite side of the room to enter the Rear Deck. There, another set of cutscene will play, which will lead Amy back to Station Square.
After clearing Final Egg, the player has to return to the Egg Carrier. Upon entering its Adventure Field, another cutscene will play, which leads into the boss fight with ZERO on the Egg Carrier's Central Dome. After clearing this boss fight, the player is shown another cutscene before being treated to the end credits for Amy's storyline.
Big the Cat[]
After clearing Emerald Coast, the player will be shown a few cutscenes before finding Big in the Egg Carrier Hall. Here, the player must make their way to the Hot Shelter Entrance and press the Switch right next to it in order to open said entrance. Head then inside the entrance to play through Hot Shelter. After clearing this Action Stage, the player will be shown a cutscene that will take Big to the Mystic Ruins' past. After the trip is over, Big will be deposited in front of the Hot Shelter Entrance in the Egg Carrier Hall. From here, head to to the Monorail Station and call the monorail there with a press of the nearby buttons in order to travel to the Deck. Once there, head to the Central Dome. There, a new cutscene will be triggered, which will lead into the boss fight with Chaos 6. After clearing this boss fight, Big will be deposited on the runway for airplanes on the bow of the Egg Carrier. Head then towards the Tornado 2 in order to trigger another cutscene, which will progress into the ending for Big's storyline.
E-102 Gamma[]
After clearing Emerald Coast and visiting the Mystic Ruins' past, Gamma will be sent to the Egg Carrier Hall on the Egg Carrier. After a few subsequent cutscenes have played, the player will find themselves in control of Gamma in the Egg Carrier Hall. From there, head into Hedgehog Hammer, and proceed into Prison Hall from here. Inside Prison Hall, the player will be shown another cutscene. Once it is over, the player will find themselves in control of Gamma in the Prison Hall. They must then return to Hedgehog Hammer and exit into the Egg Carrier Hall's main hall from there. There, a brief cutscene will play. After that, enter the Arsenal and pick up the Jet Booster Level Up Item in there. From here, return to the main hall, where another cutscene will play. After it, the player has to use the elevator to reach the Rear Deck. Upon arriving there, a cutscene will play, before the player engages in a Character Conflict with Sonic. After completing this fight, a new cutscene will play, which ends with Gamma transitioning into the Mystic Ruins.
After clearing Red Mountain, the player must return to the Egg Carrier. Upon arriving there, the player is shown a cutscene, before having to make their way across the Deck to the Free Floating Platform in the Rear Deck section and use it to enter the Egg Carrier Hall. From here, enter the Hot Shelter Entrance to begin the Hot Shelter Action Stage. After clearing it, Gamma will be deposited in front of the Hot Shelter Entrance. From here, use the Elevatore to reach the Deck. Upon arriving there, another cutscene will play. After it is over, head to the Center Dome where the boss fight with E-101 Mark II will be triggered. After clearing this boss fight, one last cutscene will play before the player is treated to the end credits for Gamma's storyline.
Trivia[]
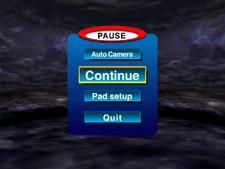
The Egg Carrier missing from the screen, from Sonic Adventure.
- If Sonic Adventure is paused while the Egg Carrier is transforming, the Egg Carrier will disappear, leaving only the skybox and pause menu on-screen.
- The song "Calm After the Storm - Egg Carrier - The Ocean" is listed as the Egg Carrier's second Field Map track, implying it was meant to replace the map's default track when floating in the ocean. However, the track only plays once during the game, during Gamma's assessment of the Egg Carrier and fellow E-series robots upon arriving. The Egg Carrier's default track still plays for the map afterwards.
- The sound effect that plays when calling the monorail is originally from the Sega NetLink on the Sega Saturn. It sounds when a player connects online.
- The player can turn off the spotlights on the deck by jumping on it, and can turn on by jumping on it again. This can only be done before the Egg Carrier crashes.
Gallery[]
Concept artwork[]
| Gallery |
|---|
Screenshots[]
| Gallery |
|---|
Maps[]
| Gallery |
|---|
Music[]
| Name | Artist(s) | Length | Music track |
|---|---|---|---|
| "Egg Carrier - A Song That Keeps Us On The Move" | Fumie Kumatani, Kenichi Tokoi | 4:03 | |
| "Calm After the Storm ...Egg Carrier -the ocean-" | Kenichi Tokoi | 2:08 |
See also[]
References[]
- ↑ 1.0 1.1 Sonic Adventure Online. Map: Egg Carrier: Pre-Transformation. Sonic Team. Archived from the original on 25 May 2016. Retrieved on 18 July 2016.
- ↑ 2.0 2.1 In-game map of the Egg Carrier from Sonic Adventure DX: Director's Cut.
- ↑ 3.0 3.1 3.2 3.3 3.4 3.5 Sonic Adventure Online. Map: Egg Carrier. Sonic Team. Archived from the original on 25 May 2016. Retrieved on 18 July 2016.
- ↑ 4.0 4.1 4.2 4.3 Sonic Adventure Online. Map: Egg Carrier: Post-Transformation. Sonic Team. Archived from the original on 25 May 2016. Retrieved on 18 July 2016.
- ↑ 5.0 5.1 5.2 5.3 5.4 5.5 Sonic Adventure Online. Map: Egg Carrier. Sonic Team. Archived from the original on 25 May 2016. Retrieved on 18 July 2016.
- ↑ 6.0 6.1 6.2 Sonic Adventure Online. Map: Egg Carrier. Sonic Team. Archived from the original on 25 May 2016. Retrieved on 18 July 2016.
- ↑ 7.0 7.1 7.2 7.3 Map of the Egg Carrier, Sonic Adventure DX: Director's Cut.
- ↑ 8.0 8.1 8.2 Sonic Adventure Online. Map: Egg Carrier. Sonic Team. Archived from the original on 25 May 2016. Retrieved on 18 July 2016.
- ↑ Sonic Adventure Online. Map: Egg Carrier. Sonic Team. Archived from the original on 25 May 2016. Retrieved on 18 July 2016.
- ↑ 10.0 10.1 10.2 Sonic Adventure Online. Map: Egg Carrier. Sonic Team. Archived from the original on 25 May 2016. Retrieved on 18 July 2016.
- ↑ 11.0 11.1 11.2 11.3 11.4 11.5 11.6 11.7 11.8 11.9 Sonic Adventure Online. Map: Egg Carrier. Sonic Team. Archived from the original on 25 May 2016. Retrieved on 18 July 2016.
- ↑ 12.0 12.1 12.2 12.3 12.4 12.5 12.6 Map of the Egg Carrier, Sonic Adventure DX: Director's Cut.
V·T·E · {{Adventure 2 info}} · Category

