Accented Blooms

Tuesday, 26 February 2019

On Saturday I attended a wonderful stamping event held by the Vancouver Island Stampin' Up! Demonstrators.  It's always fun to get together with other demonstrators to share and create!  We also did a swap of cards.

My card features the Accented Blooms stamp set from the Annual Catalogue.  I love this stampset - it's perfect for the beginner stamper, the casual stamper and the avid stamper.  I'd say my card is for the avid stamper as it incorporates heat embossing.


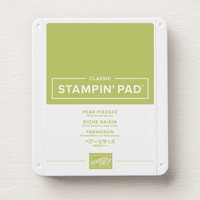
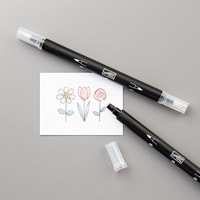
For this card, I stamped the image in VersaMark and then sprinkled by with Black Embossing Powder and heated.  I sponged the flower images with Poppy Parade using a Sponge Dauber and coloured the leaves using Pear Pizazz using a Blender Pen.

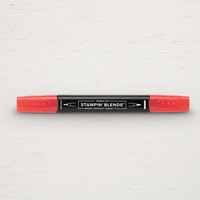
Did you notice the ribbon and wonder where Poppy Parade ribbon came from?  Here's my new favourite technique!  You can colour any ribbon using a Stampin' Blends alcohol marker.

Instructions

  1. Cut a piece of Basic Black card stock (4 1/4" x 11") in half to form a card base.
  2. Use the Embossing Buddy to a piece of 3 3/4"x 3 3/4" Whisper White card stock. Stamp the flower image in VersaMark on a  piece of Whisper White.
  3. Sprinkle with Black embossing powder and use the Heat Tool to "melt" the powder.
  4. Sponge the flowers with Poppy Parade ink using a Sponge Dauber.
  5. Colour the flowers using Pear Pizazz with a Blender Pen.
  6. Stamp the sentiment using Poppy Parade and punch out with the Tailored Label Punch
  7. Adhere to the embossed image using Dimensionals
  8. Adhere to Poppy Parade card stock (4" x 4")
  9. Adhere to the card base
  10. Colour a piece of Silver Metallic thread using the Dark Poppy Parade Stampin' Blend. (TIP - make sure that you put a piece of paper underneath your ribbon as the ink will bleed through).
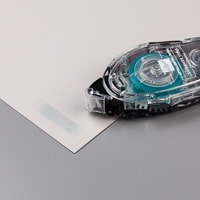
  11. Adhere around the card base using Snail.
  12. Adhere 3 Faceted Gems over the seam.
  13. Stamp the inside sentiment using Poppy Parade ink on a 4" x 5 1/4" piece of Whisper White cards stock. 
  14. Adhere to the inside of the card.

If you live in Canada, I would love to be your demonstrator!  You can click on the supply list below to order any of these items through my online shop. 

Please be sure to use the current Host Code FGVKUG26 to receive a free gift from me in February. When you place a $50 order (before shipping and taxes) using the Host Code, I'll send you four cards and instructions by mail as a thank you.  If your order is over $200, please do not use the Hostess Code as you'll qualify for Stampin' Rewards, but I'll still send you the 4 free cards! 


Happy Stamping!
Melva


Product List

Sale-a-Bration Painted Seasons and Four Season Framelits

Friday, 22 February 2019

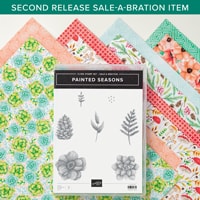
My card today features the Painted Seasons Bundle - now available for FREE with a $120 CDN order during Sale-a-Bration.  I'm so excited that you will be able to buy coordinating Framelits for this stampset as well a number of other stampsets and a new punch starting March 1st.  


Isn't this the loveliest Designer Series Paper!!!


Instructions

  1. Cut a piece of Pool Party card stock 4 1/4" x 9 1/4".  Score at 5 1/2" to make card base.
  2. Cut a piece of Granny Apple Green card stock 4" x 3 1/2.  
  3. Cut a piece of Designer Series Paper 3 3/4" x 3 1/4"
  4. Adhere the Designer Series Paper to the Granny Apple Green cardstock
  5. Cut a piece of Whisper White card stock 4" x 5 1/4"
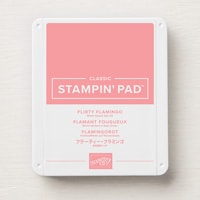
  6. On a scrap piece of paper stamp the succulent image twice - once in Flirty Flamingo and once in Petal Pink and the leaf twice in Granny Apple Green
  7. Cut out using Framelits and Big Shot
  8. Adhere the Petal Pink succulent and 1 leaf to the bottom of the piece of Whisper White card stock using Snail.  Adhere the Flirty Flamingo succulent and the other leaf to the cardstock using Dimensionals.
  9. Stamp the sentiment in Flirty Flamingo and stamp 2 leaves over the sentiment using Granny Apple Green ink (stamped off twice).  Punch out using Story Label Punch.
  10. Adhere the Whisper White card stock to the inside of the card
  11. Tie a piece of Lemon Lime Twist ribbon around card and adhere the punched out sentiment using Dimensionals.

If you live in Canada, I would love to be your demonstrator!  You can click on the supply list below to order any of these items through my online shop. These Sale-a-Bration items are only available until March 31st or while supplies last.  If you love them as much as I do, don't be disappointed, order yours today!

Please be sure to use the current Host Code FGVKUG26 to receive a free gift from me in February. When you place a $50 order (before shipping and taxes) using the Host Code, I'll send you four cards and instructions by mail as a thank you.  If your order is over $200, please do not use the Hostess Code as you'll qualify for Stampin' Rewards, but I'll still send you the 4 free cards! 


Happy Stamping!
Melva


Product List

Let It Ride

Tuesday, 19 February 2019

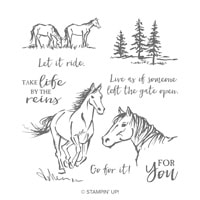
Check out todays' cards that features the Let It Ride stampset from the Occasions Catalogue. When I saw this in the catalogue, I knew I had to have it.  I don't ride horses, but there was something about the stamped images that called to me.  The sentiments are powerful and encouraging.


This card was quick and easy to make and is perfect for any type of stamper - beginner, casual or avid.  And while it is definitely a masculine card, I think the message is appropriate for anyone in your life.


Instructions

  1. Cut Early Espresso card stock 4 1/4" x 11" and fold in half to make the card base
  2. Cut a piece of Soft Suede card stock 4" x 5 1/4"
  3. Stamp the horse image in Early Espresso ink on a piece of Very Vanilla card stock (3 3/4" x 5")
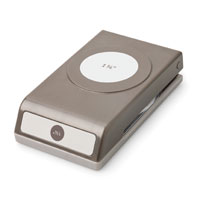
  4. Stamp the sentiment on a scrap piece of Very Vanilla card stock and punch out using the 1 3/8" Scallop Circle Punch
  5. Punch out a circle from Early Espresso using the 1 3/4" Circle Punch.
  6. Adhere the stamped sentiment to the Early Espresso circle
  7. Adhere a 3" piece of Burlap Ribbon with the end cut to a banner point to the bottom of the Very Vanilla card stock using Snail.
  8. Adhere the sentiment on the left hand side of the ribbon using Dimensionals.
  9. Adhere the Very Vanilla stamped card stock to the Soft Suede card stock.
  10. Adhere to the card base.
  11. Stamp the sentiment and horse head on a piece of Very Vanilla card stock (4" x 5 1/4").  
  12. Adhere to the inside of the card.

Sale-a-Bration

Have you seen the new products available during Sale-a-Bration?  Stampin' Up! has added 3 new items available for FREE with either a $60 or $120 order during Sale-a-Bration.  I'm in love with the Painted Seasons Bundle!  Get yours before they are gone - only available until March 31st or while supplies last!

Free with a $120 CDN order

Check out the new Sale-a-Bration rewards here 


If you live in Canada, I would love to be your demonstrator!  You can click on the supply list below to order any of these items through my online shop. 

Please be sure to use the current Host Code FGVKUG26 to receive a free gift from me in February. When you place a $50 order (before shipping and taxes) using the Host Code, I'll send you four cards and instructions by mail as a thank you.  If your order is over $200, please do not use the Hostess Code as you'll qualify for Stampin' Rewards, but I'll still send you the 4 free cards! 


Upcoming Classes

Have you checked out my upcoming classes?  I have lots available in February and March including some kit classes.  You can sign up online or you can check them up on my Facebook Group.   


Happy Stamping!
Melva


Product List
© Stamping With Melva • Theme by Maira G.