Location
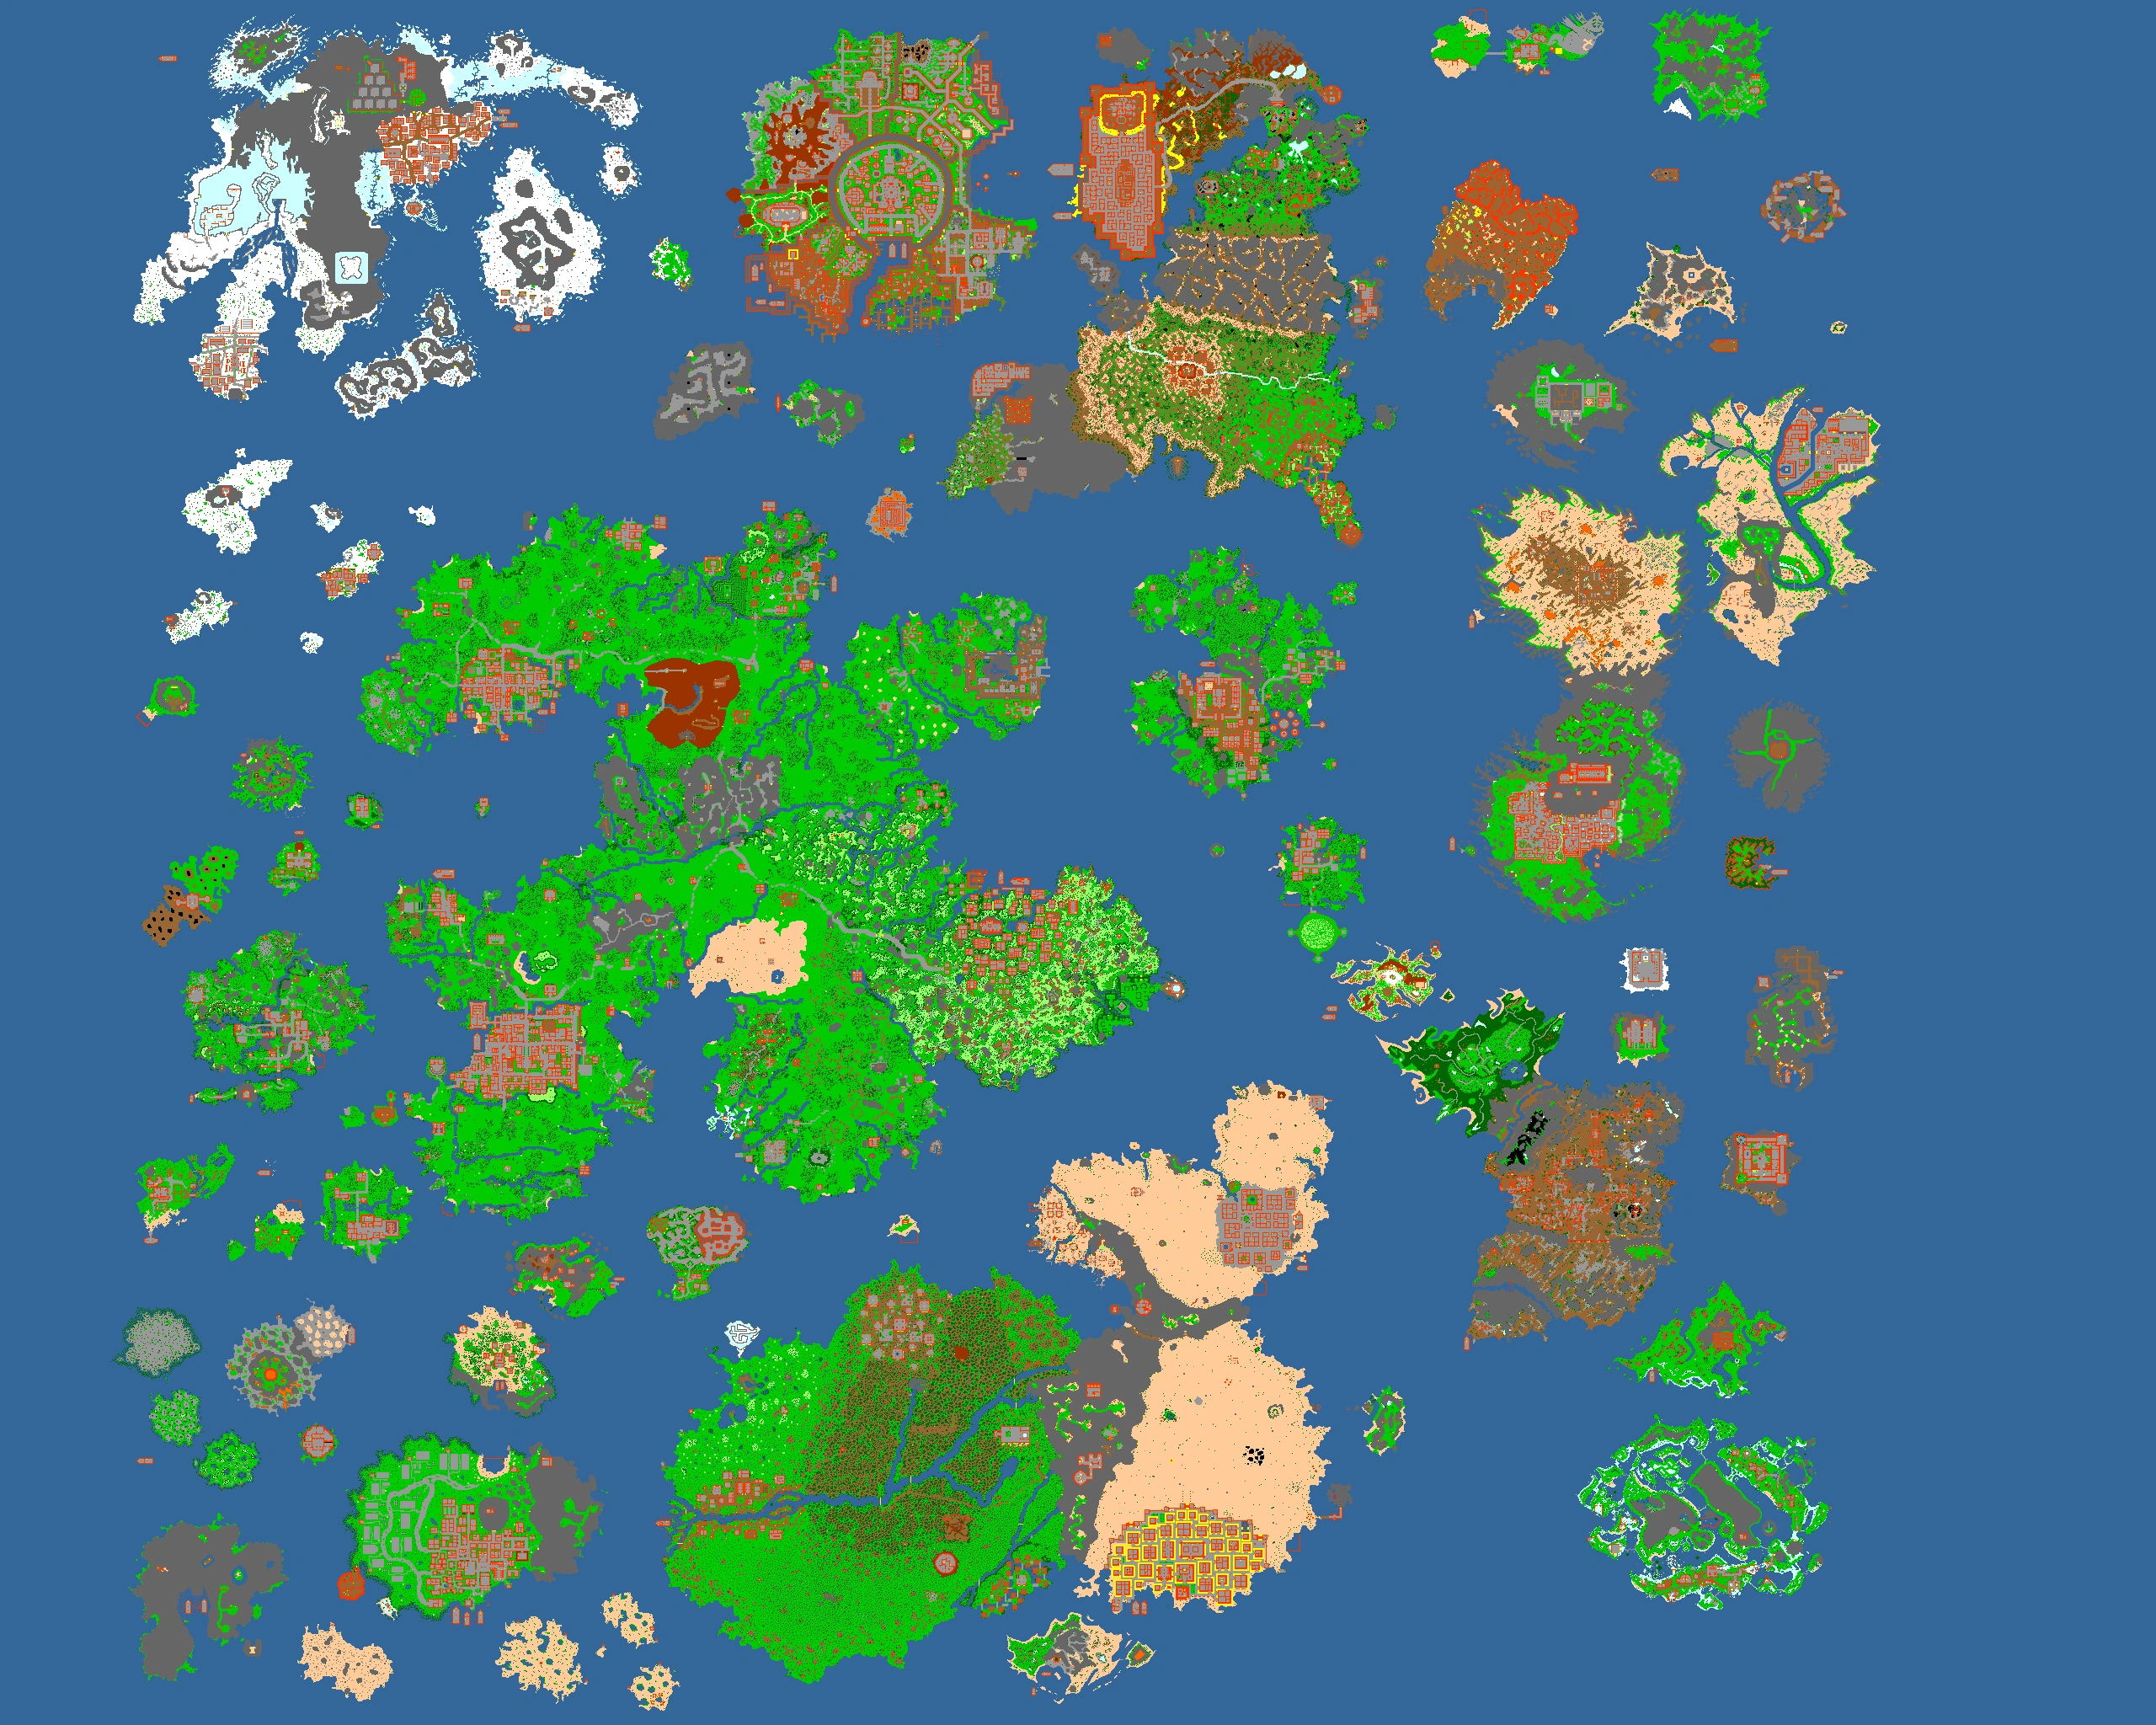
Various, starts in Thais
Dangers
Juggernauts, Lost Souls, Dark Torturers, Demons, Behemoths, Hellfire Fighters, Ungreez, The Ruthless Seven Minions, Undead Dragons, Hellhounds, The Count, Massive Water Elementals, Quara Predators, Quara Pinchers, Quara Hydromancers, Hands of Cursed Fate, Massive Fire Elementals, Crystal Spiders, Nightmares, Giant Spiders and more monsters.
Reward
Demon Hunter Outfit and addons ![]()
![]() , access to the deeper Demon Forge areas, ability to buy the Blessing of the Inquisition, 3 achievements (High Inquisitor, Master of the Nexus and Demonbane), and your choice of one of the following: Emerald Sword, Hellforged Axe, Obsidian Truncheon, Warsinger Bow, Royal Crossbow, Spellbook of Dark Mysteries, Master Archer's Armor, Fireborn Giant Armor or Robe of the Underworld.
, access to the deeper Demon Forge areas, ability to buy the Blessing of the Inquisition, 3 achievements (High Inquisitor, Master of the Nexus and Demonbane), and your choice of one of the following: Emerald Sword, Hellforged Axe, Obsidian Truncheon, Warsinger Bow, Royal Crossbow, Spellbook of Dark Mysteries, Master Archer's Armor, Fireborn Giant Armor or Robe of the Underworld.
(settings)
Required Equipment
- 20 Vampire Dusts
- 20 Demonic Essences
- 3 Garlic Necklace (recommendation only - not required)
- Machete
- Shovel
- Rope or Magic Rope
- Travel Money
Note: You need to do missions 1-5 only to get the outfit. You don't need level 100 for this either. It's rather easy too. Level 100 is NOT needed to kill Ungreez, so you can also get the first addon before this level.
Also note that you don't require a premium account to start the quest and do the first three missions.
Finally, note that in order to access the Demon Forge and start Mission 7 you must have absorbed the spirit of at least one of The Ruthless Seven in The Pits of Inferno Quest.
Completing this quest up to mission 3 allows you to start the Vampire Hunter Quest with Storkus.
Method
Go to Henricus (1 floor down here) and ask him for a mission. He will ask you if you want to join The Inquisition. Say yes and ask for a mission again.
Mission 1: Interrogation
Your mission is to investigate the 5 guards in Thais regarding the Heretic behavior. Tim, Kulag, Grof, Miles and Walter are their names. If you do well you see a holy sprite  on you. Starting from the south entrance of the city near Henricus and going clockwise around the city limits you will find the guards in the next order.
Walter, The Guard
- Greet him by saying "hi".
- Then ask him if there is any trouble.
- After that ask him what the authorities can do about it.
- Then you should ask him what he think the authorities can do to have avoided the trouble.
- Finally ask him how the gods would allow this to happen.
Kulag, The Guard
- Greet him by saying "hi".
- Then ask him if there is any trouble.
- After that ask him what the authorities can do about it.
Grof, The Guard
- Greet him by saying "hi".
- Then ask him if there is any trouble.
- After that ask him what the authorities can do about it.
Miles, The Guard
- Greet him by saying "hi".
- Then ask him if there is any trouble.
- After that ask him if he thinks that the lack of trouble is explained by the foresight of the authorities.
- Then you should ask him if he thinks that it is also for the gods will that he has no trouble.
- Finally ask him if he thinks that any trouble will arise in the near future.
Tim, The Guard
- Greet him by saying "hi".
- Then ask him if there is any trouble.
- After that ask him what the authorities can do about it.
- Then you should ask him what he think the authorities can do to avoided the trouble.
- Finally ask him how the gods would allow this to happen.
Mission 2: Eclipse
Henricus tells you to get The Witches' Grimoire. Start by traveling to the Femor Hills carpet and say Eclipse to Uzon and he will take you to the witches' mountain.
You are in a Protection Zone when you arrive. Go down the ramp to the witch's camp.
Beware here, because you can find up to 8 Witches, 2 Ghouls and a Dark Magician. Also some 2 Cats, 2 Rats, and 2 Frogs will be there to annoy you.
It's recommended to use Sudden Death runes and Death Strike here since the Witches are weak to Death Damage.
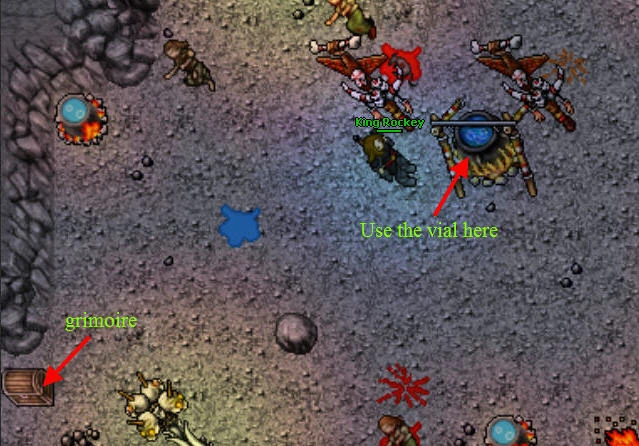
Use the vial of holy water that he gives you on the big cauldron (an explosion  will appear on the cauldron) and open the chest to your left, then bring the witches' grimoire to Henricus.
Mission 3: Vampire Hunt
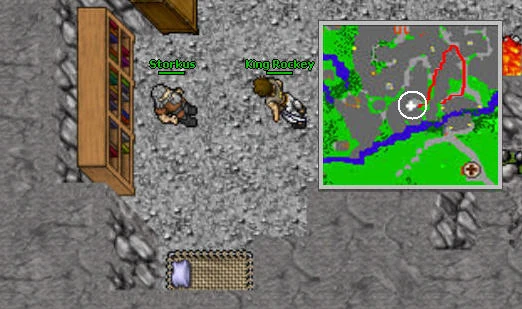
Ask for mission to Henricus. He wants you to find the Dwarfish Vampire Hunter, Storkus, located west of the Dwarf Bridge here. It's good idea bring your 20 Vampire Dusts with you to save some time.
Once you found Storkus, he wants 20 Vampire Dusts. Give to him and ask again for a mission.
Now he wants you to kill a vampire lord, The Count in the Green Claw Swamp, The Count is located near to the Blood Herb Quest, here. You will need a Machete or equivalent tool to cut the Jungle Grass on your way there.
When you go down the hole walk to the right and go down the next stairs. You'll see a buried coffin surrounded by 3 counters. To summon The Count, you must "use" the coffin in the center of the room. Kill it and bring The Ring of the Count to Storkus.
Note: There is a way to make this mission easier, just put 1 Garlic Necklace on each counter before using the coffin. Now use the coffin and when The Count spawns, he will be The Weakened Count (just like one regular vampire), making your work much easier.
Note: The count can easily kill a 85 mage in one turn with summons. It is recommend to use the garlic necklace trick.
Mission 4: The Haunted Ruin
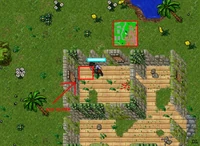
Henricus will give you a Special Flask (vial of holy water). Go to Liberty Bay and use the vial on an old house, here. Use the vial on the most north-west corner!, just like the image shows:After using the vial the holy cross  will appear, a Pirate Ghost will spawn and the door will close. Killing it is optional, just wait around 10 Seconds and the door will open.
Get back to Thais and report your mission to Henricus.
Mission 5: Essential Gathering
Ask Henricus for a mission. He wants you to bring him 20 Demonic Essences. After you've handed in the essences, ask for outfit and he will give you the Demon Hunter Outfits without addons.
Mission 6: The Demon Ungreez
Ask to Henricus for a mission. He wants you to kill a demon called Ungreez. Head to Edron Hero Cave and go down a few levels, here.
The demon takes around 5–15 minutes to respawn, depending on how many that are online on the server, and each person must kill him once (by dealing the most damage). Ungreez is like a regular Demon.
After killing Ungreez, Henricus will give you the first addon.
Note: After finishing this mission (report the mission with Henricus) you cannot access this room again.
Mission 7: The Shadow Nexus
This is the hardest part of the quest. You will need a large team with plenty of firepower and support. Level 150+ for all team members is strongly recommended. Remember to bring your vial of holy water, you will need it to destroy the Shadow Nexus.
Your mission is to go to the Demon Forge and slay seven of The Ruthless Seven Minions. The Demon Forge is located in the Edron Hero Cave, through a portal in the Temple of Xayepocax. Upon entry you will immediately be ambushed by Hellfire Fighters, Fire Devils and Fire Elementals. Kill them and go south to the Retreat.
Note: In order to access the Demon Forge you must have absorbed the spirit of at least one of The Ruthless Seven in The Pits of Inferno Quest. Check your quest log to see if you have. You must have also reported your earlier mission to kill Ungreez.
The Retreat is a hub which allows easy access to the sections of the Demon Forge. By each teleport you will notice signs on the walls, indicating where it leads. You will not have access to any of the portals right now, they are unlocked through the quest. You must instead walk the Dark Path.
From here until you reach The Shadow Nexus, your mission is quite simply: kill your way to a boss room, kill the boss, exit via the teleporter within 2 minutes to unlock the next area. Repeat this until you reach the Shadow Nexus (after killing Hellgorak).
Keep in mind the following for the rest of the quest:
- If you step in a teleporter inside a boss room before the boss is dead or after 2 minutes of slaying the boss, you will return to The Retreat. You will not gain access to the next area if you do not enter it. The same is true if you die in the boss room: you will have to repeat the process even if your team kills the boss after you die. For this reason, you must also kill each demon boss in a specific order (except Latrivan and Golgordan which are fought together).
- If you enter the teleport at the start of a section of the Demon Forge, it will take you back to the Retreat. You can leave to resupply and return later without losing any progress. This only applies if the area is accessible from the hub, otherwise it will take you to the previous subsection (i.e. The Battlefields will take you back to the Vats).
- When entering boss rooms, you may be close to the teleport out. Keep calm! If you accidentally jump into the teleport at the sight of a boss, you will have to repeat that section. When entering the boss room, just don't move until you are aware of your surroundings.
- When you are granted access to a teleport in the hub, it is permanent. If you die, you can always return.
- You do not have to do this quest in one sitting. You can always resume from where you left off by going into the teleport of the first unfinished section.
- The quest log will tell you nothing. Do not search it to confirm your status. The only way to check where you are up to is by entering the portals from last to first: the first one that works is the one you need to do. In the case of The Hive you can check your quest log if you are done with this mission.
For future references, the sections of the Demon Forge are:
- The Dark Path
- The Dark Path - Massive Fire Elementals, Hellfire Fighters.
- Hall of the Colossi - Stone Golems, Gargoyles, Behemoths, Juggernauts.
- Boss room - Ushuriel, Eyes of the Seven.
- The Crystal Caves
- The Crystal Caves - Ice Golems, Crystal Spiders, Spectres, Hands of Cursed Fate.
- The Mirror Maze of Madness - Giant Spiders, Nightmares, Phantasms.
- The Sunken Cave - Quara Hydromancers, Quara Pinchers, Quara Predators, Massive Water Elementals.
- Boss room - Zugurosh, Pillars (shielding reducers).
- The Blood Halls
- The Blood Halls (3 floors) - Lost Souls, Betrayed Wraiths, Dark Torturers, Hands of Cursed Fate.
- The Foundry - Hellfire Fighters, Furies, Plaguesmiths, Destroyers, Juggernauts.
- Boss room - Madareth, Pillar (paralyzer).
- The Vats
- The Vats - Plaguesmiths, Blightwalkers, Sons of Verminor, Defilers.
- The Battlefields - Destroyers, Furies, Juggernauts, Blightwalkers, Hellhounds, Hands of Cursed Fate, Nightmares, Dark Torturers.
- Boss room - Latrivan, Golgordan, Flamethrowers, Magicthrowers, Plaguethrowers, Shredderthrowers.
- The Arcanum
- The Arcanum - Liches, Vampires, Efreets, Braindeaths, Warlocks, Diabolic Imps, Hands of Cursed Fate, Demons, Undead Dragons
- The Soul Wells - Betrayed Wraiths, Spectres, Lost Souls, Phantasms, Demons.
- Boss room - Annihilon, Lavaholes (Deathspawn spawners).
- The Hive
- The Hive (3 floors) - Bonebeasts, Ancient Scarabs, Nightmares, Sons of Verminor, Hellhounds, Juggernauts.
- Boss room - Hellgorak, Dreadbeast
- The Shadow Nexus - Furies, Juggernauts, Hellhounds, Undead Dragons, Pillars (Demon spawners).
The Dark Path: Ushuriel
Go up the stairs to the west of the Demon Forge retreat. You will be in a path with many Hellfire Fighters and Massive Fire Elementals. Follow the path east and go up the stairs. You must now walk north through a great hall, filled with Stone Golems, Gargoyles, Behemoths and Juggernauts. Be careful when luring monsters here, groups of up to 4 Juggernauts can be found.
Tip: juggernauts do not walk over energy fields.
At the end of the hall is a Teleport which leads to Ushuriel and many eyes of the Seven. Wear a stealth ring (or cast Invisible) and enter. Ushuriel is not particularly strong for a competent group, but the eyes are deadly in masses - do not lose invisibility or you may die quickly.
Once Ushuriel is dead, enter the portal to go to the next area, the Crystal Caves.
Note: do not enter the teleport before Ushuriel is dead! You will be sent to the demon forge retreat and have to walk through the Dark Path again if you do.
Note: once Ushuriel is dead, you must not wait more than 2 minutes before entering the portal or you will be sent to the retreat instead of the next area (the Crystal Caves).
The Crystal Caves: Zugurosh
You will be greeted by several Crystal Spiders, Spectres and Ice Golems, and later Hands of Cursed Fate. Head as far east as you can. When you reach a wall, go south and then west to eventually find stairs.
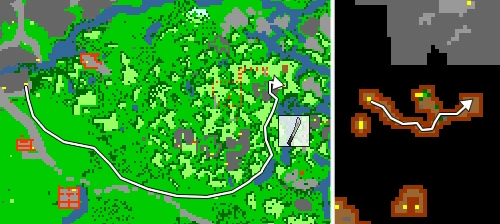
Go up the stairs to the The Mirror Maze of Madness. Here you will find many Phantasms (many of them will be summons), Giant Spiders and Nightmares.
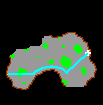
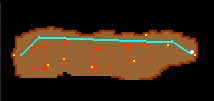
To traverse the maze, follow the directions given in the image above:
- North, east, up the stairs
- North, west, down the stairs
- North, east, north, up the stairs
- West, south, down the stairs
- South, west, north, up the stairs
- South, east, north, down the stairs
- North, west, north, up the stairs
- North, west, up the stairs
- You are now at the teleport room
Go through this teleport to an undersea cave passage. Here you will find many Quara Predators, Quara Pinchers, Quara Hydromancers and Massive Water Elementals.
Walk far east to find the teleport to Zugurosh.
Now you must defeat Zugurosh. He is immune or strong to almost every element except physical. His next biggest weakness is energy. In addition to Zugurosh there are Pillars across the room's border which will reduce your shielding to around 1-11. The battle against Zugurosh is a test of endurance. He will drain all of your supplies if you are unprepared.
A good strategy is to have a few paladins run Zugurosh over Fire Fields, while shooting at him. This way, his invisibility will be cancelled every time he walks, and paladins are quite effective hitters. Another strategy is to summon Fire Elementals to speed up killing, however keep in mind this battle will be quite consuming.
Once he is dead, go through the teleport to be teleported to the Blood Halls. This area is extremely dangerous, even upon entering! It may be a good idea to enter the teleport back to the retreat when you enter the blood halls, so your team can reorganize and, if necessary, resupply after Zugurosh.
The Blood Halls: Madareth
Here you will face a great number of Dark Torturers, Betrayed Wraiths, Lost Souls and Hand of Cursed Fate. Kill the Dark Torturers first.
Keep going north and west to the center of the room to find stairs. Up these stairs is an obscene amount of the same previously mentioned creatures. At least two very high level knights (190+) must try to go up the stairs and to corners with the monsters. Immediately, sio'ers must go up and sio the blockers or just let a mage (150+) stair jump with Any Ue (Recommended Rage of the skies or Eternal Winter).
Go west, then south and you will find another stairs. You can use the same tatic of previous stairs here. Go east, then north and you will find a teleport.
Going through this teleport and you will be in a room with several Juggernauts, Hellfire Fighters, Plaguesmiths, Furies and Destroyers. Shooters must Magic Wall to make a barrier or many monsters will come at same time.
After kill all monsters, go to the southeast corner of the room and you will find the teleport to Madareth's Ward. Sorcerers and Druids can use Icicle Runes and Paladins can use Assassin Stars and Divine Missiles to kill Madareth.
Once he is dead, go through the teleport to be teleported to the next throne.
The Vats: Latrivan & Golgordan
The Vats contains many Sons of Verminor, Plaguesmiths, Blightwalkers and Defilers.
Note: A Dwarven Ring is recommended for the Blightwalkers.
After entering the Vats, proceed east/north-east. It is recommended to hug the south wall to find less monsters. To the far east you will find a teleport to The Battlefields.
Be prepared for many Furies, Hellhounds, Destroyers, Blightwalkers, Hands of Cursed Fate, Hellfire Fighters, Nightmares, Dark Torturers and some Juggernauts. Enter the portal and clear your way to the east to find another teleport, this time to Latrivan and Golgordan.
The Arcanum: Annihilon
The Arcanum is a place with Warlocks, Liches, several Hand of Cursed Fate, Braindeaths, Vampires, Undead Dragons, Efreets, Diabolic Imps, Demons and possibly more. The path is a straight line through the 3 rooms before you reach the teleport to enter the Soul Wells.
The Soul Wells is full of Betrayed Wraiths, Spectres, Lost Souls, Phantasms, Demons and possibly more. Head south, while sticking the western wall to avoid the majority of the spawn. Continue to head south until you find the teleporter to Annihilon.
The Hive: Hellgorak
You will instantly be greeted by multiple Nightmares, Bonebeasts, Sons of Verminor and Juggernauts. Head north towards many ramps, where you will see more of the same monsters, Ancient Scarabs and Hellhounds. Continue to head north where there will be more ramps with the same creatures and Giant Spiders. Again, head north and slightly east to the final set of ramps. Go up and kill the Juggernauts, Sons of Verminor, Nightmares and Demons. Enter the teleport to face Hellgorak.
He is very strong against all damage types, so have everyone convince the Dreadbeasts summoned in the room. These will damage him and allow you to defeat him. This is the only way to defeat Hellgorak. Enter the teleport to enter the Shadow Nexus.
The Shadow Nexus
Do NOT use the teleport to return to the retreat. There is no other way back to the Shadow Nexus other than to walk all the way back to Hellgorak's room.
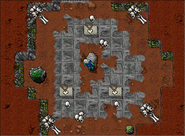
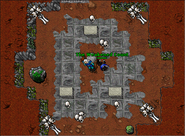
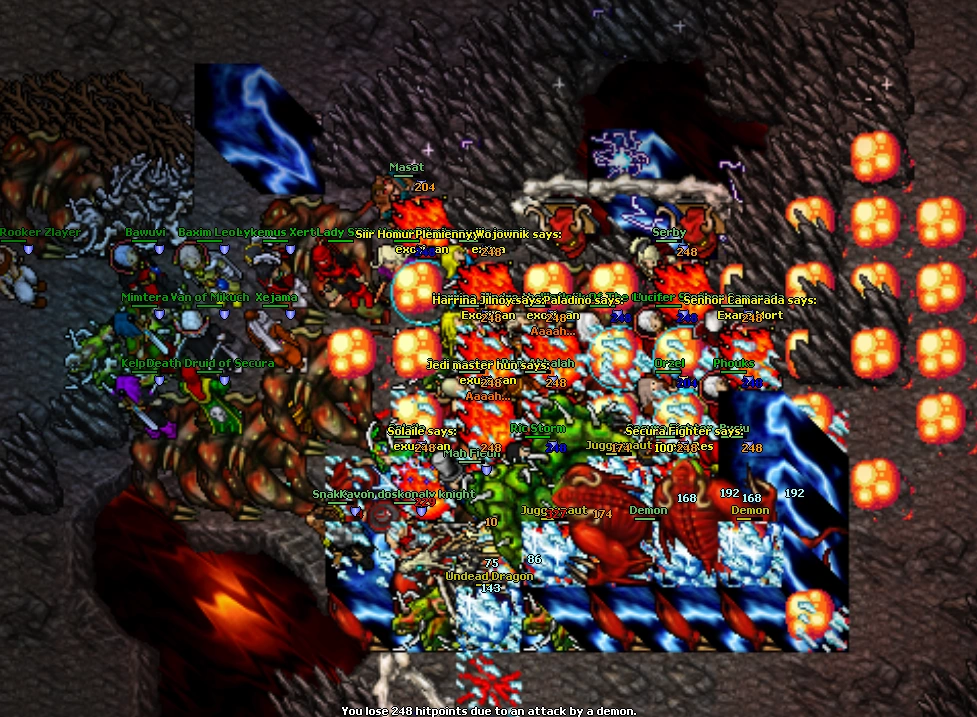
The final room consists mostly of Furys, Juggernauts, Demons, Undead Dragons and Hellhounds. Demons are constantly spawned by Magic Pillars, so it is a waste of supplies to kill them as the tower spawns them endlessly, as soon as one dies another one is summoned. Each Magic Pillar spawns 1 Demon. (Note: Placing parcels or field runes around the Magic Pillars will not keep them from summoning Demons) There are a total of 5 of the Magic Pillars. Their locations are shown in the picture below they have blue circles around them, the Shadow Nexus is the two small red dots twords the center of the room.

Whilst blockers are holding these creatures, players should approach the magicwall in the centre of the chamber, a magicwall [see picture below].
Players should:
- Use the vial on the magicwall to electrify it.
- Use the vial when the wall changes from electric to a burned out Fire Field ontop.
- The magic wall returns to the energy stage, and after 20 seconds goes back to a burned out Fire Field ontop.
- Use the vial again on the magicwall, and again it returns to the electric stage.
- The magic wall returns to the energy stage, and after 20 seconds goes back to a burned out Fire Field ontop.
- Use the vial a 3rd time on the magicwall.
- The magicwall becomes fully ignited with a full Fire Field ontop.
From here, the player must use the vial one more time to complete their mission.
The full Fire Field lasts for around 10 seconds, and if any player can reach the full Fire Field and use their vial on it, they have instantly completed the mission. A maximum of 4-5 people can complete the mission per full Fire Field before it resets to the original position, and the aforementioned steps must be repeated - unless you are on an optional-PvP server, where everyone can stand on the same spot and complete the mission at the same time.
It is recommended to have a high level druid cast Mass Healing repeatedly at this point.
Rewards
Report back to Henricus, the quest will appear "completed" in your quest log and you will earn the High Inquisitor achievement.
Now ask to Henricus for a outfit. He will give you the 2nd addon of the Demon Hunter Outfits, and you will earn the Demonbane achievement.
Now you can enter to the Reward Room. But remember: you may only choose one out of the 9 prizes. Just after you take your item, you earn the Master of the Nexus achievement.
Also, you will be able to buy the Blessing of the Inquisition (all five blessings at once, 10% more expensive) with Henricus.
Transcripts
Mission 1: Interrogation
|
Player: hi |
|||
|
Player: hi |
|||
|
Player: hi |
|||
|
Player: hi |
|||
|
Player: hi |
|||
|
Player: hi |
|||
|
Player: hi |
|||
Mission 2: Eclipse
|
Player: mission |
|||
- Uzon, in Femor Hills
|
Player: hi |
|||
|
Player: hi |
|||
Mission 7: The Shadow Nexus
(after finishing mission 7)
|
Player: mission |
|||

