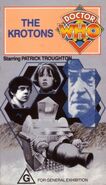
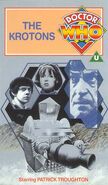
The Krotons was the fourth serial of season 6 of Doctor Who. It was the first story penned by future script editor Robert Holmes, whose prolific contributions to the series created or contributed to many key elements of the programme's mythology.
Synopsis[]
The TARDIS arrives on the planet of the Gonds, who are ruled and taught in a form of self-perpetuating slavery by the alien Krotons — crystalline beings whose ship, the Dynatrope, crash-landed there thousands of years earlier after being damaged in a space battle.
The Krotons are in suspended animation, in a crystalline slurry form, awaiting a time when they can be reconstituted by absorption of mental energy. Periodically, the two most brilliant Gond students are received into the Dynatrope, nominally to become "companions of the Krotons", but in truth to have their mental energy drained, after which they are killed.
When the Second Doctor and Zoe take the students' test, their mental power is sufficient to reanimate the Krotons. The Doctor discovers that their life system is based on tellurium. With help from the Gond scientist Beta, he destroys them and their ship with an impure form of sulphuric acid.
Plot[]
Episode one[]
On the planet of the Gonds, a ceremony is underway. The two brightest students, Abu and Vana, have been selected to become "companions" of the Gonds' unseen masters, the Krotons. As Abu eagerly dons his selection robes and enters the Krotons' machine, another Gond, Thara desperately begs Vana not to go. The Gonds argue with him. She has been selected for the highest honour. Those companions who have gone before have never been seen nor heard from again. The Gond leader Selris, Thara's father, is resolute, stating that Kroton law dictates that she must.
The Doctor's TARDIS lands in a desolate area nearby. Jamie immediately notes the strong odour of sulphur whilst the Doctor states that the planet has twin suns. Zoe suggests that they depart, but the Doctor opts to explore. From a clifftop they see the Gond city below. They encounter a metallic crystalline structure with a hatchway similar to the one in the city. Jamie noticed that the smell is stronger. The Doctor is cautious. He identifies the structure as a machine and wants to head back to the TARDIS. As they head off, the door opens, and they hide as a dazed and weary Abu emerges from the hatchway. Before their horrified eyes, he is evaporated by blasts of energy.
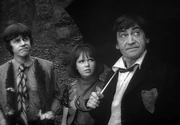
Jamie and Zoe are less than impressed by the Doctor's sunny outlook for their landing spot.
Thara and Selris argue over Vana's selection. Thara questions if the Krotons even exist. Thara draws a weapon and is soon surrounded by Gonds. The Doctor, Jamie and Zoe enter the city. They are regarded with suspicion; the Gonds have never met strangers before and the area where they landed, the Wasteland, is believed uninhabitable. Meanwhile, the stand-off between Thara and the Gonds continues. Vana wants to go through the door in order to protect Thara. He relents. The Doctor, Jamie and Zoe watch this, and the Doctor tries to stop it, thinking it some kind of sacrifice. The Gonds seize the Doctor and his colleagues for stopping their ritual. As a particularly hotheaded young man named Axus fights with Jamie, Vana rushes into the Kroton machine. Jamie wins the fight with Axus. Selris interrogates the Doctor and his colleagues. The Doctor's description of the death of Abu shocks the crowd, as does the revelation that they have been in the Wasteland. The Doctor, Jamie and Zoe rush back to the Wasteland to rescue Vana, followed by Thara.
They all reach the door. The Doctor sets about finding stones and starts blocking the energy beams with rocks. They hide. Soon Vana appears and swoons. The Doctor swoops in with his umbrella up to save her. The gas knocks the stones free, which causes the Doctor's umbrella to disintegrate, but everyone is safe. Vana is near-catatonic. They all set off for Selris' house.
Back in the city, the Doctor tends to Vana through hypnosis. Selris tries to make sense of what is happening. Have they always been murdering the selected Gonds? The Kroton machine landed on the planet thousands of years earlier, and the ensuing war nearly annihilated the Gonds and ruined the landscape. Since then, the Krotons have never left their machine.
Thara and a band of students sneak into the Learning Hall and interrogate the Curator for information about the Krotons. The Curator states he is forbidden to tell and that they only communicate through messages and, very occasionally, voice. They decide to fetch the Krotons out by smashing their teaching machines.
The Doctor and his colleagues learn that the Krotons created the teaching machines to train the Gonds on the laws, science and culture that require their top students to become companions; the Doctor notes this is a form of self-perpetuating slavery. Selris panics about what this means for his society. Beta, their chief scientist, arrives and tells Selris of Thara's actions. Selris worries he will not reach the Learning Hall in time; however, the Doctor states that they can cross through the Wasteland. Selris is reluctant but soon relents.
Thara and his gang vandalise the Kroton teaching machines to force them to emerge. They are stopped by a bellowing, mechanical voice ordering them to leave the hall immediately. Thara wants to push on to bring the Krotons out. The Doctor, Selris and everyone else arrive and unarm the vandals and reason with them.
Somewhere inside the machine, a check is run on the Doctor. In the Learning Hall a portal opens and a metallic, snake-like object emerges and moves towards the group. Inside the machine all screens display an image of the Doctor. The probe homes in on the Doctor who backs away. The Doctor falls and covers his face as the machine bears in...
Episode two[]
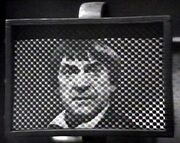
The Krotons take notice of the Doctor.
The device stops when the Doctor shields his face. Zoe notes that the device must use pattern recognition. This is confirmed when the Doctor deliberately lowers his hands momentarily and it comes back to life. A student attacks the device, which vaporises him and then retracts into the Kroton machine. The Doctor notes the apparently limited logic of the device's programming; it seems to think it has completed its task of destroying him. Thara wants to continue destroying the machines, but Selris stops him. The bellowing mechanical voice returns, ordering them to leave the hall. Selris orders the Gonds back.
The Doctor checks up on Vana. She is getting better. The Doctor and Zoe note the large gaps in the Gonds' knowledge. They have a great knowledge of chemistry and medicine but no knowledge of electricity. The Krotons apparently are training the Gonds for a specific purpose. They leave Jamie to care for Vana and go look round the Learning Hall. Selris says he will come with them.
The Doctor, Zoe and Selris enter the Learning Hall. The Doctor investigates a closed-off chamber running under the Kroton machine, and he and Selris go to investigate. Left alone, Zoe's curiosity forces her to experiment with the learning machines. She becomes enthralled as she operates it. The Doctor and Selris come back, saying it is only the foundations of the machine; however, the Doctor has noticed something is peculiar. Before he has a chance to explain, he notices Zoe on the machine and pulls her off it and berates her. Zoe has a big smile on her face and says that the Krotons are happy with her. The Doctor tries to snap her out of this brainwashed state. Selris notices that she has registered twice as high as the record for a Gond score.
Vana wakes up. She begins to babble about a "burning ball". Thara tries to calm her, but she continues to talk about "flashing lights" and her "burning mind". She briefly recognises Thara but then goes back into her reverie. Jamie gives her some pills the Doctor gave him which send her back to sleep. Jamie leaves to tell the Doctor of the situation.
The Doctor and Zoe are inspecting one of the walls in the Gond city and find it covered in some kind of crystalline substance. The Doctor states that underground he found that the machine's foundation had a root structure, suggesting the Kroton machine may be organic. A gong sounds, and a message from the Krotons is delivered. Zoe has been summoned to be a companion of the Krotons. The Doctor takes the test himself so as to accompany her. He does not perform as well as Zoe, scoring higher but requiring more questions. The Doctor comes away from the machine stating that he is happy he has pleased the Krotons, before realising he too is becoming brainwashed. The gong sounds again, and the Doctor has been summoned also. The door opens. The Doctor and Zoe have lost a bit of their bravery but edge their way in. As the door closes, Jamie enters and sees his two friends enter the dangerous machine.
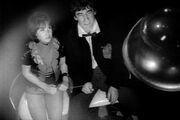
Zoe and the Doctor inside the teaching machine.
The Doctor and Zoe find the interior chamber empty, save for two chairs. They sit and are subjected to a force generator that keeps them glued to the spot. The Doctor asks Zoe to hold onto the other end of a chain which may equalise the power load and save them. The machine lights up and bears down on them.
Jamie is furious with Selris for allowing the Doctor and Zoe to enter the machine. He tries to get in.
The Doctor and Zoe struggle against the machine. They succeed and awake. Zoe notes that the device must convert mental power into energy. They see some bubbling tanks and realise that, whereas the Gonds' mental energy was insufficient, their mental energy set the tanks into operation. The Doctor takes a sample and realises that it is a crystalline slurry for making life. Zoe discovers some pipes on the floor, similar to an astronaut's airlines. They notice something forming in the tanks. As it starts to climb out, the Doctor and Zoe escape. As they do, two Krotons, crystalline bipeds, plug themselves into the airlines and watch them on their scanners.
Outside Jamie is still trying to get in. He moves off in search of a crowbar.
The Krotons wonder why the Doctor and Zoe are not following the same pattern as the other Gonds. They speculate as to whether the conditioning is failing.
The Doctor and Zoe make their way through an elaborate series of pipes and find a photo-electronic circuit that should open the door, but it has been disabled. The Doctor uses a piece of metal he has with him to complete the circuit manually. They door opens, but they realise that they are on the cusp of where the deadly gas vaporises the Gonds.
The Krotons watch the reasoning of these Gonds in shock.
Zoe decides to risk it, but they should drop down the side of the ramp and escape that way. They do so.
The Krotons decide to keep monitoring the Doctor and Zoe whilst also ordering the Gonds to bring them back. They speculate that they are not Gonds. They look in the Learning Hall and see Jamie attempting to enter. He is also not a Gond, but another Gond, Selris, is watching on. They speculate the Gonds are working in alliance with a new race. They decide to take Jamie.
The door opens. Jamie, armed with the crowbar, enters. He is immediately gripped by a Kroton. They test his mind. The machine starts, and Jamie is paralysed. He tries to resist. The Krotons realise he has a primitive brain. They state that the machine will destroy him if he does. Jamie slumps to the ground...
Episode three[]
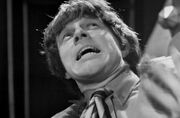
Jamie undergoes Kroton mind probe.
One of the Krotons determines that Jamie may be able to provide information about the Doctor and Zoe and turns off the mind probe.
The Doctor decides to head back to the TARDIS. Zoe questions the safety of Jamie, but the Doctor perseveres.
The Krotons question Jamie as to where he and his friends come from. They ask about the TARDIS, and Jamie is forced to answer truthfully by the mind probe. They watch as the Doctor and Zoe enter the TARDIS. Jamie questions if they are heading off without him. The Krotons deliberate whether to destroy the TARDIS.
A group of Gonds, led by security chief Eelek, approaches scientist Beta about how to attack the Krotons now that the Doctor and Zoe are presumed dead. Beta is reluctant, not out of fear as Eelek infers, but out of a lack of knowledge. The Krotons have taught the Gonds only what they want for them to know. Beta bemoans the inability of the Gonds to think for themselves and thinks they are just as unprepared and primitive as their ancestors. Eelek is impatient to act against the Krotons. He reveals there has been a vote amongst the counsel of the Gonds and that he has been announced the new leader.
They decide not to fire. They question Jamie about the operating principle and the transference interval of the TARDIS, but Jamie cannot answer any of those questions. A Kroton is sent out to investigate.
Back in the Gond city, Thara tends Vana. Selris comes and tells of the fact that the Doctor, Zoe and Jamie have entered the machine and that he is going to call a counsel meeting to discuss what to do. Thara is resentful of Selris's apparent inaction and tells him of Eelek's power grab.
The remaining Kroton tells Jamie he is to be killed.
Thara tells Selris that the Gonds are fed up with talking and want war. Although Selris considers the Krotons enemies, he is more cautious about how to fight back than Eelek. He doubts Eelek's intentions and sees his ambition as more of a power grab.
Jamie questions what the Doctor and Zoe are needed for. The Kroton explains that high ability brains are needed for transferring power into the Dynatrope, the Kroton's name for their machine.
At the council meeting, Beta openly argues with Eelek.
The Kroton tells Jamie that there is no way of destroying a Kroton. They can be rendered into molecular form but will always survive. Jamie is edging towards a weapon that he saw the other Kroton arm himself with.
Meanwhile the Doctor and Zoe have analysed the substance that they found in the tank and have discovered that it is tellurium. They have also discovered that the smell in the air is hydrogen telluride. The Doctor wants to extract some of the sulphurous rock that is producing this gas. Zoe fears they are being watched. They are, by a Kroton. Jamie watches on the screen and implores the Doctor and Zoe to get back in the TARDIS.
Zoe sees the Kroton, and it orders them to return to the Dynatrope. Jamie attacks the other Kroton; it is disorientated.
The Kroton is unable to see in the light and has lost contact with the other Kroton; the Doctor and Zoe are able to escape. The other Kroton must ignore Jamie to provide directional data and instructs the Kroton to destroy the TARDIS. The Kroton fires a dispersion jet. Zoe is horrified when the mist clears and the TARDIS is gone, but soon after the Kroton leaves to return to the Dynatrope, the TARDIS re-materialises. The Doctor tells Zoe he turned on the HADS (Hostile Action Displacement System) before leaving, and they return to the Gond city.
Eelek and his men prepare to attack the Dynatrope directly. Selris enters and demands Eelek stop. Eelek ignores him and leaves with his supporters. Selris has his own plan, which he shares with Beta, to attack the support pillars under the Dynatrope (accessible via the closed chamber in the Learning Hall). He hopes the attack will force the Krotons to emerge so they can be attacked directly.
The Kroton tells Jamie that, without high ability brain power, the Dynatrope will expire in three hours. Jamie escapes.
The Doctor and Zoe return to find Thara with the recovered Vana, preparing to leave the evacuated city. The Doctor is alarmed when Thara informs him of Selris's plan. He hurries off to the learning hall. Selris is putting his plan into operation.
The Doctor stops off at Beta's lab to leave the sulphur and instructions. His alarm heightens when he realises Jamie may still be in the Dynatrope. The Doctor and Zoe rush off, but Thara and Vana stay with Beta.
The Krotons notice that their Dynatrope is unbalancing.
Selris watches as cracks begin to form in the roof of the base unit of the Dynatrope. The Doctor enters the underchamber, yelling for them to stop. Their efforts cause a massive rockfall. Some of the rubble falls on the Doctor...
Episode four[]
Thara and Vana head down to the foundations of the Dynatrope. They feel the rumbling. Thara rushes down.
Thara joins Zoe and tries to save her, but she refuses to leave without the Doctor. Thara sets off to look for him.
Vana finds Selris and tells him that Thara is looking for the Doctor and Zoe. Selris worries for the Doctor.
The Doctor is shaken but otherwise unhurt, though several Gonds are injured. Thara is added to the number of injured when a further rock fall lands on his leg. The Doctor and Zoe pull the rock off.
Jamie staggers around the tremulous Dynatrope looking for an exit.
The Krotons are attempting to readjust their Dynatrope, eventually rendering it stable. They realise that the Gonds have attacked them in association with the Doctor and Zoe. They send out to get them back.
Thara has fractured his leg. The Doctor wants to abandon the Learning Hall. Selris joins them and regrets that his actions have not effected the machine at all. The Doctor disagrees and shows that it is leaking and probably not running at full power. Vana provides the Doctor with a small sample of Beta's sulphuric acid. The Doctor is horrified to learn that Jamie is inside the Dynatrope and rushes off.
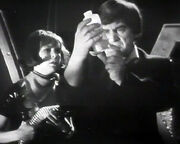
The Doctor and Zoe come up with a chemical plan.
In an effort to escape, Jamie tries to pull the door open but then finds the metal the Doctor used.
Eelek and Selris argue over leadership. Eelek blocks all of Selris' ideas and is preparing for war. He attempts to arrest Selris, but all are distracted when a Kroton emerges from the Dynatrope, demanding the two high-brains (the Doctor and Zoe) be returned. Their minds are needed to produce energy to repair the drive mechanism, and the Dynatrope is quickly running out of energy. The Kroton kills a Gond and says they have fifteen minutes. Eelek promises that they will comply.
Through trial and error, Jamie manages to open the door a crack
Eelek and Selris argue. The opportunistic Eelek realises that if they are captured, the Krotons will leave, though Selris suspects that the Krotons will destroy the Gonds regardless.
The Doctor and Zoe discover Jamie stuck in the door and pull him out, narrowly avoiding the gas. The Doctor checks Jamie is okay and sends him off to Beta to prepare more acid before rushing off.
Vana and Selris decide that what Eelek is doing is unfair and that the Doctor and Zoe should be warned. Jamie aids Beta in the construction of the acid — although neither really know what they are doing.
Vana and Selris come up with a plan. Selris is to distract the guards, whilst Vana escapes and warns their friends. This plan is foiled, and as Vana is brought back, the bottle of acid falls from her. Selris picks it up.
The Dynatrope will power down in 27 minutes. Eelek and his men capture the Doctor and Zoe as they enter the city. The Krotons watch this. They now have 22 minutes.
As they are forced into the machine, the Doctor tries to reclaim the acid from Vana, but she no longer has it. The Krotons decide not to destroy the Gonds yet as it will use up power.
Vana asks Selris if he has seen the acid. Selris realises what has happened and jumps into the Dynatrope as the door closes.
The Doctor and Zoe come face to face with the Krotons. As Selris appears and gives the acid to the Doctor, he is destroyed by a Kroton. The Krotons begin their take-off. They have twelve minutes. Zoe suggests they should stall for time, but the Doctor points out that if the machine powers down it will explode and destroy the planet. The Doctor manages to get the Krotons to explain that they need four brains working in tandem to power the ship. There used to be four Krotons, but two got destroyed in a space battle. This forced them to land on the planet of the Gonds and go into perpetual stability whilst they train the Gonds to assist them. During this story the Doctor surreptitiously hands the acid over to Zoe. There are now nine minutes.
Jamie and Beta make their way down into the basement of the Learning Hall carrying a huge cauldron of acid. Eelek tells him that the Doctor and Zoe have re-entered the machine. Jamie confronts Eelek for forcing them into it. The Gonds are evacuating the city as it will be destroyed when the Dynatrope leaves. Jamie, Beta, Vana and Thara stay.
The Krotons order the Doctor and Zoe to put headsets on as there are only six minutes left. As the Doctor distracts the Krotons, Zoe pours the acid into the tank into which their airlines are connected. The Doctor and Zoe stall for time but are eventually left with no option other than to put the headsets on. Just at the last minute, the Krotons begin to feel the effect of the acid. They fire their weapons, forcing the Doctor and Zoe to duck. When they emerge, they see the Krotons are dissolving. The Dynatrope also seems to be disintegrating.
Jamie, Beta and some more Gonds are pouring acid into the Dynatrope. They are joined by the Doctor and Zoe. They watch as the machine melts. The Doctor, Zoe and Jamie sneak away. Thara vows he will deal with Eelek, and Beta says he will become the true scientist he wishes he could be. He is only disappointed when he realises the Doctor isn't around to aid him.
In the Wasteland, the TARDIS dematerialises.
Cast[]
- Dr. Who - Patrick Troughton
- Jamie - Frazer Hines
- Zoe - Wendy Padbury
- Selris - James Copeland
- Abu - Terence Brown
- Vana - Madeleine Mills
- Thara - Gilbert Wynne
- Eelek - Philip Madoc
- Axus - Richard Ireson
- Beta - James Cairncross
- Student - Bronson Shaw
- Custodian - Maurice Selwyn
- Kroton Voices - Roy Skelton, Patrick Tull
- Krotons - Robert La'Bassiere, Miles Northover
Uncredited cast[]
- Gonds - Robin Scott, Peter Rann, David Melbourne, Nick Rutter, Robert Hayward, Mark Johnson, Reg Nardi, Keith Ashton, Ronnie Chance, Roger Charles, Alex Hood, Justine Elliott, Patricia Matthews, Wendy Wilson, Sylvia Steele (all DWM 318)
Crew[]
- Writer - Robert Holmes
- Title Music - Ron Grainer and the BBC Radiophonic Workshop
- Costumes - Bobi Bartlett
- Script Editor - Terrance Dicks
- Designer - Raymond London
- Producer - Peter Bryant
- Director - David Maloney
- Special Sounds - Brian Hodgson, BBC Radiophonic Workshop
- Special Effects designed by Bill King (Trading Post)
- Make-Up - Sylvia James
- Lighting - Howard T. King
- Sound - John Holmes
- Film Cameraman - Alan Jonas
- Film Editor - Martyn Day
Uncredited crew[]
- Grams Operator - Ron Arnett (INFO: The Krotons)
- Floor Assistants - David Collins, Maurice Gallagher (INFO: The Krotons)
- Scene Supervisors - Ron Bailey, Reg Lewis, Brian Davis, Ron Hasler (INFO: The Krotons)
- Props - Sheila Bray, Joe Hughes (INFO: The Krotons)
- Graphics - Peter Netley, Don Shaw (INFO: The Krotons)
- Technical Manager - Fred Wright (INFO: The Krotons)
- Director's Assistant - Raquel Ebbutt (INFO: The Krotons)
- Artists's Booker - Barbara Buchanan (INFO: The Krotons)
- Vision Mixer - David Langford (INFO: The Krotons)
- Design Assistant - Jane Anderson (INFO: The Krotons)
- Film Camera Assistant - John Walker (INFO: The Krotons)
- Film Sound - Ron Blight (INFO: The Krotons)
- Film Sound Assistant - Ian Morton (INFO: The Krotons)
Worldbuilding[]
Science[]
- Hydrogen telluride is referred to as being the worst smell in the world.
Story notes[]
- A preliminary outline for the story, then entitled The Trap, was submitted for season 2. It was rejected because the robots were deemed too similar to the Mechanoids, then set to feature in The Chase. Three years later, Holmes re-submitted the outline as The Space-Trap to a new, more receptive production team. The script — under the name The Space Trap (without hyphen, as here) — was actually commissioned for delivery in 1969, probably for the penultimate story of Season 6. However, because Holmes had completed the scripts early, the story went into production in late 1968 when a Dick Sharples story, Prison in Space, fell by the wayside.
- Episode one exists as a 35mm black-and-white film negative, while the others exist as 16mm film negatives[1].
- As of today, this story has the most title-drops of any Doctor Who story, at 72.
- Robert La'Bassiere — billed as playing one of the Krotons in the closing credits for episodes two to four — was actually a pseudonym for Robert Grant, who had requested that he be credited under this name both on-screen and in the Radio Times programme listings.
- This is the first collaboration between writer Robert Holmes and script editor Terrance Dicks. It was only Dicks's second story in that capacity. In a neat bit of symmetry, Horror of Fang Rock was one of script editor Robert Holmes's last stories, written by Terrance Dicks.
- David Maloney called the story "a disaster" and felt it was his fault, while Frazer Hines didn't care for it either, calling it "horrible". Terrance Dicks felt that it worked as a story, but not as a monster, feeling the Krotons themselves were useless and non-threatening.
- The Krotons were written with the intent of replacing the Daleks as the Doctor's principle nemesis, as Terry Nation had asked The BBC to stop using them so that he could pitch his own Dalek series to US TV networks, which ultimately fell through. Unfortunately, the Krotons didn't have the same impact the Daleks had, and they faded into obscurity, with Nation eventually allowing the Daleks to return to this series midway through the Third Doctor's era.
- Frazer Hines would have originally departed in this story (or at least, the one that filled its slot) and been replaced with a male companion named Nik. He ultimately decided to leave along with Patrick Troughton.
- The serial was repeated on BBC2 in November 1981 to celebrate The Five Faces of Doctor Who and bridge the gap between Seasons 18 and 19. At the time, it was the only four-part Second Doctor serial that fully existed in the BBC Archives. All other four-part stories were either incomplete or missing entirely.
- Robert Holmes envisioned the Krotons as crystalline men. Costume designer Bobi Bartlett opted instead for a more robotic approach.
- Jack Lovell Ltd were tasked with constructing the Krotons but, in their haste to build the monsters, they did so to the wrong scale. As a result, the Krotons were larger and more unwieldy than intended and a rubber skirt had to be added to hide the operator's legs, which would otherwise now be exposed.
- Eelek was originally called Avrik, while the Dynotrope was originally named the Dynotron.
- Wendy Padbury found her PVC dress to be very impractical, because it was so prone to getting torn.
- According to Toby Hadoke, voice actor Roy Skelton chose to give the Krotons a South African accent as a deliberate protest against Apartheid, although the accent he used sounds more like a Birmingham accent.
Ratings[]
- Episode one - 9.0 million viewers
- Episode two - 8.4 million viewers
- Episode three - 7.5 million viewers
- Episode four - 7.1 million viewers
Myths[]
- The Krotons were the winning entry in a Blue Peter "design a monster" competition. (This is not the case. However, one of the winning entries in the Blue Peter design a monster competition, the "Aqua-Man", resembled a cardboard box with legs and arms — similar to the Krotons' appearance.)
Filming locations[]
- West of England Quarry, Malvern, Worcestershire (Kroton searching in person and finds TARDIS)
- Tank Quarry, Malvern, Worcestershire (TARDIS lands / Doctor explores landscape)
- Ealing Television Film Studios, Ealing Green, Ealing
- Lime Grove Studios (Studio D), Lime Grove, London
Production errors[]
- Beta is simultaneously in his lab and underneath the Learning Hall at the end of episode three.
- In the opening shot of the story, the sliding hatch that opens to allow Selris to receive instructions from within clearly gets stuck before being jerked free from behind the scenes.
- The rock the Doctor places on the outer door of the machine falls straight down in close shot but is nowhere to be seen in long shot right afterwards.
- The lines spoken by the Krotons at the end of episode two are not exactly the same as those spoken at the beginning of episode three.
- Richard Ireson (Axus) trips up on one of his lines in episode four, saying "if we don't hand over the strangers, they'll kill us any anyway". Who will do the killing — the strangers or the Krotons?
- After the Doctor drops one of the Krotons' headsets in episode four, he is then shown properly placing it on his head. However, when the camera cuts to a shot of a Kroton and then back to the Doctor, the headset is off his head again without explanation or acknowledgement.
Continuity[]
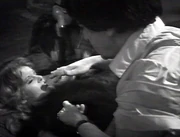
Is this act of hypnotism a sign of psychic times to come?
- The Krotons appear in PROSE: Alien Bodies, which greatly fleshes out Kroton history, biology and origins. They also return to battle the Sixth Doctor and Charley Pollard in AUDIO: Return of the Krotons.
- The Eleventh Doctor sets up the HADS before his encounter with the Ice Warrior Skaldak. (TV: Cold War)
Home video and audio releases[]
DVD releases[]
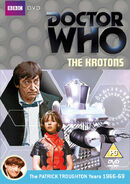
This story was released on DVD in the UK on 2 July 2012.
Special features[]
- Commentary with actors Philip Madoc (Eelek), Richard Ireson (Axus) and Gilbert Wynne (Thara), assistant floor manager David Tilley, make-up designer Sylvia James, costume designer Bobi Bartlett and special sounds designer Brian Hodgson. Moderated by Toby Hadoke
- Second Time Around - Looking back over Patrick Troughton's tenure as the Second Doctor
- Doctor Who Stories - Frazer Hines (Part One) - Actor Frazer Hines reminisces about his time on the series in an interview originally recorded in 2003 for the BBC's Story of Doctor Who
- The Doctor's Strange Love - Writers Joseph Lidster and Simon Guerrier take an affectionate look at The Krotons
- Radio Times Listings (DVD-ROM)
- Production Information Subtitles
- Photo Gallery
- Coming Soon Trailer - The Greatest Show in the Galaxy
Notes[]
- Editing for the DVD release was completed by the Doctor Who Restoration Team.
Digital releases[]
This story is available:
- in iTunes stores (Australia, Canada, France, Germany, UK and US) as part of the Doctor Who: The Classic Series collection Doctor Who: The Best of The Second Doctor, which additionally includes the stories The Tomb of the Cybermen, The Ice Warriors and The Seeds of Death
- in non-continental iTunes stores (Australia, Canada, UK and US) as a stand-alone season of Doctor Who: The Classic Series
- on Amazon Video (UK) as Season 47 of Doctor Who (Classic) series
- for streaming through BritBox (US) as part of Season 6 of Classic Doctor Who.
VHS releases[]
- This story was released on video as The Krotons in episodic format in 1991.
Audio releases[]
- This story was released on CD by BBC Audio on 13 November 2008 with linking narration by and a bonus interview with Frazer Hines.
- The story was re-released on 5 October 2017 as part of the box set Classic TV Adventures - Collection Two.
Footnotes[]
External links[]
- The Krotons at the BBC's official site
- The Krotons at RadioTimes
- The Krotons at BroaDWcast
- The Krotons at the Doctor Who Reference Guide
- The Krotons at Shannon Sullivan's A Brief History of Time (Travel)
- Krotons at The Locations Guide

