| “ | I have told all staff about this ad nauseam, but I believe it bears repeating; I think we can make a real difference here. We can change lives. | ” |
— Daniel Whitehurst tells his workers about the finished construction of the asylum[src]
| ||
The Whitehurst Insane Asylum is a fictional location from the Saw franchise as well as the main location of Saw: The Video Game.
Layout and Structure[]
The Whitehurst Insane Asylum was a large building divided into several wards. These wards were mostly named after trees, such as the Oak Ward, the Pine Ward or the Cedar Ward. Each ward housed numerous rooms for the patients and storage rooms for medicines, drugs and chemicals. In several places, there were security checkpoints, which could only be opened from their respective guardhouse.
The entire building was heated by a boiler, which was too small for the size of the building and therefore had to be kept under high pressure at all time. The asylum also had a crematorium for the incineration of deceased patients. Besides that, the asylum also had several courtyards, one of which was used as a cemetery. Other noticeable locations inside the building were a theater, where the patients could watch performances such as the concerts of the Happy Thoughts Quartet, a boys' choir, and the chapel in the Cedar Ward, which was built there after the patients demanded a religious area in the asylum where they could pray.
History[]
Opening[]
The Whitehurst Insane Asylum was a psychiatric hospital founded by Daniel Whitehurst. After his father committed suicide due to a mental illness, Whitehurst decided to spend his life on helping and rehabilitating people with mental diseases to protect them from suffering the same fate as his father. Therefore, he became a doctor and planned to build the Whitehurst Insane Asylum, which was supposed to be forerunner of traditional and experimental medical treatment.
Whitehurst's plan began to take shape and after a long time, the construction of the Whitehurst Insane Asylum was finished in 1885. It was opened only two months later on June 2, 1885. He ran the asylum for at least 12 years. However, despite his eagerness to help his patients, the work of him and his staff already suffered due to a low budget, which forced them to some cost-cutting measures such as the sparing use of antibiotics or opiates. Additionally, the building had several serious construction defects like buckling or permeable walls due to the building settling onto the foundation in 1897. All these problems negatively affected both the well-being of the patients as well as the safety of the staff. (Saw: The Video Game)
Patient Abuse[]
Despite Daniel Whitehurst's noble goal of helping his patients, the hospital became known for its intense cruelty towards the patients as the leadership was passed down from generation to generation. Besides that, the management as well as most of the doctors and nurses, didn't care about helping the patients and also didn't bother to improve on the working conditions, which resulted in the severe endangerment of the custodial staff. Daniel Whitehurst's descendants were granted higher budgets from the government, but nonetheless tried to cut corners at the expense of the patients' well-being. For example, Daniel Whitehurst II. decided that the patients' linens and clothing could only be changed every two weeks, to reduce the amount of detergent gas needed. In other cases, opiates were only given to the patients who absolutely needed them, while patients, who didn't react to pain due to their mental diseases didn't get any opiates at all. Besides this extreme neglection, the patients were also used in several experiments for the development of new kinds of treatment, which often resulted in the patients' death or a deterioration of their physical and mental state.
- Isolation Treatment: Many schizophrenic or delusional patients were locked inside small, unlit rooms for however long it took for the mental illness to dissipate. Meals were only given at regular intervals through a small hole in the door. On some occasions, the patients were only given an inconsistent meal delivery or no meals at all to “starve out the illness.”
- Remote Sympathectomy: During a traditional surgical sympathectomy, a surgeon entered the patients' body cavity and resected several ribs to to access the sympathetic nerve trunk. The thoracic nerve cluster was then dissected within the patient. This was done to cure cases of causalgia. As opposed to this, the remote sympathectomy developed at Whitehurst used devices similar to Moniz’s leucotomes to dissect thoracic nerve tissue rather than the brain. The size of the instruments meant that the patient was in less physical danger during the procedure. However, as it was very hard to estimate where the nerve tissue was being dissected, the remote sympathectomy often led to unexpected nerve damage.
- Mannequin Usage: Mannequins were used as human surrogates to ease severely disturbed patients back into social life. However, in many cases, the patients became even more distressed and distant than before. The mannequins were still used in the construction of therapeutic devices, but their therapeutic usage was ended.
- Phrenology: Phrenology was a process, which involved observing and feeling the skull to determine an individual's psychological attributes. It was believed that the brain was made up of 27 individual organs that determined personality, with 19 of them also existing in other animal species. Phrenologists would run their fingertips and palms over the skulls of their patients to feel for enlargements or indentations. Besides that, they often took measurements with a tape measure of the overall head size and more rarely employed a craniometer, a special version of a caliper. However, the method of phrenology was forbidden by the management of Whitehurst, who deemed it inaccurate, racist, lazy and outdated.
- Hydrotherapy: As part of Whitehurst's stimulus research, the bathrooms of the asylum were set up with cold and hot running water. Spraying patients with cold water made them enter a hypothermic state. According to the researchers' theory, patients with various mental hyperactivity disorders would be more in control of themselves during hypothermic state. They also attempted the opposite - stimulating the patients with scalding water - but ended these experiments as the resulting skin damage was hard to hide from their family and friends.
- Trepanation: Trepanation was a kind of lobotomy, during which holes were drilled in a patient's skull to cure them from general mental disorders that were difficult to diagnose, assuming that many of these diseases were caused by encephalitic swelling, a condition that trepanation could cure.
- Rush Chairs: The Rush Chair was a device developed by Benjamin Rush, father of American psychiatry and signer of the Constitution. These chairs slowed the blood flow to the brain in order to prevent insanity. The doctors of Whitehurst deemed this completely ridiculous and instead used the chairs as temporary isolation chambers during the time when the isolation cells were renovated.
- Fluid Reduction: During their research regarding treatments using fluids to “generate” a patient’s mental status, the doctors found patients much more at ease after drawing 40 ounces of blood. Therefore, they expanded the tests to see if patients would become calmer after dehydration, removal of the prostate or removal of the salivary glands.
- Electroconvulsive Therapy: With the upgrade to Whitehurst's electrical grid, the researchers started tests of electroconvulsive therapy. Thereby, they placed electrodes on the patients' heads, either bilateral or unilateral, and gave them electric shocks at varied intervals. The more time the patients were exposed to electric shocks, the longer and more profound their seizures tended to be.
- Gamma Knife: In an attempt to find a less invasive method of brain surgery, the researchers prototyped radiation surgery. The patients were fitted with a lead helmet, the openings of which correspond to the area of the bran that was supposed to be surgically removed. The patient's head was then exposed to high-intensity gamma radiation.
MKULTRA[]
Another one of these experiments was the government's MKULTRA project. Therefore, Whitehurst was given a big financial grant by the Technical Services Division of the government to test the effects of a new drug called lysergic acid diethylamide, commonly known as LSD, on the patients. However, the LSD research funding eventually came to an end, probably because the general public was used as the government's new research sample, which made Whitehurst's research illegal. Therefore, all documents related to MKULTRA were destroyed, patient files were redacted and Whitehurst's inventory was purged. (Saw: The Video Game)
Closure[]
Eventually, the hospital was closed by Daniel Whitehurst IV. due to further financial limitations. While there was still some money coming in from private benefactors, he decided that to close the asylum as there was only little hope to get further grants from the government. Most sever patients were transferred into other facilities, while volunteer patients were discharged. Whitehurst offered to write letters of recommendation for all of his employees to help them in finding a new job at other companies, such as the Umbrella Health Insurance Company. After the asylum was finally shut down, the building increasingly decayed. (Saw: The Video Game)
David Tapp's Trial[]
Years later, the abandoned hospital was used by John Kramer, better known as the Jigsaw Killer, for one of his games. The primary victim of this game was David Tapp, a discharged detective formerly working for the Metropolitan Police Department, who became obsessed with finding and apprehending the killer after his partner, Detective Steven Sing, was killed by one of Jigsaw's traps. During his investigation, he became embroiled in the pursuit of Zep Hindle, another victim of Jigsaw, who Tapp mistook for Jigsaw himself. While pursuing him through an underground tunnel network, Tapp was shot in the chest and left for dead by Zep. However, he was later found by Jigsaw or one of his accomplices.
Tapp's unconscious body was then taken to the abandoned and dilapidated asylum. During a surgery, one of Jigsaw's apprentices removed the bullet from Tapp's chest and treated his wound, while Jigsaw himself embraced the opportunity and hid a key in his body. Afterwards, he was sat in a wheelchair and taken to a toilet room somewhere in the asylum. While being taken there, Tapp briefly regained his consciousness, but was still dazed due to his injury as well as the surgical operation and suffered from hallucinations of Jigsaw's deadly traps and unfortunate victims. (Saw: The Video Game)
David Tapp's First Test[]

Tapp wakes up with the Beartrap on his head
However, he eventually fully came back to his senses and found himself in the toilet room, strapped by the arms to a chair and with a metallic device locked onto his head, which he recognized as a Reverse Bear Trap, one of Jigsaw's traps that he had already used on one of his previous victims, Amanda Young. Upon realizing the dangerousness of his situation, Tapp started to panic and attempted to free himself from his restraints. However, he stopped doing so when a TV turned on in front of him and a mechanical ventriloquist puppet appeared on the screen. The puppet confronted him with his obsession with apprehending Jigsaw and the sacrifices he had to make for it, such as Sing's death or the bullet wound caused by Zep Hindle. Thereby, it also introduced Tapp to the first test of his own game and reminded him of the Reverse Beartrap, which was hooked into his upper and his lower jaw and would tear his head apart if he didn't manage to free himself in time. To illustrate the consequences that his failure might have, the deadly function of the trap was demonstrated to him by another beartrap, which destroyed the head of a mannequin on a chair in front of him.
After the tape ended and the TV turned off again, Tapp got free from his chair and in panic tried to remove the trap. He didn't have a key, unlike Amanda Young in her test. However, Tapp had spent much time examining the trap while he still worked for the police to the point where he was able to open it without a key. Despite being under immense pressure, Tapp quickly managed to remove the trap and threw it away, causing it to burst open only moments after hitting the floor. Tapp angrily yelled that he wouldn't play this game, but quickly realized that he had no other choice and therefore tried to calm down. (Saw: The Video Game)
The Bomb Room[]
Upon trying to escape, Tapp realized that the exit door leading out of the room was secured by a padlock, which required a three digit combination to open. He soon discovered that the necessary numbers had been written mirror-inverted on the doors of the room's three toilet cabins. Tapp closed the doors and was then able to read the numbers by looking at a mirror on the opposite wall of the room. With the right combination, 437, Tapp opened the door and continued his way. Thereby, he soon heard the voice of a man, who screamed for help. Upon following his voice, Tapp entered another toilet room, where numerous nail bombs were hanging from the ceiling. Seconds later, the door slammed shut behind him. Through a metal grate, Tapp noticed the screaming man in the next room, who asked him what he had done. At this moment, another TV turned on in front of them, showing another recording of the puppet, which informed the men about the rules of their test. The doors to both of their rooms were secured by two control panels. However, in order to activate them, Tapp first had to find a fuse in one of the toilets.
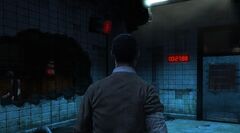
Tapp in the bomb room
When the tape ended, a 90-seconds-timer started to count down. In his fear, the first man told Tapp that he had witnessed someone dropping the fuse in the toilet. The toilet however was full of used syringes. Therefore, the other man frantically encouraged Tapp to get it out. Eventually, Tapp managed to obtain the fuse and inserted it in a fuse box, which caused to timer to stop. Afterwards, the men where able to open the doors with the panels. Upon doing so, the first man received a small electric shock and yelled in anger. As they went on, he noticed that the floor in Tapp's path was covered in broken glass shards. However, he explicitly refused to give Tapp his shoes and showed himself rather ungrateful for his salvation. Afterwards, he went on. (Saw: The Video Game)
Appreciate Your Life[]
Upon passing the path covered in broken glass, Tapp followed the same way as the other prisoner and thereby came to a dark hallway, which he could only illuminate with a lighter he had in his pocket. As he progressed, he heard a metallic sound, followed by the noises of someone who was running away. Seconds later, he stumbled upon the mutilated corpse. Unable to do anything for him, Tapp went on and eventually came to a fence. Behind the fence were two men, who argued with each other. One of them had one of Jigsaw's traps, a metallic Death Mask, locked around his neck and demanded the key from the other men. The second man however claimed that a cop named Tapp had it. Angered by this, the man with the mask brutally battered him until he lay lifeless on the floor. Seconds later, he noticed a ticking sound coming from the mask and also noticed Tapp on the other side of the fence. In panic, he approached the fence, while screaming in fear, but ultimately died and subsequently collapsed, when the mask, which was filled with nails, closed on his head.
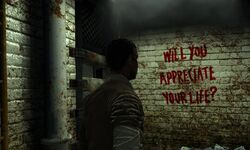
Tapp finds the message
After witnessing this brutal scene, Tapp continued his way and soon came across another TV, which turned on right in front of him. Yet again, the puppet appeared on screen and explained the reasons of Jigsaw's grisly games to Tapp, warning him that soon he would have to make some sacrifices in order to survive and to leave this place alive. When the TV turned off again, Tapp saw the words "Will you appreciate your life?" written on a wall in red letters. He then continued his way and climbed up a ladder. As he was halfway up, he suddenly witnessed a mysterious man with a pig mask, who ran towards him, but was held back by a grate. Terrified by this, Tapp climbed up the rest of the latter as quick as possible. (Saw: The Video Game)
Ambush[]
Thereby, Tapp reached the surgical theater of Whitehurst. Upon doing so, he heard the voice of a woman on the lower level of the theater, who screamed for help. However, another fence prevented Tapp from getting to her. Furthermore, he couldn't see her due to a big, white curtain blocking his view. As he went further on the upper level, he found the corpse of another male victim of Jigsaw. Next to him was a tape recorder. Tapp learned from this tape that the woman was one of his witnesses and the "first victim of his obsession." The tape also told him that he could save her, if he was able to reach her in time.
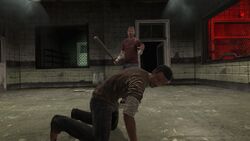
The prisoner attacks Tapp
Eager to help the woman, Tapp went on. However, just as he went through another door, he was suddenly attacked from behind with a bat by the man, who he had saved from the nail bombs only a few minutes earlier. When Tapp asked him what he was doing, the man assured him that it was nothing personal, but rather part of his own game, and than advised Tapp to take a weapon on his own. Just before Tapp got back on his feet, the man went to the next room and closed the door behind him. Through another grate, he witnessed how Tapp was attacked by a second prisoner, who was much more aggressive. Therefore, Tapp grabbed a metal pipe from a trashcan and used it to successfully defend himself by killing his attacker.
Moments later, another TV turned on in the room, where the first man had locked himself up. When the puppet appeared on the screen and mockingly laughed at him, he angrily yelled that his game was over as he had done what he had been told to do. Afterwards, he attempted to leave the room through another door. However, when he opened the door and tried to leave, he was shot by a shotgun, which had been set up above the door. Unable to react, he was killed and fell to the floor before Tapp's eyes. (Saw: The Video Game)
The Key[]
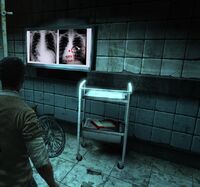
Tapp finds the x-rays
In order to progress, Tapp searched the corpse of his attacker and thereby found a key to open the next door. Furthermore, he found a note written by Jigsaw, in which the latter told the prisoners that he had hidden a key inside Tapp's body, which could save all of them from their traps and their imprisonment at Whitehurst. As Tapp went on, he eventually entered a room with a bed as well as an x-ray of his chest, which showed the key inside his body and was marked with the words "Tapp is the key to your survival." Another written message confirmed Tapp's worst assumptions, as it told him that Jigsaw had hidden the key inside him, while one of his accomplices had treated his gunshot wound received from Zep Hindle. (Saw: The Video Game)
The Right Body[]
Tapp went on and thereby attempted to enter the main hallway. However, the door automatically closed in front of him as he approached and couldn't be opened again without a key. In his attempt to find it, Tapp choose another way and thereby came across a man, who hung dead between countless strains of razor wire. In the room next to him was another audio tape left by Jigsaw, in which he tried to convince Tapp that not everyone saw his work as something evil, claiming that some people wanted to be tested or even created tests on their own.
Tapp finds the bodies
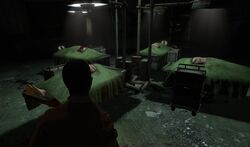
Not impressed or misled by those words, Tapp continued his way and thereby came across an operating room. Through the fenced windows, he saw the bodies of four men, each one lying on an operating table and covered with a surgical drape. Shortly afterwards, Tapp was able to open the door to the room by restoring the power. Over the loudspeakers, Jigsaw told him that one of the bodies contained a key required to progress. However, he also warned him that there'd be consequences if he chose the wrong one. Another audio tape then told Tapp, that the key hadn't been placed by Jigsaw himself, but rather by another one of his victims, who was told to do so and to be prepared to take action if Tapp searched the wrong body. By taking a look at some x-rays on the walls and the tags at the men's toes, Tapp quickly found out that the key was in the body of Arney Faulkner, who was in fact the only one of the four men, who was already dead. With a scalpel from a table, Tapp cut open the body and obtained the key.
Moments later, a TV turned on in front of him and granted him a first look behind the curtain in the surgical theater. Thereby, he recognized her as Amanda Young, the first person who ever survived one of Jigsaw's games. She was, however, strapped to some sort of a medical chair. She immediately panicked, as Jigsaw, who concealed himself with a cloak and a hood, worked on the chair for some final preparations. Amanda told him that she had passed her test already. Jigsaw responded that she didn't, as she still hadn't been able to overcome her drug addiction and self harming tendencies, which were the reason for her test in the first place. (Saw: The Video Game)
Freedom is an Illusion[]
With the key, Tapp went on and soon came back to the door to the main hallway, which he was now able to open. When he entered the next room, he saw that the floor had collapsed and only a single wooden beam provided a path forward. On the other side of the room was another prisoner with a Reverse Beartrap on his head. As he noticed Tapp's presence, he immediately yelled at him and tried to reach him by running over the beam. However, he quickly lost his balance and fell down, where he was impaled and killed by numerous metal spikes. Despite this event, Tapp had no other choice but to try to walk over the beam as well. By keeping his balance and moving slowly and carefully, he was successfully able to reach the other side of the room unharmed.
After doing so, he found another door leading to the surgical theater. However, it was closed just like the one before. Furthermore, it was surrounded by several monitors with the words "Can you rescue her, Detective Tapp?" appearing on the screens. While looking around to find another way, Tapp noticed as window with the word "Freedom..." written above it. However, as he approached it, a roller shutter slided down with the words "...is an illusion" on it. Realizing that Jigsaw merely tried to mock him, Tapp continued his path. Thereby, he came across a locked security gate. In order to open it, he had to find a coupler and had to put it in a circuit box nearby. (Saw: The Video Game)
A Different Perspective[]
As he went on to find it, he found a small black box with a message attached to it, which said "Who am I?". The box was unlocked and contained an excerpt of a partly blacked out patient file. It was the file of a 34-year-old husband of a pregnant wife, who was a patient at Whitehurst in 1998. According to the excerpt, the patient was a highly intelligent man, who suffered from a narcissistic disorder. However, there were barely any information that could help Tapp to identify the man yet. Therefore, he went on and climbed down a ladder to one of the lower floors. As he entered an area, which resembled a morgue, another TV turned on on a table in front of him. Yet again, it showed Jigsaw, who told Amanda that Tapp was on his way to save her, much to her surprise. When the TV turned off again, the words "Darkness also illuminates", which were written on the same table, were revealed, as they had been written with a special fluorescent color.
Tapp in the morgue area
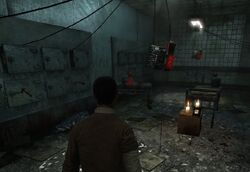
Tapp took a look around in the morgue and saw several nail bombs hanging from the ceiling. There were also numerous lockers with different symbols written on them. Furthermore, there was another audio tape, which told Tapp that the key to solve the next task could only be solved looking at the problem from a "completely different perspective." When he found a fuse inside a nearby cabinet, Tapp decided to follow Jigsaw's clues and used it to activate a panel, which caused some of the incandescent lamps in the room to burst. In the newly created darkness, Tapp saw several lines drew on the wall with the same fluorescent color as the secret message. From the right perspective, these lines looked exactly like a gun. Therefore, Tapp opened the locker with a gun drawn on it and found the coupler, that he was looking for, inside. This, however, caused the timer of the nail bombs around him to count down. Therefore, Tapp fled from the room and quickly got out of the range of the explosion. Afterwards, he went back to the security gate he had found earlier, and used the coupler to open it. (Saw: The Video Game)
The Way to Amanda Young[]
After passing the door, Tapp continued his way to finally get his hands on the key to the surgical theater. As he went through the hallways, he was suddenly surprised by another prisoner, who broke through a door in the next room in front of him and was ready to kill him to get the key from inside his body. Tapp reacted quickly and bolted the door before the man could reach him. Additionally, he blocked it by shoving a large wooden crate before it. Having evaded the attack, Tapp went on and thereby came across a table, where he found another audio tape as well as the badge of his late partner, Steven Sing. The tape reminded him of Sing's death as well as his interrogation of Amanda Young after her survival and told her that the desk held the key to her chamber. Mourning Sing's death and feeling guilty for it, Tapp picked up his badge and took it with him as he went on.
He soon entered a room with another set of nail bombs. As their timer started to count down, the door behind Tapp slammed shut. His only way to escape was to open the next door, which was secured by another padlock, within 60 seconds. This lock required another three digit combination. In panic, Tapp searched the numerous file cabinets in the room and thereby found a fuse. When he used it to activate the next panel, three TVs turned on in front of him and showed him the combination, one digit per screen. With the combination, 579, Tapp managed to escape the explosion in time. Just as he opened the door, the timer stopped to count down. In the next room, he found a single key lying on a small table. However, as he grabbed it, the mysterious man with the pig mask suddenly broke through the next door in front of him and sedated him before he could react. (Saw: The Video Game)
Amanda Young's Salvation[]
Amanda in her trap
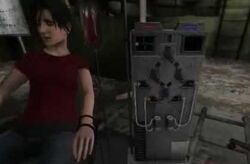
When he woke up again, he found himself lying on the floor directly in front of the door to the surgical theater, which he was now able to open with the key. As he went down a set of stairs, he found another TV and witnessed Amanda, who was still talking to Jigsaw and tried to convince him to free her, promising that she didn't tell the police anything about him and that she would overcome her drug addiction and her acts of self-harm. Jigsaw however remained calm and denied her plea for freedom. As the TV went blurry again, the next door was opened. Upon passing it, Tapp finally reached the surgical theater, just as the white curtain was lifted and revealed Amanda, who was still strapped to the medical chair and further panicked. Moments later, the next TV turned on in front of them. Jigsaw's ventriloquist puppet appeared on the screen and once more confronted Amanda with her previous misdeeds. Thereby, he also told her that only Detective Tapp could save her from her trap. Meanwhile, her arms were injected with poison by two syringes.
Amanda argues with Tapp
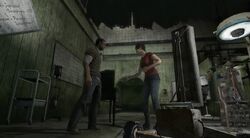
When the tape ended and the TV turned off again, Tapp sat down on the second chair and was injected with poison on his own by two needles which pierced his neck. While Amanda further panicked, Tapp tried to administer all the colored vials to the correct side. Eventually, he managed to cure himself and Amanda from the poisons and both of them were released from their chairs. As Amanda was still agitated, Tapp tried to calm her down. However, when she told her that she had seen Jigsaw and he asked her who he was and what he looked like, Amanda got angry as Tapp was more interested in Jigsaw rather than the fact that she had almost been killed by the trap. Furthermore, she blamed him for having been tested again. Nonetheless, the two of them went on and continued their way together. (Saw: The Video Game)
Amanda Young's Abduction[]
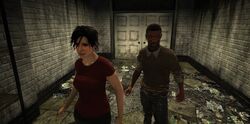
Tapp and Amanda continue their way
As they went on, Amanda warned Tapp that they had to play by Jigsaw's rules if they wanted to escape the asylum. When he asked her why she was there despite already having survived one of Jigsaw's games, Amanda responded that she didn't learn her lesson in the killer's eyes. Furthermore, she made no secret of her aversion of Tapp and reminded him that Jigsaw was in control of everything now. Upon going down a staircase, they reached a door with a set of numerous TVs placed around it, showing the face of Jigsaw's puppet. Additionally, there was a tape recorder in a small box and the words "Find secrets buried in the basement" written on the wall. Once Tapp started the tape, the TVs switched to a live feed of Jennings Foster, one of Tapp's former colleagues before his discharge. The tape told him that reaching Jenning's in time to save him was his next test in this game. Thereby, it also told Tapp to ask Jennings about the truth about a hit-and-run case they both worked on earlier, indicating that Jenning's had something to do with it.
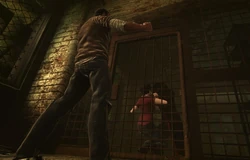
Amanda is attacked by Pighead
When the tape ended, the door opened and Tapp and Amanda went on. After a few steps, another set of TVs turned on, showing Jennings, who woke up, strapped to a large metal table, and screamed for help. However, he was suddenly interrupted by Jigsaw. To his surprise, Jigsaw knew the truth about the hit and run accident, which Jenning's actually had been responsible for, and confronted him with his crimes. Jennings however showed no remorse and, despite his fear, angrily insulted his abductor. When the TVs turned off again, the next door opened. However, once Tapp passed it, it slammed shut behind him, separating him and Amanda. Moments later, Amanda was attacked and dragged away by the man with the pig mask, with Tapp being unable to help her. (Saw: The Video Game)
The Shotgun Collar[]
Forced to continue his way alone, Tapp went on. Only a few seconds later, he witnessed another prisoner behind a lattice gate, who desperately screamed and tried to get rid of a mechanical collar around his neck. However, he was killed when the collar suddenly detonated. The words "Innocent or guilty? Friend or enemy? Find the truth." appeared on numerous TVs positioned around the gate. Unfortunately for Tapp, he didn't have the key to pen it yet and had to go another way. Thereby, he came across a barrel filled with acid. The next TV turned on, showing the puppet, who told him about a key, which was hidden in the barrel. Having no other choice but to grasp at it with his bare hands, Tapp received the key, but only by suffering intense pain due to the acid.
The key, however, wasn't meant to open the gate Tapp just came across, but rather a second gate leading to the asylum's boiler room. As he went on and tried to get their, he quickly reached the next obstacle in his path. Hot steam came from a broken pipe with high pressure and blocked his way. Two TVs turned on above it, showing the puppet yet again, which told Tapp that he needed to obtain a valve wheel to shut off the steam. The only clue given to him was a message written on the wall, which said "See the janitor about the steam." Therefore, he followed a direction sign leading to the janitor's office. However, when he passed another gate, he was attacked and subdued by the man with the pig mask from behind, who took him to a bathroom somewhere else in the building.
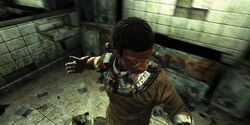
Tapp with the collar
When Tapp woke up again, he was initially dazed, but quickly came back to his senses and started to panic when he realized that he wore one of Jigsaw's explosive collars around his neck. He desperately tried to remove it, but ultimately had to accept that it was impossible. Therefore, he decided to continue his path and tried to find a way out of the room. He quickly saw some letters written on a mirror and the opposite wall. By looking at the mirror from the right perspective, he read the words "Darkness illuminates." Tapp turned off the lights and thereby saw the symbol of a key painted on a wall above a toilet cabin in the next room. Just like in the very first room with the bombs, he grabbed the key, which was hidden in the toilet among many used syringes. With this key, he was finally able to leave the bathroom. (Saw: The Video Game)
Outside the room, he found the corpse of another one of Jigsaw's victims with a tape recorder in front of him. From the tape, Tapp learned that his collar would be activated once he got to close to other victims in the asylum who wore the same collars. His only way to survive was then to either kill them or to bring some distance between himself and the other victims. Only moments later, he would witness the function of the collars once again. A man attacked him in his attempt to obtain the key from inside Tapp's body. Tapp managed to close a door in front of his attacker and bolted it, making it impossible for the man to follow him. Afterwards, Tapp ran away and moments after moving out of range, the second man's collar detonated. (Saw: The Video Game)
The Wheel[]
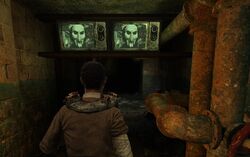
The puppet talks to Tapp
Tapp went on and after a while, he finally reached the janitor's office. A message on a chart told him that the valve wheel he needed to shut off the steam was nearby. Shortly afterwards, Tapp found it in the office and picked it up. However, on his way back, he encountered two other prisoners who wanted the key as well, forcing Tapp to kill both of them in self defense. When they were dead, he went on and after a few minutes eventually returned to the path blocked by the steam. He attached the wheel at the designated position and shut off the steam. Thereby, the TVs above the pipes turned on once again and the puppet congratulated him for solving his task, while also warning him that other prisoners might use the same path as well. As Tapp was about to pass the pipes, he stumbled upon a corpse of a man who had apparently died of severe extensive burns and had another tape in his possession. According to the tape, the man had been told by Jigsaw to redirect the steam to slow down Tapp, while avoiding the steam himself. The man however hadn't been careful enough and was therefore killed by the steam. (Saw: The Video Game)
The Steam Maze[]
Tapp went on to the boiler room and soon found his next obstacle. Before him was a maze of different hallways with hot steam coming from various pipes and blocking the path. To find a way through it, Tapp had to turn several valves in the right order and move forward little by little. Upon doing so and by following several white arrows painted on the walls, he quickly managed to reach the end of the maze and thereby finally reached the boiler room. (Saw: The Video Game)
The Boiler Room[]
As he entered it, a written message informed him that he had reached the heart of the boiler room. However, he wasn't there alone. Another prisoner was there with a large metal box on his head. Due to the box, he couldn't see anything and had to rely on his hearing. In panic, he began to flail around and tried to locate Tapp to kill him and obtain the key from his body. However, by setting up several traps with various components he had found throughout his game so far, Tapp was able to kill his attacker.
Afterwards, he entered a small adjacent room, where he found a small box standing on a table. This box contained the key, which he needed to finally reach the place where Jennings Foster was held hostage. However, as he picked it up, the puppet, which appeared on another set of TV screens, told him to hurry up as the pressure from the pipes around him started to raise dramatically. Just as the tape ended, a timer of two and a half minutes started to count down. Therefore, Tapp quickly ran all the way back, while the pipes around him started to blow. Seconds after he reached the door to Jennings, the boiler detonated behind him and destroyed most of the area. (Saw: The Video Game)
The Furnace Room[]
With the key from the boiler room, Tapp was finally able to open the door, which he had found shortly after Amanda's abduction. As he followed the direction signs to get to the furnace room, he came across another TV, which showed Jigsaw, who talked to Jennings in his trap. Upon being confronted with the hit-and-run accident, Jennings desperately tried to play it down by stating that none would have missed the homeless man anyway as he had no family. He also attempted to justify his actions afterwards, when he framed an innocent man, by saying that it was necessary to protect himself.
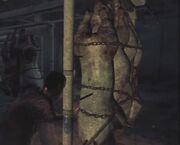
Tapp moves the pigs out of the way
Tapp continued his way and came across another message on a wall, which told him to "Push and pull your way forward." In the next room, he found several rotten pig carcasses hanging from large meat hooks. Tapp had to move them in the right way in order to clear the way and be able to go on. Thereby, he came into a room, where another victim of Jigsaw was released from a cell. Like the one in the boiler room, this man wasn't able to see due to a metallic contraption on his head. However, he was just as aggressive as the other prisoners and flail around in his attempt to kill Tapp. Therefore, Tapp killed him instead and retrieved a key from his body. With this key, he was able to open the door to the furnace room, where he finally found Jennings Foster, still chained to the metal table underneath a giant pendulum blade, which was lowered down at regular intervals. (Saw: The Video Game)
Jennings Foster's Salvation[]
When Tapp entered the room, the next TV turned on in front of them. Jigsaw's puppet appeared on the screen and once again confronted Jennings with his previous crimes. Thereby, he also told him that only Detective Tapp could save him from his trap. Positioned around the table were three panels with gears. Tapp had to connect them by putting more additional gears of varying sizes between them. If one series of gears was connected successfully, the pendulum, if lowered down already, would return to its original position, thereby granting Tapp more time to finish the task.
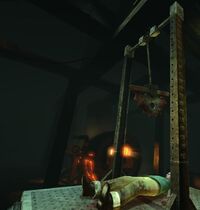
Jennings in the trap
When the tape ended and the TV turned off again, the pendulum blade suspended above Jennings started to swing back and forth. While Jennings further panicked and yelled at Tapp to hurry up, Tapp tried to connect the gears on the three panels around the table. Eventually, he was able to do so in time and the pendulum abruptly came to a standstill. Seconds later, the blade suddenly broke away from its holding mechanism and fell down right between Jennings' legs, thereby barely missing him. Afterwards, Jennings was released from his shackles and stood up from the table. While Tapp tried to calm him down, Jennings angrily yelled at him and insulted him as he was only abducted by Jigsaw because of Tapp's obsession with catching him. This resulted in a brief argument between them, during which Tapp confronted him with the accident years ago, which Jennings once again tried to play down. Afterwards, he went away to find a way out on his own and thereby left Tapp behind. (Saw: The Video Game)
Blindsight[]
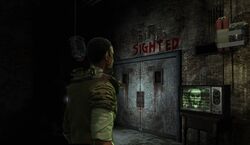
Tapp has to choose a way forward
Forced to continue his way alone once again, Tapp soon entered another room with several nail bombs positioned all around him. A TV turned on, standing on a table between two doors, one with the word "Sighted", the other one with the word "Blind" written above it. The puppet explained to Tapp that both ways would allow him to move forward, while each one posed a different threat. The left path would allow Tapp to progress through the area while being able to see. However, he would have to evade a number of traps and obstacles in his way. If Tapp chose the right way instead, he had to bypass several explosive barrels all around the hallway, while having to rely on the weak sources of light he had, such as a firelighter or a camera. Thereby, he had to be careful so the barrels wouldn't detonate. Eventually, Tapp was able to pass this test, before the 3-minute-timer expired and the nail bombs detonated. (Saw: The Video Game)
The Utility Room[]
After escaping the bombs, Tapp found a door leading to the utility room. However, as it was locked, he went upstairs instead, where he came across another security checkpoint. In order to pass it, he had to restore the power first, which could only be done in the utility room. In another washroom nearby, Tapp found the key in a toiled filled with syringes and returned to the door.
As he entered it, he realized that the entire room was partly under water. Moments later, the door slammed shut behind him and another video recording of Jigsaw's puppet explained his next task to him. There was a corpse, hanging from a chain and wrapped in several electric cords. The body was slowly lowered down by a winch and would eventually kill Tapp once it touched the water and therefore energized it. Tapp's only way to escape was to open the cage, where the body was located, and to reroute the power within three minutes. The cage door, however, was secured by a combination lock.
When the tape ended, Tapp quickly searched the entire room. Thereby, he saw fragments of numbers painted all over the walls and columns. From the right perspective, he was able to find the right combination, which was 435. Furthermore, he had to look for another coupler, which he eventually found in another shelf. After obtaining both, the right numbers and the coupler, Tapp opened the cage and used the coupler to manipulate the fuse box. Thereby, he rerouted the power and escaped the room in time. (Saw: The Video Game)
The Grave[]
Upon his return to the checkpoint gates, Tapp came across a TV, which showed Melissa Sing, the widow of his late partner, in a trap. When she woke up, she was greeted by Jigsaw and immediately insulted and accused him for the death of her husband. Jigsaw however defended himself, stating that the trap, which had killed Steven, could've been disabled by police procedure if Tapp wouldn't have ignored it. This further fueled Melissa's hatred for her late husband's partner. Tapp then went on and passed the checkpoint. However, as he was about to do so, another set of TVs turned on and showed a man digging a grave with the name of Steven Sing written on the tombstone.
As Tapp further proceeded through the decayed hallways, he reached another locked door. While trying to find a way to open it, he came across another prisoner. Just as he noticed him, the man shot himself in the head, apologizing to Tapp as he had only one bullet left. Afterwards, Tapp searched the next room. Thereby, he was locked up and a deadly gas was passed into the room. However, Tapp managed to shut it off by repairing a valve and then left the room with a coupler, which he used to restore the power and thereby opened the previously locked door. As he went on, he eventually found another audio tape left by Jigsaw, which confronted him with his role in in Sing's death and the effect his decision had on the life of the latter's family, especially his wife, Melissa.
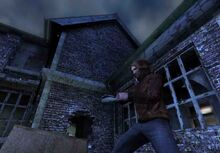
The man ignites a molotov cocktail
Tapp then went on and entered a small yard. Moments later, he attacked by another prisoner, who threw Molotov cocktails at him from a canopy. However, Tapp was able to kill him before he could set the yard on fire. As he looked around the area, Tapp witnessed another prisoner through a window in a room above him, who was brutally strangled by Pighead. After watching the disturbing scene, Tapp climbed up a ladder to the canopy and reentered the building. While proceeding through the next hallways, he came across the message "Your late partner holds the key" written on a wall.
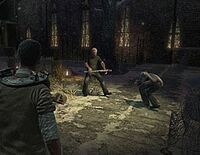
Tapp enters the graveyard
Afterwards, Tapp finally reached the asylum's graveyard and was informed by Jigsaw to look for the key in Sing's grave. As he entered the yard, he witnessed two men, who fought each other, but instead chose to attack him once they noticed his presence. Once both of them were dead, Tapp began to search the graveyard and thereby noticed that a small box was standing on each tomb, each one connected to a nail bomb. Knowing that they would detonate and that he could only open the box on Sing's grave, Tapp looked for his partner's tomb and eventually received the key to the Cedar Ward from the box. (Saw: The Video Game)
The Cedar Ward[]
Just as he found the key, Jigsaw gave him the next clue, saying that he had to "find the angel" to save Melissa's life. Afterwards, Tapp immediately entered the ward. While looking for the next clue, he went into a hallway, which contained the holding cells for the highly aggressive and violent patients of Whitehurst. As he entered, the door was locked behind him and a timer of two and a half minutes, which was connected with several nail bombs yet again, started to count down. To escape, Tapp had to find the combination for a padlock securing the exit door. However, he wasn't alone, as another prisoner was in one of the cells, wearing a box on his head similar to the man Tapp previously encountered in the boiler room. Tapp lured him out of his cell and then went in himself as there was a peephole on the wall. By looking through it, he saw the numbers 838 written on the opposite wall of the next room. Therefore, he was able to escape the area and locked the door behind him. The word "Patience" written on the wall told him that he had to wait until the bombs detonated, which he did, as the door was able to withstand the explosion.
Following the detonation, Tapp returned to the hallway, where the bombs had partly destroyed a decayed wall. Through a hole, he was able to get into another toilet room, where he found the next key in a toilet filled with syringes. With this key, he opened the door to the stairs, which led him down to a room. As he went in, he saw the message "You ended his life. Who saved yours?" written on the wall and a tape recorder lying underneath it. The tape contained a recording of an emergency call made by Jigsaw at the night of Sing's death. Only due to this call, Tapp was found in time and could be saved after having been injured by the killer. Furthermore, there were several documents hanging on the walls, including newspaper articles by Globe Staff writer Oswald McGillicutty, whose articles had ruined Tapp's reputation after the death of Sing. However, there were also official documents as well as a recording of a voice mail from Elizabeth Harris, the school counselor of Melissa and Steven Sing's son, Franklin. From these documents and the recording, Tapp learned that Melissa had started to severely neglect her son due to her depression.
As Tapp left the room, he was surprised by Pighead, who tried to attack him but was held back by several planks blocking his way. Therefore, Tapp was able to went on unharmed. He then went down another staircase and found another audio tape left by Jigsaw. The recording confronted him once more with the consequences his own decisions had for others, thereby telling him that he wasn't any better than the killer he pursued. However, this didn't affect Tapp's decision to stop him. Therefore, he went on and thereby came across a locked door with several TVs positioned around it. On the screens, the words "Fallen Angel's Wings" appeared. As Tapp looked around, he saw several rooms, each one containing the statue of an angel. However, only one of them attracted his attention as it was the only one without wings. Finally understanding Jigsaw's previous clues, Tapp destroyed the statue, which turned out to be hollow and contained the key to the chapel of Whitehurst. As he was about to open the door surrounded by TV monitors, Melissa appeared on the screens and demanded to see her son. Jigsaw reminded her of how she neglected him after Steven's death. She however accused Tapp again, expressing her hate and her desire for him to suffer. (Saw: The Video Game)
The Chapel[]
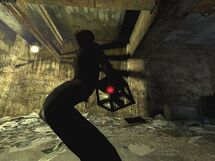
The explosive cube
When the feed ended, Tapp passed the door and came across another hostile prisoner. The man carried a small, cubical glass box with an explosive inside it. He had to cling on the explosive as the cube would detonate if he dropped it. Like the other prisoners, he desired to get his hands on the key in Tapp's body and immediately attacked him. Once again, Tapp was forced to use lethal violence and killed the man. Afterwards, he searched his body and found a coupler, which he used to close a circuit in another fuse box and thereby opened the next door. Upon going on, another TV showed Melissa, who once again tried to convince Jigsaw that Tapp was responsible for her and her son's miserable situation. He, however, merely told her that Tapp was the only one who could save her. Afterwards, he finally reached the run-down chapel. (Saw: The Video Game)
Melissa Sing's Salvation[]
Upon entering the big hall, he finally found Melissa, who was strapped to a pedestal between two large plates with circular saws mounted to them. Moments later, a TV turned on in front of them. Jigsaw's mechanical ventriloquist puppet appeared on the screen and once more confronted Melissa with her hatred and depression. Thereby, he also told her that the plates with the saws before and behind her would snap shut and kill her if Tapp didn't save her. Therefore, he instructed the latter of how to do so.
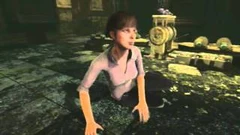
Melissa escapes the trap
When the tape ended and the TV turned off again, the saws were activated and began to spin. Melissa frantically yelled at Tapp to hurry up while he tried to shut off the machine. In order to do so, he had to short circuit the blades by placing a magnetic cube in the correct circuit. Failing to avoid shorting out the batteries holding the plates with the saws in place would have resulted in both plates slamming shut on her. Eventually, he was able to do so in time and Melissa was freed from her restraints. As she was still afraid, Tapp tried to calm her down. She however told him not to touch her and once again accused him for Steven's death. Furthermore, she claimed that she wished he wouldn't have saved her. Tapp defended himself, stating that he wished to take Steven's place if it was possible, before he went on. (Saw: The Video Game)
The Pine Ward Puzzle[]
Melissa followed him to the Pine Ward, but after only a few minutes, she left him again, stating that she couldn't forgive him and that he deserved this game. As she locked the door behind her, Tapp was unable to follow her and therefore barely hesitated to go on alone. Thereby, he came across the next set of TVs and was told about the next victim, Oswald McGillicutty, who had destroyed his reputation after Sing's death. To get to him, Tapp had to find pieces of a puzlle, which would allow him to further progress.
After a while, he entered another room with several nail bombs all around him. Jigsaw told him to search the adjacent rooms as one contained the means necessary to prevent the explosion. As the timer began to count down, Tapp noticed a reversely written on the door and closed it to see it in the mirror correctly. As the number was 207, Tapp went to the room with the same number, a padded cell, where he found numerous articles by Oswald McGillicutty as well as a strange box. This box contained the first bag full of puzzle pieces, which Jigsaw had told him about. As he took them, the timer of the bombs stopped to further count down.
The Oak Ward Puzzle[]
With the pieces in his possession, Tapp was about to leave the bomb room to continue his way, when another video of Jigsaw's puppet congratulated him for finding the pieces, while also telling him that the second bag was hidden in the Oak Ward. Tapp went on and entered another hallway, where he saw a big hole in the floor. As he jumped down to the lower level, another TV turned on, showing Oswald waking up in one of Jigsaw's traps. As he saw a hooded man working on the trap, he angrily yelled at him and attempted to threaten him. However, he stopped and started to panic when he realized that this man was in fact the Jigsaw Killer.
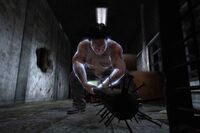
Tapp's next enemy
Tapp went on and proceeded through another number of different rooms and hallways, until he suddenly came across a prisoner, who ruthlessly smashed the head of another man with a nail-studded baseball bat. As he noticed Tapp's presence, he immediately attacked him as well. However, just as before, Tapp was able to overpower his opponent and killed him in self-defense. He then continued his way and faced several more dangers and obstacles, such as blocked doors, barricades and more enemies.
Nonetheless, he ultimately managed to find the next tape. The recording reminded him of how Oswald McGillicutty had ruined his reputation by purposefully badmouthing him in his articles. However, it was still Tapp's task to save him. In order to do so, he had to find the remaining pieces of the puzzle and than had to return to this room to assemble it and open the door. Tapp proceeded further to the Oak Ward, when he came across another TV. The feed showed Oswald in his trap as he tried to persuade Jigsaw to let him go as he had helped him to spread his message. Jigsaw however told him he couldn't free him and instead confronted him with his personal vendetta against Tapp. As Tapp went on, he finally reached the ward, but was locked up in another room with nail bombs. However, his way out was blocked by several pig scarcasses hanging from metallic carts. Only by pulling and pushing them in the right order and direction, he was able to escape the room in time. As he did, he soon reached another room with a message written on the wall saying: "Rigid arms contain the code". In the room, there were several mannequins as well as dozens of numbers written on the walls. However, by turning on some spotlights, Tapp was able to find out that the shadows of the mannequins on the walls were pointing at the combination 206. Upon solving this riddle, the next recording of Jigsaw's puppet started to play.

Tapp watches Oswald in his trap
As he made his way back, he was locked up in another room, when a deadly gas was passed into it. As before on an earlier occasion, Tapp turned off the gas by repairing a valve and continued his way. Thereby, he came to a previously locked door, which he was now able to open with the newly found combination. Inside, he found the second and last bag of puzzle pieces. Upon his return, he came across yet another TV, which showed Oswald, who was interrogated by Jigsaw, who asked him for the reasons of his crusade against Tapp. Oswald admitted that he wanted revenge on Tapp for not giving him information about the Jigsaw Case. Tapp then reentered the room where he had to assemble the puzzle, which depicted Jigsaw's puppet. After completing it, he passed the next door. (Saw: The Video Game)
Oswald McGillicutty's Salvation[]
Inside the next room, he finally found Oswald. Moments later, Jigsaw's puppet appeared on another TV screen and once more confronted Oswald with his sensationalism and his hate campaign against Tapp. Thereby, he also told him that the trap he was strapped to would bend his limbs and midsection backwards and kill him if Tapp didn't save him within four minutes. Eventually, Tapp received his instructions of how to do so.
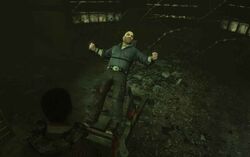
Oswald in the trap
When the tape ended and the TV turned off again, the trap was slowly set in motion. Oswald frantically yelled at Tapp to hurry up while he tried to shut off the machine. In order to free Oswald, he had to reverse the electric motors of the trap by bypassing three circuit panels on the walls. Eventually, he managed to accomplish his task in time, resulting in Oswald being released from the trap unharmed. After his salvation, he accused Tapp of having let Jigsaw escape. However, he ultimately admitted that he was wrong when he suspected Tapp. Tapp asked him what Jigsaw looked like, which Oswald couldn't answer. In an attempt to escape, both of them went on and continued their way together. (Saw: The Video Game)
Oswald McGillicutty's Death[]
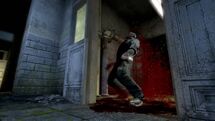
Oswald is killed by the trap
As they made their way through the next ward of the asylum and looked for Jigsaw's next clue, they came across a ladder and climbed up. Oswald suggested to separate as it would increase their chance to find the exit faster. He entered a hallway and thereby accidently stepped on a tripwire and noticed two large blades to the right and the left of the door. However, before he could react, the blades rushed towards him and killed him right in front of Tapp's eyes. (Saw: The Video Game)
Desired to be Tested[]

Tapp on his way to the second floor
Unable to do anything for him, Tapp left his body behind and went on alone again. Thereby, he found another audio tape, which told him about the next victim, Obi Tate, who was trapped in the crematorium. However, Tapp also learned that Obi was there on his own free will and desired to be tested by Jigsaw. As Tapp passed through the next door, he witnessed Pighead, who dragged away a screaming man, but didn't seem to notice Tapp, who was therefore able to go on. To get to the crematorium, Tapp first had to reach the second floor, which he successfully did after facing a number of obstacles. Once he reached the second level, a door secured by a combination lock blocked his path forward. However, he found the combination in the next room, where the correct numbers, 628, were revealed to him by a slide projector.
After passing the door, Tapp jumped through a hole in the floor and thereby returned back to the lower level. As he did, he came across a set of TVs, allowing him to witness the madness of Obi Tate. Obi was trapped inside a large furnace in the crematorium, where he was greeted by Jigsaw. Thereby, he expressed his admirance for him and his work and voiced his desire to be tested. Jigsaw, however, confronted him with the question what the point of his test was if he wasted his life looking for a way to be tested. (Saw: The Video Game)
A Surgeon's Hand[]
As Tapp went on, he read the message "Cut by a surgeon's hand" on a wall. A note left by Jigsaw told him that a surgeon's hand held the key to life. Therefore, Tapp headed for the surgery. Upon doing so, he came across another message reading "X marks the spot." He found the "X" shortly afterwards, painted on a wall above a hole in the floor. Tapp climbed down and found a frozen hand in a box, holding a key.
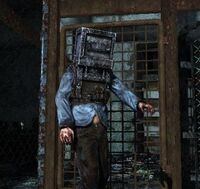
Tapp's next enemy
When he picked it up, Jigsaw spoke to him over the loudspeakers, advising to somehow incinerate the hand as it was the only way to retrieve the key from its grasp. Additionally, another door was opened near the message which had told him about the hand. As Tapp went on to continue, he was suddenly attacked by an enemy, who wore one of the metal boxes on his head and was unable to see him. Therefore, Tapp was once more forced to use deadly means to defend himself. Afterwards, he went on and was surprised by Pighead, who stood behind a lattice gate and stared at him, before he went on. At the same time, another TV turned on, showing Obi in his trap. He asked Jigsaw about the rules of his game and how he was supposed to free himself. To his dismay, Jigsaw told him that he wasn't able to save himself, but had to be saved by another person.
Afterwards, the gate was opened, allowing Tapp to continue. Moments later, he found himself in another room, surrounded by several nail bombs. At the same time, a countdown of three and a half minutes was started. In order to open the next door and escape the room, Tapp had to find two couplers and had to use them to activate two circuit boxes. Despite the limited amount of time, Tapp once more finished to accomplish his task and escaped the room before the bombs exploded.
Upon his escape, another set of TVs allowed him to see Obi, who begged Jigsaw for another test, stating that he wanted to feel the pain of going through it on his own. Jigsaw responded that he first had to be saved by someone else in order to realize the true meaning of his tests. Afterwards, Tapp had to activate two more circuit boxes to escape a room full of bombs, which turned out to be more difficult than the first time as he had to face numerous additional threats, such as an aggressive prisoner and a passage blocked by poisonous gas. However, he managed to open the next door as well and escaped once more. Behind the door, he found the next audio tape, lying in a box on a small table. The recording informed him that Obi was right ahead of him. Afterwards, the door was opened, enabling Tapp to enter the crematorium. There, he put the frozen hand in a furnace, causing it to melt, and then took the key that was left by it. With this key, he opened the final door and reached the oven, in which Obi was trapped. (Saw: The Video Game)
Obi Tate's Salvation[]
As he approached him, a TV turned on in front of both of them, showing the puppet, which Obi with his desire to be tested by Jigsaw. Besides that, it also told him that he would be burned alive due to the increasing heat, with Tapp being his only hope of salvation.
When the tape ended and the TV turned off again, the furnace started to heat up. Therefore, Tapp tried to reroute the gas lines leading to the burners of the oven. Eventually, he was able to finish his task and thereby opened the door of the furnace, enabling Obi to escape. Obi however wasn't grateful for his salvation and instead angrily yelled at Tapp, whom he accused of having ruined his game. To Tapp's surprise and shock, Obi also told him that he had put an advertisement in the newspaper, where he had asked Jigsaw to be tested, and was therefore told to come to the asylum. Even though Tapp was shocked and called him crazy, the two of them went on and continued their way together. (Saw: The Video Game)
A Gift[]
When they passed a hallway, they found another audio tape on a table. The tape informed Tapp about the next victim he had to save, a man who had attempted to commit suicide and was therefore abducted by Jigsaw. After that, he and Obi went up a stairwell when Obi suddenly confronted Tapp with his obsession with catching Jigsaw. As he saw his games as a gift and a way to salvation, he merely believed Tapp to be ungrateful and blinded and therefore decided to leave him. Tapp, however, didn't bother to follow him and rather continued his way to finally reach the end of his game. (Saw: The Video Game)
The Path of Light[]
Shortly afterwards, Tapp reached the theater of Whitehurst and went up another stairwell to a walkway from where he could see the stage. The next tape left by Jigsaw told him that he had to use light to continue. However, the bulbs of two of the spotlights were missing, making it Tapp's next objective to find them. Therefore, he went back down the stairs and through a hallway. As he passed another checkpoint, a TV turned on above him, showing a man strapped to another trap. He recognized him as Jeff Ridenhour. At the night of Sing's death, he and Tapp had found Jeff and saved him from one of Jigsaw's traps in the latter's hideout. As he now woke up in a trap once more, he immediately panicked when he saw Jigsaw. When he asked him if he hadn't suffered enough already, Jigsaw confronted him with his attempted suicide, promising that he would see the value of life the closer he would come to losing it.
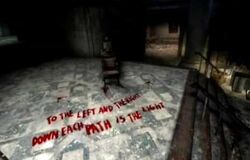
Jigsaw's next inscription
Tapp went on and thereby entered a large hall. On the floor in the center of the room, he read the words "To the left and the right, down each path is the light. Tapp then went to the staff housing. Upon passing the next security checkpoint, he saw Jeff once again on another TV screen. He told Jigsaw Tapp had kept harrassing him after his escape from Jigsaw's hideout in order to get information about the killer. This was also the reason for his second attempted suicide as he saw no other way to escape his situation. Jigsaw, however, told him that he'd learn soon that there was no escape, before the TV turned off again. Afterwards, Tapp went on and came across another message written on the wall, which said: "A nab's obsession can lead to ruin."
He then went up a stairwell and found the next door, which was secured by a combination lock. Therefore, he went down another stairwell again and entered a utility room. Through a small hole in the wall, he looked into the next room, where the message "I know you are looking. Come to room 204." was written on the wall. As it turned out, 204 was also the combination to the lock, which allowed Tapp to enter the women's wing. In room 204, he finally found the first bulb in a box. However, upon taking it, a deadly gas was passed into the room and once again, Tapp had to repair a valve in order to survive. Over the loudspeakers, Jigsaw told him to look for the second bulb in the cafeteria.
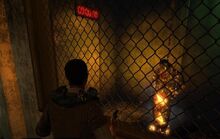
Tapp faces the horrors of Whitehurst
Therefore, Tapp went all the way back to the hall with the inscription on the floor and went down the other hallway this time. As before, he had to pass a security checkpoint and then reached another door with a combination lock. Next to it, another set of TVs turned on. Jigsaw asked Jeff if he truly wanted to die, which the latter negated. Therefore, Jigsaw confronted him once more with his second attempted suicide after escaping his first trap. To defend himself, Jeff once more blamed Tapp for having caused him to make this decision. After the TVs turned off, Tapp tried to open the door. In order to find the combination, he went back to the checkpoint, where he noticed three TVs, each one with a number on its screen. With the combination 038, Tapp opened the lock and continued his way.
Moments later, Tapp reached the cafeteria. However, as the door was blocked, he had find another way around. While making his way through a number of rooms, he found the door to the freezer, which was locked. In the next room, the words "Feed the grinder to get the key." were written on the wall. Tapp then went down a stair well, where he saw several pig carcasses hanging from a conveyor bar on the ceiling, directly above a grinder. He activated the bar and began to throw bricks at the pigs. Thereby, he caused them to fall into the grinder, where they were liquified. The liquid was then carried into a vat, where the key to the freezer room lay on a wooden board. As the vat was filled with liquid, the key slowly came into Tapp's range until he was able to pick it up.
Tapp went back up the stairwell and entered the freezer. Only moments later, he was imprisoned in the room along with several pig carcasses hanging from metallic carts. Over the loudspeakers, Jigsaw warned him to find a way out as fast as possible as otherwise he would freeze to death. Then, the sprinklers on the ceiling were activated. Due to the low temperature, the water froze almost immediately. Tapp began to push and pull the carts back and forth in his attempt to find a path out of the room. Eventually, he successfully managed to do so and escaped the room, undercooled but alive. (Saw: The Video Game)
The Theater[]
Outside the freezer. Tapp ultimately found the final bulb and returned to the theater, where he went back up the stairs to the spotlights. After inserting the bulbs, he turned on the green, blue and red spotlights, which revealed the numbers 831. With these numbers, Tapp opened the door to the theater. Once inside, he went to the stage and behind the curtain, where he found Jeff in his trap. (Saw: The Video Game)
Jeff Ridenhour's Salvation[]
As he approached him, a TV turned on in front of them. Jigsaw's ventriloquist puppet appeared on the screen and once more confronted Jeff with his repeated attempts of suicide. Thereby, he also told him that Tapp was now the only one who could save him and gave the latter the instructions of how to do so. Finally, several symbols appeared on 16 TV screens in front of them, before they disappeared again.
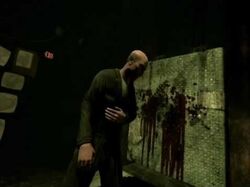
Jeff is released from the trap
When the tape ended and the TV turned off again, Tapp tried to find the corresponding symbols just as Jigsaw had told him. For every mistake, one of the metal spikes rushed through a tiny hole in the platform, to which Jeff was strapped, and pierced his body. After too many mistakes, the final spike would pierce his head, killing him in the process. Eventually, Tapp managed to accomplish his task, resulting in Jeff being released from the trap. He fell to his knees and was only able to stand up under great pain. As he recognized Tapp, he was distraught to see him and despite the latter's attempts to calm him down, he angrily yelled at him. When Tapp assured him that they could beat Jigsaw together, Jeff merely insulted him and left Tapp, stating that he was now on his own. (Saw: The Video Game)
Pighead[]
Once again, Tapp continued his way alone and headed for the library. As he went to the entrance, he was suddenly surprised by Pighead, who tried to attack him but was held back by a fence and therefore disappeared. When he was alone again, Tapp found the next tape on a table before him. On the tape, Jigsaw asked Tapp whether he saw him as a masked vigilante or rather an obsessed psychopath, stating that there was in fact no different between them. Nonetheless, Tapp went on undaunted. Over the loudspeakers, Jigsaw told him that what he was looking for was located in the library. As Tapp searched the rooms, he watched a hooded figure in a room below him, who worked on some kind of chemical before disappearing.
Tapp continued his path and thereby went down to the lower level. There, he found the next tape left by Jigsaw in a box. The tape warned him of Pighead, who tried to sabotage his game in an attempt to surpass Jigsaw and had the only key to escape Whitehurst. Furthermore, Jigsaw informed him that he had no other choice but to face Pighead and advised him to use his surroundings for his own defense. Moments later, Tapp reached a yard, where he saw another prisoner, who was trapped in a small area surrounded by a fence. Pighead, who was waiting for Tapp, pushed a button and thereby energized the floor, killing the man behind the fence. Afterwards, he and Tapp engaged in a fight. However, as Pighead turned out to be a ruthless and capable opponent, Tapp was forced to keep him at distance. Unable to defeat him by any other means, Tapp eventually lured Pighead into the fenced and closed the door behind him. Afterwards, he pushed the button and thereby finally killed Pighead, who immediately collapsed due to the electrocution. Following his death, Tapp searched his body and found the key Jigsaw had told him about. (Saw: The Video Game)
The Library[]
With the key in his possession, Tapp entered the library, where another video recording of Jigsaw's puppet waited for him. The puppet confronted him with Pighead's death, asking him if he saw himself as a murderer know and how far he was willing to go to finally catch him. Jigsaw also told him that he was waiting for him in the library, where his final test would take place.
Afterwards, Tapp entered the atrium, where he found three doors. One had the word "Freedom" written on it, the other one was labeled with "Truth", while the last one was uninscriped. Tapp went through the latter, where he saw the hooded figure again, who stood on a pedestal above him. Several TVs turned on, showing the puppet, which introduced him to his final test. He had to choose whether to go through the door leading to the "Truth" or "Freedom". But first of all, he had to retrieve a final key. (Saw: The Video Game)
David Tapp's Final Test[]
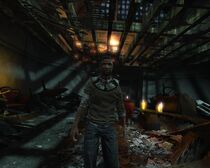
Tapp faces his final test
Eager to finally put an end to this game, Tapp went on and faced his last obstacle. Within ten minutes, he had to find his path through a maze of ladders, stairs and walkways, while facing numerous dangers such as enemies, who attacked him as well as each other, electrified water and dozens of nail bombs. However, in the end he made it through the area and after retrieving the key, returned to the atrium. When he stood in front of two doors, Jigsaw gave him his final ultimatum. Tapp could either choose to let go of his obsession with Jigsaw in exchange for the freedom of all remaining victims who were still trapped at Whitehurst, including himself, or he could decide to uncover the truth about Jigsaw and thereby condemn all the other prisoners. Depending on the player's choice, there were two different outcomes:
- Freedom: Tapp decided to choose freedom and escaped from the asylum, freeing the rest of the people trapped inside. He returned to his apartment and reviewed newspaper clippings, which labeled him a hero by those who survived their tests in the asylum. Despite this Tapp couldn't overcome his obsession with Jigsaw and ultimately commited suicide by shooting himself in the head. This ending was later confirmed to be the canon ending.
- Truth: Tapp couldn't overcome his obsession and decided to continue to go after Jigsaw. He pursued a mysterious cloaked figure who he believes to be Jigsaw. After catching and brutally beating the figure, Tapp realized that it was actually Melissa Sing. An audio tape explained that Jigsaw had put her in charge of keeping Tapp alive and making sure he followed the rules of Jigsaw's game after Tapp rescued her, in order to save her son, who had been abducted by Jigsaw as well. Additionally, Pighead, had sewn her mouth shut to avoid her from warning Tapp about her test. Attempting to run away from Tapp, Melissa desperately charged through a nearby door rigged with a shotgun, killing her in the same way as her late husband, Steven Sing. Tapp suffered a mental breakdown as a result of her death and was taken to an asylum as he was hallucinating and therefore believed he was still trapped in one of Jigsaw's games. (Saw: The Video Game)
Aftermath[]
After Tapp chose to let go off his obsession in order to save the lives of the remaining survivors, the Metropolitan Police Department raided the asylum. Thereby, they discovered the numerous corpses of Jigsaw's victims and freed the survivors from their imprisonment. Within the following days, the press reported the events to the public, thereby labeling Tapp as a hero and restoring his reputation. (Saw II: Flesh & Blood)
