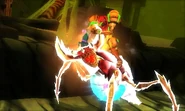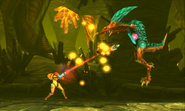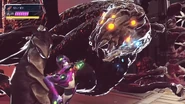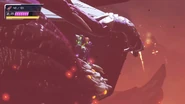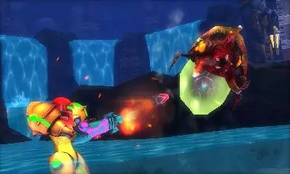
Samus fires multiple Missiles at an Alpha Metroid during its Grab Sequence in Metroid: Samus Returns.
A Grab Sequence[1][2][3] occurs whenever a Melee Counter is used on a major boss in Metroid: Samus Returns and Metroid Dread. When initiated, Samus will grab the enemy she is facing, incapacitating them and giving her a chance to fire multiple Missiles or Beam shots[note 1] at the boss before it shakes her off and normal gameplay resumes.
During a Grab Sequence, the camera focuses on both Samus and the boss. Some Grab Sequences do not have Samus literally grabbing her opponent, such as the Alpha Metroid's, where she fires rapidly at it while stunned. During most boss battles, a minimum of two Grab Sequences are possible.
Grab Sequences are the successor to the Lethal Strike and Overblast used in Metroid: Other M. In fact, Samus performs an Overblast during some Grab Sequences.
Metroid: Samus Returns[]
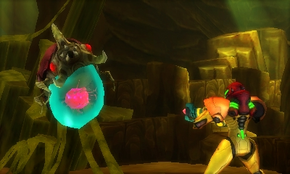
Samus attacks the first Alpha Metroid during its Grab Sequence.
As stated above, when Samus counters an Alpha Metroid, she does not grab the creature. It levitates stunned in midair for a few of seconds, giving her a chance to attack it.
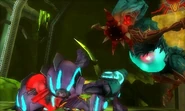
When Samus counters a Gamma Metroid, its Grab Sequence sees her fire a Missile at its head before launching toward the creature, grabbing it by the horn. She flips over top of its body and can fire multiple Missiles at its face while gripping the horn with her left hand. This move is similar to an Overblast from Other M. After about nine Missiles, the Metroid will throw Samus off, causing her to backflip behind it. Depending on how weakened it was before, one Grab Sequence can be enough to kill a Gamma Metroid.
The Zeta Metroid's Grab Sequence triggers when Samus counters it. The force of her move launches the Zeta into the air, after which Samus rushes towards it and grabs its right hind leg, using that to slam the Metroid onto the floor. She fires two to three Missiles at the beast before losing her grip on its leg when it is pulled away. The creature attempts to jump on top of Samus, but she blocks its head with her foot, giving her another chance to blast its membrane. After some more hits, she kicks the Zeta Metroid off with both legs and knocks it backwards.
In the Omega Metroid's Grab Sequence, Samus staggers the creature with her counter before leaping at its membrane, knocking it to the floor. This move is also similar to an Overblast. Once Samus has fired into its membrane sufficiently, it will attempt to slash her with its arm, causing her to backflip upwards in slow motion. She then lands on its neck, grabbing its tooth and shooting into the membrane further, before jumping off of it.
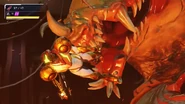
When the Queen Metroid's Grab Sequence is initiated, Samus stuns her with a whack to the head, at which point her inner tongue can be grappled. Samus can pull it down, opening the Queen's mouth and thereby granting access to her internal organs, which can be Power Bombed. This process can be repeated thrice to kill the Queen. This is optional, as it is also possible to defeat her with repeated Missile blows to her head.
Proteus Ridley's Grab Sequence occurs twice during the third stage of his battle. When the baby drains some of his energy after he takes damage, Ridley will attempt to retaliate and Samus can use the Melee Counter on him. The counter knocks him back in midair, and Samus leaps onto his right talon before jumping up to his neck, and can blast him with attacks as she does so. In slow motion, she swings around his neck to the back of his head, before coming back around and firing directly into his mouth. This is something she also does at the end of her fight with his Meta incarnation in Metroid Prime 3: Corruption. Upon dealing sufficient damage, Samus falls backwards, then recovers before landing on the ground.
The Arachnus and Diggernaut are the only bosses in Samus Returns with no Grab Sequence.
Gallery[]
Metroid Dread[]
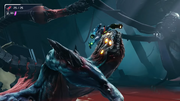
Corpius is the first boss with a Grab Sequence, which occurs in the third phase of its battle. Upon Sliding under it, Samus can counter the beast with an upward kick, which knocks it back. Once she fires at it, she propels forward (aided by her thrusters) and pulls herself onto Corpius' head, which she slams to the floor. While wrestling with it, Samus can fire Missiles at its mouth until it pushes her off. Next, Corpius swings its tail around and grabs Samus, unintentionally making its face vulnerable to attack again. After Samus has fired at its face several more times, Corpius lets her go and the sequence ends. It can be repeated at least once more before the creature dies.
In the second phase of Kraid's battle, he will attempt to whip his arm at Samus when she is atop the wall facing him. She can counter his attack, stunning his arm and leaving his face and mouth open to attack. The camera zooms in on Samus's back as she is given a window to fire into Kraid's mouth before he punches her. Samus flips forward in the air, landing between Kraid's jaws. While holding them open, she can continue to shoot into his mouth before he eventually dislodges her, ending the Grab Sequence. Samus flips back onto the sliding blue magnetic strip on the wall adjacent to Kraid, and the battle continues.
Drogyga's Grab Sequence does not have it grabbed by Samus. Instead, she deflects its tentacle attack, giving her a chance to deal further damage to its eye. The camera moves to an isometric angle to emphasize Samus as she fires at it.
Experiment No. Z-57's Grab Sequence is perhaps the most intense. After firing a laser beam from its mouth, Z-57 will attempt to attack Samus with its face, which can be countered. This staggers the beast. Samus shoots it in the face while sliding underneath it, then runs up its right arm while continuing her fire, before jumping onto its head and latching on (similar to an Overblast). The creature climbs out of the playable arena and attempts to shake her off while scurrying along the ZDR furnace. When Samus regains her footing, she can resume firing at its head before it throws her off. Samus skids across the floor with her thrusters flaring, and looks up as the Experiment returns to the room and roars, ending the sequence. It can be repeated once, unless Samus instantly kills it by pulling off a cinematic, upward Shinespark.
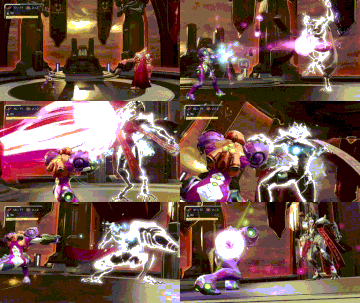
Raven Beak's second Grab Sequence.
Finally, Raven Beak has two Grab Sequences. His first one happens after he uses a massive energy wave attack that spans much of the room. He will attempt to charge at Samus, which she can counter. After that, she has a moment to fire at him as he points his Arm Cannon to the right, telegraphing a swipe with his laser beam. Once he has taken enough damage, the Grab Sequence is extended: this time, Raven Beak swipes his laser downward, which Samus sidesteps, giving her another chance to shoot him. Raven Beak will attempt to strike her with his left hand, which Samus flips over. He then tries to stomp on her, but she slides through his legs, aided by her thrusters, and backflips over another laser slash. Once Raven Beak takes enough damage, he will unveil his Chozo wings, commencing phase two of the fight, during which a Grab Sequence is not possible. After Samus destroys one of his wings, and he rips out the other, phase three begins, and the Grab Sequence can optionally be repeated.
The E.M.M.I., Central Units, Robot Chozo Soldiers, Chozo Soldiers, Golzuna, Escue and Raven Beak X have no Grab Sequences. However, the E.M.M.I. can grab Samus and kill her, short of a well-timed and difficult to pull off counter, and Chozo Soldiers must be defeated with a Finish Counter.
Gallery[]
Official data[]
Metroid: Samus Returns manual[]
- Grab Sequence
- Counter a boss's special attack to create an opening. Attack during this opening to perform a special action that deals a lot of damage.
Metroid Dread loading screen tip[]
- GRAB SEQUENCE
- Some bosses use attacks that can be countered. Successfully counter one to enter a sequence in which you can greatly damage the boss.
Notes[]
- ^ The Beam Burst and uncharged Plasma Beam shots are most effective.
References[]
- ^ Metroid: Samus Returns electronic manual
- ^ Metroid Dread Report, Volume 11: Power through with these pointers for exploration and combat - If you successfully Melee Counter such attacks and strike during the opening it creates, you can begin the “grab sequence” where you can dish out heavy damage with Missile attacks.
- ^ Metroid Dread tip


