This is a list of all the bosses that appear in Kid Icarus: Uprising. Each chapter contains one boss, and in some chapters, such as Chapter 9, there is a mini-boss. Some bosses previously fought before will return in later chapters.
Chapter 1: The Return of Palutena[]
Twinbellows the Ferocious[]

Twinbellows, as seen in Kid Icarus: Uprising.
This is the first boss in Kid Icarus: Uprising. In order to defeat this boss, Pit will have to shoot and dodge. Twinbellows often fires fireballs at Pit and jumps at high speeds, trying to grab him. Even though Twinbellows' hitpoints are low, his damage output is pretty high, so Pit must watch out for his attacks (Twinbellows' hitpoints are quite high on a higher intensity). One tip for the high speed attack is to make sure Pit is always on the sides of Twinbellows and not right in front of him. Doing this will make it harder for Twinbellows to suddenly jump and damage Pit. Dodging helps as well.
Chapter 2: Magnus and the Dark Lord[]
Dark Lord Gaol[]

Dark Lord Gaol greeting Pit and Magnus.
This is the second boss in Kid Icarus: Uprising. For this boss Pit get help from Magnus. However, he will have to do the most of the fighting by himself, as Magnus has no projectiles. Magnus is a perfect distraction to Gaol as Gaol will mostly attack Magnus instead of Pit. Gaol is pretty fast, so hitting her from a distance may be difficult; therefore getting closer will facilitate the battle. Gaol's damage output is not that high, and her health pool is moderate. Pit can avoid almost all the attacks by dashing. However, Gaol can summon two Skuttlers; Pit must be sure to eliminate those. When it looks like Gaol is charging an energy attack, Pit must avoid her. She will create an energy wave that surrounds her. If Pit gets hit by it, the attack will deal a lot of damage.
Chapter 3: Heads of the Hewdraw[]
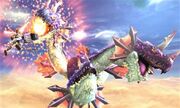
Pit fighting the three-headed Hewdraw.
Hewdraw is the first boss Pit meets in the air before facing it on land. It's a huge dragon with three heads. It's one of Medusa's commanders, so taking it out is a necessity.
Three-Headed Hewdraw[]
First, Pit has the air battle, where he has to destroy all three heads. Their health pool isn't significantly large, but their attacks do a lot of damage. The strongest attack is the flamethrower. If the player sees a head preparing a flame attack like in the image, Pit should attack that head. If he is quick enough, he can prevent it from breathing fire, thus cancelling the attack. Palutena eventually prepares a deadly laser beam, but Pit can destroy all of the heads if he is quick enough. The order that Pit destroys the heads determines the dialogue later in the chapter, as each head has a different personality.
Hewdraw Head[]

Pit encountering a Hewdraw head after the Monster Pheromone's effect.
On the land battle Pit has to kill two heads. The first one is very easy, and Pit faces it after Palutena grants him a monster pheromone. This will occur halfway through the level. The head tries to bite Pit and has no ranged attacks. Pit must try to stay out of its way in order to facilitate this boss fight. Also, there will be other minor enemies trying to add to the chaos, so the choices are either to ignore them or to try to get rid of them.
Hewdraw Reborn[]

Pit encountering Hewdraw Reborn.
The second head (aptly named Hewdraw Reborn, as the head has generated a new body) is much stronger and has several attacks. His head is his weak point. He has a moderate health pool and an average damage output. Sometimes, he goes underwater making it unable for Pit to hit him with bullets or melee attacks. Pit needs to shoot his fireballs back in order to get it out of the water. He must hit the red fireball but not the purple ones. If Pit hits the purple ones, an energy ball will be shot at him. Also, Hewdraw Reborn will throw scales at Pit. After a successful hit with a red fireball, an explosion will occur, and Hewdraw Reborn will become beached on the ground. Pit must run to its head and use melee attacks. Hewdraw Reborn will eventually return back to the water.
Chapter 4: The Reaper's Line of Sight[]
Great Reaper[]

The Great Reaper.
Since there are two levels to the arena, there are two places to attack this boss—his head and his feet. The head takes more damage, however. When Pit is on the upper level, he will have to look out for the Great Reaper's attacks, such as the scythe slash and the energy wave attack. These attacks deal a lot of damage. However, the lower level is no slouch, either, as he will try to stomp Pit. He also has an eye laser attack that calls out Reapettes. Over time, his attacks become stronger and more lethal. When the player sees a yellow light coming out of his eyes (the Reaper will wince in pain), Pit should go to the upper level, as his feet will no longer be a target. Pit should keep attacking his head while watching out for the jumping shockwave attack on the lower level and the spinning scythe attack on the upper. Pit should change levels whenever necessary.
Chapter 5: Pandora's Labyrinth of Deceit[]
Goddess of Calamity, Pandora[]
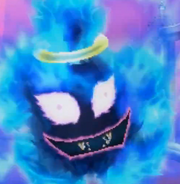
Pandora, as seen in Kid Icarus: Uprising.
Pandora's health and damage output are both below average. There are two parts in this battle. The first half is pretty easy. Pit should dodge Pandora's flames and energy crystals. Also, Pandora will submerge under the ground and will attempt to jump from underneath Pit. He should dodge as she gets closer to him in order to avoid this attack. If Pit is too close, she will attempt to slam him. Eventually, she will "give in" and will show Pit the Mirror of Truth. A cutscene will occur, and then the second phase will begin. Phase two is different as Dark Pit will now help Pit battle Pandora. However, Dark Pit uses the same weapon as Pit in this battle. Pandora gains some more attacks in this phase. First, she will turn red and will attempt to suck Pit in. Pit should try to avoid this, as physical contact with her will cause damage to Pit. Also, she will generate two discs of flame that home in on Pit. These are hard to avoid, but they dissipate eventually. Pit should watch out for fire from Dark Pit, as he may "accidentally" shoot Pit.
Chapter 6: Dark Pit[]
Dark Pit[]

Dark Pit.
On land, Pit will have to play a version of "hide and seek." Dark Pit will be hidden in one of the four branches. The areas are either an open field, an underground room, a high perch, or a big building. Pit should use Palutena's clues to figure out where Dark Pit is hidden. Pit will have to do this twice. Dark Pit will have one of four of the following weapons: an Ogre Club (which he will use in the underground room), a staff (which he will use on the perch), a cannon (which he will use under the big building), or a palm (which he will use in the open area).The open area has a robo-mech suit called a Cherubot. Pit should use it to pummel Dark Pit.
Dark Pit will have a Silver Bow in this battle, so he will either attack with charged shots, dashing shots, or multiple shots. Sometimes, using Pandora's powers, he will go into flight mode and will attack from the air. Dark Pit will use special wide-area attacks on Pit by targeting one of the four platforms. In order to dodge this move, Pit should jump onto another platform. Failure to do this will result in Pit taking massive damage. Lastly, Dark Pit will attempt to ram into Pit.
Chapter 7: The Seafloor Palace[]
God of Death, Thanatos[]

Thanatos in Kid Icarus: Uprising.
This boss is one of the strangest; he can change his form into either some swords, a bat, a vase, or a doll that multiplies; sometimes he remains in his original state. To defeat him, Pit just needs to shoot or melee him, but when he is in the form of a vase, Pit should melee his skulls back to him (only the white skulls); otherwise, Pit won't do any damage. The battle area is large, which facilitates any need to avoid his attacks or run away when in trouble. His damage output is not that high, but the battle will take a little longer than the others due to his form changes.
Chapter 8: The Space-Pirate Ship[]
Galactic Fiend Kraken[]
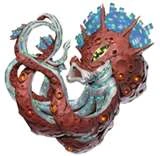
The Galactic Fiend Kraken.
The Kraken battle starts with Pit shooting at its tentacles. This is an easy phase, as the Kraken's arms won't hurt Pit if he keeps himself in motion. The tentacles are weak, making them easy to defeat. After the tentacle phase, the Kraken will reveal its head, which is a lot more difficult to defeat. Its strongest attack is the laser beam that it shoots from its mouth.Pit can avoid this by going to the very left of the platform, where the beam mostly misses. It also shoots yellow projectiles at Pit, and if it is too close, it will slam him. Although the area is large, Pit should stay to the left of the area to avoid the Kraken's lasers. Its health pool isn't significantly large, and its damage output is fairly high.
Chapter 9: Medusa's Final Battle[]
Medusa, Queen of the Underworld[]

Medusa, as she appears in Kid Icarus: Uprising.
The battle against Medusa has Pit use the Three Sacred Treasures and takes place in the air. When Pit approaches her, she will launch Pit far back. When Pit returns in flight, she will set up traps, such as spherical projectiles targeted at Pit, red lasers with only one safe way to dodge, and some rocks that Pit can shoot down. Then, Pit will circle around her while closing the distance between them until Pit reaches a proximity close enough to hit her. Medusa will teleport around for a while, but she will eventually give that up. Then, she will shoot yellow projectiles out of her eyes; these should be easily avoided. When Pit damages her enough, her face will transform into that of a monster. She will detach her head from her body, and it will fly after Pit. She will shoot a laser out of her only eye and attempt to execute other methods in order to defeat Pit. But when her head is back on her body, Pit should shoot her once in the eye to defeat her.
Chapter 10: The Wish Seed[]
The Immortal Phoenix[]
The Phoenix is a huge bird that might be hard to hit due to the large distance between the bird and Pit; Pit will need to close that distance in order to hit it accurately. But if Pit does, the Phoenix will attack him by transforming into flames and flying forward in an attempt to land a blow on Pit. Pit can avoid this attack by using the jump pad in the middle of the area, but doing so will make the job of damaging the bird difficult, as the distance between Pit and the Phoenix would be widened again. Long-ranged weapons are the best used against this boss. When Pit has damaged the Phoenix enough, the bird will fall, and Pit should sprint towards it and attack its head. Once this is done, the Phoenix will be much easier to hit.
Chapter 11: Viridi, Goddess of Nature[]
Cragalanche the Mighty[]
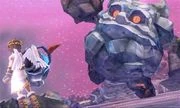
Pit encountering Cragalanche.
The boss is a large golem, containing only one weak spot on his back. That spot is marked red, so it is possible to see where to shoot. Pit should dash behind him to hit this spot; however, Cragalanche will try to stop him from approaching in that manner. In the beginning, this isn't that hard, but when Pit has done some damage to him, Cragalanche will use an attack in which he will heat up rocks and throw them at Pit. These stone projectiles have a high damage output and are hard to avoid, so it's best to defeat him before this phase. Cragalanche is one of the stronger bosses, having an average-sized health pool and high damage output. One of Viridi's Treasure Hunt challenges is to beat Cragalanche without exploiting its weak spot.
Chapter 12: Wrath of the Reset Bomb[]
Reset Bomb Pod[]

The Reset Bomb Pod.
There are guards protecting the Reset Bomb Pod. Pit can knock those enemies out, but they will reappear. Their attacks don't do much damage, so if Pit focuses on the Reset Bomb Pod, he can easily destroy it. However, the pod has a shield protecting it from any attacks. Pit should avoid the guards' attacks and melee them towards the Reset Bomb Pod. This will cause an explosion, which will expose the inner layer of the pod. Pit should keep attacking it until he destroys it; otherwise, the outer layer will regenerate (in this case, Pit should melee another guard towards the pod).
Chapter 13: The Lunar Sanctum[]
Arlon the Serene[]
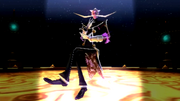
Arlon.
The battle includes blackouts, making Pit unable to see Arlon; the only way to find him is to shoot at the areas that Arlon's attacks are coming from. Pit should use melee attacks to make hiding more difficult for Arlon. Arlon's attacks are long-ranged, which means it's impossible to out-range him.
Chapter 14: Lightning Battle[]
Lightning Flash Phosphora[]

Phosphora.
This boss can be beaten in under thirty seconds. As Palutena advises, Pit shouldn't run at Phosphora, as she will simply dodge out the way. She can move extremely fast by turning into a lightning bolt as well as teleport behind Pit. Her main attacks including summoning a large ball of lightning to fire at Pit or to blast it into strips on the ground. Her special attack is charging up her energy and then blasting Pit with a massive rain of lightning. The blast radius is visible, so Pit should avoid the circle of lightning she creates. Her attacks will do massive damage if Pit doesn't manage to evade them.
Chapter 15: Mysterious Invaders[]
Aurum Core[]

The Aurum Core.
The Aurum Core is a machine, protected by some plates spinning around the core. Pit should be able to shoot in between the gaps. The core has some cannons that fire off strong spherical projectiles to Pit; however, they are easy to avoid, and if Pit destroys some, they will always respawn, so it's better to focus on the machine instead. The machine uses ground attacks as well. When the ground underneath Pit lights up, he should make his way to a safe place; otherwise, he will be hit by the attack. However, this attack doesn't do very much damage.
Chapter 16: The Aurum Hive[]
Aurum Generator[]

The Aurum Generator.
This is the only boss battle to take place entirely on grind rails. Pit should choose the rail that isn't far away from the generator and start shooting at enemies while on it. Some enemies will try to protect it so Pit can choose to shoot them down, but if taking a few hits from the enemies isn't much of a problem, then Pit should concentrate on the generator and keep shooting at it. Pit acquires "aid" from Pyrrhon, but ironically, he makes Pit's mission more difficult. The generator is not that strong, and it itself doesn't attack Pit, so it's a rather easy boss. After the fight, if Pit defeated the generator while Pyrrhon was present, he will also be present in the cutscene.
Chapter 17: The Aurum Brain[]
Aurum Pyrrhon[]

Aurum Pyrrhon.
The first thing Pit should do is destroy the green lights around the area. After that, the shield around Pyrrhon will disappear. Pyrrhon can take a lot of hits, so Pit won't be able to defeat him very quickly. Pyrrhon's attacks aren't weak, either, but Pit can avoid them by using the jump pad in the middle. Pit should use it in order to avoid the fire ring that would otherwise hurt Pit. Pyrrhon can also target Pit using fire snakes, which Pit should dodge to avoid.
Chapter 18: The Ring of Chaos[]
Pit's Body[]
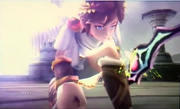
Pit's soulless body.
Just like Dark Pit, Pit's Body is very swift. Magnus doesn't have any ranged attacks, which makes the battle more difficult. Pit's Body can shoot at Magnus, making him fall, and while Magnus is on the ground, Pit's Body may already be at the other side of the stage. When Magnus hits him, Magnus should stay close so that he can be within range of attacking Pit's Body again. Pit's Body also has the ability to fly by himself, so Magnus should attempt to keep him from doing so. Pit's Body doesn't have a very large health pool.
Chapter 19: The Lightning Chariot[]
Chariot Master[]

The Chariot Master.
The battle starts with both Pit and the Chariot Master riding on a chariot, each being pulled by one of the two unicorns of the Lightning Chariot. In the very beginning, Pit can't move and can only shoot attacks at the Chariot Master, but as the battle progresses, he'll gain more combat liberties. The Chariot Master will never stop attacking Pit, so Pit should retaliate instead of attempting to avoid his attacks too often. The Chariot Master has an average health pool, but his attacks are powerful and quick.
Chapter 20: Palutena's Temple[]
Goddess Palutena[]

Pit encountering a Chaos Kin-controlled Palutena.
This mission requires Pit to save Palutena. Above her head will be a glowing dark creature. Pit should shoot at it, and the Chaos Kin will appear. This boss will quickly move about the whole area, so Pit should follow and shoot at it. If the player can make Pit go fast enough, Pit can catch up to it and melee it. The Chaos Kin is fairly easy to defeat, and its attacks are weak. However, Palutena will be attacking Pit as well, and her attacks are stronger. Also, the Chaos Kin will stay close to Palutena, making it more difficult for Pit to avoid shooting Palutena. If Pit hits her too much, then she will be defeated, which in turn will result in a Game Over for Pit.
Chapter 21: The Chaos Vortex[]
Chaos Kin[]

The Chaos Kin.
Dark Pit will help Pit defeat this boss, just like he did when Pit battled Pandora. The Chaos Kin is a boss with speed as its best attribute. It uses this attribute to constantly dodge and move around the entire stage. It doesn't focus much on fighting Pit, so Pit would have to chase after it throughout much of the battle. its health pool is fairly small, so a few shots at it should be able to defeat it. Dark Pit's aid is only at best a distraction for the Chaos Kin.
Chapter 22: Scorched Feathers[]
Amazon Pandora[]

Amazon Pandora.
The battle starts with Pandora in her original form fighting Dark Pit. Just like in Chapter 5, she isn't very strong and is easily defeated. But upon her defeat, she will jump into the nearby Rewind Spring and change into a form that resembles that of a young woman. This new form significantly improves her abilities; she sets up many traps and shoots hearts at Dark Pit. She can also use melee attacks, and her damage output is very high. Her large health pool makes her one of the more difficult bosses of the game. Also, the Treasure Boxes that appear around the area are actually all Pandora's Boxes and can prove to be difficult to avoid. Dark Pit should dodge as needed and watch out for her teleports.
Chapter 23: Lord of the Underworld[]
Heart of Hades[]

Pit encountering Hades's Heart.
Hades's Heart is a tricky one. Pit won't get a lot of advice from someone to figure out how to beat it. However, Pit does mention to look out for false hearts. Pit will see two hearts running around the area. One should have yellow flames around it; this one is fake and dangerous. It will explode, hurting Pit if he is in the same line, so Pit should avoid lining up with this one. Instead, Pit should go after the other one; when he shoots at it, it will become enraged and glow red. When this happens, Pits should start fleeing; it will run at a very high speed towards Pit, and it is hard to avoid. After a while, it will return to normal again. Pit will have to repeat this process a few times until it is defeated. Sometimes the fake heart will linger around the real one. Pit can trick it by lining up with it; after letting it explode, Pit should quickly go after the real one. The fake heart can continuously respawn, so shooting at it or letting it explode is not particularly effective.
Chapter 24: The Three Trials[]
Magnus and Gaol[]
In this chapter, Magnus and Gaol are summoned by Dyntos to fight Pit. Magnus and Gaol work together this time, and that makes the battle a little harder. However, Gaol isn't any stronger than the last time Pit fought her, and Magnus can only hit him from nearby. Magnus is very slow, so Pit should run away from him; thus, he won't be able to bother Pit. Gaol has ranged attacks, so it's recommended to defeat her first before taking down Magnus.
Pseudo-Palutena[]
After this battle, Dyntos will summon Palutena in the same room. Her fighting style is the same as the one in Chapter 20, but after Pit hits her a few times, she will change into a distorted version of Palutena, as her face will change into that of a vile and disgusting one. Pit should shoot at her and dodge to avoid as many of her attacks as possible; however, she has one melee attack that can be hard to avoid by dodging, so the player should keep an eye out for that one.
Great Sacred Treasure[]

The Great Sacred Treasure.
The next battle is against the Great Sacred Treasure, which will usually ram or shoot at Pit. Pit should keep dodging and firing. When the Great Sacred Treasure flies off to charge, and Palutena shouts at Pit to watch out, Pit should run to the left (facing the Great Sacred Treasure) to escape from the red glowing zone. Being hit by this attack yields an instant game over.
Chapter 25: The War's End[]
This chapter is essentially a four-part battle and the only chapter to be fought entirely in the air.
Hades, Lord of the Underworld[]
Pit battles Hades starting with the Great Sacred Treasure's first form; after fighting for a bit, Hades will start to chase Pit through a ravine. Then, Hades will attempt to flee through a portal, so Pit turns the Great Sacred Treasure into its second form, Pursuit Mode, to chase down Hades.
Hades (Battle)[]
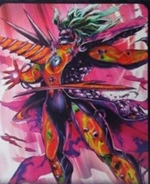
Hades (Battle).
After Hades takes enough damage, he will change into his battle form and attack Pit with every weapon on his body, forcing the Great Sacred Treasure into Mech Armor Mode. When Hades takes enough damage, Hades will grab Pit and attack him with the drill on his chest, severing off the bottom half of the Great Sacred Treasure, prompting Pit to shift it into Ultra Light Mode, which utilizes a beam sword to slice off Hades's legs.
Hades (New Legs)[]
Hades then goes through the portal above ground and grows a new pair of legs. After taking enough damage, Hades will destroy the Great Sacred Treasure by smashing it in between his hands, which will send Pit falling, forcing him into a position in which he needs to land safely (the player has to focus the reticle at a certain point on the ground). Once Pit is on the ground, Palutena will notify Pit about a strange force targeting Hades. The player must then keep the reticle on Hades to guide the force.
Hades (Final)[]
Medusa, enraged at Hades for reviving her again, will appear and attack him, tearing off his head at the cost of her own arm. Hades replaces his head with another and defeats Medusa. Viridi will then activate the Power of Flight on Pit, who grabs the cannon of the Great Sacred Treasure. Palutena will charge up the cannon while Pit avoids Hades's attacks; once the cannon is ready to fire, Viridi will notify Pit to fire it, which will finally destroy Hades once and for all.
