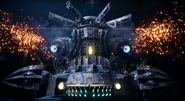
An autonomous mobile weapons platform manufactured by Shinra's Advanced Weaponry Division. It is armed with an extremely powerful cannon on its right arm and rotary cannons on its left. Equipped with cutting-edge combat AI, it calculates the most efficient method of annihilating its targets based on the situation.
Enemy Intel
The Arsenal is a boss in Final Fantasy VII Remake, fought by Barret and Aerith, with the help of Red XIII, at the end of Chapter 17, "Deliverance from Chaos", during "The Great Escape". It is fought in the Shinra Building.
Stats[]
Attacks[]
Some attacks used depend on the battle phase.
- Phase 1: The Arsenal is accompanied by three Barrier Drones and will stay in position. After the first attack against a drone, the Arsenal will become immune to attacks.
- Phase 2: After the drones are destroyed, The Arsenal starts moving and its Left and Right Front Wheels and Back Wheels become targets.
- Phase 3: The Arsenal's Main Cannon will become a target.
- Phase 4: The Arsenal is nearly defeated.
 = Physical damage
 = Magical damage
| Attack | Pic | Phase | Description | Block | KBKnockback |
|---|---|---|---|---|---|
| 1–3 | The boss fires its gun arm. | ||||
| 1–3 | The boss fires from its gun arm at a nearby target. | ||||
| 1–3 | The boss charges its cannon arm for 5 seconds and fires at a target. The attack is stopped if the boss's weak point takes 1500 damage, or Barret hits it with Focused Shot, Maximum Fury, or Overcharge. | ||||
| 1–3 | The boss charges its front cannon for 5 seconds to unleash purple homing lasers. The attack is stopped if the boss's weak point takes 1500 damage, or Barret hits it with Focused Shot, Maximum Fury, or Overcharge. | ||||
| 1–3 | Discharges electricity along the floor in 5 directions. If hit, the character is stunned for 5 seconds. | ||||
| 1–3 | A blue light will follow targets and create a field of electricity that persists for 10 seconds. | ||||
| 2–3 | The boss charges at a target. | ||||
| 2–3 | The boss charges its cannon for 2 seconds to fire at a target. The attack is stopped if the boss's weak point takes 1500 damage, or Barret hits it with Focused Shot, Maximum Fury, or Overcharge. Hard Mode: Barret must perform the stopping action twice to stop the attack. |
||||
| 2–3 | The boss charges for 7 seconds to unleash laser beams. The attack is stopped if the boss's weak point takes 1500 damage, or Barret hits it with Focused Shot, Maximum Fury, or Overcharge. Hard Mode: Barret must perform the stopping action twice to stop the attack. |
||||
| 2–4 | The boss erects walls of fire that persist for 20 seconds. | ||||
| 3 | The boss charges its main cannon for 12 seconds to unleash a one-hit kill beam. Dealing 2000 damage to its weak point will cancel it. Hard Mode: Dealing 3000 damage during the charge cancels the attack. |
||||
| 4 | The boss charges its main cannon for 45 seconds before wiping the party. | ||||
| Physical Defense Protocol | Resists physical damage | ||||
| Lightning Defense Protocol | Resists |
||||
| Fire Defense Protocol | Resists |
||||
| Wind Defense Protocol | Resists |
||||
| Ice Defense Protocol | Resists |
Battle[]
All elemental ![]() Magic Materia are useful in the battle. The boss is weak to all elements, but uses damage protocols to protect itself from one element at a time.
Magic Materia are useful in the battle. The boss is weak to all elements, but uses damage protocols to protect itself from one element at a time.

The Arsenal and its Barrier Drones.
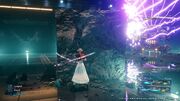
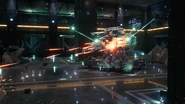
The first phase starts with The Arsenal deploying three barrier drones that shield it, greatly reducing the damage it takes. The drones can be assessed, but are not needed for Enemy Intel completion. The drones must be destroyed to remove The Arsenal's shield. The weak point is vulnerable before and after the shield is removed. If the player sufficiently attacks the weak point while Arsenal charges for primary fire or homing lasers, Red XIII will use Sidewinder, instantly staggering one of the drones, which can then be destroyed by Aerith and Barret. While staggered, the drones have no defense stats, making them extremely weak. If Aerith is low on MP, this is an excellent opportunity to use Soul Drain. In this phase, The Arsenal will employ a large variety ranged attacks, such as firing with its left machine-gun arm, or an explosive blast with its right cannon arm.
Barret and Aerith can hide behind debris and pillars for cover, crucial for when the boss charges its main attacks. The Arsenal can use Homing Laser to hit characters behind cover. It will also deploy EM Fields at characters that are out of its range hiding behind structures, and if it hits, they will be stunned; however, a target reticule will appear on the ground before the EM Field expands, giving the player enough time to avoid them. It may also use Voltaic Discharge, which sends electric waves that stun on contact.
The Arsenal can destroy debris with Primary Fire, though debris near the back or the pillars can be used for cover instead. Whenever the Arsenal charging for primary cannon or homing laser, a weak point appears, and hitting the main cannon or the laser cannons with lightning spells, or Barret's Focused Shot, stops the attack and leaves the Arsenal open for staggering.
Once all three drones are destroyed, the second phase will start. The Arsenal's barrier will dissipate, exposing its elemental weaknesses, as well allowing its wheels to be targeted. However, the wheels will resist any form of damage until the boss is pressured or staggered. The Arsenal will move around the battlefield faster in this phase, occasionally charging at the player.
After it loses 50% HP, The Arsenal will start using Pulse Cannon, which must be avoided by hiding behind debris. It'll also use Firewall, which erupts two long pillars of flames that can trap characters. Once its HP is reduced to 1/4, it will charge Cry Havoc. The first one can be avoided by hiding behind debris, which will be destroyed. It'll then charge it again, and the player must destroy The Arsenal within the time limit, as there'll be no debris left to hide behind. The Arsenal will continuously use Cry Havoc every 45 seconds should the player survive.
Strategy[]

Aerith taking cover from Obliterating Laser.
As soon the fight starts, Barret can build-up ATB with Overcharge and use Lifesaver to help mitigate any damage Aerith may take, as well Steelskin and Manawall to increase his own defenses. Aerith can hide behind one of the pillars and use ATB Ward followed by Arcane Ward. The player can equip any elemental materia to deal with The Arsenal's exposed elemental weaknesses in the second phase, but ![]() Lightning Materia and
Lightning Materia and ![]() Fire Materia are often the most useful. The player can pair Lightning with
Fire Materia are often the most useful. The player can pair Lightning with ![]() Magnify Materia to hit all drones at once.
Magnify Materia to hit all drones at once.
Barret is the ideal character to be controlled during the first phase to destroy the drones as soon as possible with Maximum Fury, and swap to Aerith when the boss focuses on him. The boss will target one character at a time, meaning as it targets one, the other can be switched to. The player should always attack the right arm when it becomes vulnerable during Primary Fire.
After the drones are destroyed, the player can focus all efforts on damaging the main body and ignore the wheels as targets until the right arm is destroyed, then destroy the wheels. Most damage can be dealt against its main body until the wheels are exposed. Destroying one will stagger it, after which the player can lay into it with spells.
When the Arsenal uses its most powerful attacks in low health, the party can take cover behind debris or a pillar, then when it charges up the next, use powerful abilities, such as Barret's Maximum Fury, to defeat it quickly.
Hard Mode[]
On the hard difficulty, while The Arsenal doesn't have any new tactics, it will use its abilities more often, specially the EM Field and Homing Laser to hit characters hiding behind debris.
The same strategy from normal mode applies, but the player can equip Aerith with ![]() MP Absorption Materia to help conserve MP, and also
MP Absorption Materia to help conserve MP, and also ![]() Synergy Materia paired with Lightning to follow-up with Thunder whenever Barret uses offensive abilities. When the Arsenal is pressured, and during the very last phase of the fight, Aerith can use high level spells.
Synergy Materia paired with Lightning to follow-up with Thunder whenever Barret uses offensive abilities. When the Arsenal is pressured, and during the very last phase of the fight, Aerith can use high level spells.
Both Barret and Aerith can make good use of ![]() Refocus Materia, especially with Transference Module on Barret and Spectral Cogwheel on Aerith.
Refocus Materia, especially with Transference Module on Barret and Spectral Cogwheel on Aerith. ![]() Barrier Materia paired with
Barrier Materia paired with ![]() Magnify Materia can be a good combo on Barret.
Magnify Materia can be a good combo on Barret.
Defeating the Arsenal will earn Aerith the Telluric Scriptures Vol. XIII.


