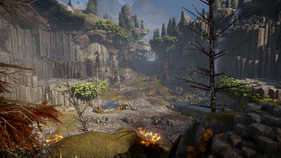
The Fereldan Frostback is one of twelve high dragons encountered in Dragon Age: Inquisition. It can be found in Lady Shayna's Valley; the northeasternmost region of the Hinterlands, situated north of the Dusklight Inquisition Camp.
Background[]
The Fereldan Frostback is a variant of high dragon that is native to the Frostback Mountains. Even when compared to other high dragons, Frostbacks are viciously territorial. They often claim a large swath of territory where their numerous offspring are allowed to roam, under the protection of their mother.[1]
Quests[]
Locations[]
Stats[]
- Level 12 Boss
- 90000 HP (Normal) / 105261 HP (Nightmare)
- 38 Armor
- Greater Fire Resistance
- Cold Vulnerability
- Immunity: All Disabling Effects
- Immunity: Slowed
- Perceptive
Strategy[]
The Fereldan Frostback is resistant to fire, but vulnerable to cold. She is immune to all debilitating effects. It is recommended to face this dragon at levels 10 to 13 using a warrior, a rogue dual wielding daggers and either two mages or one mage and one rogue archer. All party members should have fire-resistant armor and dragon-slaying or frost weapon runes. Equipping fire resistance tonics may also help.
PLEASE NOTE that no fire-resistant armor, Dragon-slaying or Frost Runes, or fire-resistance tonics are necessary even if you want to take the Fereldan Frostback on at levels FAR BELOW the recommended levels of 10-13! Please also note that no runes of any type are available before the completion of the War Table Operations In Hushed Whispers or Champions of the Just preceding In Your Heart Shall Burn before transitioning to Skyhold.
- The Fereldan Frostback can also be taken down with only one Level 4 Mage with Gameplay set to NIGHTMARE & Trials Take it Slow ENABLED and ANY Cold Damage dealing Staff without the Fereldan Frostback ever taking flight or summoning Dragonling as long as several things are done; although this fail-safe method is as easy as it is time intensive. Gaining access to The Blood Cliffs Region North of Lady Shayna's Valley early in the game gives you immediate access to unlimited quantities of the Tier 2 Crafting materials Obsidian, Veridium, and August Ram Leather in addition to Guaranteed Fade-Touched Obsidian (+3 Guard on Hit) from the nodes throughout the region along with the two sets of loot containers in the Dwarven Boat in the Northernmost section of the Blood Cliffs Region. To ensure unlimited replenishment; take only the 23 Obsidian OR 9 Veridium AND the FT Obsidian from the one set of containers in the boat and take only the 15 August Ram Leather AND the 3 Malachite from the other set of containers. Leave the area and return as often as you like. Use the Tier 2 materials for early equipment upgrades as needed and sell the rest!
- If your Inquisitor is a Mage: Use the Change Party Horn in the Dusklight Camp and leave ALL of your party behind. Equip your best Cold Damage dealing staff and kill any Nugs as you approach the entrance to Lady Shayna's Valley but DO NOT enter the valley. Stay close to the last Iron node nearest the overlook and target the Dragon while facing it, then quickly look towards the ground back the way you came so as to frighten any approaching Nugs away so they don't run into the valley and draw the Dragonlings near. Press and hold the LMB (coffee cup handle works well) in addition to casting Energy Barrage and Winter's Ruin as often as they're available until the Dragon is defeated. Return to the Horn to gather your Party in order to deal with the Dragonlings while you loot the regions.
- If your Inquisitor IS NOT a Mage: Switch your character control to Solas (Dorian and Vivienne most likely will still not be available at lower levels) and equip him with your best Cold Damage dealing staff and set the Behavior of the rest of your party to DEFEND to prevent them from rushing the Dragon and drawing unwanted attention from the Dragonlings. DO NOT enter Lady Shayna's Valley and attack the Fereldan Frostback as noted above with only a solo Mage. Once the Dragon is defeated, switch the behavior of your entire party back to FOLLOW and control your main character as before so you can easily deal with the Dragonlings and loot the regions.
Despite being the first dragon most players encounter, the Fereldan Frostback can be quite difficult (except as otherwise noted) even for players who over-level themselves before the fight. This is mostly due to her controlling the terrain of the battle as well as calling Dragonlings to aid her, the latter often swarming the players.
There are four stages of melee combat (see below) or only one stage of Mage Ranged-Attack combat (see above):
- First Stage. As you enter the initial area close to the camp (Lady Shayna's Valley), the dragon will circle around, destroying the top of the central spire by smashing into it. Upon seeing your party she will start to periodically bombard you with fireballs. The first fireballs will be coming directly above you so try to dodge them and get close to the central spire. The dragon will change her path when you are far enough in. Standing behind the spire will protect you from this new wave of fireballs. You can also put in some hits with a mage or an archer. After a few rounds, she will eventually fly and land in the next area (Blood Cliffs). If somehow you are caught off-guard by a wild fireball, you have time to cast barrier in the time the fireball takes to travel. Be aware that this area contains dragonlings who will also attack you if they notice you.
- Second Stage. The dragon lands in the Blood Cliffs area and this is where the real fight begins. Get your warrior in front of the dragon and all ranged members to the sides close to her. If any party member is too far away, the dragon will flap her wings and suck party members in while doing heavy damage to them. This can be avoided by staying relatively close to her. All dragons are immune to taunting, so the only purpose to abilities such as War Cry or Challenge is to generate guard. Rogues with daggers should be at the back to maximize damage. Dragons have multiple targetable parts: dealing enough damage to any leg will force her to jump to the other leg. For example, when you hurt the left leg enough she will jump to her right. When she does so, reposition your team as before with only the warrior in front. This positioning ensures that only your warrior will be hit by breath attacks, and your party won't get stomped on. Though she can't be taunted, she will still attack the party member with the greatest threat generation, in this case your warrior wearing heavy armor. Cast Barrier whenever possible on the warrior or any member who needs it the most.
- Third Stage. When you cut her health to 75%, she will take to the skies again, throwing fireballs and breathing fire down a path. This attack is a little tricky to avoid as it is faster than the fireball and has a wide AoE, so it is a good idea to keep your party on the move. She will land on a ledge and call dragonlings to attack you. Although you can used ranged attacks at this point, you should focus on killing the dragonlings to stop them damaging your party. The dragon will return to the field after killing all the dragonlings and the fight will continue as per the second stage. Taking her health down to ~50% will make her fly to a ledge and summon dragonlings again. During this stage the dragon may use a roar that will stun your entire party for a few seconds.
- Final Stage. Upon reaching 20-25% health, she will proceed to the final area. Climb up the hill by following the path. If somehow you can't get to her, your party can. The dragon will face you to the bitter end here, along with her dragonlings, although it will take longer for the dragonlings to reach the area compared to previous stages and it is possible to finish her off before any dragonlings reach your party. This area is smaller than the previous one so you might get caught by the maelstrom attack and/or get KO'd instantly by a wild fire breath attack, so this is when you should attack her all-out. She will also stun your party with her roar, but if you keep the party spread out, you're only likely to lose one member if she follows up with a breath attack after a roar. Once you kill her, loot her remains and claim the landmark.
Trespasser[]
With the addition of the DLC Trespasser an achievement has been added for defeating a level 16 Fereldan Frostback with the trial Even Ground switched on. When this trial is active enemies scale to match the Inquisitor's level. The trial does not alter any of the dragon's tactics, however, a well-equipped party should still be able to defeat the Fereldan Frostback using the strategy mentioned above. Keep in mind all dragonlings will also scale to the Inquisitor's level.
Exploits[]
The Fereldan Frostback can easily be cheesed to death by a mage standing at the entrance to the Blood Cliffs at maximum engagement distance, using a frost staff along with the storm spell Energy Barrage to attack while she sits too far away to attack you. This exploit is due to staves and spells having essentially unlimited range and perfect accuracy. This will take some time depending on your level and you'll need to adjust your character since energy barrage will move them forward a little bit each time. Due to the distance, however, she won't fight back, and your allies will continually reset back up next to you, preventing them from getting close enough to aggro her.
This cheese is even easier if you have the ring of doubt, as Energy Barrage does not cancel the invisibility, and therefore allows you to be anywhere within attack range to kill the dragon.
You can use this fight to farm for experience and loot from dragonlings. They reward 36exp per kill along with the chance to drop valuable crafting materials. In order to do this, simply have a rogue with Stealth stay far enough away so that they don't get attacked and allow your 3 teammates to kill the creatures for you. If the loot doesn't appear at your feet (which it should if you're far enough away), then simply use Stealth to run in and grab all the loot.
Rewards[]
Killing the dragon yields:
- 1,057 XP plus 1,934 XP
- Influence 1600
- Power 4
Notable loot[]
 Superior Belt of Focus
 Garnet (3)
 Grand Enchanter's Staff
 Superb Amulet of Constitution
 Sigil of Felandaris (Trespasser required)
 Dragon Gland (50% chance)
 Intense Dragon Blood (6-12)
 Dragon's Tooth (1-2)
 Dragon Webbing (1-5)
 Dragon Scales (1-5)
 Dragon Bone (1-5)
See also[]
- Trial of the Empress achievement
Gallery[]
References[]
- ↑
 Dragon Age: The World of Thedas, vol. 2, p. 304


