- This level occupies the map slot E1M3. For other maps which occupy this slot, see Category:E1M3.
E1M3: The Gatehouse is the third level in the City of the Damned episode of Heretic.

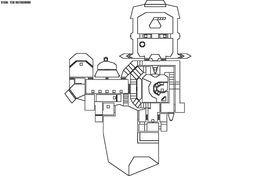
Map of E1M3
Walkthrough[]
From the starting point, head forward until you reach two wooden doors. Go through either door and turn right, then follow the corridor until you reach a large room. There are several platforms in this room that lower temporarily as you enter. Turn right and go to the other end of the room, then pass through the door on your right. The next room contains a Quartz Flask that will trigger an ambush if you take it. Leave this room through the door next to the one you came in from. In the next room, locate an Ethereal Crossbow in the northern niche. Entering the niche opens an ambush. Head southeast through the room containing barrels and continue into the room that contains the yellow key. Entering this room results in another ambush. Take the key and backtrack to the room with the lowering platforms.
Pass through the yellow door. An ambush will trigger. Take the stairs to your left to reach an outdoor area with a tower. Pull the switch in the tower area, then go around the tower near the slime pool. Enter the tower and climb up to find the green key. Take it and go through the teleport, which takes you back to the first pair of doors. Return to the room with the lowering pillars and pass through the green door. As you enter, the switch to your left lowers the wall blocking your way, and the one to the right lowers the lift that allows you to access the exit switch. Lower the wall and secure the room beyond. Now lower the lift and ride it up to the exit.
Secrets[]
- After collecting the yellow key, return to the first pair of doors. The Silver Shield will have lowered. Pull the switch behind it and head towards the starting point. A chamber with a teleport will have opened. Go through it and collect the Tome of Power, then drop down to open a second teleport opposite the first. Pass through this one to find yourself on the platform bordering the starting area. Collect the bonuses and pull the switches to lower the platforms holding ammo. Drop down into the well to collect the Dragon Claw. To save time, you may wish to access this secret after collecting the green key.
- Go through the yellow door and head right. Pull the switch that opens the doors, then go to the tower room and through to the area where the Bag of Holding is located. A chamber will have opened. Collect Gauntlets of the Necromancer and pull the switch. Return to the room with the lowering pillars and you will find a new passage opened in the southeast corner. Go through to collect the Tome of Power, then continue south across the water(use <SHIFT> to run) to an island where you will find a stash of ammo. Stepping onto the island grants a secret and triggers an ambush.
The following do not count as secrets:
- In the hallway immediately after the first pair of doors, going left leads to a torch.
- Immediately north of the yellow key room is another room containing a Shadowsphere. Taking it activates an ambush.
- After going through the yellow door, go up the stairs to the right. Pull the switch to open the doors leading to a room containing some bonuses.
- The passage from the northeast of the tower area leads to a Bag of Holding. You can also get Gauntlets of the Necromancer if you head south from the yellow key door, up to the sixth step.


