Oh, shut up and help me remodel the Sigmascape V4.0 page!
Sigmascape V4.0, known by players as O8, is the fourth and final battle of the
Story[]
Normal[]
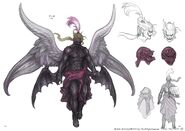
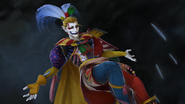
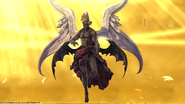
The looming face of the Sigmascape, "Kefka" will be your final opponent in this test world. Analysis of his data reveals that, despite his comical appearance, this cackling jester once rose to godhood and cast his entire planet into ruin. His is a power not to be underestimated. Nero has also alerted you to the villain's propensity for trickery, and promised to watch for deadly feints through his enhanced monitor. You can only hope that his warnings come in time...
Description
Savage[]
The urge to flip switches is almost irresistible...even when you know full well the consequences for doing so. Once more your finger moves as if of its own accord, and activates the second phase of the Savage Initiative. As the gentle arrangement drifts from the terminal, you are transported to a remembered vista of the Sigmascape, each lapping wave of the song swelling the boundary of your memories...
Description
Progression[]
Normal[]
Kefka's main gimmick in this fight is his trickery. Any of his magic attacks can be fakes; if an attack is a fake, Kefka will have question marks on the AoE indicators and the orbs floating around him.
- Hyperdrive- Hard hitting magic tankbuster.
- Blizzard Blitz- Large or small circular AoE.
- Fragrant Fire- Players will have orange markers applied to them. Be sure to spread apart when the marker falls off.
- Ultima Upsurge- Raid wide AoE attack.
- Thrumming Thunder- Several line AoEs that span the arena.
- Timely Teleport- Kefka will teleport to the outside of the arena. He will immediately cast an attack afterwards so be sure to stay behind him unless he begins casting Aero Assault.
- Aero Assault- An ability that will knock players away. Stand behind of Kefka to avoid getting knocked off the field.
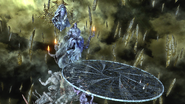
Halfway through the fight Kefka will cast Graven Image and a statue will form just outside the arena, attacking players with different abilities.
- Shockwave- The statue will move his hand to one side of the arena and form an orb that will knock players back, this will also trick players depending if the orb moves to the other side of the arena or not.
- Orb- A giant orb will appear on the left side or right side of the arena, go to the opposite side to avoid.
- Ave Maria- A look away or look at mechanic.
Savage[]
Pre-Transformation[]
The Savage version is similar to the normal fight, Kefka will still trick players depending on if the attacks have question marks or not, but players will need to remember them as he will cast them in-between attacks.
- Mana Charge- Copies the next ability he uses. Functionally [ctrl]+c
- Mana Release- Discharges the ability copied by Mana Charge. Functionally [ctrl]+v
Post-Transformation[]
Successfully reaching this phase will allow the raid to restart from this phase rather than repeating the prior phases.
Kefka will start the battle off with Heartless Angel which will reduce the party's HP to one; he will then begin casting Ultima, killing anyone not healed up properly. Once Ultima is cast he will use Hyperdrive on the main tank, also giving a Bleed DoT. Next is Celestriad: there will be a cross and outer circle AoE. Have everyone stand outside in the pink circle until the inner circle goes off. The DPS will then be marked with individual Fire III's, so have them spread out, and the tanks and healers stack together to split the damage. After another Ultima have the tank pull the boss to the center of the arena for the next mechanics. Forsaken, which causes high raid-wide damage, follows close behind.
Next up is Heartless Archangel, leaving everyone with 1 HP once more, but this time, if anyone isn't healed up to full they will be incurable for the upcoming mechanics. Following close behind Heartless Archangel are three meteor markers and Mad Skulls. To do this properly you need two people to soak the meteors, the healers stand in the middle and the 4 DPS stand in the other 2. In the meantime ,the skulls will be tethered to the DPS. They need to stand in the AoE diagonal to their skull, then bait the skulls away from the middle and run into their skull. After the skulls are taken care of, Wings of Destruction will begin casting, targeting the closest and farthest player. To deal with this, have the main tank stand in the boss's hitbox, the other players need to be max melee range, and the off tank needs to run out to the edge of the arena. He will then cast Light of Judgement, just like the pre-transformation version this deals high raid damage.
The start of the second phase begins with a cast of Trine's small version: triangles will begin falling on the arena in unusual patterns. Explosions go off at each point/angle on the triangles, while Kefka begins casting Wings of Destruction on one side, indicated by one glowing wing. For Trine run to the last set of landing triangles, and once the first set go off run to the first set to be safe from the others. Another double Wings of Destruction, Ultima and a new mechanic: Futures Numbered or Pasts Forgotten. The ability can yield either of the following effects:
- Futures Numbered- Kefka will jump and attack the party, then quickly run behind him as he will cleave directly to the front. Stack near the boss to prepare for the cleave.
- Pasts Forgotten - Kefka will jump and attack the party, then stand still as he will cleave anything behind him. Stack location is somewhat irrelevant so long as you don't wind up behind Kefka before the cleave.
Next up is Ultimate Embrace. This can be shared by the tanks or Invulned, followed by a Hyperdrive. After another Ultima pull Kefka to the center of the map for 2nd Forsaken. Next up is Starstrafe, a series of mechanics everyone will have to do.
- Melee DPS- Stand in Kefka's hitbox to avoid getting Ranged DPS's effect, dodge AoE's going clockwise or counter clockwise to avoid, then move North to soak the meteor.
- Ranged DPS- Stand on the edge of the arena one player directly East and another West. The players will get an effect that causes them to drop puddles on the arena. After the effect occurs, move northwards slowly and then soak the North meteor with the melee DPS.
- Heals and Tanks- Soak the meteors, one east and one west, then Kefka will cast Futures Numbered or Pasts Forgotten. Move to the southern part of the map, and drop the upcoming clones in different spots near the edge of the map, depending on what was cast. Move behind Kefka or stay until the cast of All Things Ending begins, then soak meteors and stack near the real Kefka.
Following a repeat of mechanics is Big Trine, have the boss on the east side but not directly center to be safe for the following patterns:
- Version 1- The big Triangle in the middle will have three triangles outside it, stand dead center to avoid
- Version 2- The big triangle will have two triangles outside it, go to the side with no triangle and stack.
The following mechanic is 3rd Forsaken which is similar to the 3rd Graven image in the first part of this fight: the boss needs to be dead center for this. Anyone with a tether will be knocked back, move north to be knocked back into the meteors, the main tank will get hit with Ultimate Embrace after. Next is similar to third Graven, if you're tethered to the left side of the statue go out, and if you're tethered to the right stay inside to soak the meteors and the confused players. The next mechanics are similar to the first forsaken with the mad skulls, but after it all the statue will be summoned and will cleave half the arena, Kefka needs to be facing East so a safe spot isn't ruined with his Wing of Destruction.
The following 4th Forsaken is identical to 3rd Forsaken.
Loot[]
Normal[]
Savage[]
Every week, the player obtains a Datalog, several of which can be exchanged for items of their choice.

